How to Get Ager’s Scepter: Tracing the Stars Quest Guide
Want to get Ager's Scepter? Then you need to check out our comprehensive guide on the Tracing the Stars quest line.
Tracing the Stars is a new questline that’s been introduced in Season of the Lost that looks like it will culminate with Guardians acquiring Ager’s Scepter, the new Stasis exotic trace rifle. This quest will become available shortly after players have gotten into the Season of the Lost campaign.
Check out our complete guide on the Tracing the Stars quest so you can pick up Ager’s Scepter as soon as it’s available.
Ager’s Scepter Guide
You can also check out our complete guide on how to get the catalyst for Ager’s Scepter too!
Tracing the Stars I
Tracing the Stars is available for every Guardian that has purchased the season pass. There’s a quest waiting for you to pick up at the Wayfinder’s Compass in the H.E.L.M. that will start you down the path to earning the Ager’s Scepter exotic weapon. This is where it all begins.
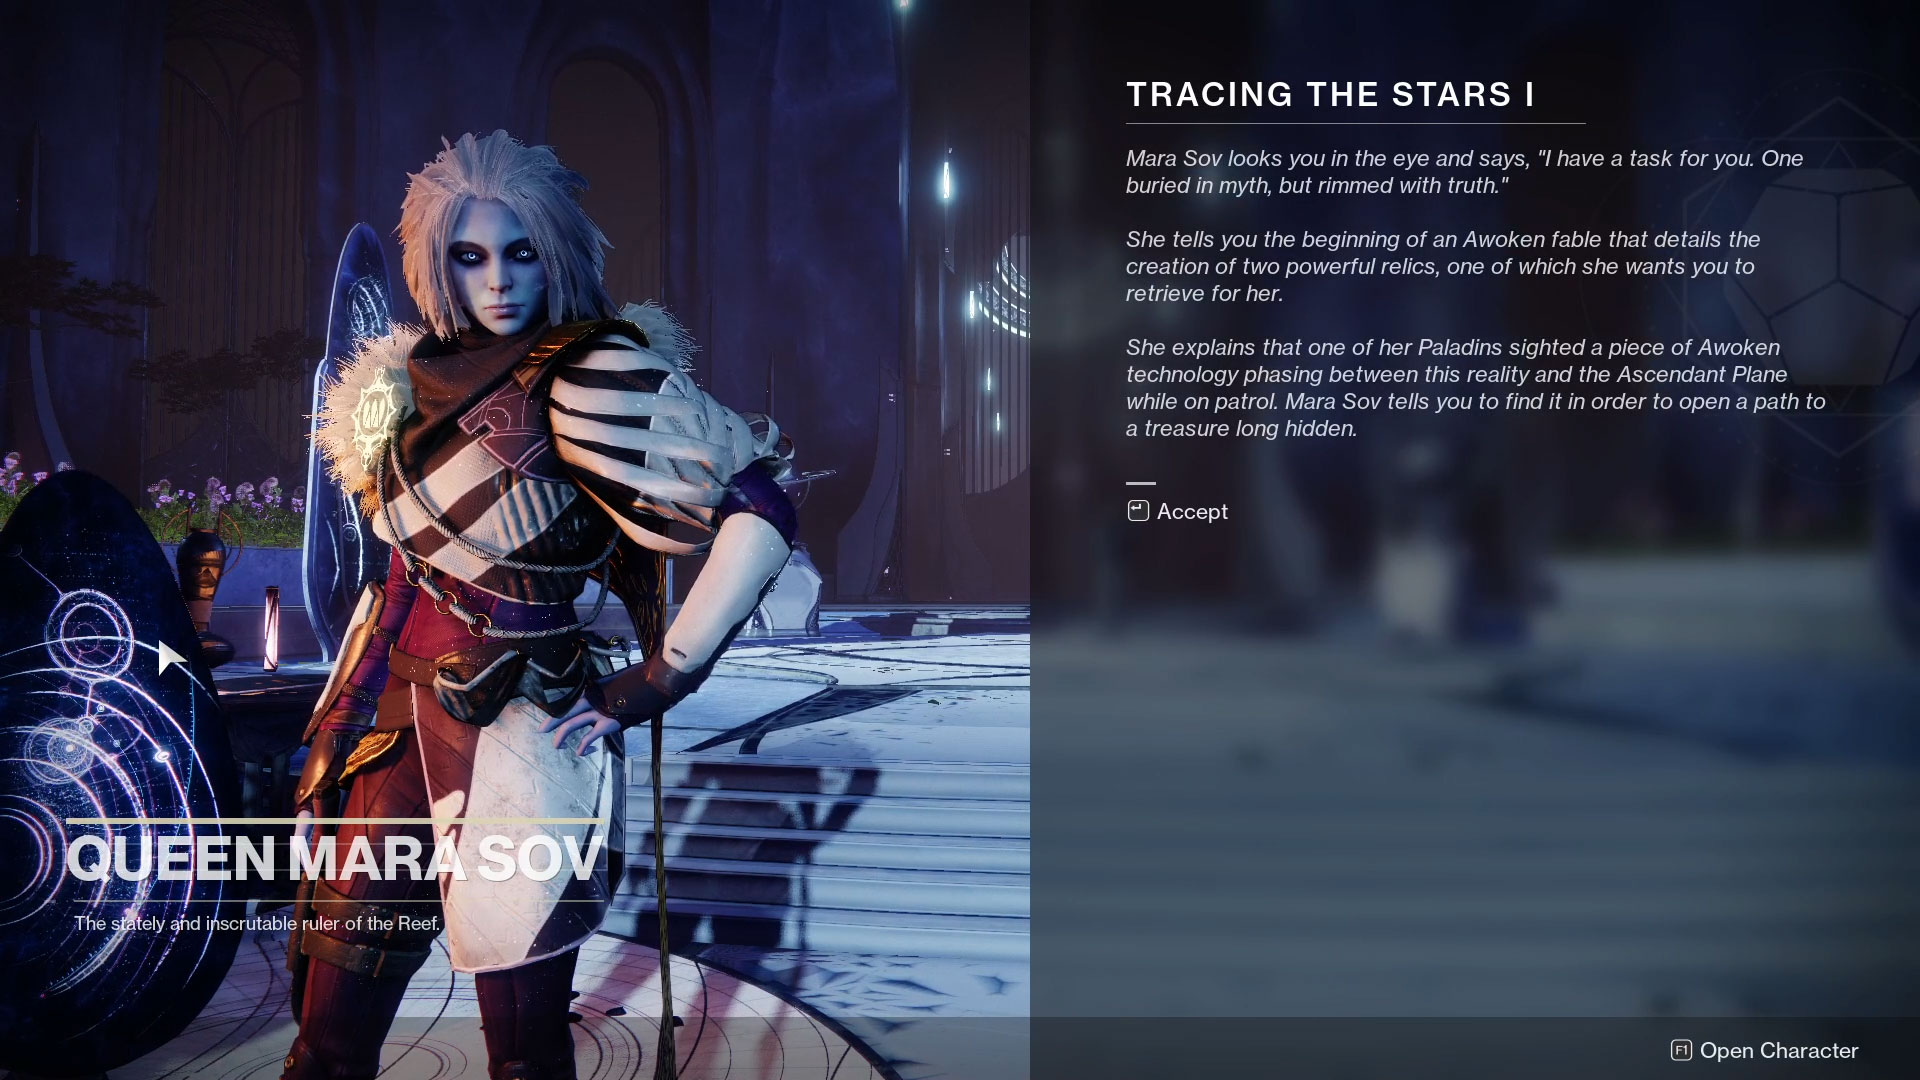
Step 1: Speak with Mara Sov
After accepting the quest, you’ll be informed that Mara Sov wishes to speak with you. You’ll need to head through the portal on the raised walkway to your right to enter Mara’s throne room. Walk up to Mara and speak with her.
She’ll tell you a story about an Awoken Tale that Uldren told many of his people’s children. It’s a tale that will give us some insight into Mara and Uldren’s relationship through a metaphor about two Kestrels, Ager (Uldren) and Rega (Mara). There’s also some very clear symbolism that seems to parallel what happened on the Fundament which set the Hive sisters on their path to becoming Gods.
Regardless, Mara needs our help finding Atlas skews to recover Awoken technology that is appearing in the Dreaming City.
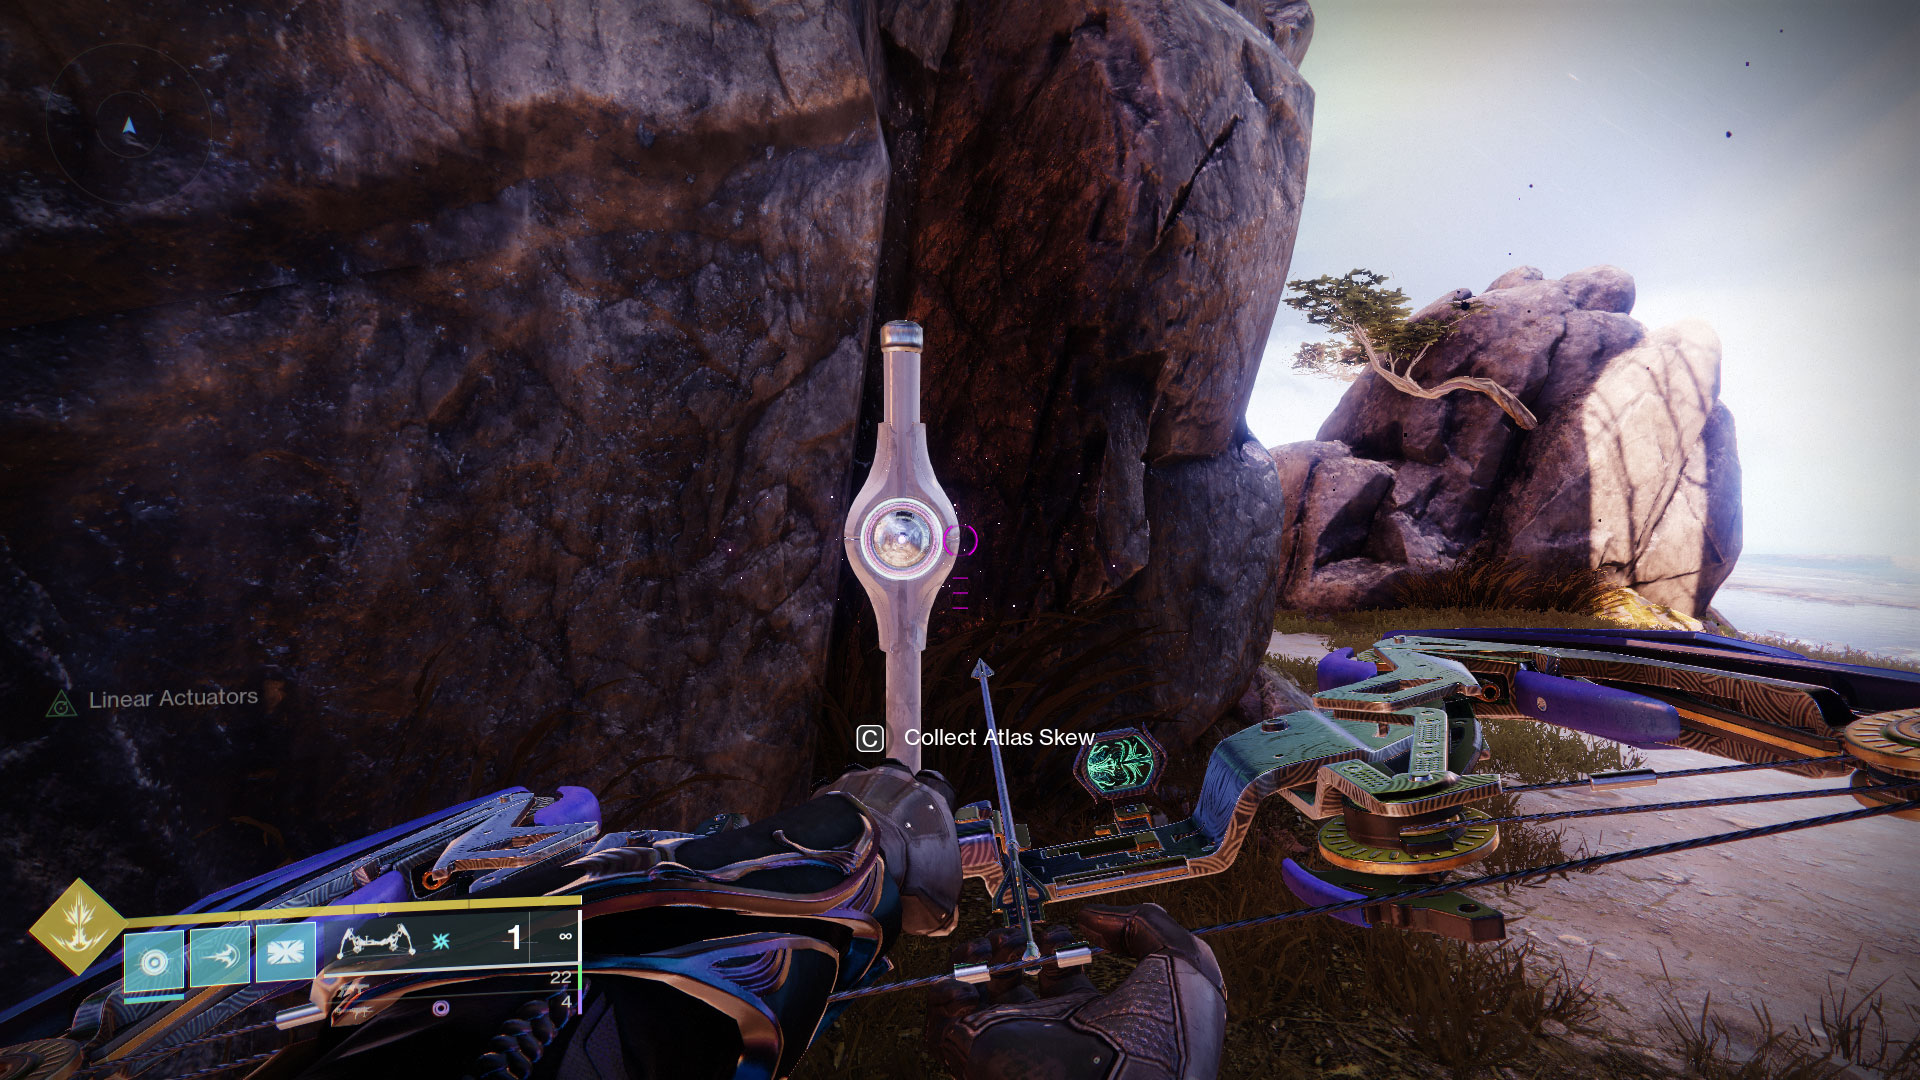
Step 2: Collect Atlas Skews in the Divalian Mists
There are a total of 5 Atlas Skews that Guardians will need to collect and they’re all located throughout the Divalian Mists region, though some are further out than others.
- Drowned Bay Alcove
- Divalian-Rheasilvia Path, Lower Cliffside
- Divalian-Rheasilvia Path, Central Cave
- Spine Oracle Orrery
- Distant Spine Island Tree
* Note: The order above and in the video is different than what’s listed in the quest step. I’ve re-organized them into the most convenient order so you aren’t bouncing back and forth a whole bunch.
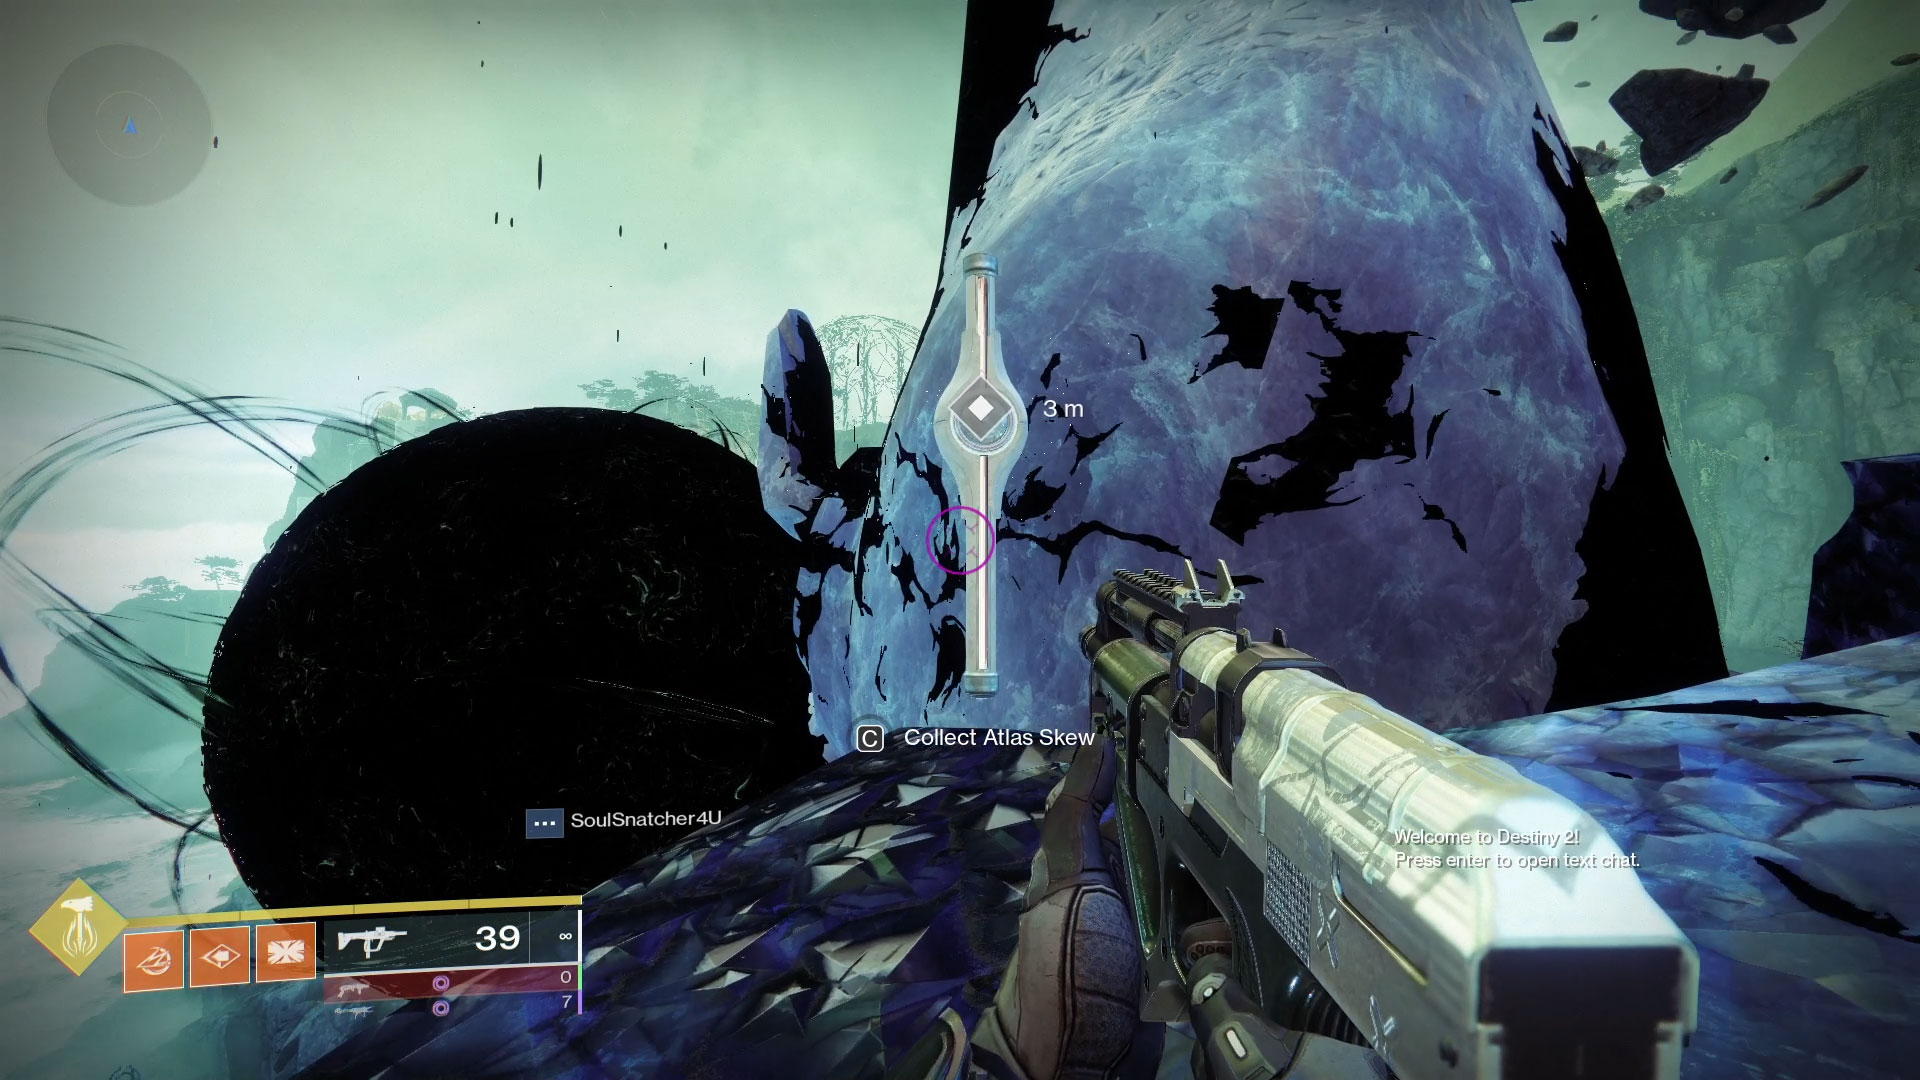
#1: Drowned Bay Alcove
This Atlas Skew is located within the Bay of Drowned Wishes lost sector in the Divalian Mists. To get there, simply teleport to the transmat zone in the Divalian Mists and turn around once you’ve zoned in.
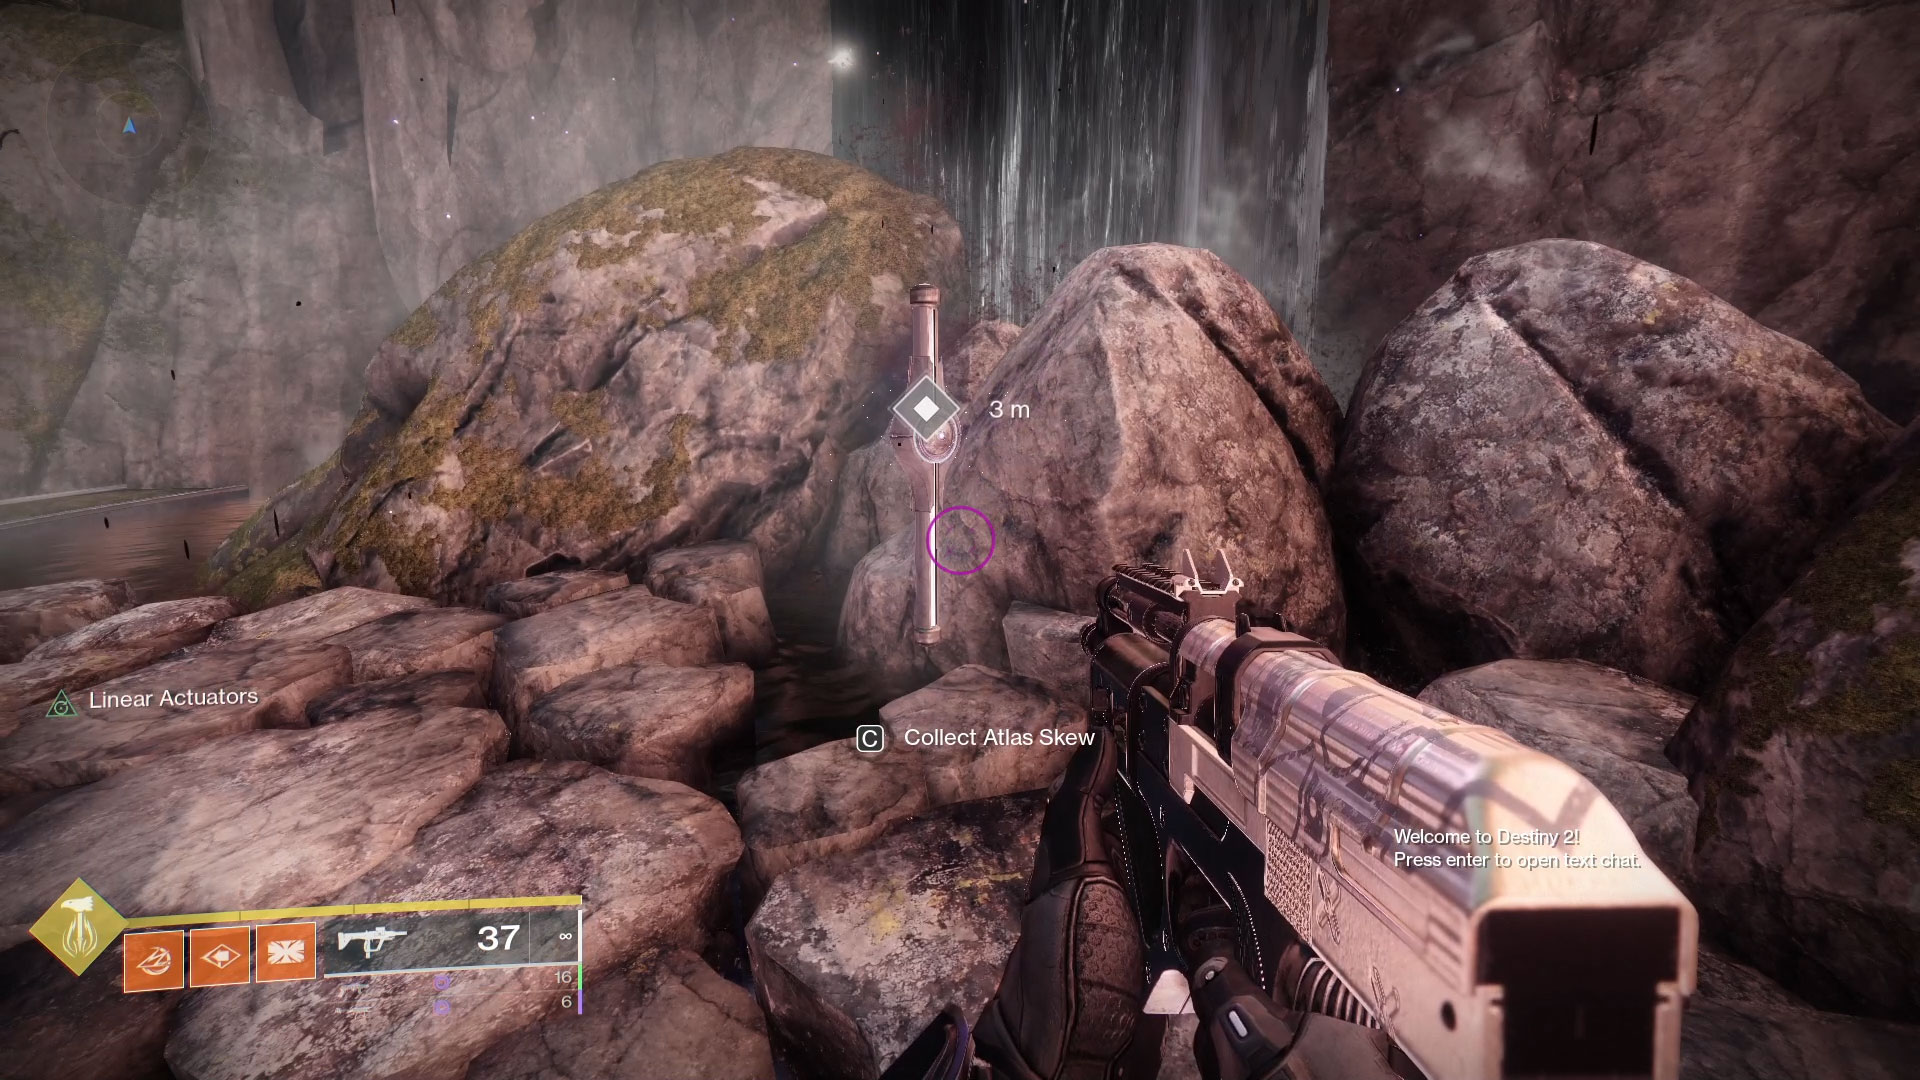
To pick up the Atlas Skew, head inside and follow the path as it opens up into the Bay itself. You’ll have plenty of Scorn and Fallen landmines to handle before you can go much further. After you clear out the first few packs, follow the footpath on the right side that hugs the cliff face. When it comes to what looks like a 4-way intersection, hang a right and the skew will be on your right against the wall.

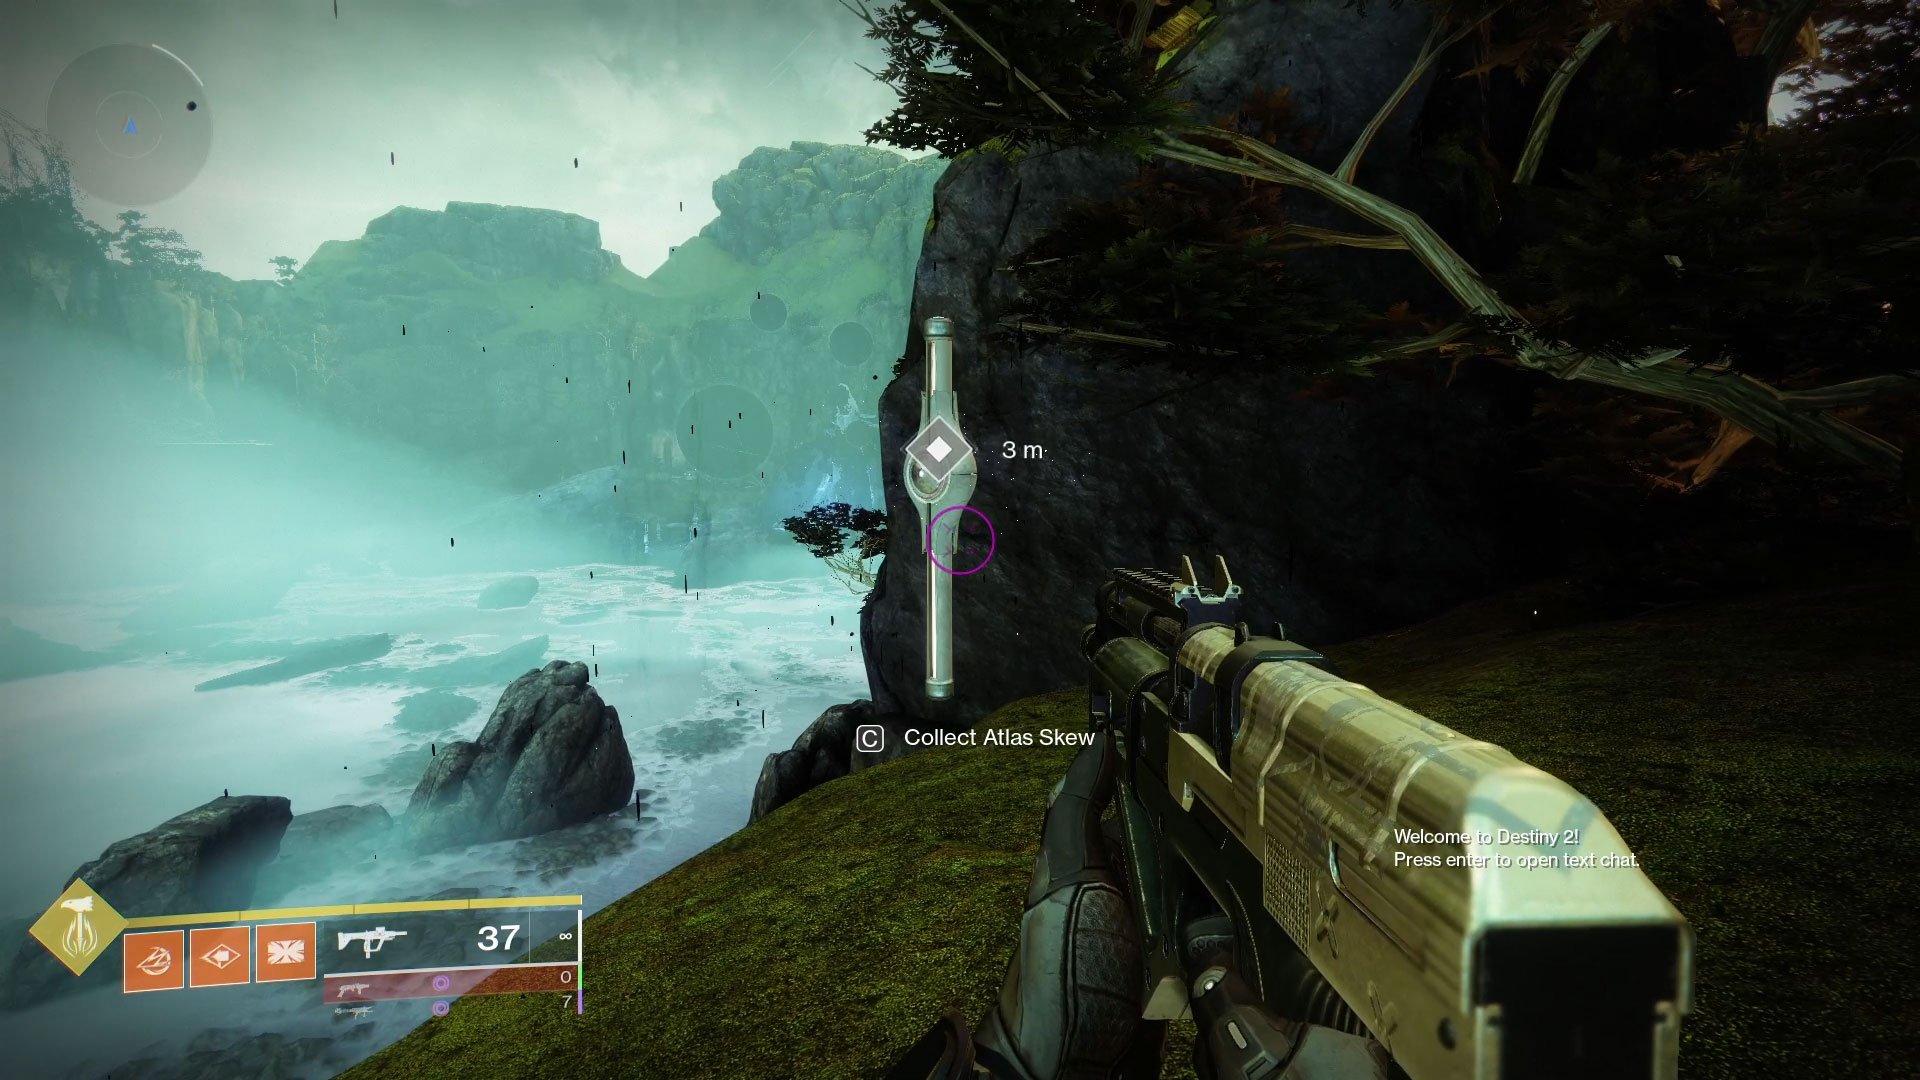
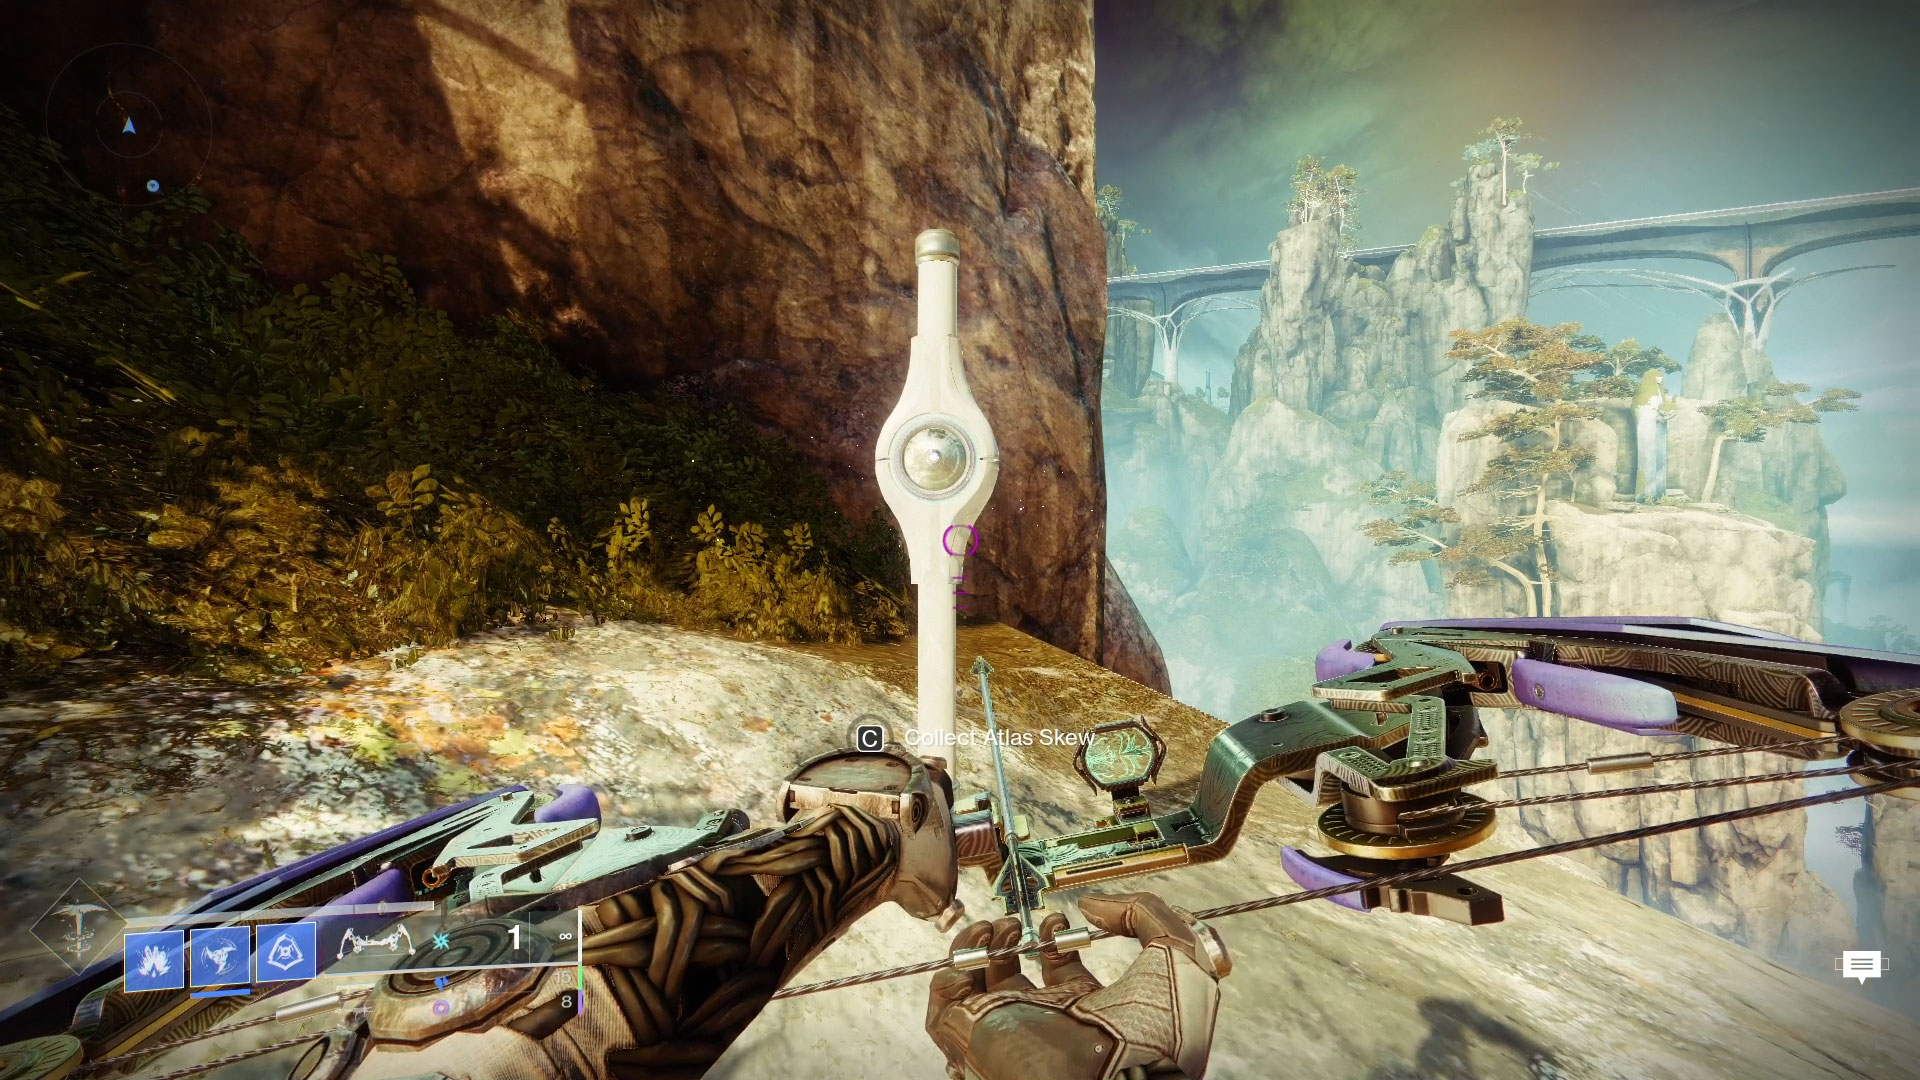
#2: Divalian-Rheasilvia Path, Lower Cliffside
Make your way to the Northeastern part of the Divalian Mists between the road that leads to the Spine of Keres and the one that heads to Rheasilvia. There is a cliff between these two roads and our second Atlas Skew will be on a ledge near the bottom. Hop off the side and land on the platform below.
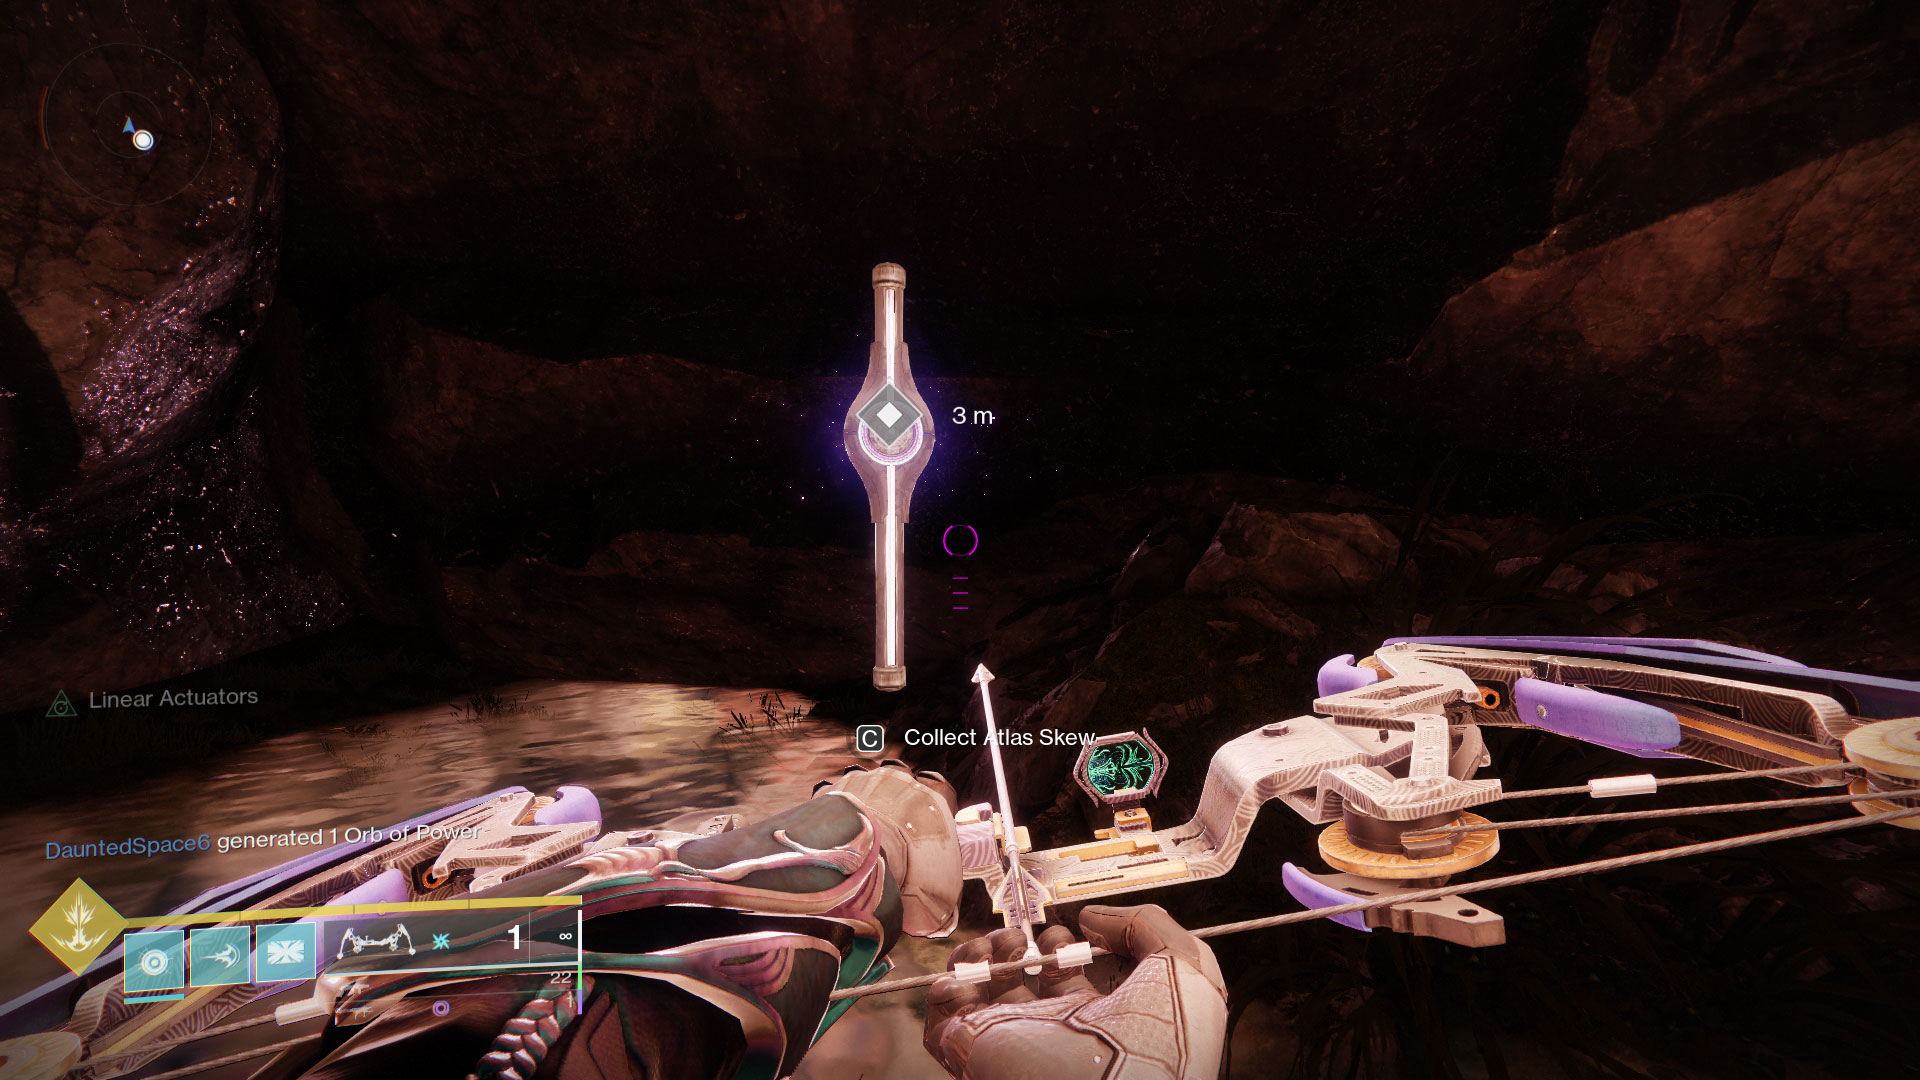
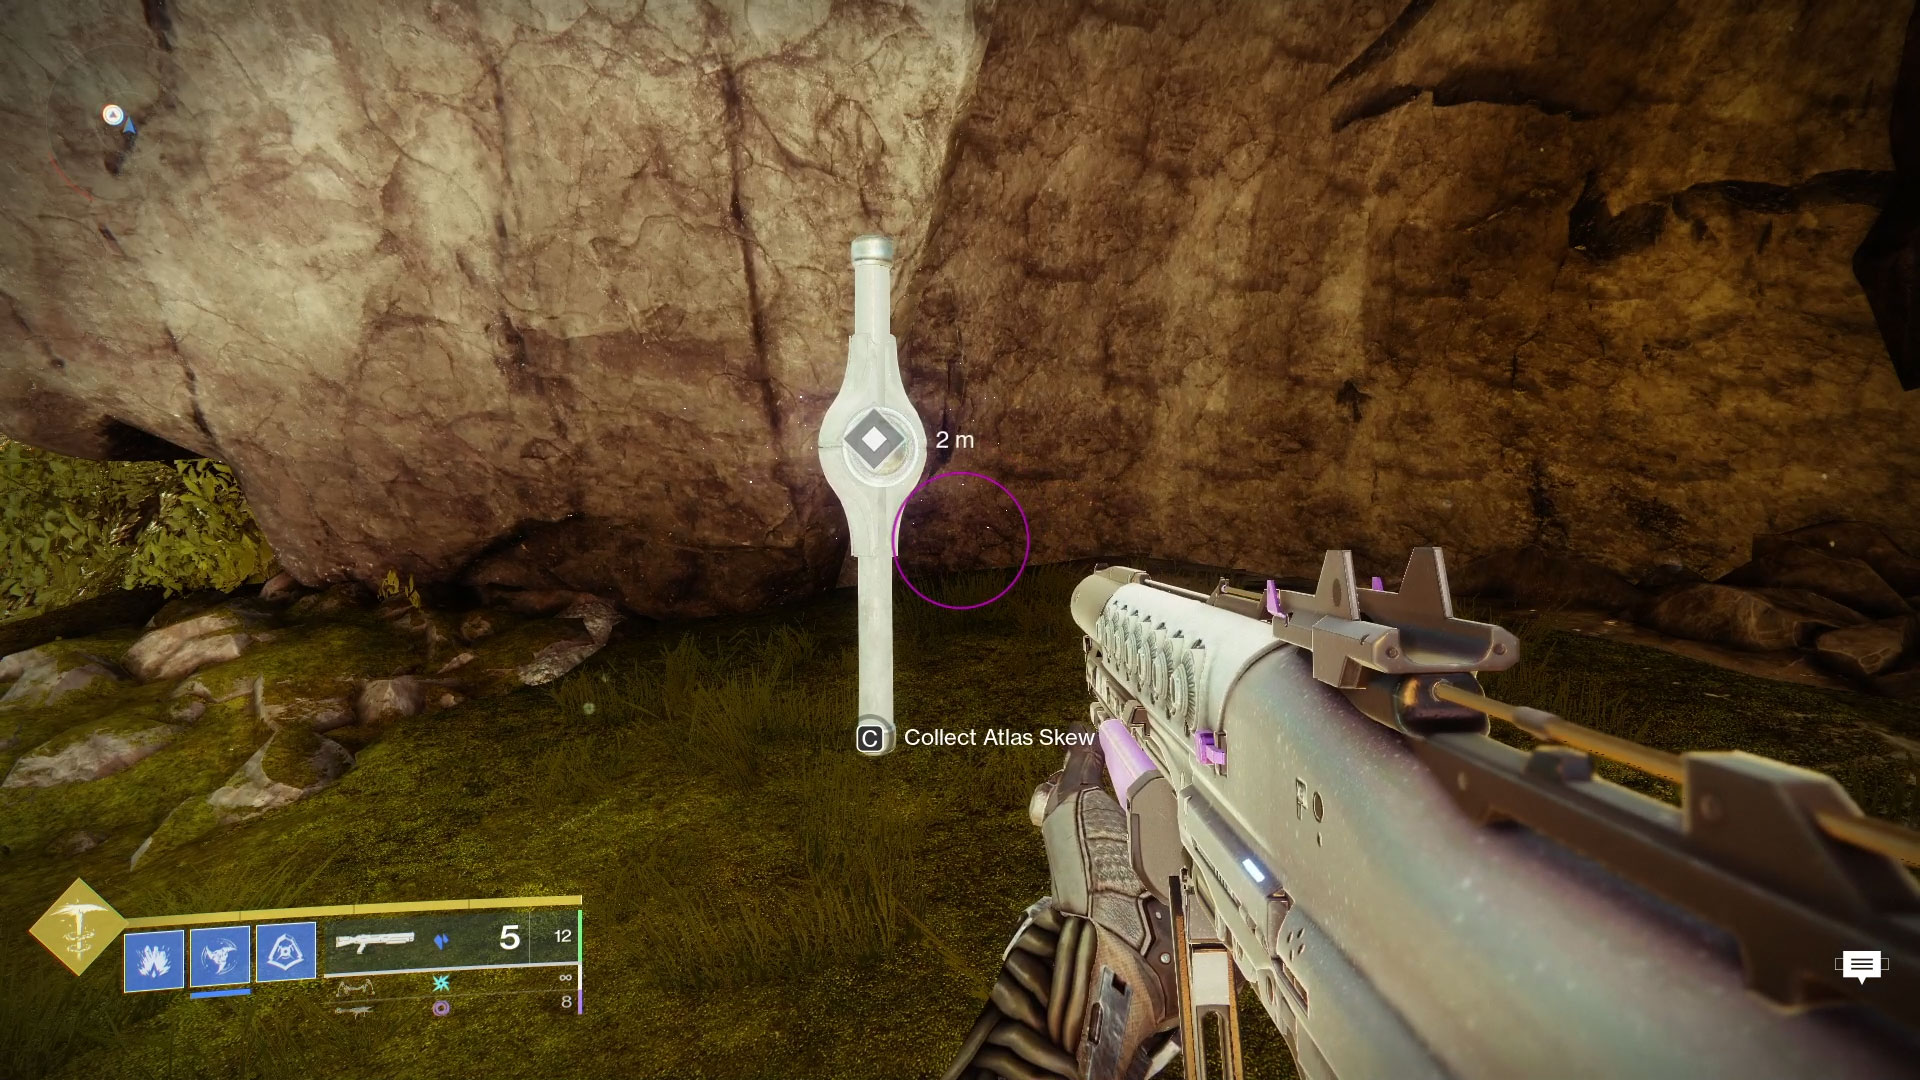
#3: Divalian-Rheasilvia Path, Central Cave
From the transmat point in the Divalian Mists, hop on your sparrow, ride straight ahead to the cliff face, and look for a cave opening in front of you. Head inside and make your way to the back of the cave. The Atlas Skew will be on the right side.
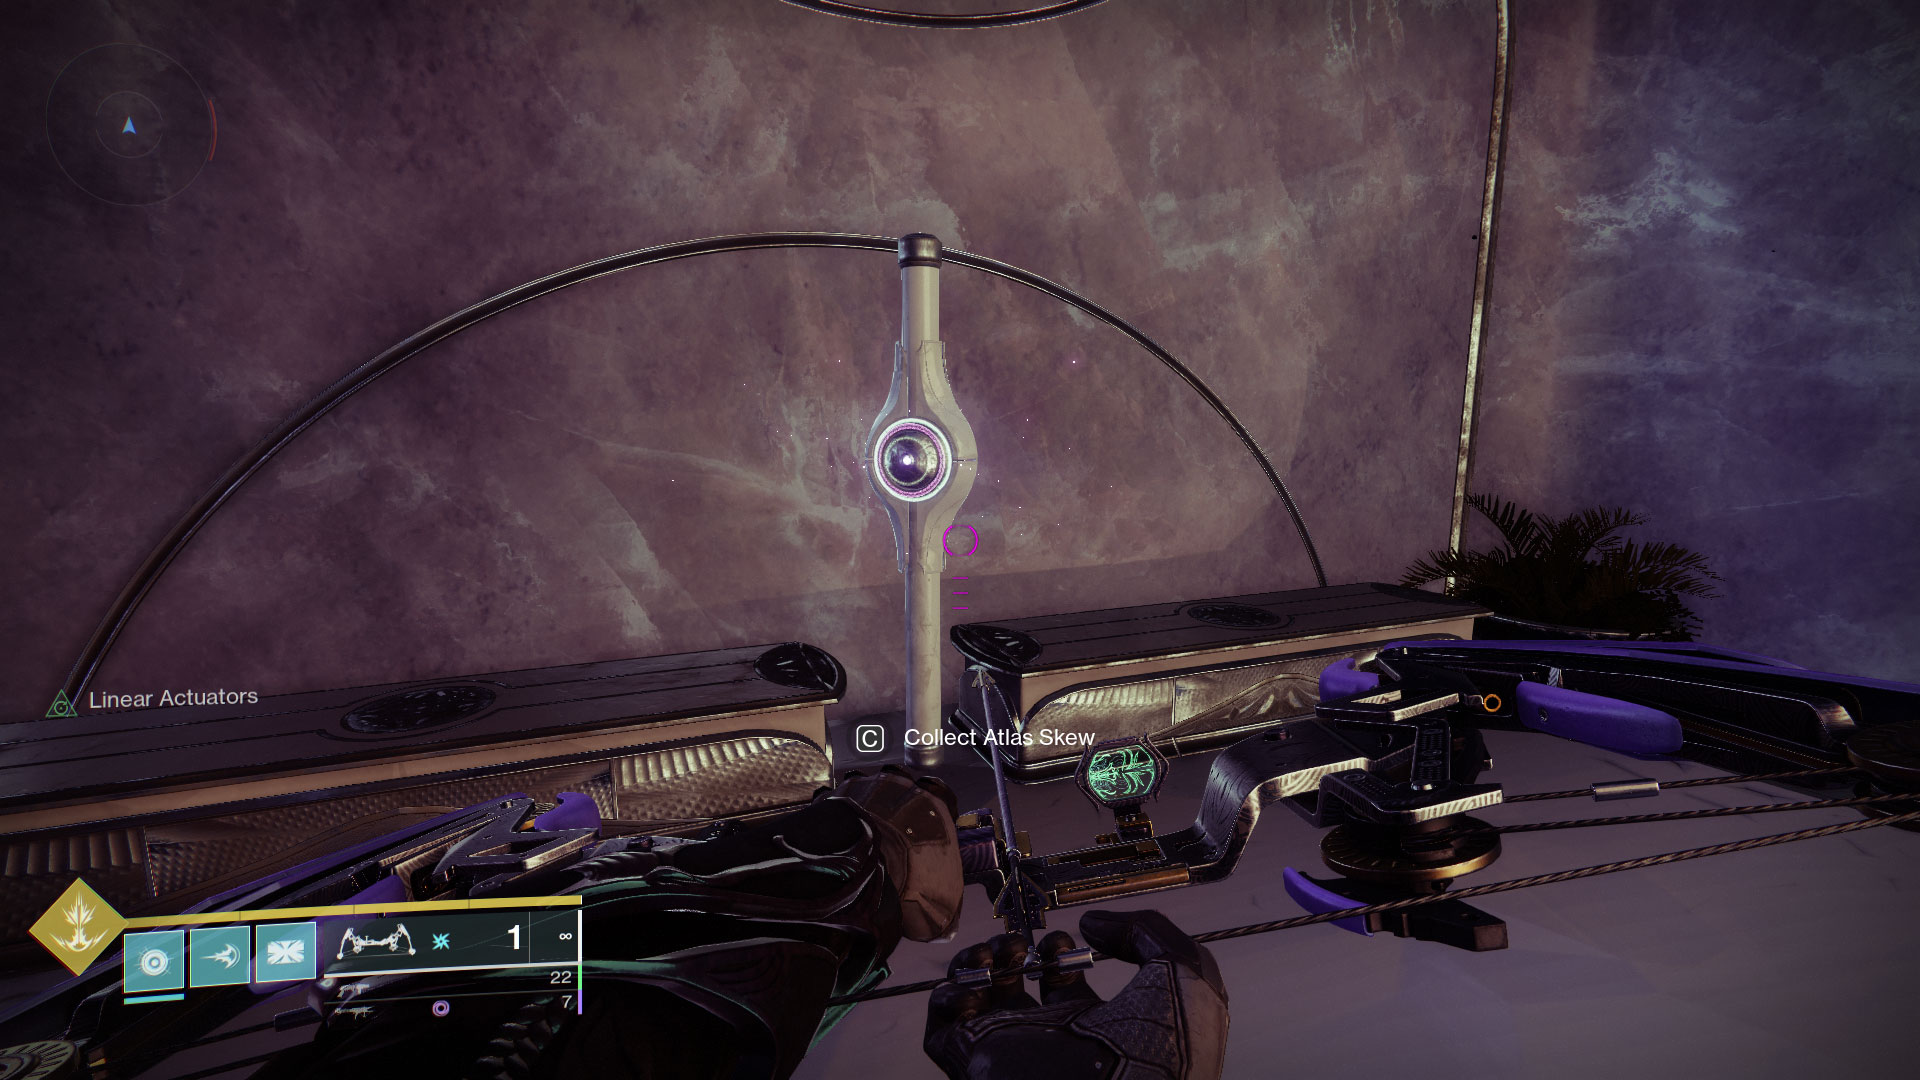
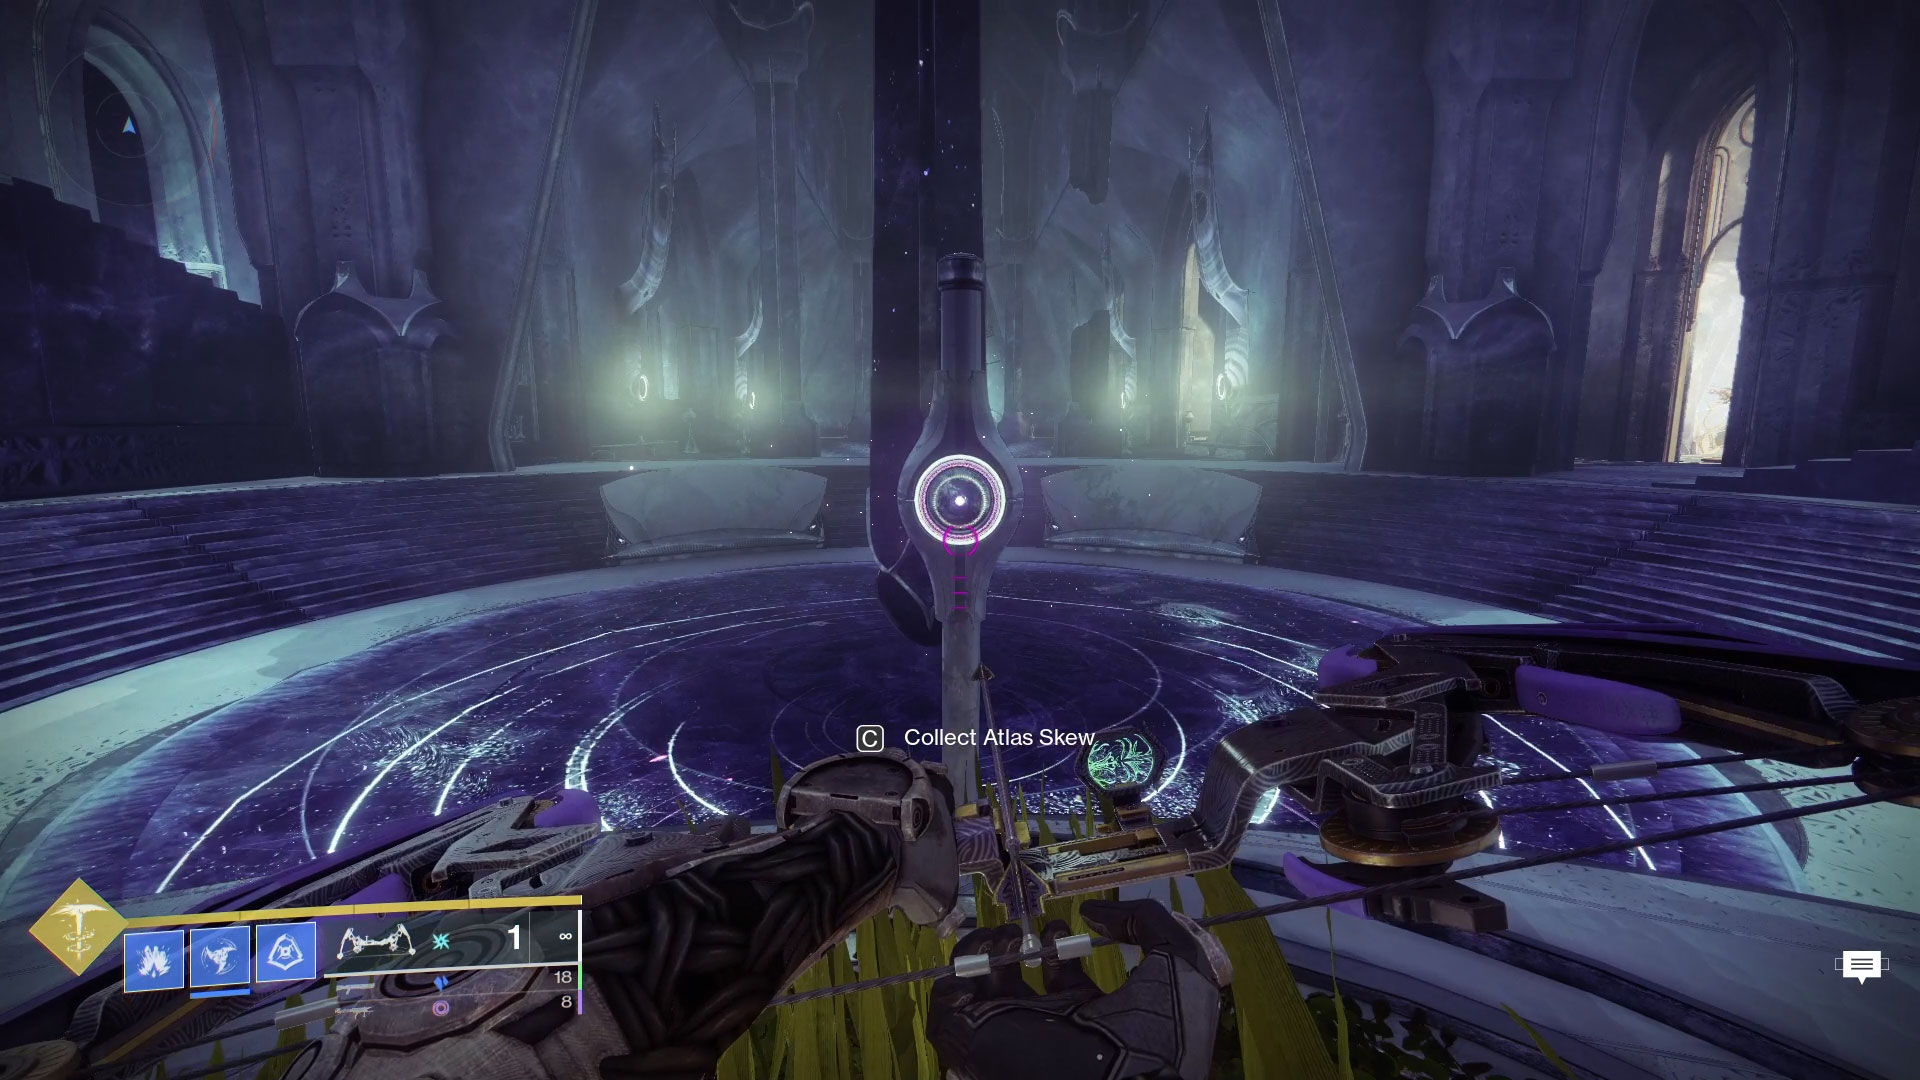
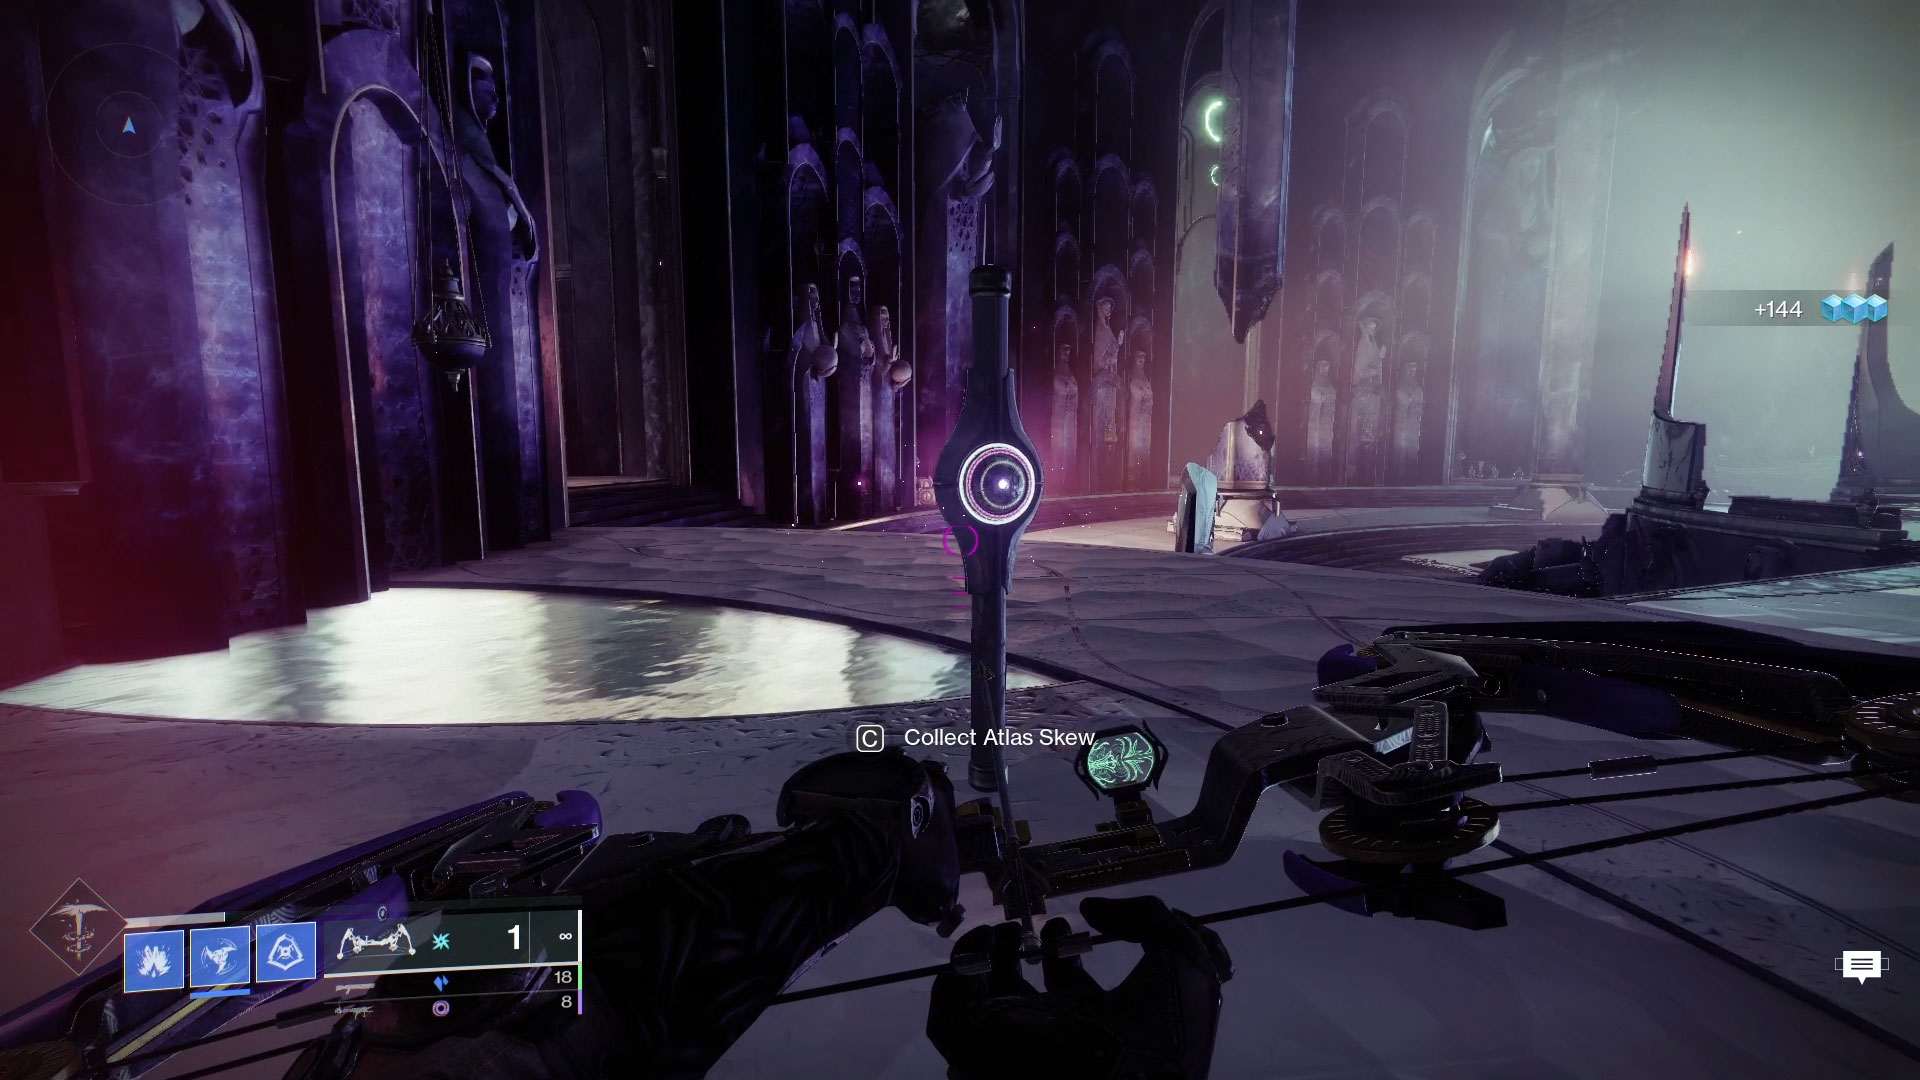
#4: Spine Oracle Orrery
Take the Northern road that leads to the Spine of Keres. Go over the ravine and through the courtyard to the Awoken structure beyond it. This is the Orrery. To get to the Atlas Skew, head up the stairs on the right side of the building and follow them to the top or just jump from balcony to balcony until you get to the top floor. The skew is between two benches against the wall.

#5: Distant Spine Island Tree
This Atlas Skew is the furthest away. From the 4th skew in the Orrery, go out the Southern exit that takes you deeper into the Spine of Keres. You’ll want to follow this path all the way down to basically where we first entered the Dreaming City all the way back in Forsaken. The 5th and final skew is located at the base of a tree on the furthest stone island.

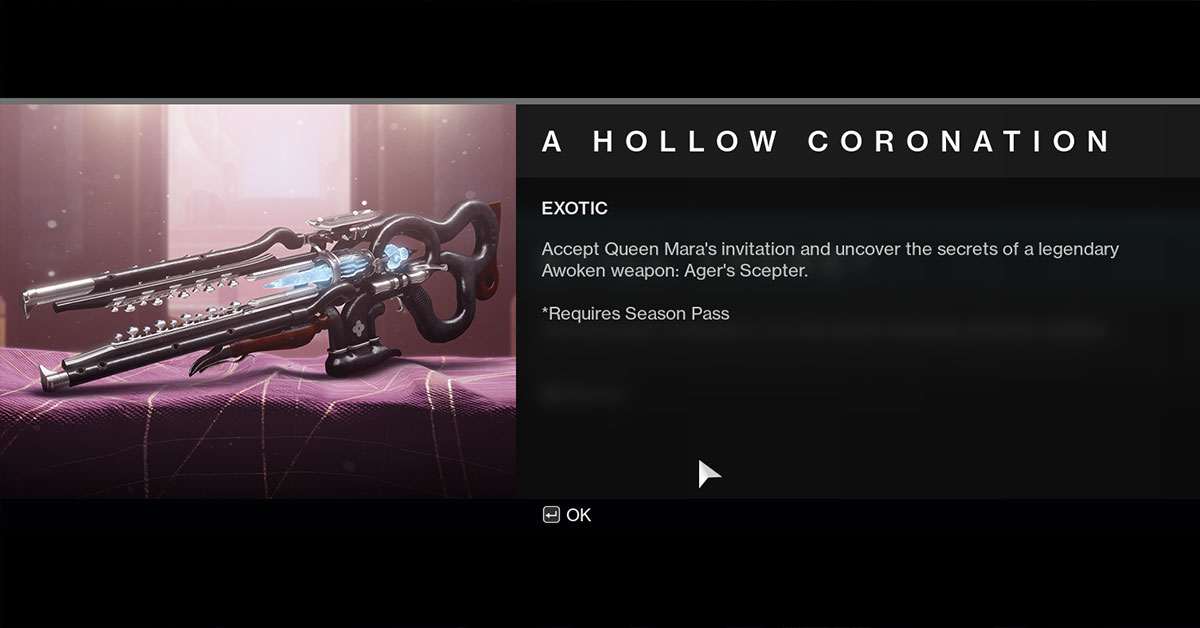
Step 3: A Hollow Coronation
After snagging all the collectibles, you’ll be prompted to select “A Hollow Coronation” from the Director. Pull up your map, select the H.E.L.M., and then select the large blue icon on the right side of the screen.
Once you zone in, you’ll be back in the H.E.L.M. Go through the portal in front of you and this will take you to the Gatehouse where you’ll turn in the skews at the first Atlas Terminal on your left.
Presumably, when we’ve activated the other 3 terminals, we’ll gain access to Mara’s vault and be able to acquire Ager’s Scepter, the new Stasis exotic trace rifle.
Step 4: Return to the H.E.L.M.
After listening to Mara, you’ll need to return to the H.E.L.M. and visit the Wayfinder’s Compass to finish the final step of Tracing the Stars I. You’ll be rewarded with a curated roll of the Vulpecula hand cannon that comes with Shoot to Loot and Harmony. Mara Sov will also let you know that she’ll be in touch when there are more Atlas Skews to be collected.
Tracing the Stars II
After you’ve completed the first step of this questline, the next part of the quest chain will be available to you after logging in. Head to the H.E.L.M. and visit the Wayfinder’s Compass calibration station to snag the quest. This step in the quest to earn Ager’s Scepter is a lot like the first one except that we’re going to The Strand instead of the Divalian Mists.

Step 1: Speak to Mara Sov
Once you’ve picked up this quest from the H.E.L.M., you’ll be prompted to return to Mara and speak with her in her Throne room again. She’ll tell you that another set of Atlas Skews has been found and need to be collected. The skews for this week are located in The Strand, the Eastern zone in the Dreaming City.
Step 2: Collect Atlas Skews in the Strand
There are a total of 5 Atlas Skews to be collected near The Strand. However, only 2x are in The Strand proper, 1x is in the Aphelion’s Rest lost sector, and the remaining two are in The Gardens of Esila, the zone to the South of the Strand.
#1: Towering Statue
Take the transmat point to the Divalian Mists and take the Eastern road through the crystal caves to The Strand. Directly in front of you is a large, crystal statue that overlooks the Rift Generator public event space. Make your way up the cliffside and the Atlas Skew is on the other side of the statue.
#2: Gazebo Statue
Off in the distance, past the bridge, at the furthest Eastern point in the Strand is a Gazebo. You might have visited this area already when Petra Venj is located here on certain weeks. Ride your sparrow over to the Gazebo and when you’ve crossed the bridge, you’ll see a craggy hill in front of you. Climb up to the top of this hill and look down. This Atlas Skew should be in view right ahead of you.

#3: Aphelion Brazier
This skew is behind a brazier at the end of the Aphelion’s Rest lost sector. The Lost Sector entrance is on the Northern cliff face below the Gazebo. Head inside and clear the lost sector. Once you’ve cleared out the boss room, look to the chest in front of the dais, and then directly behind it, upon the dais, is a rounded slab of stone with an illuminated circle on the front of it. The skew is behind the stone slab.
#4: Garden Waterfall
To get to the Gardens of Esila, head to The Strand as you normally do from the transmat point in the Divalian Mists. Once you exit the crystal caves, take the path that goes to the right and follow that down. The road will come to an end with some Awoken architecture on your right. Go through these structures until it opens up into what looks like a courtyard. Follow this path up and around until you run into a batch of Hive with a Taken Blight in the distance.
This is the Gardens of Esila. Take care of the Hive here and look to the bridge off in the distance. Below and to the right of this bridge separated by some Taken corruption is a waterfall. The Atlas Skew is at the base of this waterfall on some rocks.

#5: Garden Tree
The final Atlas Skew in the Gardens is on top of the bridge we just saw. There are two ways up to this bridge. You can either follow the main path around and fight your way through dozens of Hive enemies, or you can jump up there from the stone columns on the far side of the bridge. You may need to swap out your gear if you’re running a low mobility build, but you can easily hop up on top of the bridge, go to the tree, and pick up the Atlas Skew.
Step 3: The Hollow Coronation
After collecting the 5 skews, you’ll need to travel to the Gatehouse again and turn them into one of the dormant Atlas Terminals. Open up your Director, select the H.E.L.M. and look for the large blue icon just to the right of the Prismatic Recaster. Select it and fire up the activity.
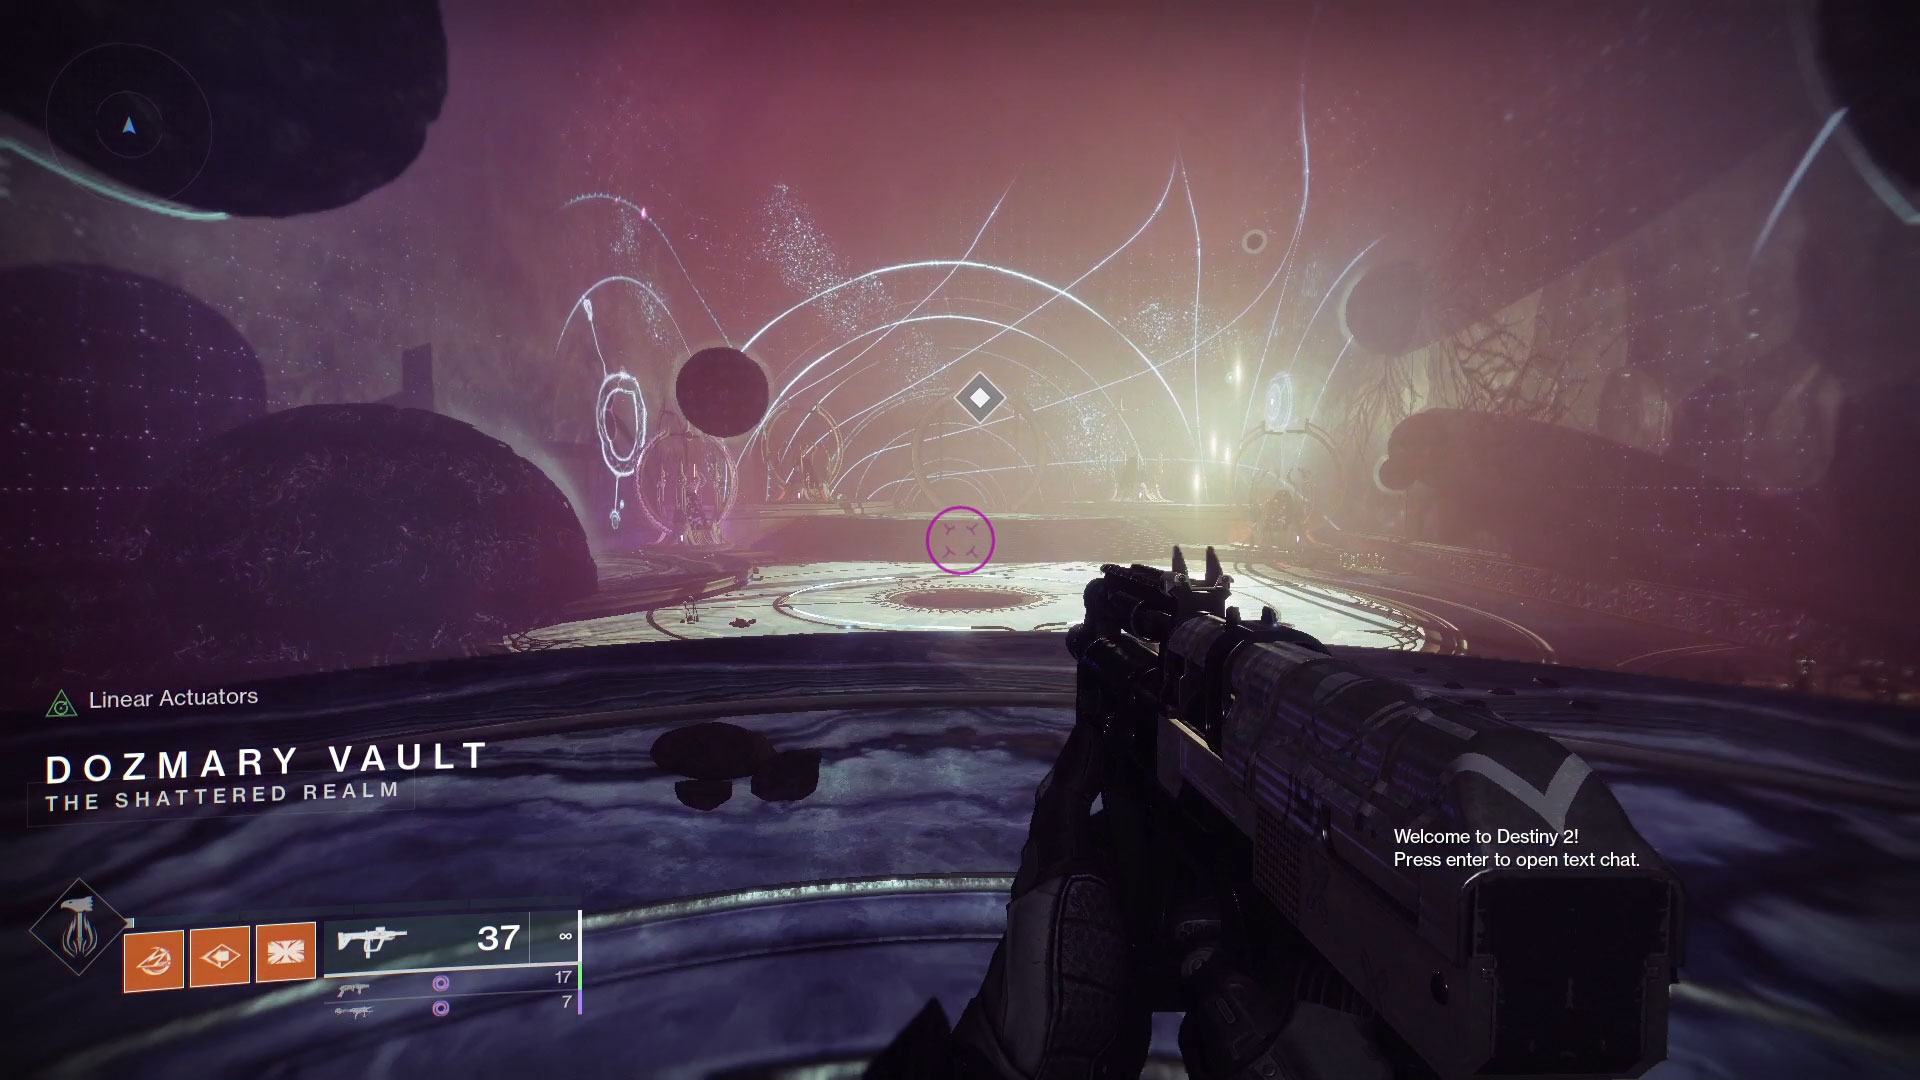
Once you zone in, head through the Starg…the portal in front of you and into the Dozmary Vault. The Atlas Terminal for the second batch of skews is on your left. Deposit the skews and you’ll be able to listen in on another recording of Crow when he was Uldren.
Step 4: Return to the H.E.L.M.
The final step has you returning to the H.E.L.M. to pick up a curated roll on the Fractethyst shotgun from the Wayfinder’s Compass calibration station. Mara tells us once again that she’ll reach out once more skews have surfaced.
Tracing the Stars III
The third part of this quest will be available once you’ve finished the previous steps. And like those previous steps, you’ll need to head to the H.E.L.M. to pick up the quest.
Step 1: Go talk to Mara in her throne room
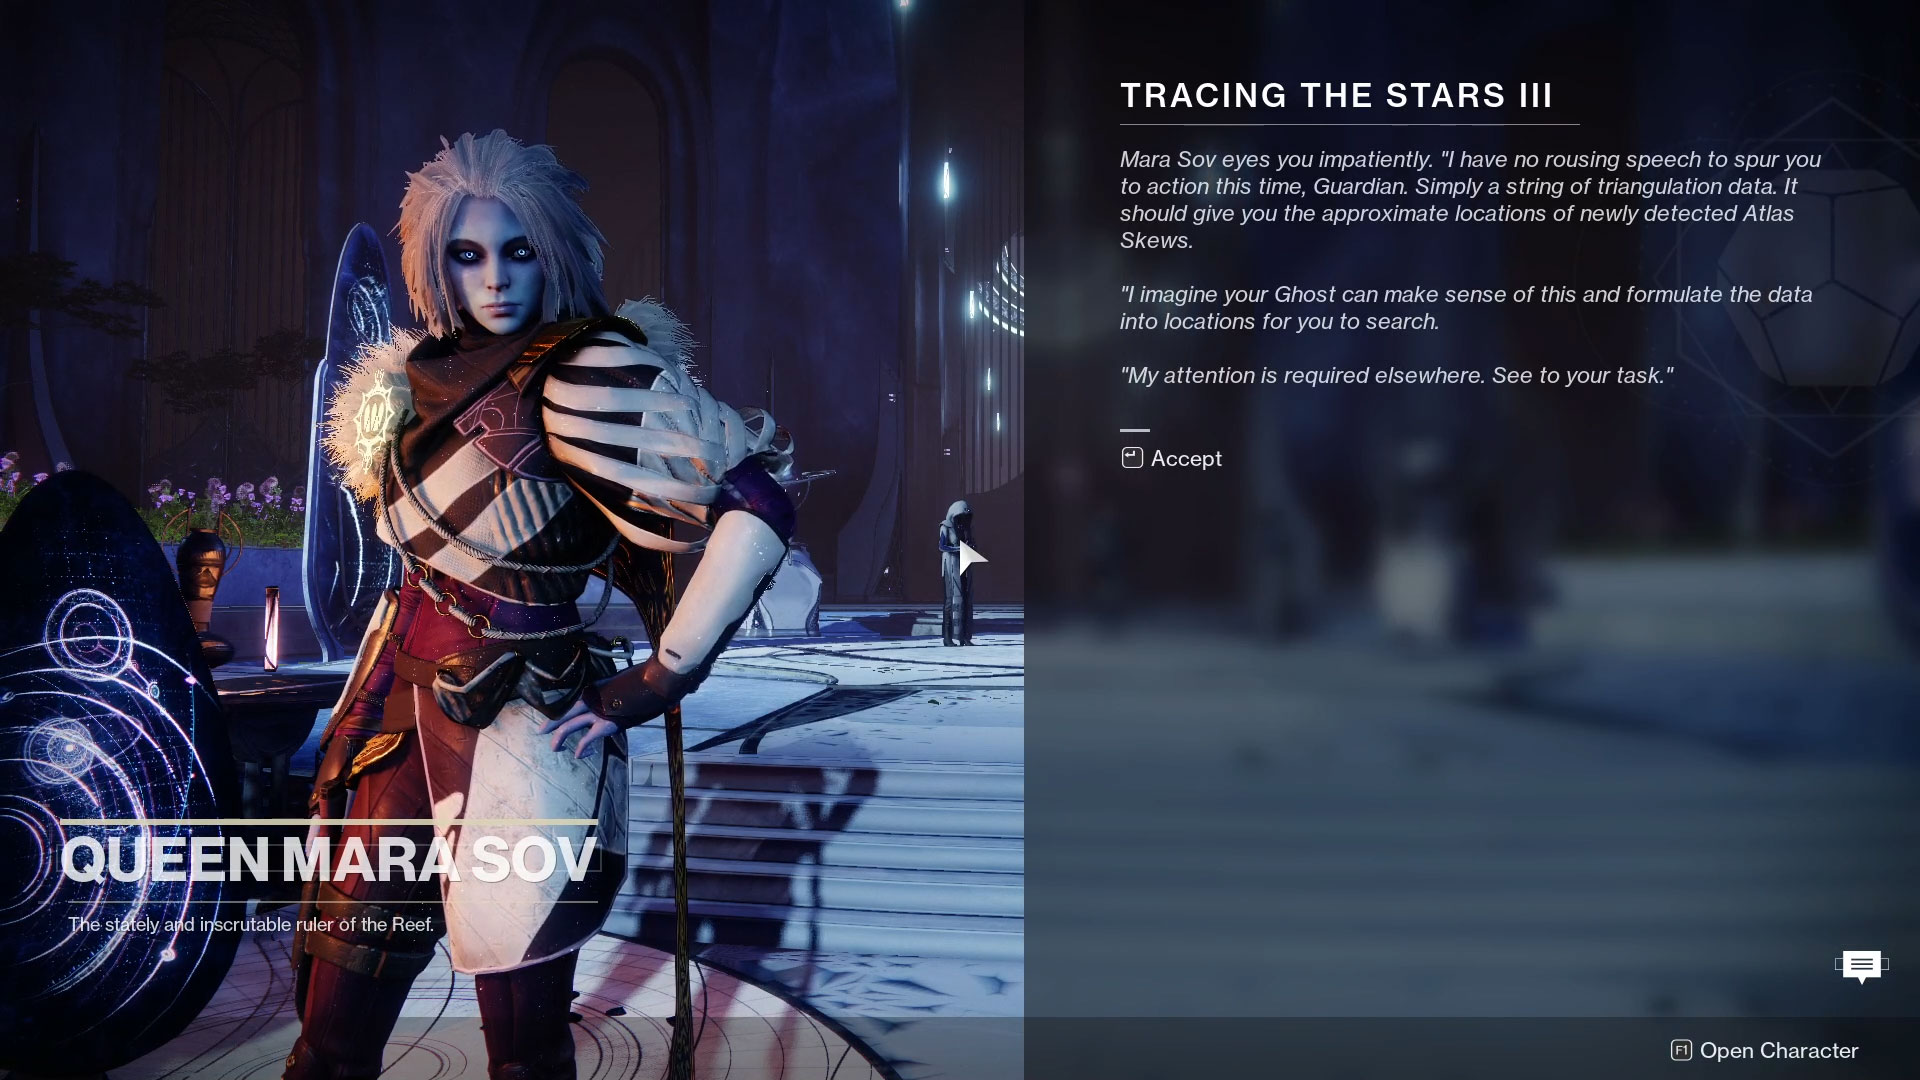
Mara Sov wishes to have an audience with our Guardian to task them with collecting the latest batch of Atlas Skews. This time we’ll be heading to Rheasilvia, the Northern zone in the Dreaming City. Once you’ve accepted this task, select the Dreaming City from the Director, transmat to the Divalian Mists, and take your sparrow along the Northern road to Rheasilvia.
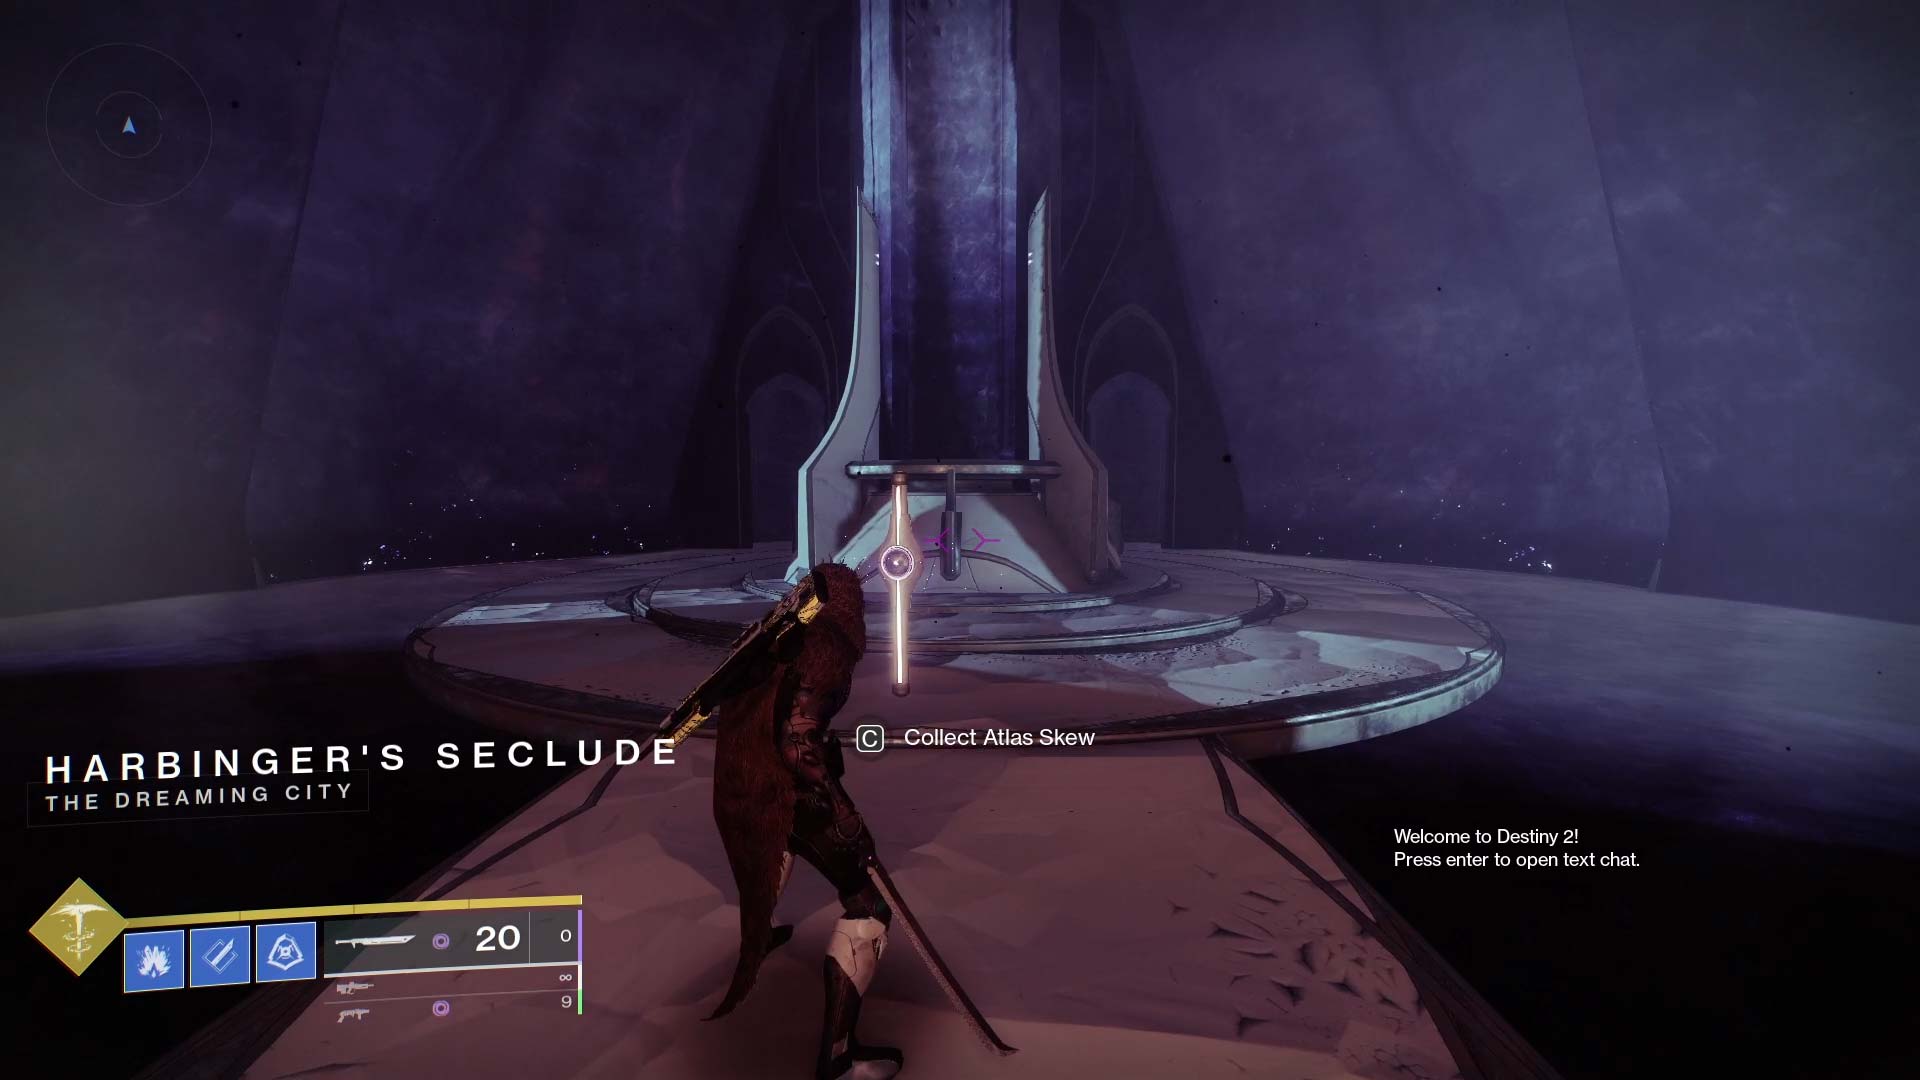
Step 2: Collect the Atlas Skews in Rheasilvia / Harbinger’s Seclude
There are a total of 5 Atlas Skews that need to be collected with 3x of them being in Rheasilvia proper and the other two are in Harbinger’s Seclude, the building at the Northern end of the zone.
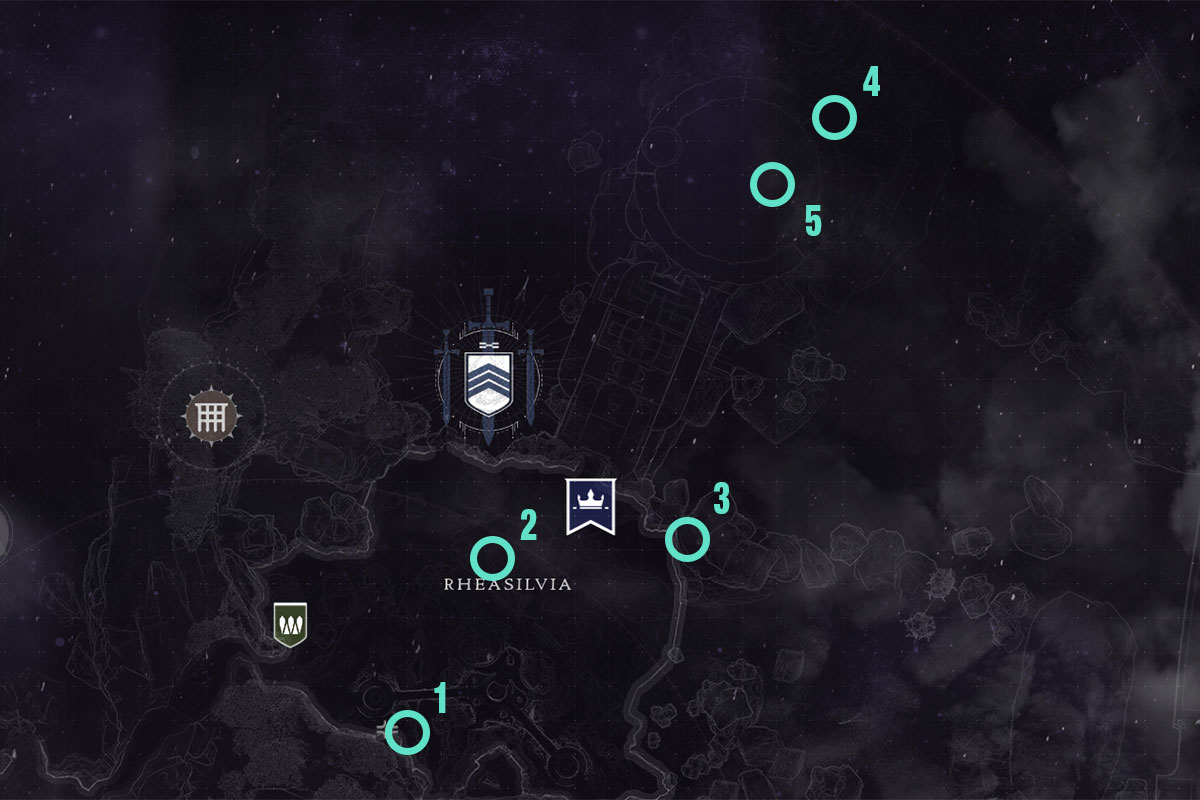
#1: Rheasilvia Lower Level
Once you enter Rheasilvia on the road from the Divalian Mists, stay to the right as if you’re going to the Chamber of Starlight lost sector. Hop off your sparrow just as that path turns right and hop over the edge of the cliff. This Atlas Skew is on a platform beneath you and the waypoint will show on your screen once you’re close enough so you have a place to aim for.

#2: Rheasilvia Temple Overlook
Head to the central platform where the Ether Harvester public event takes place. Turn to the North towards Harbinger’s Seclude and look for the stony hill just to the left of the circular platform between you and the Seclude. The Atlas Skew is on the other side of the crag about halfway up.
#3: Rheasilvia Secluded Statue
It will take some careful platforming to get to this Atlas Skew. Head over to Harbinger’s Seclude and look to the right of the entrance. There’s a stone ledge protruding from the cliffside. Hop onto it and follow it around to find a series of jumps that will take you to the island that’s a massive column of stone with a statue atop it. Make your way up the cliff* face and you’ll see the skew on the landing next to the statue.
* Be sure to use a high mobility build here to make the jumps.
#4: Harbinger Sidehall Statue
Make your way back to the entrance of Harbinger’s Seclude and head inside. Follow the main pathway until it opens up into the large cavern with the Awoken statue in the center and the raised dais on the far end of the hall. To the right is what looks like an Awoken cathedral. Head inside, handle the Taken, and go to the far end of the building that has the Awoken statue flanked by a set of stairs and two hanging banners. The Astral Skew will be at the base of the statue.
#5: Harbinger Ahamkara Skulls
There are two ways to get to this Atlas Skew, but the fastest way is from the 4th skew. Head out of the Cathedral and head to the previously mentioned dais. Go through the doorway at the top and before you will be a massive set of circular stairs that lines a circular space. Jump over the railing to the floor below. Turn around and head through that doorway. You’ll see a giant hole in the ground. That’s an elevator shaft. Jump into it.
Head through the doorway and deal with the Taken. The Atlas Skew will be on the platform to your left between the doorways to Huginn and Muninn.
Step 3: The Hallow Coronation
As usual, you’ll need to take the Skews you’ve collected and deposit them at an Atlas Terminal in the Dozmary Vault. Head back to the H.E.L.M., go through the portal, and turn in the skews at the terminal to the right of the dormant portal. You’ll get to listen to more dialogue from Uldren and Mara and get a bit more insight into their relationship.
Step 4: Head back to the H.E.L.M.
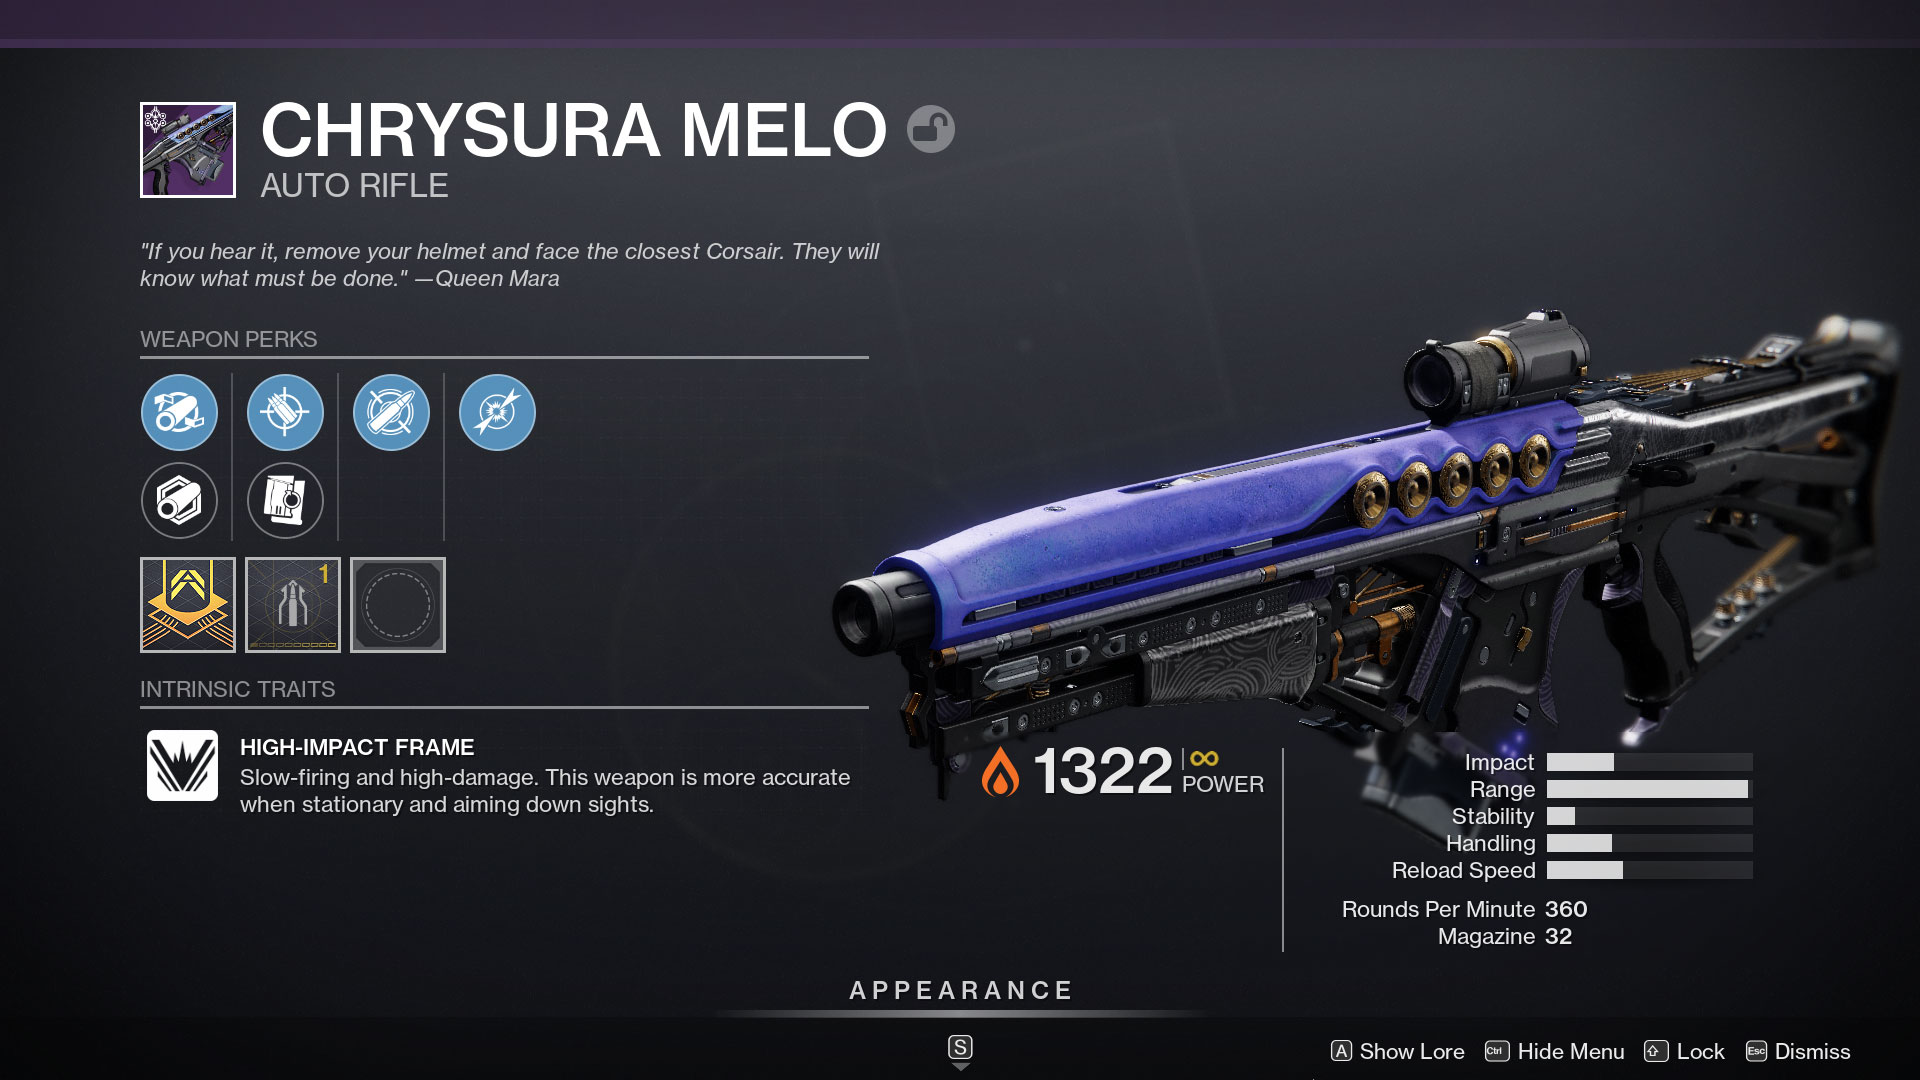
To fully complete this stage of the questline, you’ll need to go back to the Wayfinder’s Compass calibration station in the H.E.L.M. Mara will have some parting words for you and you’ll be rewarded with a max-range Chrysura Melo.
Next week is going to be interesting since it should be the last batch of Atlas Skews we need to power the portal. Whether we’ll get to acquire Ager’s Scepter or not remains to be seen, but if we can, be ready to take it into the Shattered Realm to collect more Trivial Mysteries and complete its catalyst.
A Hollow Coronation
Though this is technically the 4th step of Tracing the Stars, the exotic quest for Ager’s Scepter is called A Hollow Coronation. To kick off this quest chain, you’ll need to go to the H.E.L.M.
Step 1: Talk to Mara in her Throne Room
As usual, Mara wants an audience with our Guardian to collect the final set of Atlas Skews that are scattered within the Confluence in the Dreaming City. This time, the minions of Xivu Arath know what you’re after and they’re in the Ascendant Space around the Gatehouse.
Step 2: Collect the Atlas Skews in the Confluence
The last 5x Atlas Skews so you can get Ager’s Scepter. The majority of these collectibles can be found in the Confluence, which is the series of tunnels and corridors beneath the Dreaming City. If you’ve ever run The Shattered Throne, then you’re familiar with The Confluence.
I’ll be explaining how to find these Atlas Skews using the portal from the Spine of Keres as a starting point. If you aren’t familiar with that portal, you can find the way there by watching the video below.

#1: Confluence Giant Crystal
After entering the portal in Keres Spine, hang an immediate left and go straight down the corridor ahead of you. You should be able to see a large crystal through an arched doorway in the distance. This is the “giant crystal”. The skew is on the far side of it.
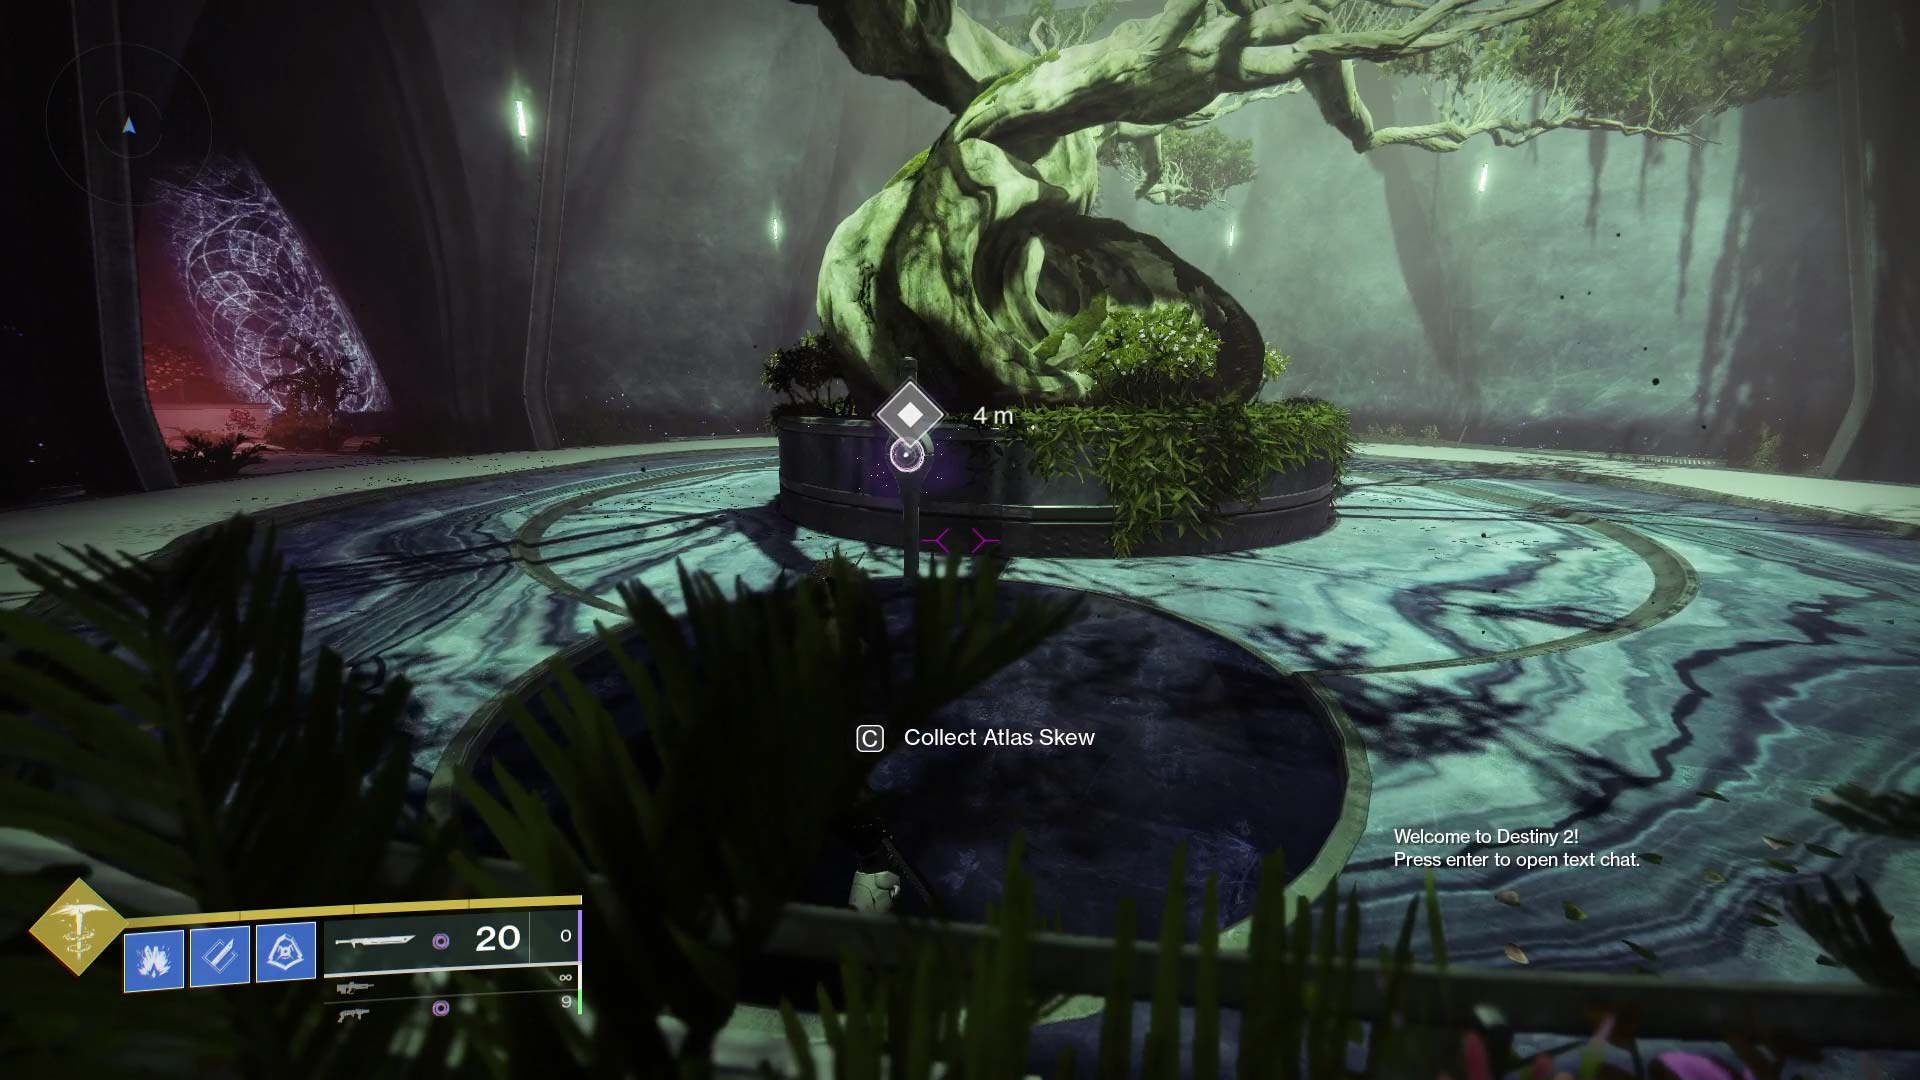
#2: Confluence Tree Triad
Keep heading down the corridor and when you come to the large circular room that has three exits, go to the one on the right. You should see a tree at the end of this hallway. If you played D1, it might remind you of the tree that was in the Tower. The second Atlas Skew is on the far side of this tree. Head around and collect it.
#3: Garden Entry Statue
Don’t be fooled by this name. The Atlas Skew itself is in the Confluence, not the Garden. It’s the entrance to the Garden from the Confluence side. From the Tree Triad, you’ll want to continue down the corridor across from where you entered the tree room. There will be a large stone with a tree behind it in the rotunda ahead of you. Hang a left in that room and the Atlas Skew will be on your right, across from the portal to the Garden of Esila. Hence, Garden Entry Statue.

#4: Confluence Throne Portal
Go back to the large circular room with the three exits. Once you enter the room, go through the exit on your right. This hallway leads to the Shattered Throne portal. Head to the end of the hallway and the skew will be on the landing in front of said portal.
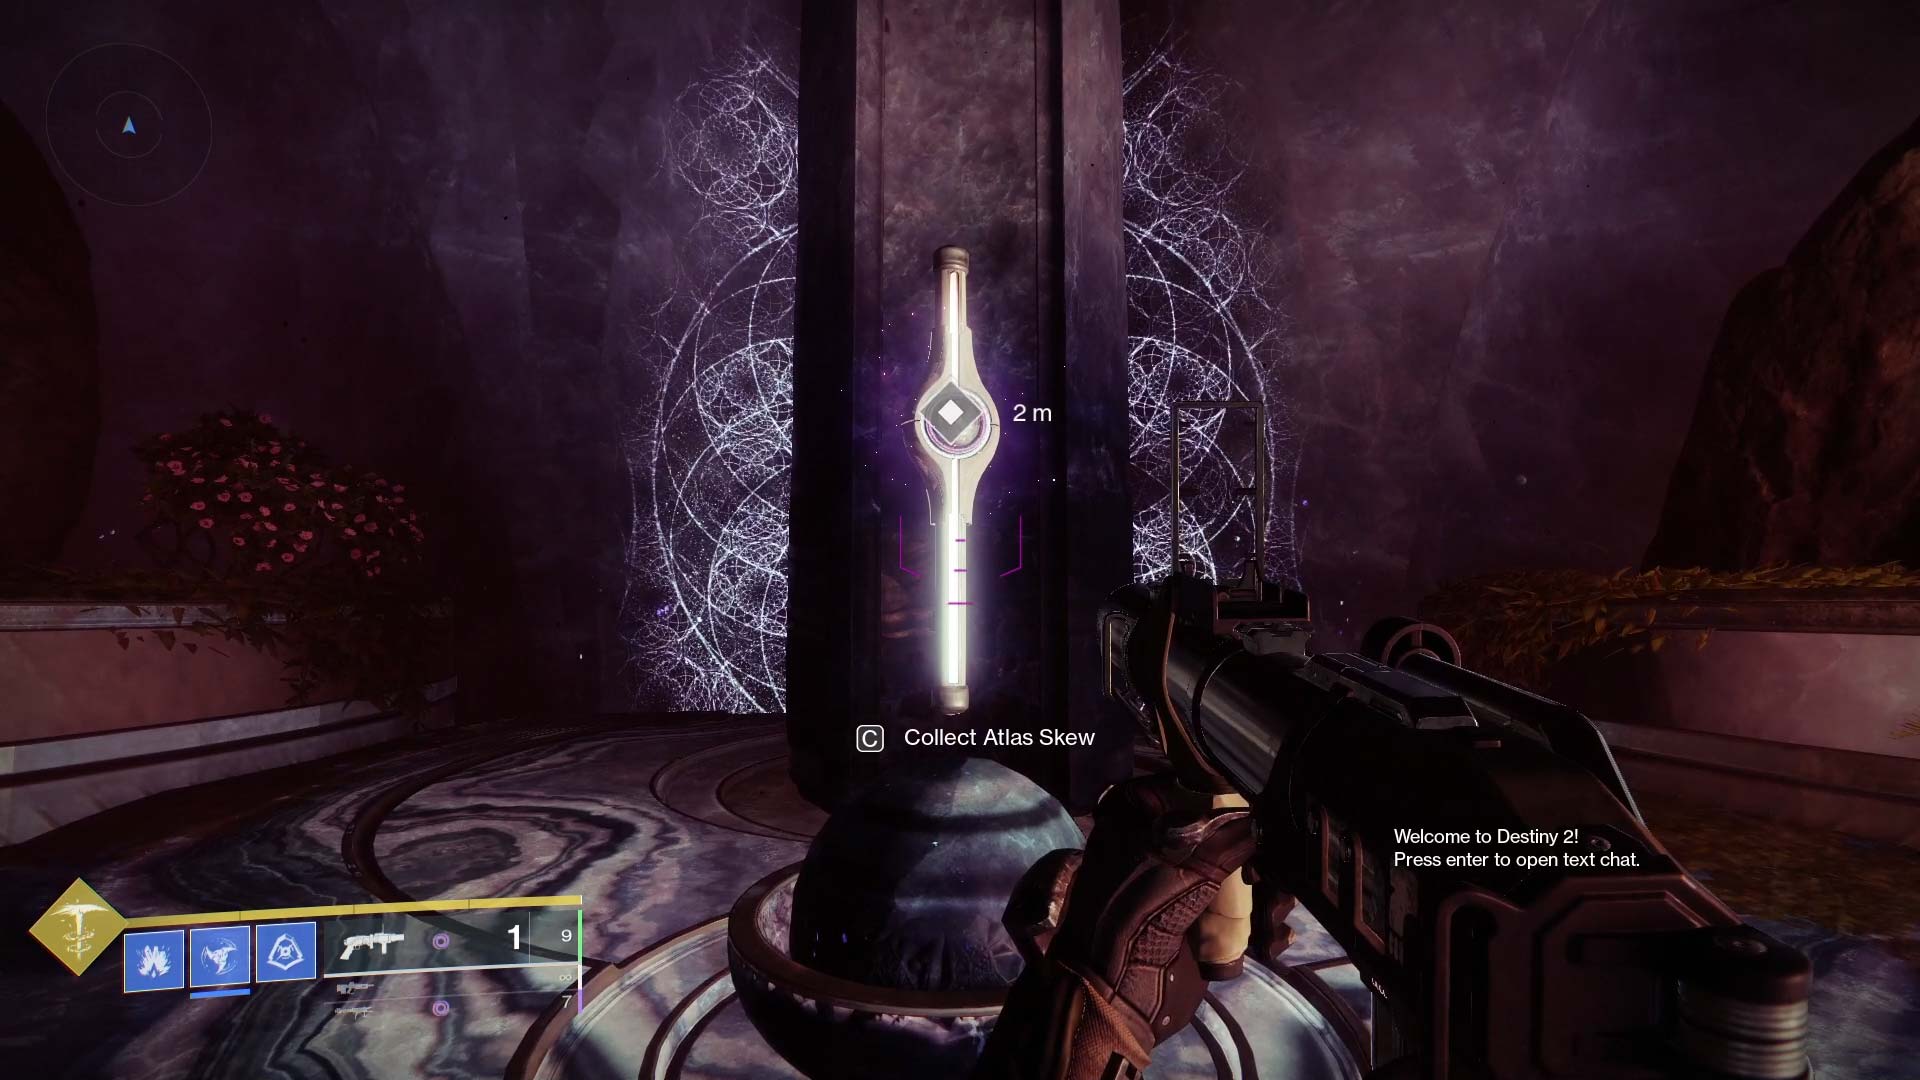
#5: Harbinger Cathedral
Turn around and go back to the circular room. Go through the doorway on your right and go past the stone statue. The corridor will open up into the Cathedral and the Atlas Skew is in front of the column at the far end of the room.
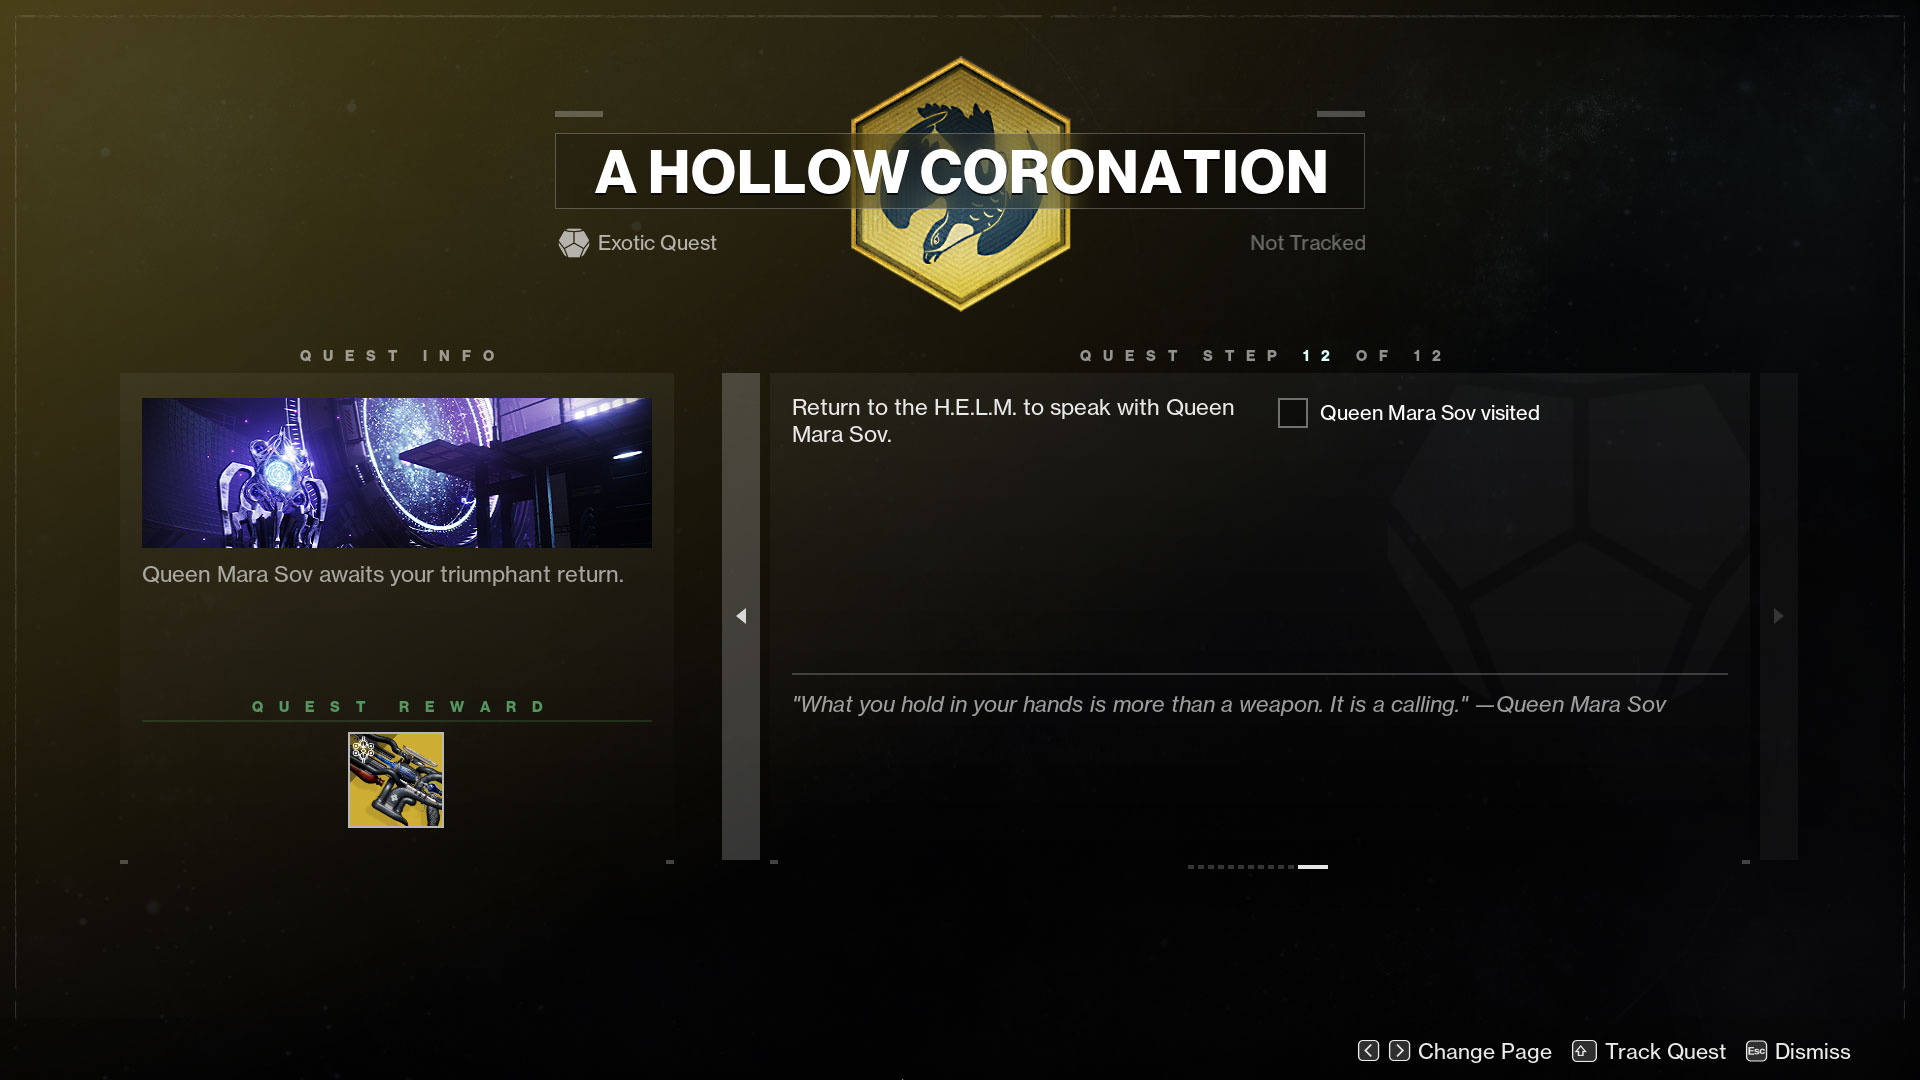
Step 3: A Hollow Coronation
Open up the Director, select the H.E.L.M. and look for the large blue icon just to the right of the Prismatic Recaster. We need to travel to the Dozmary Vault once again to turn in the Atlas Skews. Run through the portal and go to the last remaining Atlas Terminal on the far right. Once the recording has finished playing, the portal in the center of the dais will open up and you can go through.
Ager’s Scepter will be on a pedestal before you, but a shield has been triggered and you can’t unlock it yet.
Step 4: Return to Mara Sov
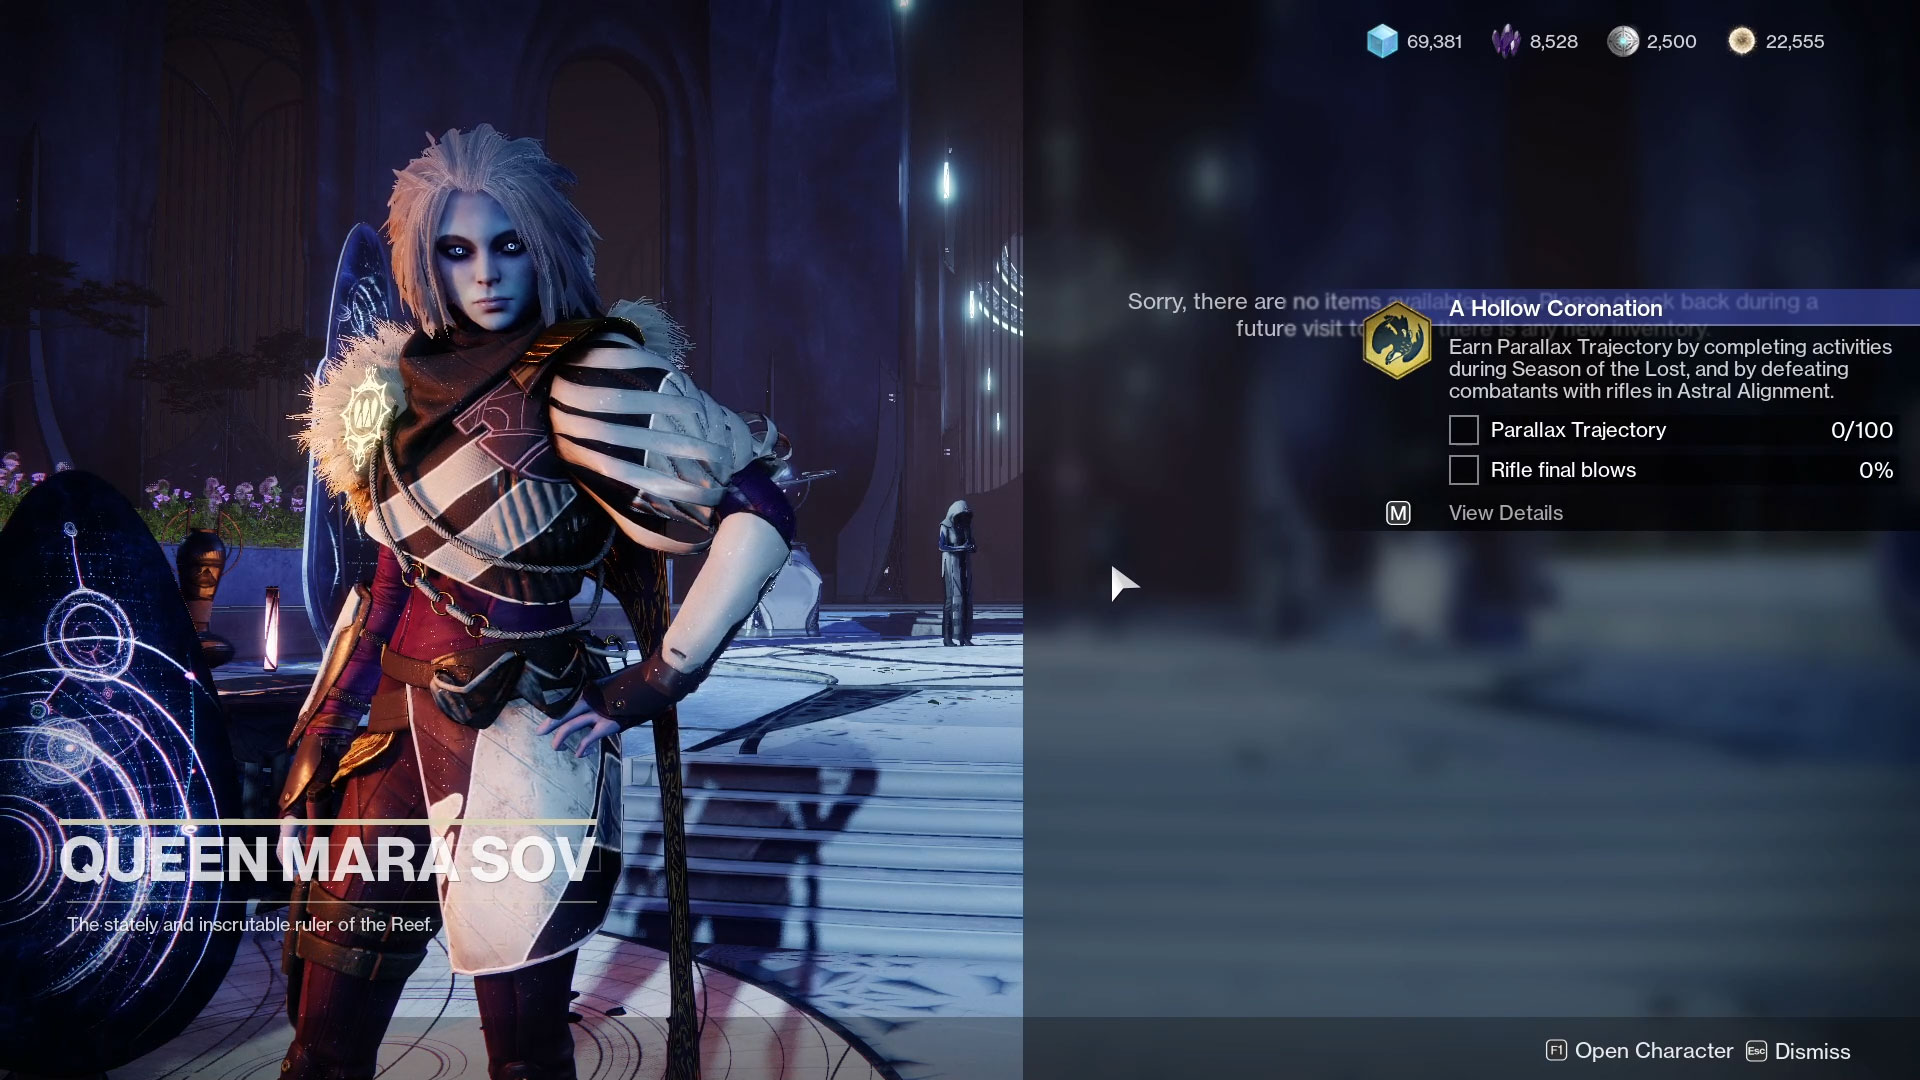
Mara tells you that the key to the lock has been scattered across the Dreaming City and she needs time to collect the codes. In the meantime, Xivu Arath’s forces are pressing forward and need to be pushed back. Mara sends you to:
- Collect 100x Parallax Trajectory
- Get final blows with rifles in Astral Alignment
Rifle weapons are any weapon with “rifle” in the name so you can use Auto Rifles, Pulse Rifles, Fusion Rifles, Linear Fusion Rifles, and Trace Rifles to get the necessary final blows. Fair warning, you’re going to need a lot so you’ll have to run Astral Alignment a few times.
Whichever weapon you choose, be sure to focus on defeating enemies with it instead of playing the objective. Yes, it’s selfish, but the faster you get your final blows, the faster you can move on to the next step.
To put it into perspective, it took me about 4x Astral Alignments to knock out this step using an Auto Rifle / Trace Rifle loadout.
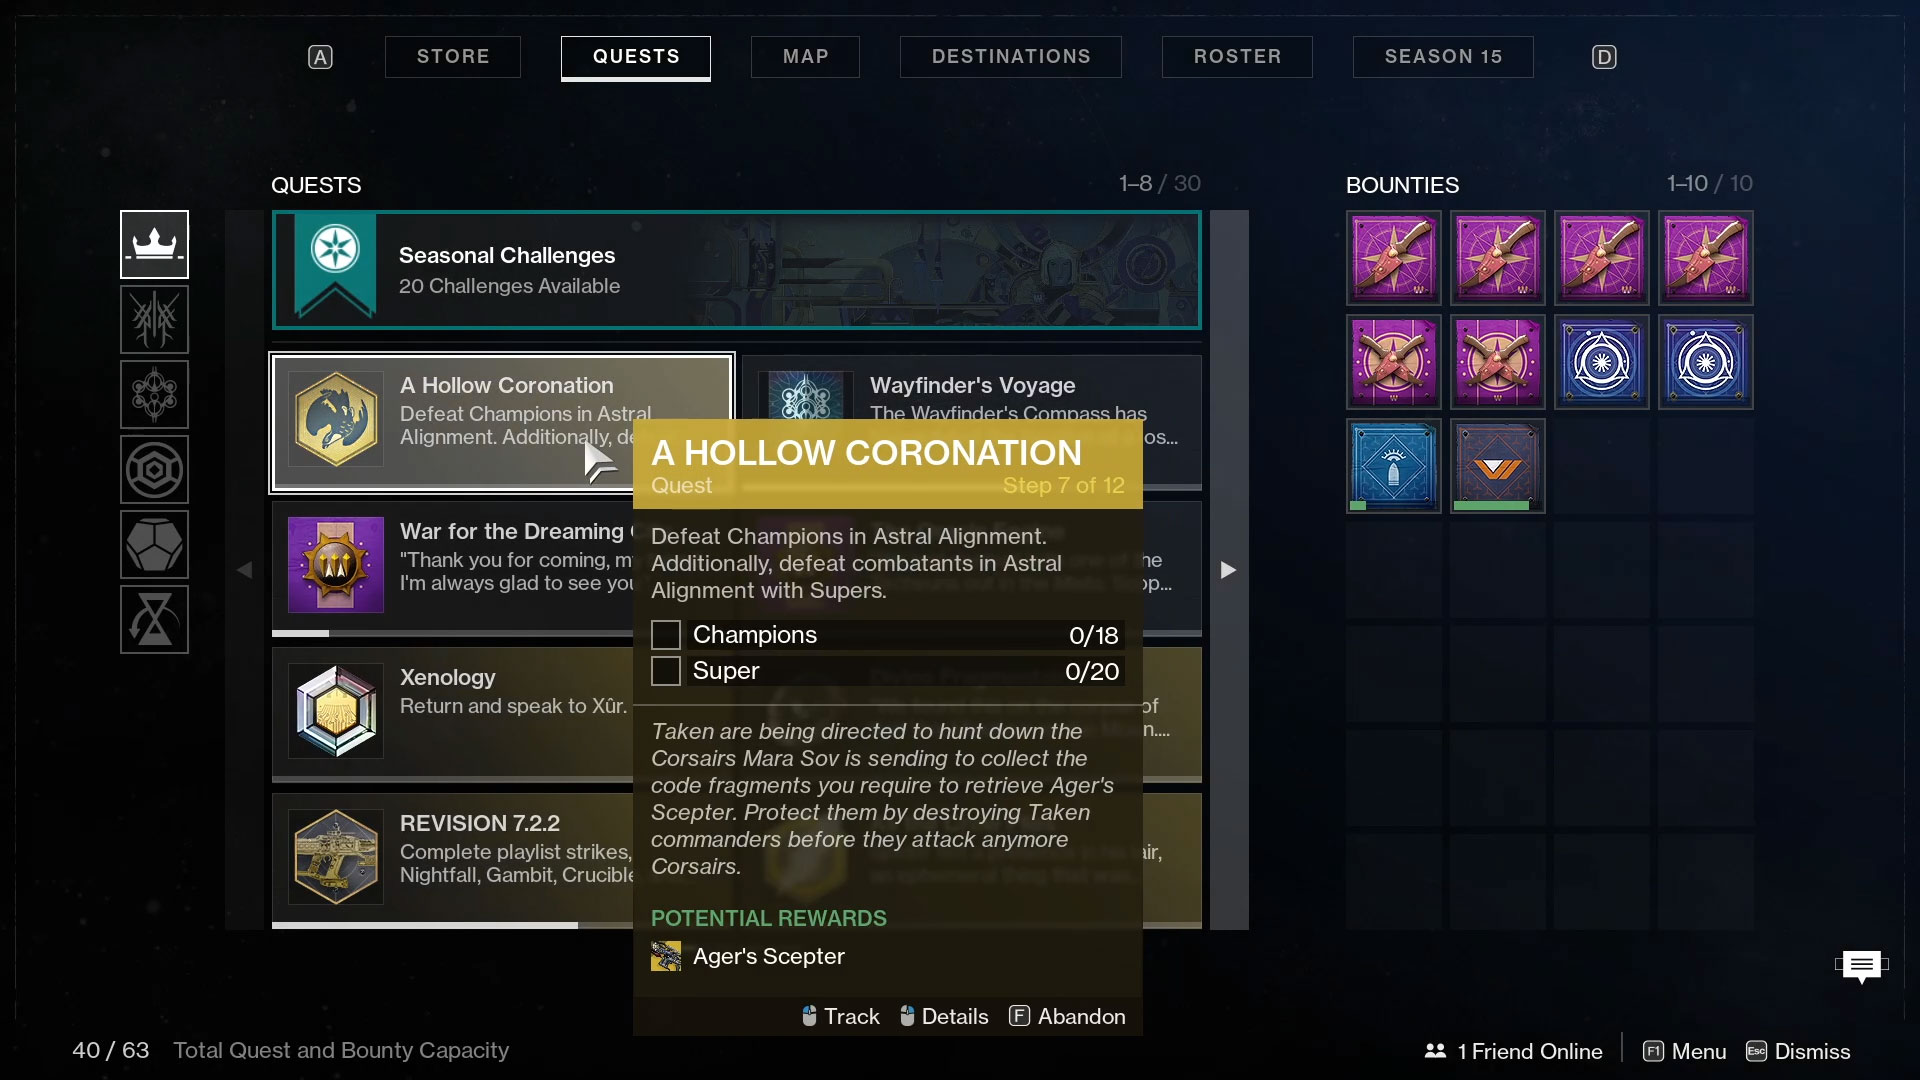
Step 5: Defeat Champions & Enemies in Astral Alignment
For the next step, we’re going right back into Astral Alignment. This step of the quest is very straightforward.
- Defeat 18x Champions
- Defeat 20x combatants with your Super
The sticking point on this step of the quest is defeating Champions. There are only so many Champions in each run of Astral Alignment and you want to make sure you get credit for each one.
You can knock out the defeats with your Super in 2-3x cooldowns if you’re using a roaming Super like bottom tree Striker / Sentinel, top tree Golden Gun, etc.
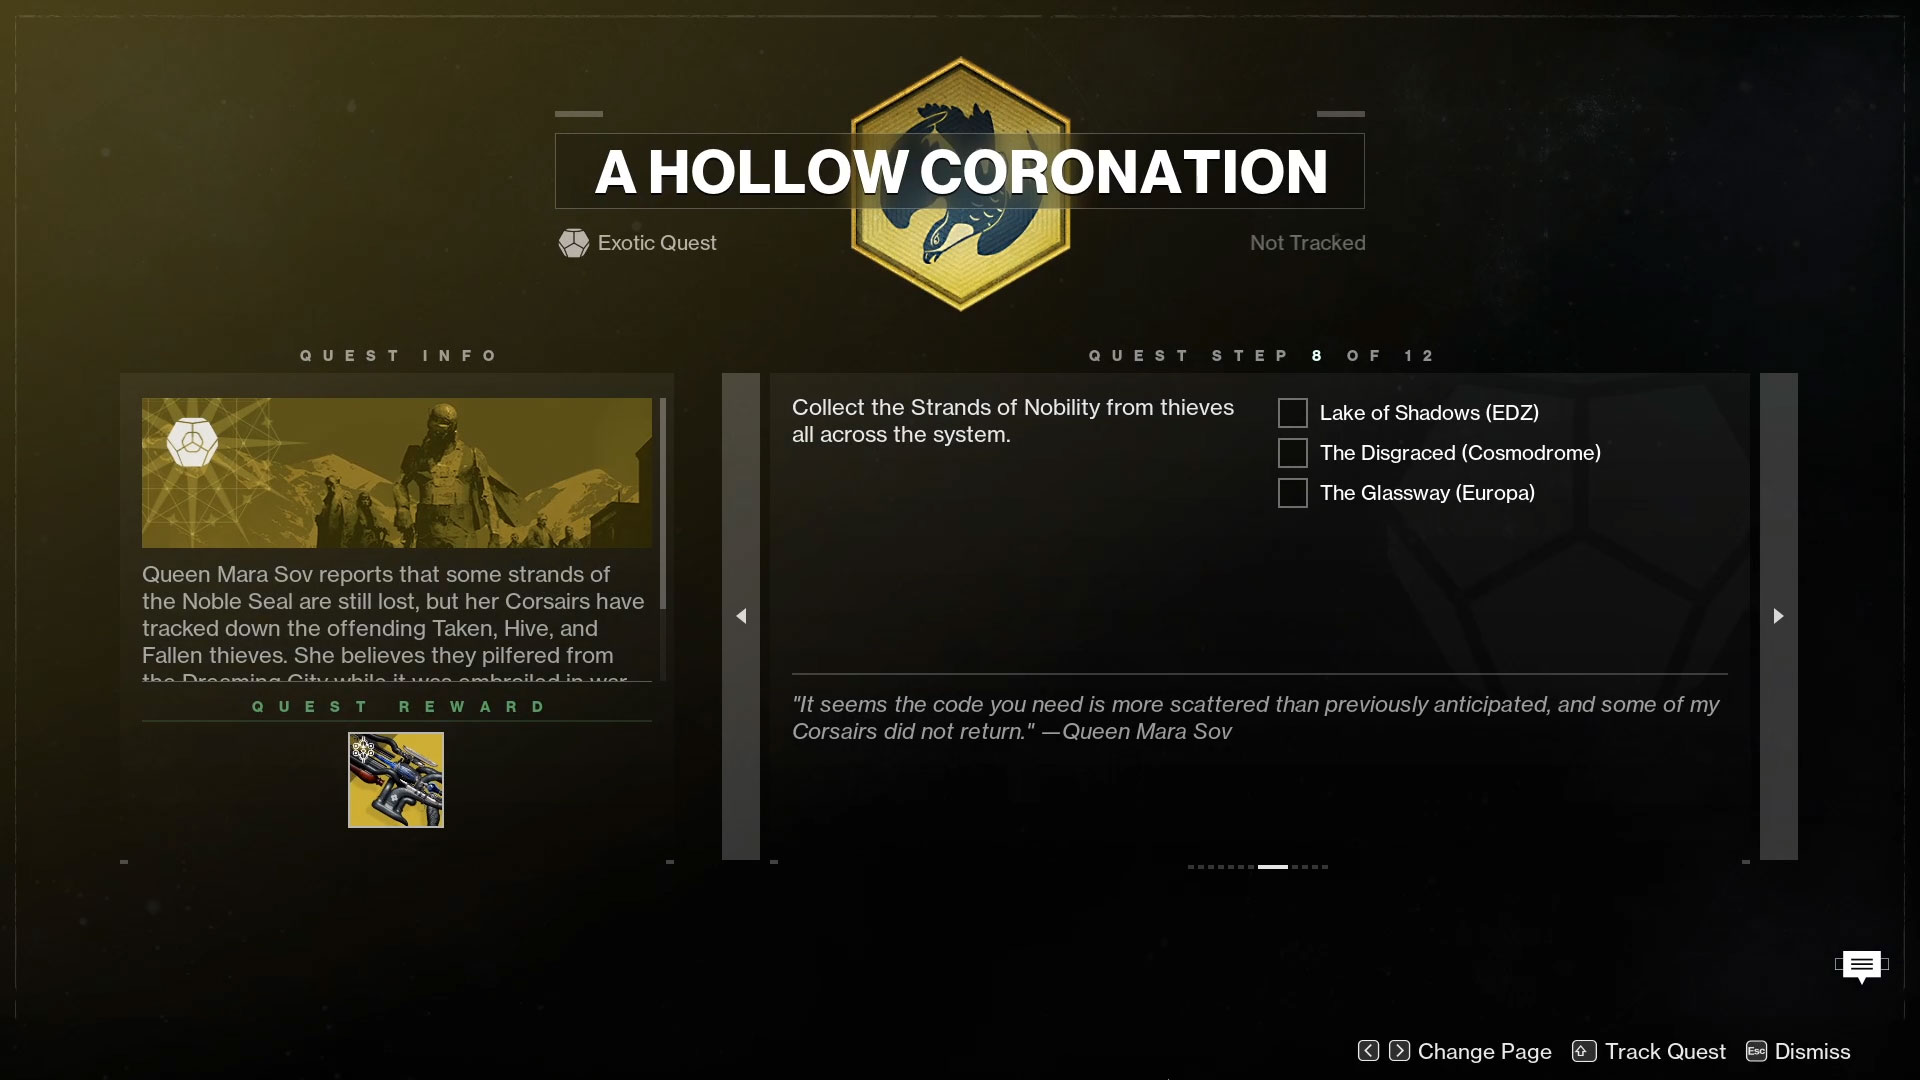
Step 6: Collect Strands of Nobility
The next step of the quest chain to earn Ager’s Scepter has you traveling throughout the system to recover 3x Strands of Nobility to rebuild the Noble Seal and unlock the failsafe around the trace rifle. This is really just a fancy way of saying that you need to run 3x strikes.
- Complete Lake of Shadows Strike
- Complete The Disgraced Strike
- Complete The Glassway Strike
Be sure to go to each strike’s respective planet and queue for them directly as opposed to going into the Vanguard playlist.

Step 7: Return to Mara Sov
Mara Sov has re-assembled the Noble Seal which will let your Guardian drop the failsafe around Ager’s Scepter. However, she hints that Xivu Arath’s forces will not let it be taken easily so be ready for a fight. Also, be sure that you have a space open in your Kinetic slot since the Noble Seal will go there.

Step 8: Claim Ager’s Scepter
Open up the Director, select the H.E.L.M., and the icon for the Dozmary Vault is now a golden exotic engram emblem. Select that and make your way to the Gatehouse. Go through the portal and collect Ager’s Scepter.
Equip your new exotic trace rifle and use it to carve a path through the destructible boulders on the far side of the room. They have a slight shimmer to them if you have trouble discerning which ones they are. On the other side of the tunnel is a large circular room where you’ll fight an Ultra Knight and wave after wave of Hive.
Use Ager’s Scepter here. Its exotic perk will freeze enemies around the ones you defeat with it which will help keep the pressure off of you.
Step 9: Return to Mara Sov
Mara Sov has some parting words for you and you’ll get to see a brand new cinematic that finishes out the Rega and Ager story.
And that does it! The Ager’s Scepter exotic trace rifle is now officially yours. Be sure to take it into the Shattered Realm to unlock more hidden secrets.

Kenny Empey
Kenny is a lifelong gamer that enjoys writing in-depth guides for RPGs, JRPGs, strategy, and FPS games. You can follow him on Twitter, YouTube, or Twitch to stay up to date with the latest content and guides from ArcadeHaven.io