All Trivial Mystery Locations in the Shattered Realm
Check out our comprehensive guide to find the location of every Trivial Mystery chest hidden in the Shattered Realm.
Trivial Mysteries are one of the many secrets that are waiting to be found by Guardians in the Shattered Realm, the new seasonal activity that was added in Season of the Lost. Trivial Mysteries are basically like the Ascendant Chests that were hidden in the Dreaming City, minus needing to use a Tincture of Queensfoil to see them. These chests are hidden throughout the different branches of the Shattered Realm and award players with a large amount of XP, planetary materials, glimmer, and sometimes Legendary gear.
Finding these chests is also a big part of completing Season of the Lost’s triumphs and a few of the seasonal challenges as well.
Every Trivial Mystery Location
Note: Full disclosure, I’ve lumped the Trivial Mystery, Enigmatic Mystery, and Ascendant Mystery chests into this singular guide. There’s no reason to make you read two other guides in addition to this one when they’re all hidden chests. That’d be ridiculous.
Forest of Echoes Trivial Mysteries
There are 10 Trivial Mystery chests scattered throughout the Forest of Echoes. Some of these chests require that you’ve previously unlocked specific abilities through the Wayfinder Compass Calibration station. Finding these Trivial Mysteries will complete their associated Triumph, which is listed in parentheses next to the location.
If you haven’t unlocked the Barrier Breach ability on your Wayfinder’s Compass yet, stop and go do that. You will not be able to get through the barriers without unlocking that ability.
#1: Catacombs (Entombed)
The first Trivial Mystery chest can be found in the first building you come across on your way to the Cathedral. It’s the square stone building that looks like a Mausoleum with a blueish purple barrier in the doorway. You’ll also see a deactivated totem just in front of the entrance.
Unfortunately, you can’t collect it just yet. The ability totems in the Shattered Realm are inert by default until you complete a specific encounter in the immediate area. In this case, it’s the encounter inside the Cathedral.
Continue down the path to your left clearing the Taken along the way. Head inside the Cathedral, dispatch the Taken around the beacon, activate said beacon, complete the encounter and head back to the Mausoleum. Get the buff from the totem and go through the barrier.
Drop down into the catacombs, follow this corridor down until you see a metal grate in front of you. Turn to your left, hop over a section of broken wall, take two rights, and the chest will be down the hall on the left.
#2: Ruins (Left Behind)
If you’re looking directly at the entrance of the Cathedral, head over to the back right side of it. On your right will be a craggy incline heading up to a ruined structure. Climb up this pathway until you reach the ruins. Go through the entrance in front of you that has the totem inside on your left.
The Trivial Mystery you’re looking for is behind a barrier in the far left building. The Barrier Breach totem is on the third floor inside that same building. Getting up there will take some platforming because of the suppression aura that prevents ability use. The rocks to the right side are a fairly easy climb.
Make your way up those rocks and to the top of the building and then drop down onto the balcony leading inside. Snag the buff, drop down to the first floor, and open the chest in the alcove.
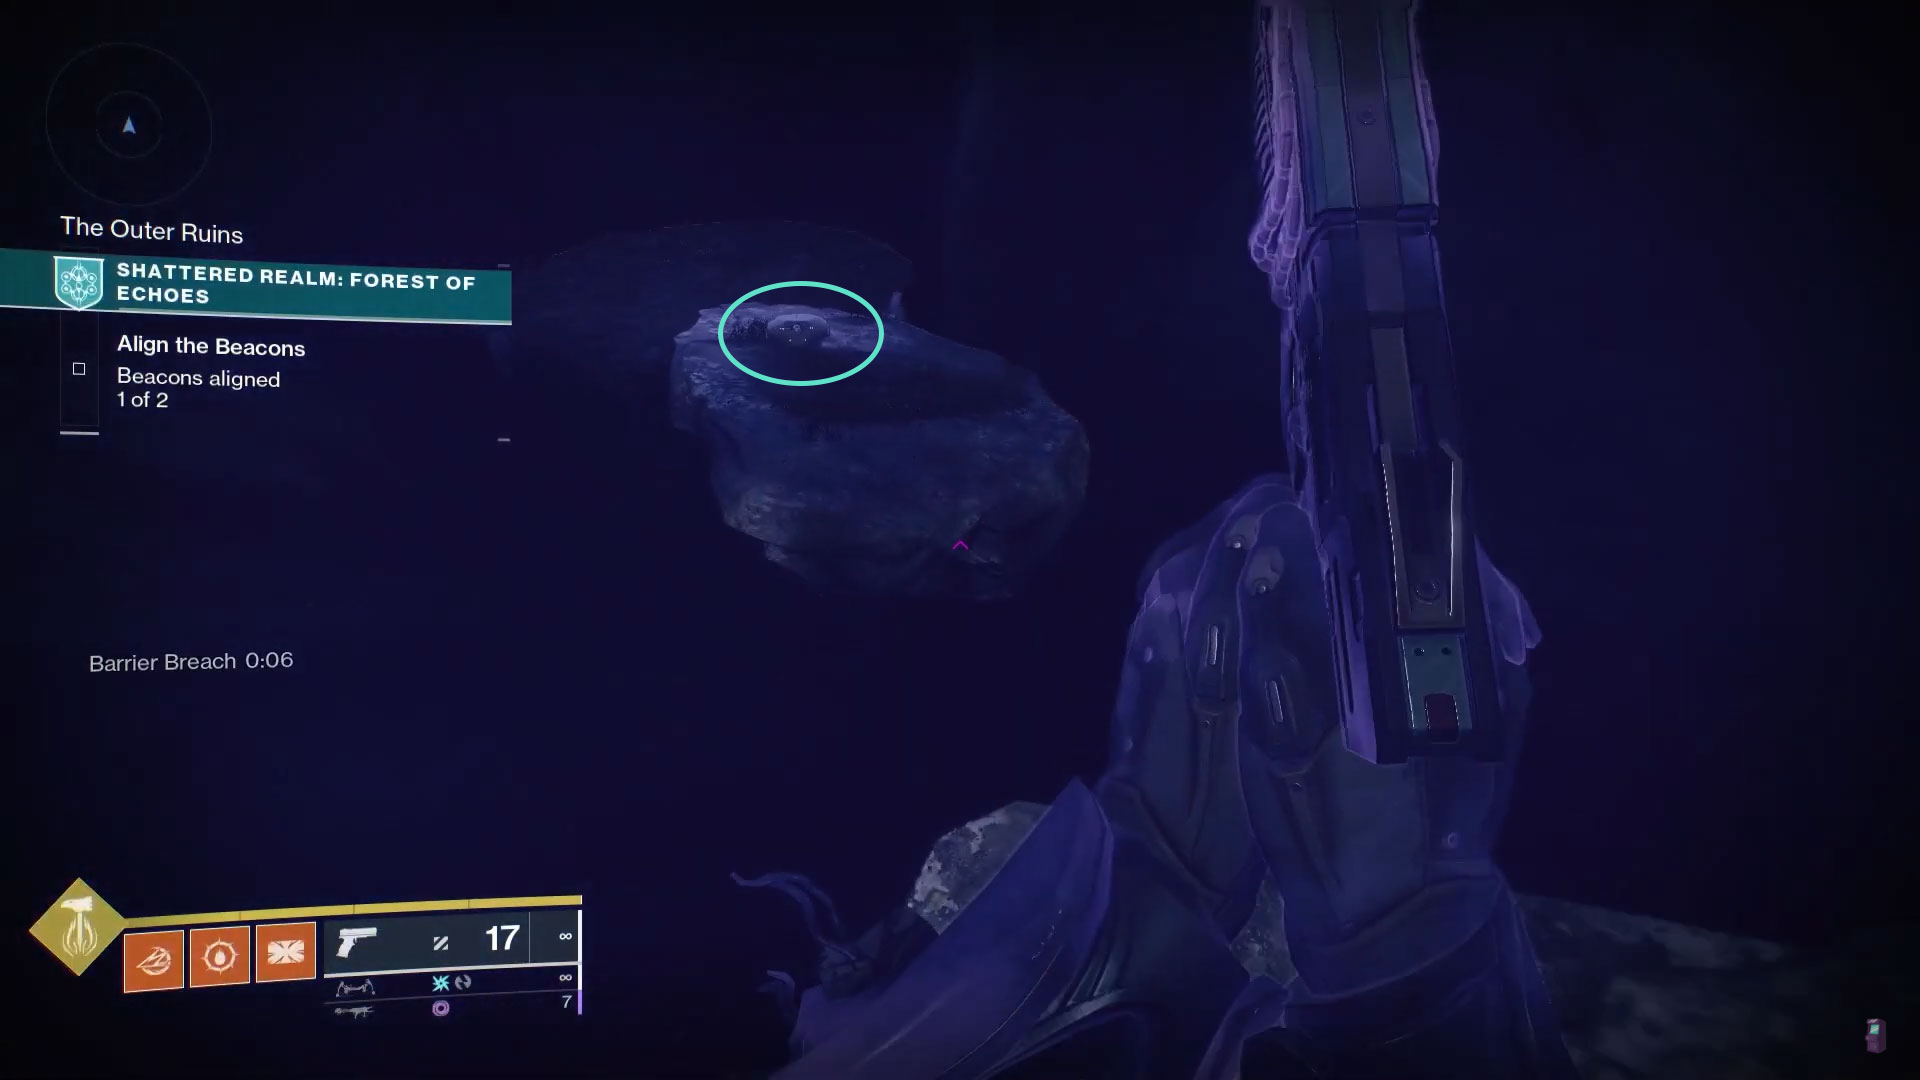
#3: Outer Ruins (Twofold Ward)
From the Cathedral entrance, turn around and go to the trail in the back left corner. Follow this up until you see a large ruined building ahead of you with an enormous arched entrance. You can see the Barrier straight ahead of you on the second floor. Take care of the Taken enemies here.
The Barrier Breach totem you’re looking for is on the second floor to the left of the entrance. Since you’re in a suppression aura, you’ll have to climb up there. The destroyed column just beneath it is tall enough for you to make the jump to the totem.
Grab the buff, go through the barrier, and you’ll see this Trivial Mystery chest on a floating island a short distance away.

#4: Descent (Taken Root)
Head back to the Mausoleum where you found the first chest. Look back towards the entrance to the Forest of Echoes and you’ll see a Barrier beneath a large tree. Grab the buff from the totem next to the Mausoleum and run through the Barrier.
Inside are a handful of Taken, but you can ignore all of them except the one down to your left. Take care of this Acolyte and head that direction. The chest will be directly in front of you.

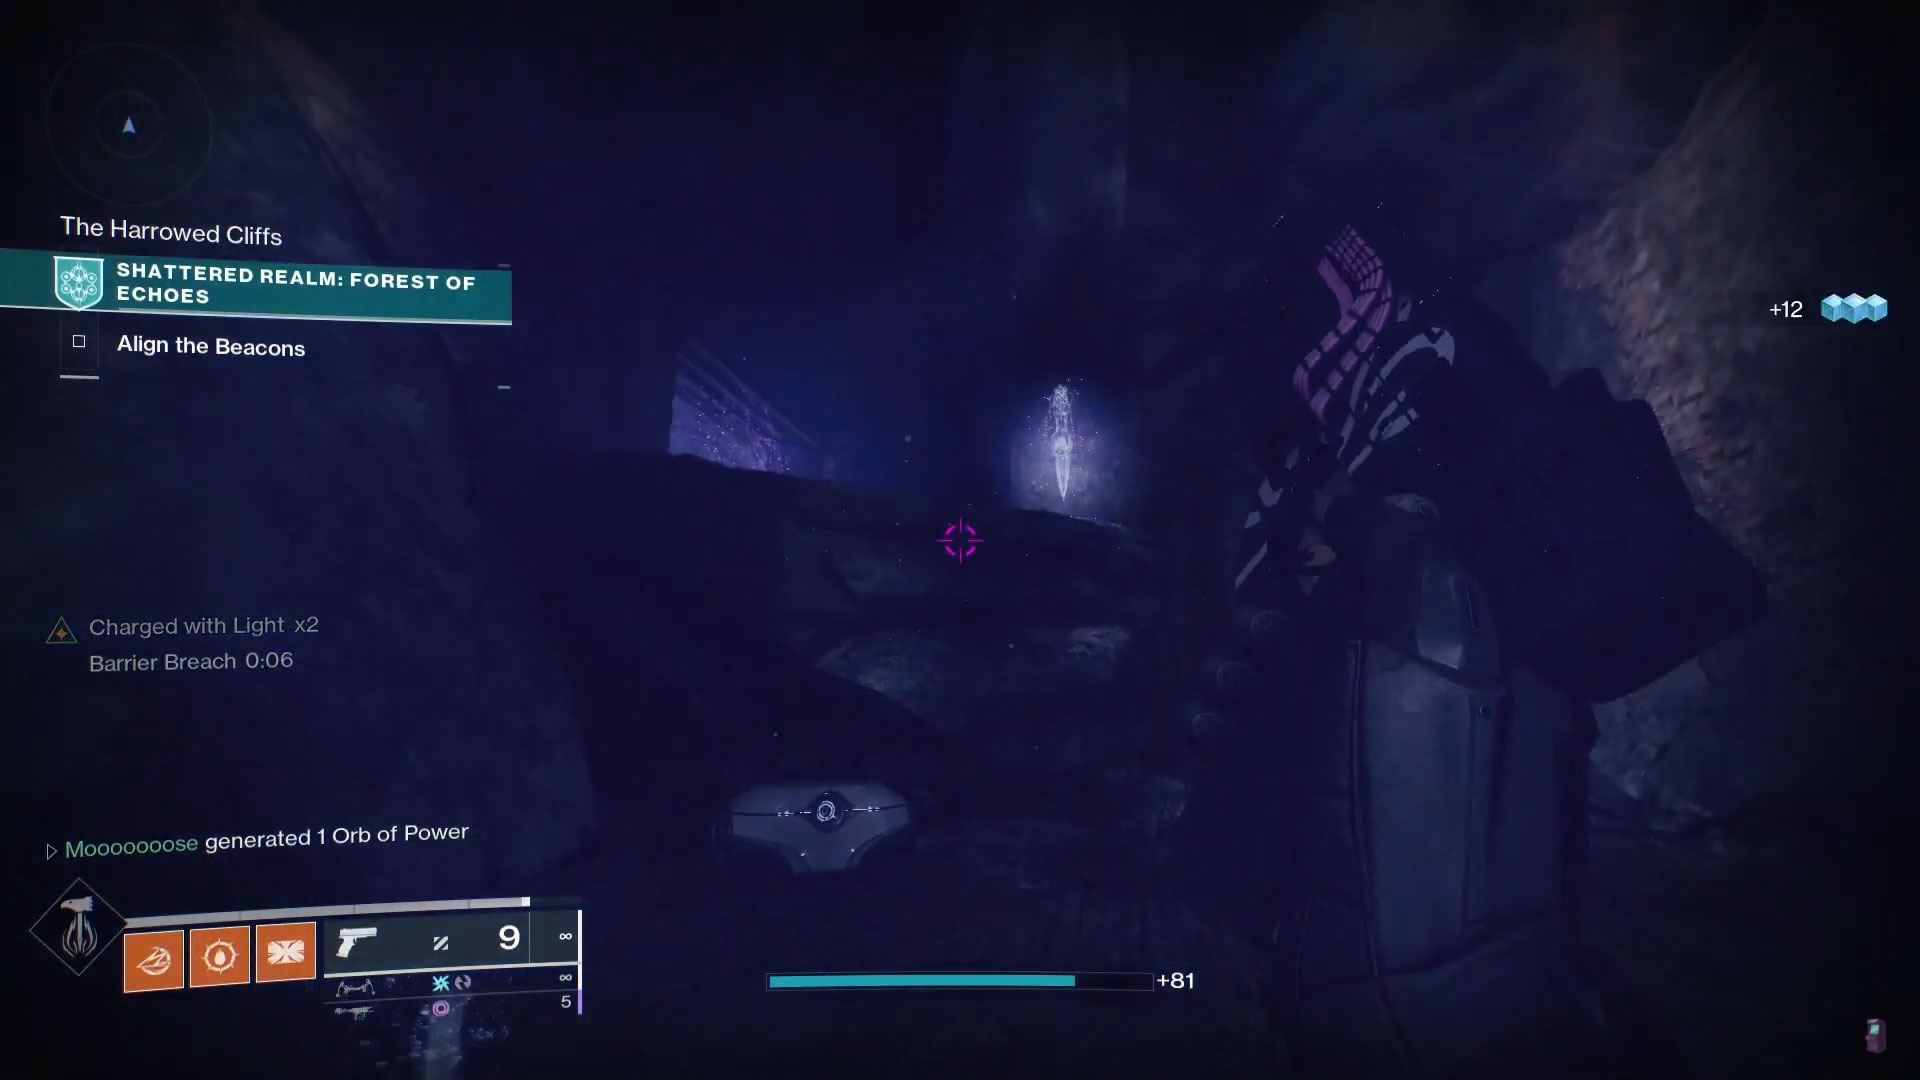
#5: Harrowed Cliffs (In Shadow)
Go to the Second Beacon. Like before, all of the totems in this region are inert until you’ve aligned the second beacon. Activate the beacon, defeat the waves of Taken, and then you’ll be able to receive the Barrier Breach buffs again.
Looking at the beacon from where you entered the zone, make your way up the ridges behind the beacon. Once you’re at the top level, follow the path that curves around to the right. There will be a floating island below you with three totems on it. The central one gives the Barrier Breach buff.
Jump down to the middle of the island and go to the center totem. You should see a giant barrier in the side of the cliff in front of you. Get the buff, jump through the barrier, and the chest will be immediately to your right.
#6: The Mill (Abandoned)
Make your way back up to the second beacon. Head towards the entrance and you should see a wooden water wheel attached to a stone building. This is the Mill. The chest we’re looking for is inside there. The quickest way in is going over the top of the building to the back left side. There’s a small stone outcropping with a Barrier Breach totem. Get the buff, head inside, deal with the Taken, and grab the chest that’s on the first floor.

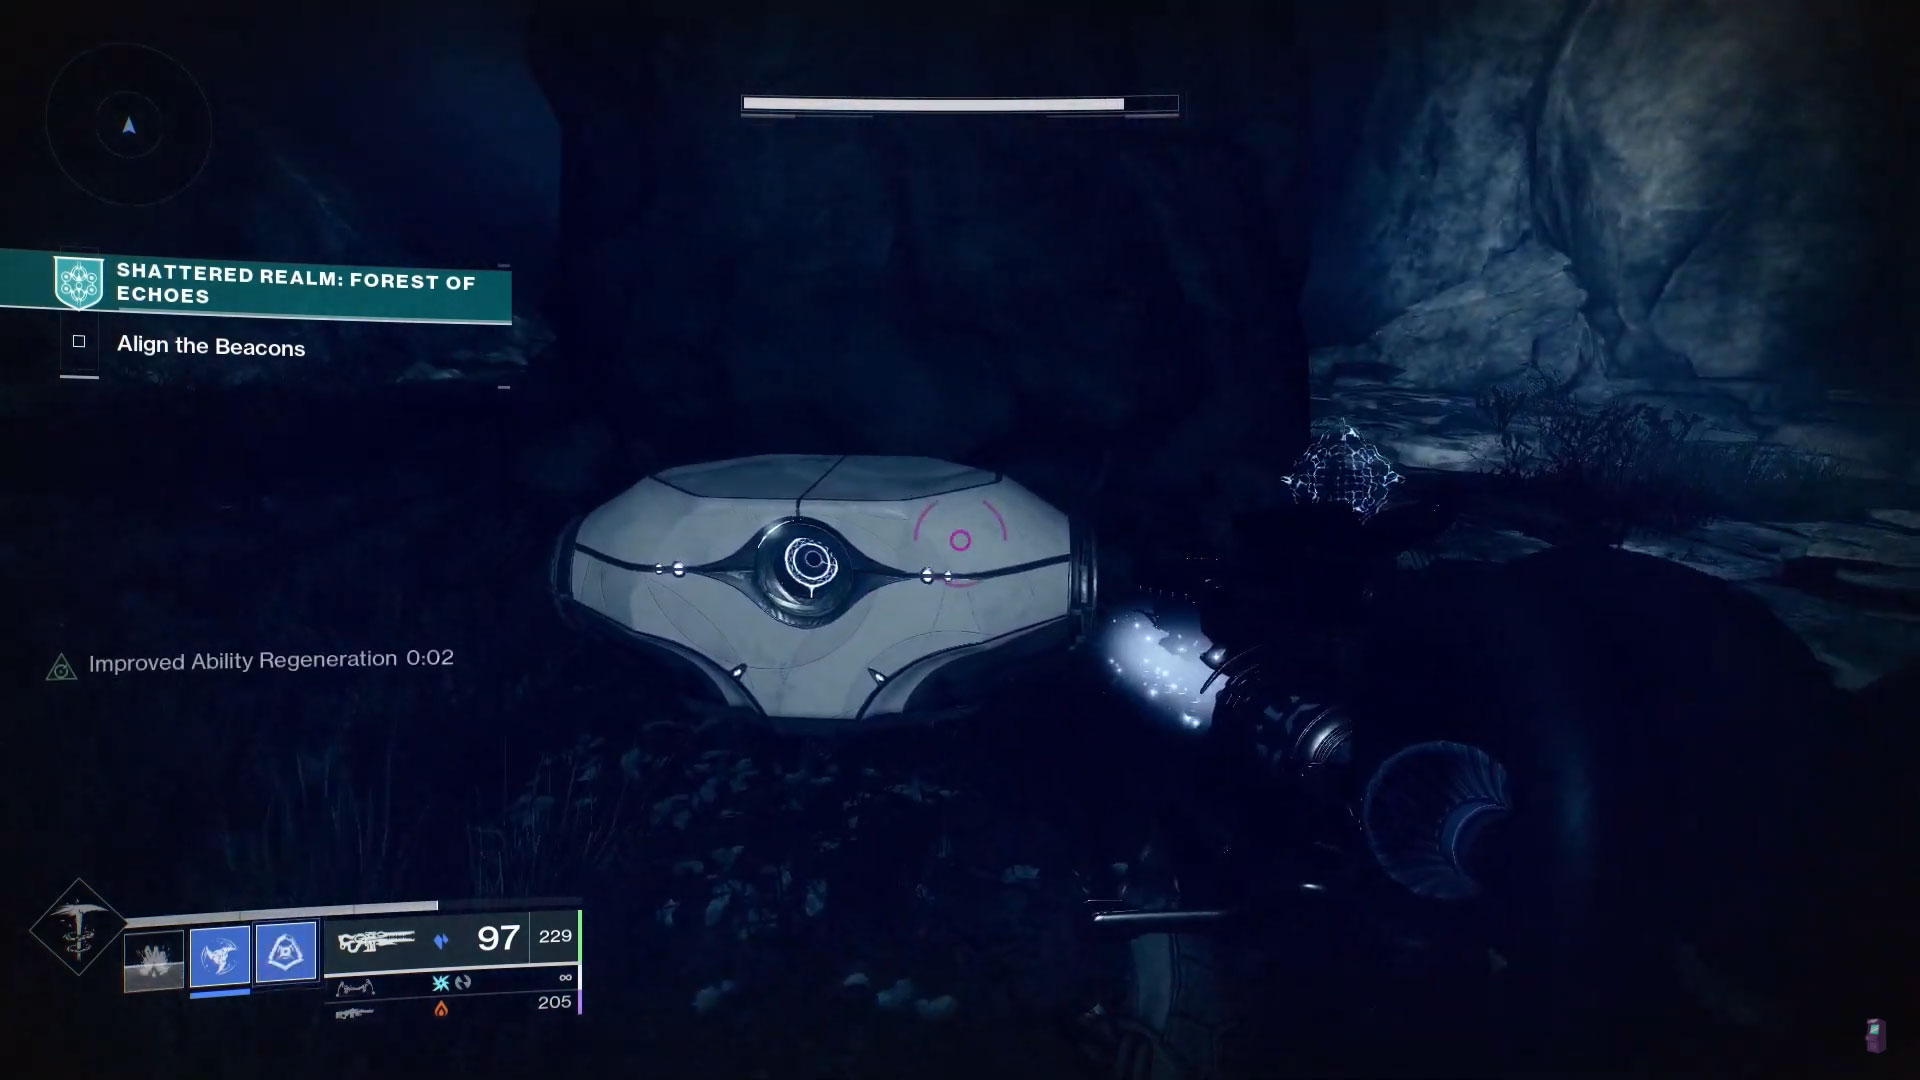
#7: The Sunken Cave (Deep Defenses)
You’ll need to go all the way back to the ruined town square near the beginning of the path that lead to the second beacon. Once you’re there, go to the back right corner. You should see an active totem there so you’ll know you’re heading in the right direction when you do.
Go to the totem and make your leap of faith. There’s a ledge down to the left that leads to an underground cave that’s beneath the town square. Head inside and deal with the Taken on the bottom floor.
The barrier you’ll need to go through is down and to the right from the cave entrance. The Barrier Breach totem is to your left. Go to the totem, grab the buff, and go through the barrier to open the chest.
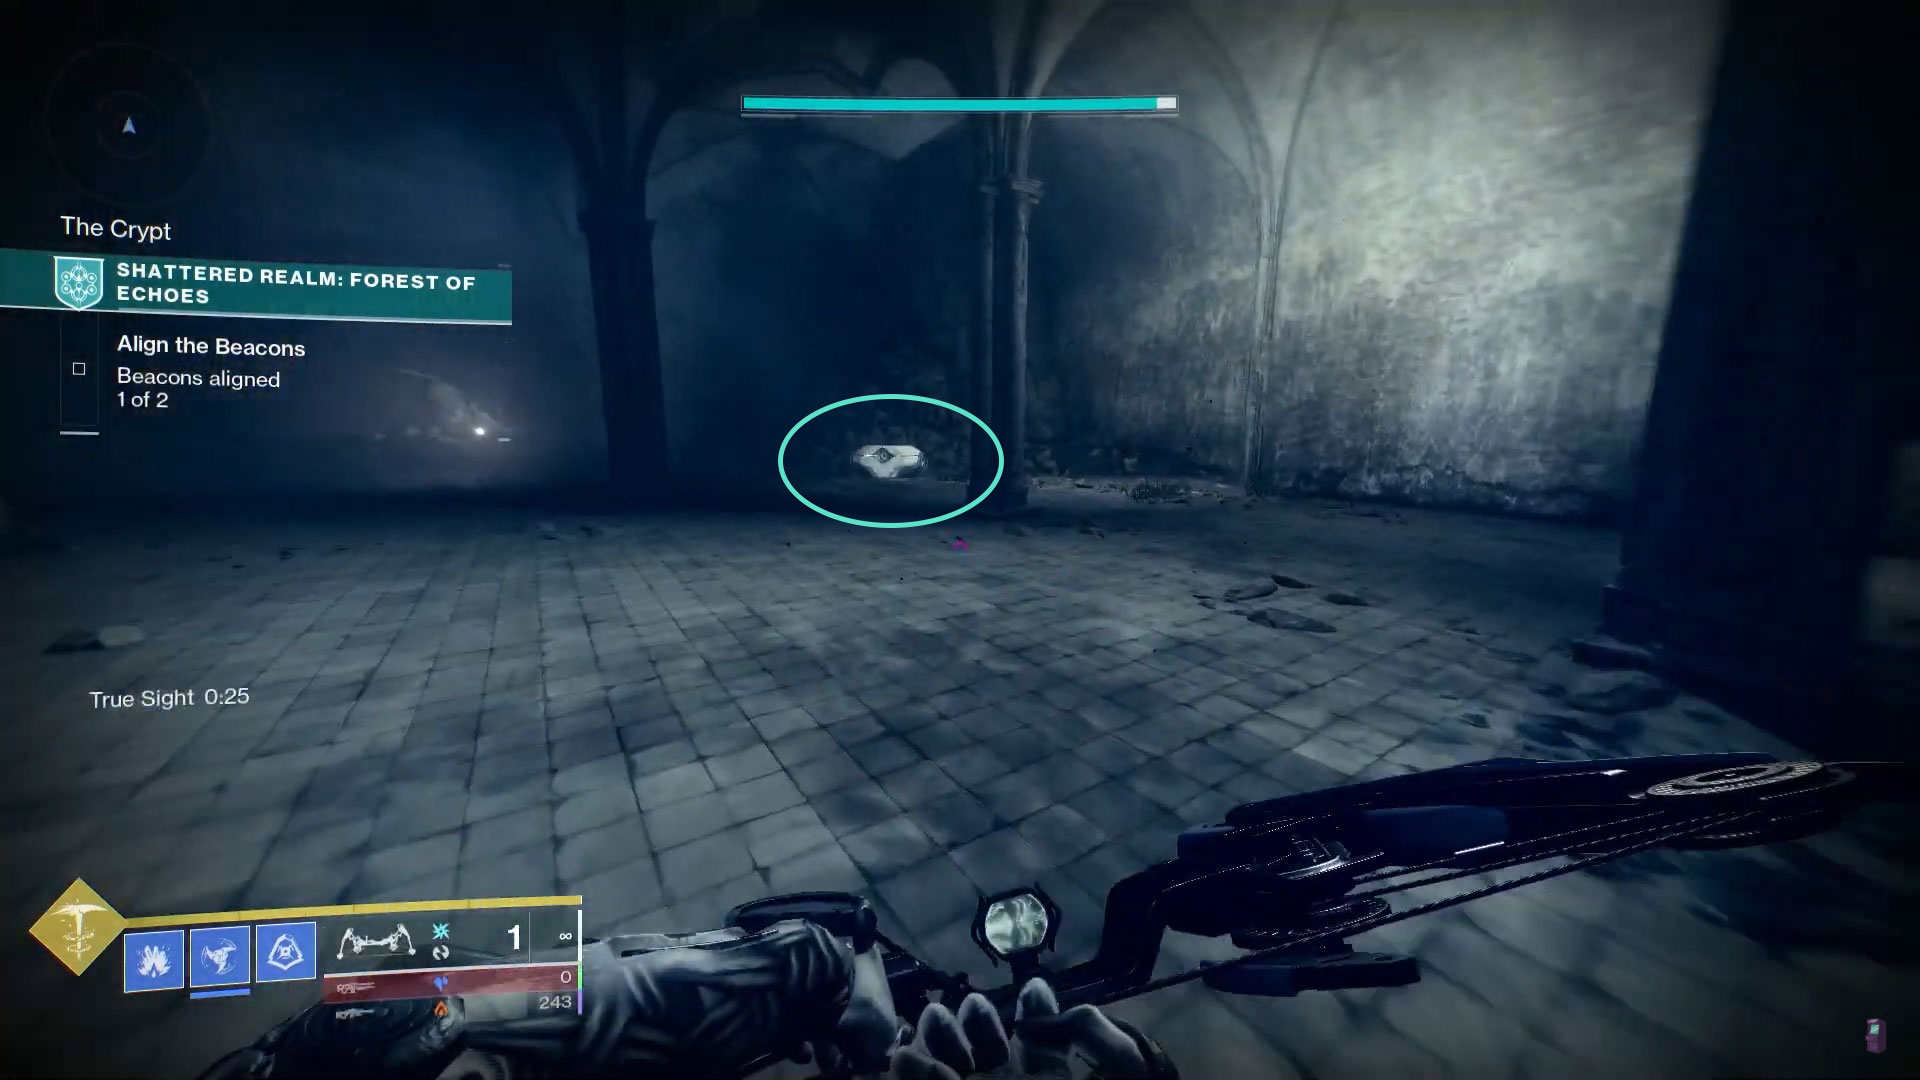
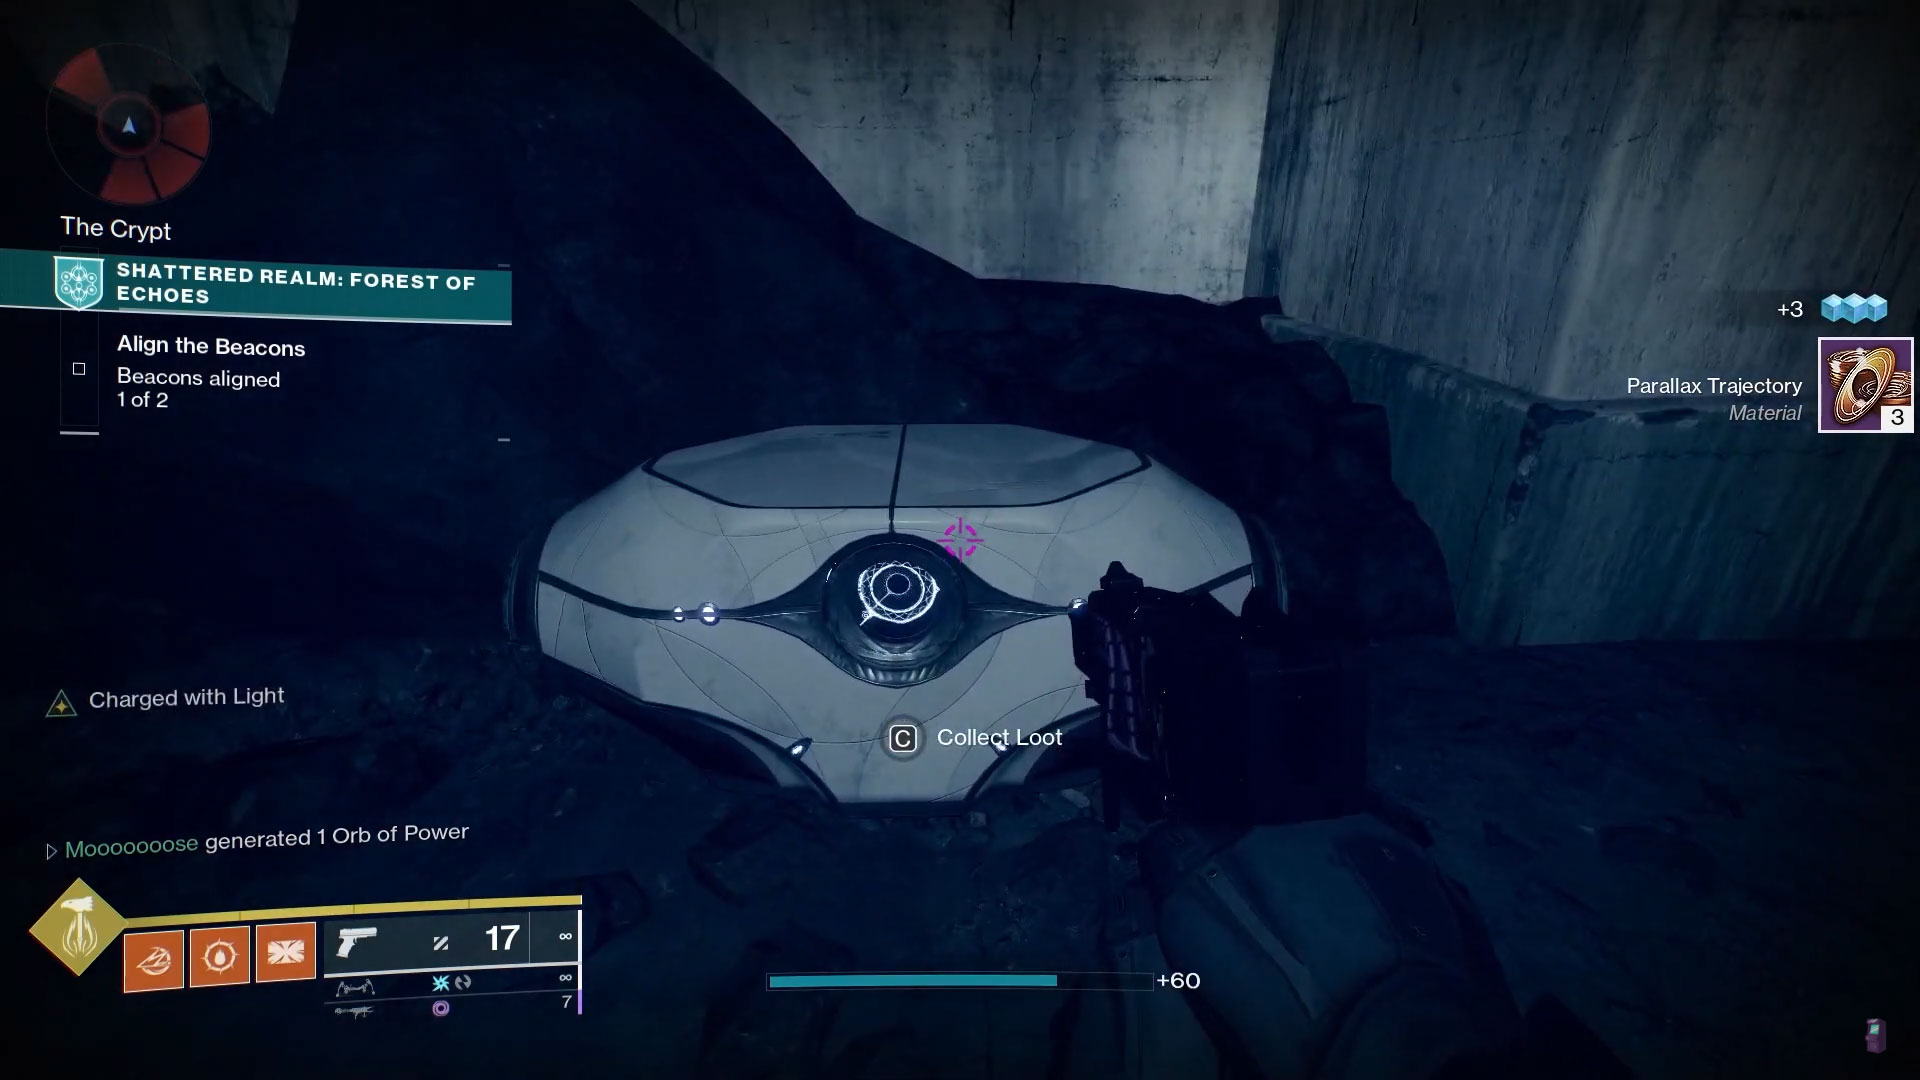
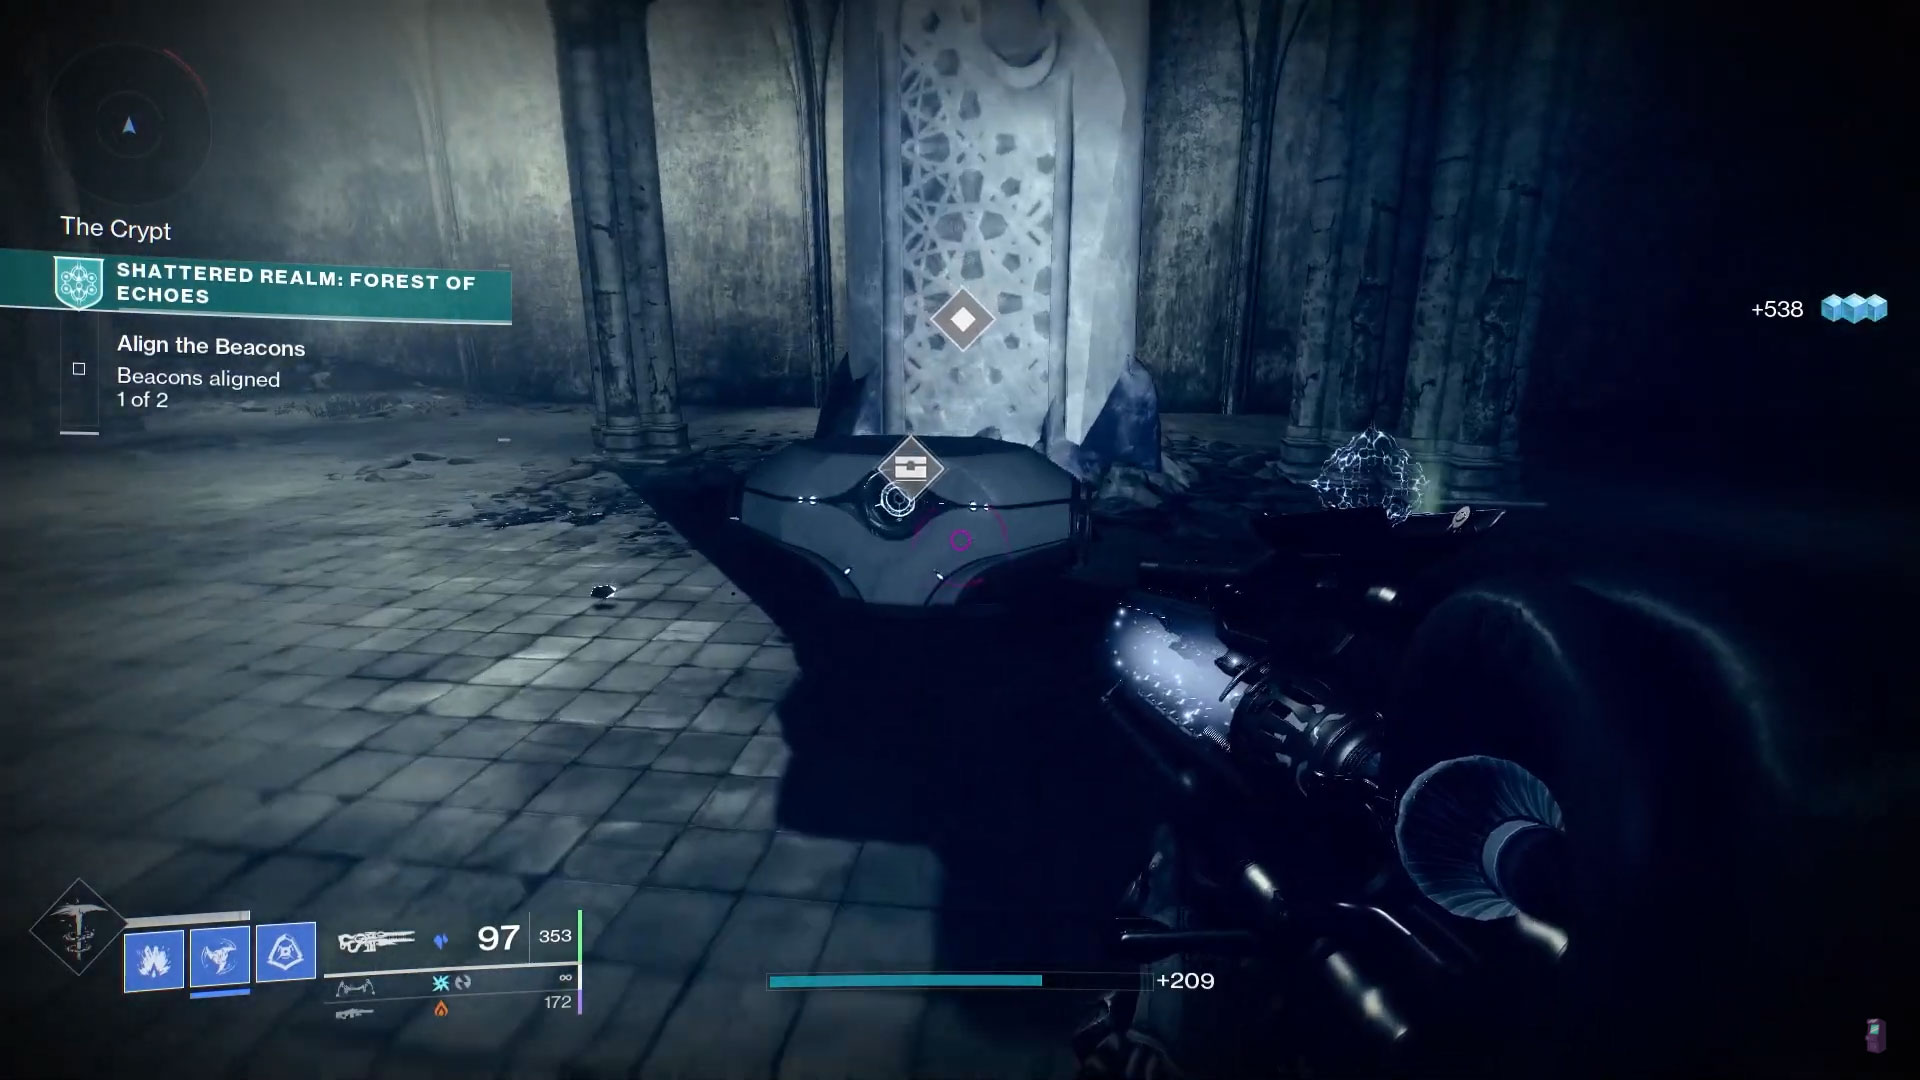
#8: The Crypt (Laid to Rest)
For this hidden chest, you’ll need to go to the same area where you grabbed the Entombed chest beneath the Mausoleum in front of the Cathedral. After you hop over the broken wall and turn right, keep going straight down the hallway. There’s a True Sight and Barrier Break totem at the end of this corridor.
Take both buffs and go through the Barrier on the left side of the hallway. There’s a large circular platform below and to the left of the landing outside the barrier. Follow these platforms down and around to the right to another Barrier that leads inside a room filled with stone columns and archways.
The hidden chest is on the far side of the room, just to the right of the broken section of the wall. It’s important to note that you can only see and open this chest if you have the True Sight buff. If you can’t see the chest or it disappeared before you opened it, there’s a True Sight totem near the entrance to the room you’re in.
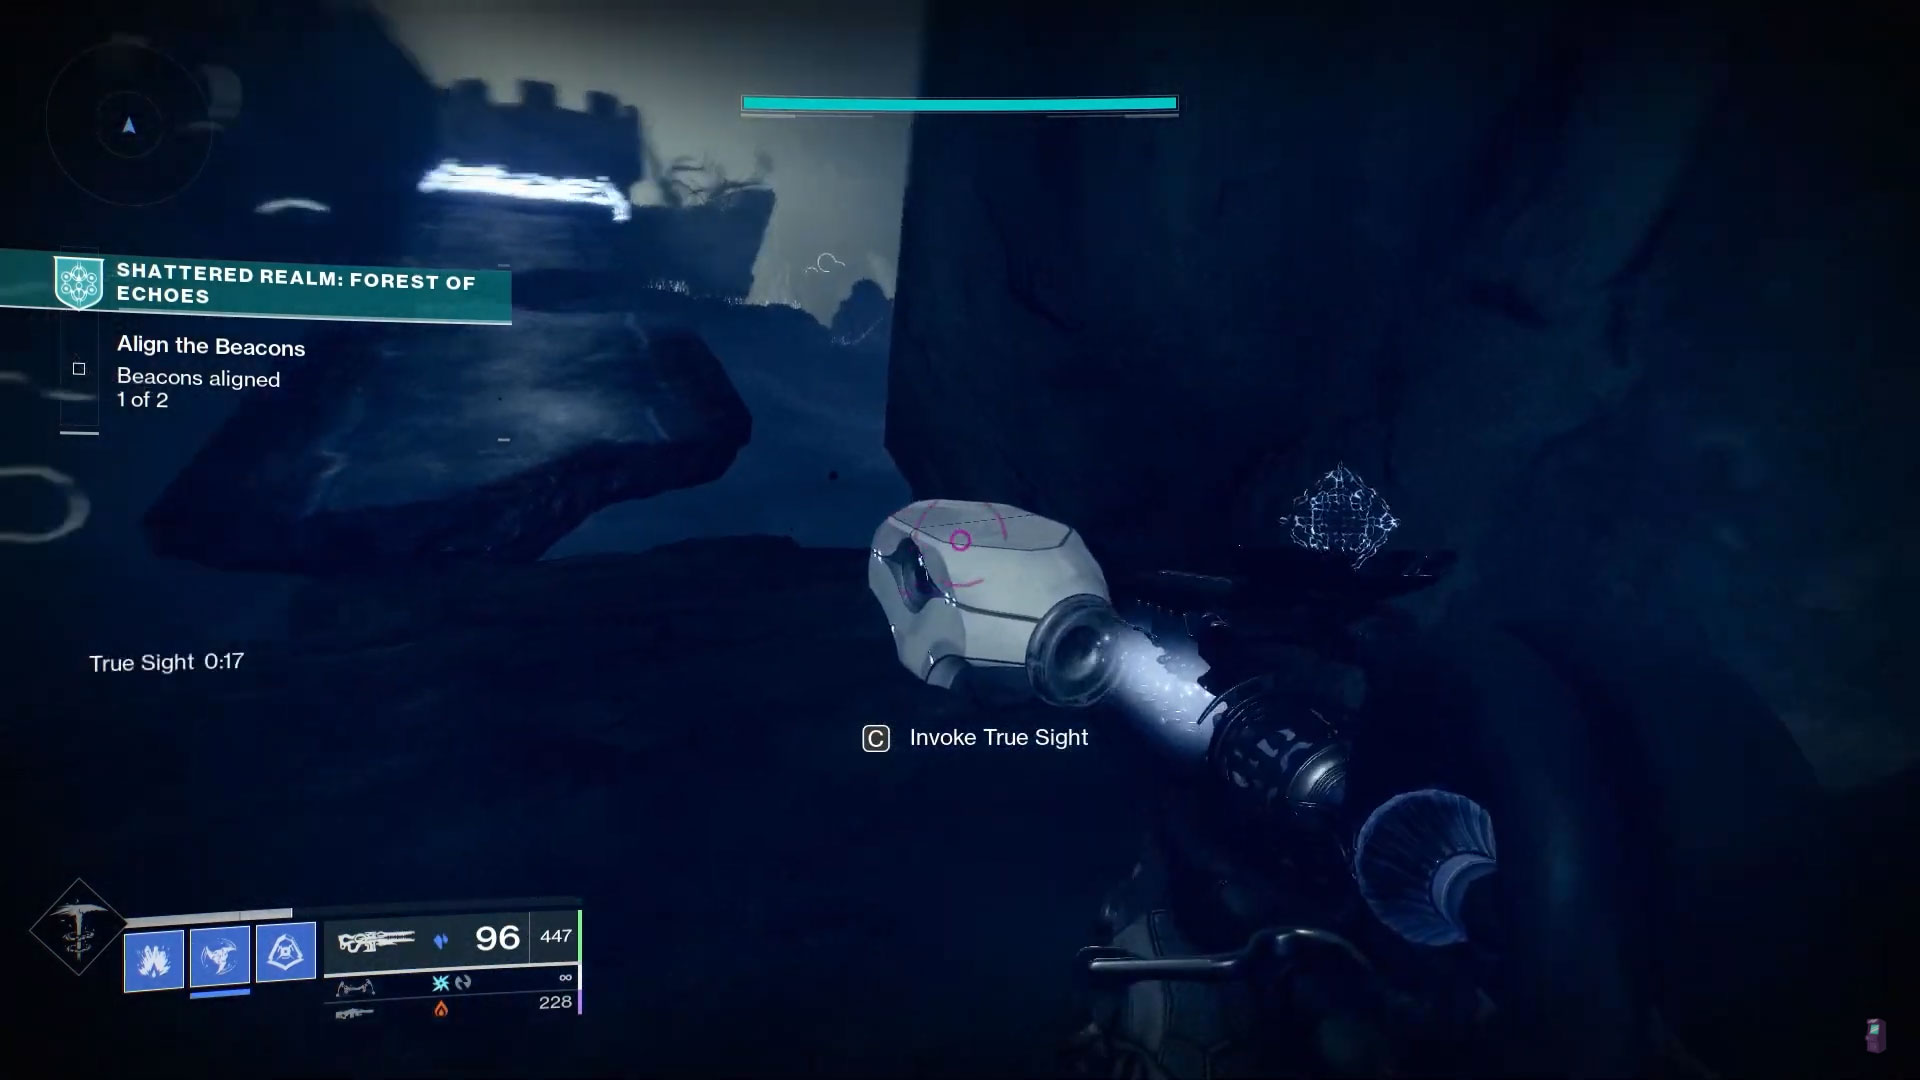
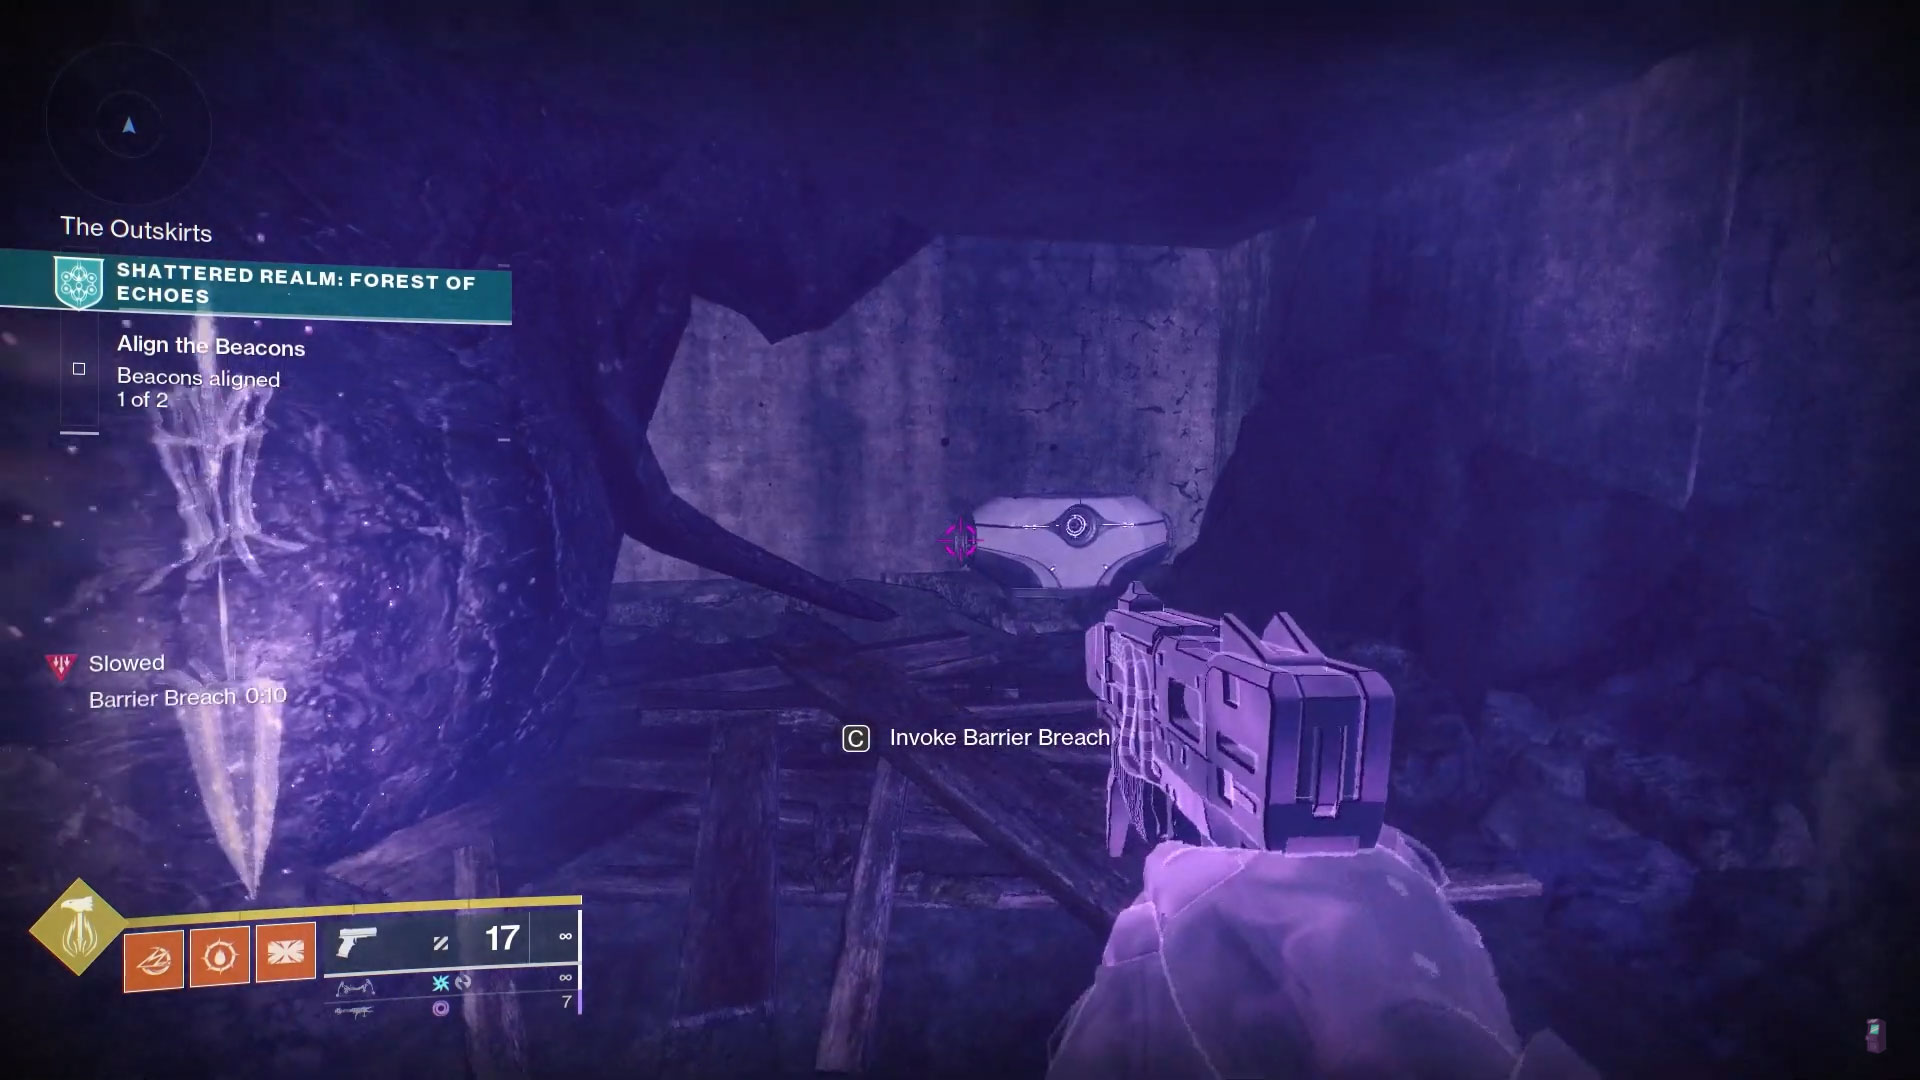
#9: Ruins (Airwalk)
This hidden chest is located in The Outskirts which are the ruined buildings up the cliffside next to the Cathedral. To get to this chest, start off by looking at the doorway that’s blocked by the barrier. Turn to your right and look for a totem near the cliffside. Grab the True Sight buff to reveal the hidden platforms in front of you.
Follow these platforms around until you see another totem with a chest next to it. This is the Airwalk chest. And like the previous chest, you need an active True Sight buff in order to see it. If yours has expired, the totem next to the chest will give you the buff.
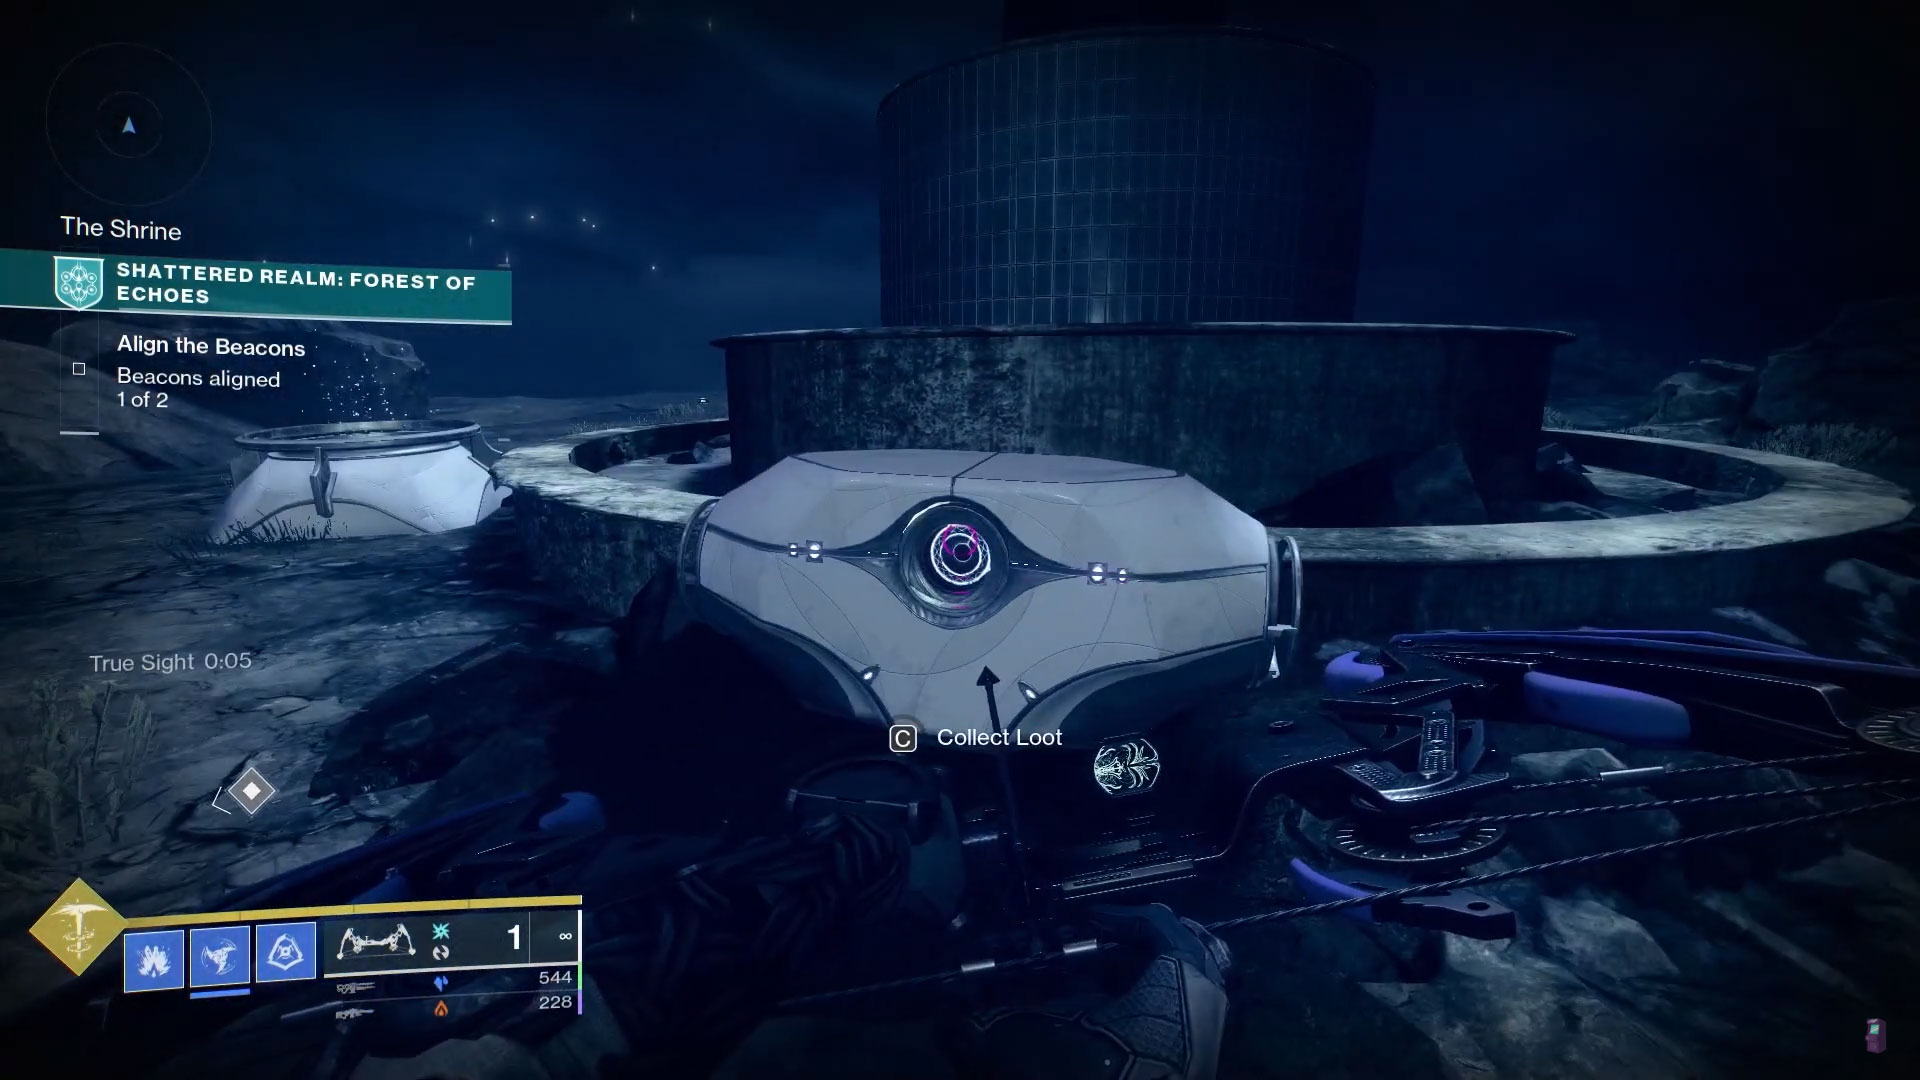
#10: The Shrine (Enshrined)
You’ll need to make your way to the floating island off to the left of the main entrance to this wing of the Shattered Realm. You can get to this island one of two ways. First, go to the very first barrier in the Forest of Echoes that’s facing the Mausoleum next to the Cathedral. If you’re looking at the Mausoleum, turn to your left and you should see a totem near the ridgeline. Activate that to get the True Sight buff so you can see the trail of platforms leading to the Shrine.
The other way is on the back side of the Cathedral. There’s a True Sight totem on the ridgeline between the Cathedral and the Shrine. Snag the buff and you’ll be able to see another set of platforms that lead up to the Shrine.
Once you’re on the island, there’s a chest at the foot of the statue and like the previous chests, you’ll need the True Sight buff to see it. Open it to collect this Trivial Mystery.
#11: The Crypt (The Dark Ritual)
If you’ve already left the Shrine island, go back to it. There will be a Relic to the left of the statue. Pick it up and follow the waypoints down into the Crypt where you collected the Laid to Rest chest earlier. Once you’re inside the room with the columns, you’ll be able to deposit the Relic.
This will spawn a few groups of Hive that are interspersed with a Knight similar to the ones you may have faced during the Ascendant Challenges in the Dreaming City. Defeat these enemies and this Ascendant Mystery’s chest will spawn.
#12: The Sunken Cave (Born of Darkness)
This is the second Ascendant Mystery in the Forest of Echoes so it takes some extra effort to complete. To kick it off, you’ll need to complete the second beacon’s encounter which will spawn a Taken Blight atop the cliffs behind the beacon. Damage the core inside of the Blight until it disappears. This will spawn two more blights next to the beacon below you.
Destroy both of those blights and then follow the blights back down to The Ruins. Repeat the process again on the Blights along the way until they’re all down. Once they are, you’ll see a Hive wisp that looks like the same model as Toland on the Moon above a well that was previously blocked off. Jump down it.
A few Hive and a powerful Taken Ogre will spawn. Defeat them and this Ascendant Mystery chest will spawn.
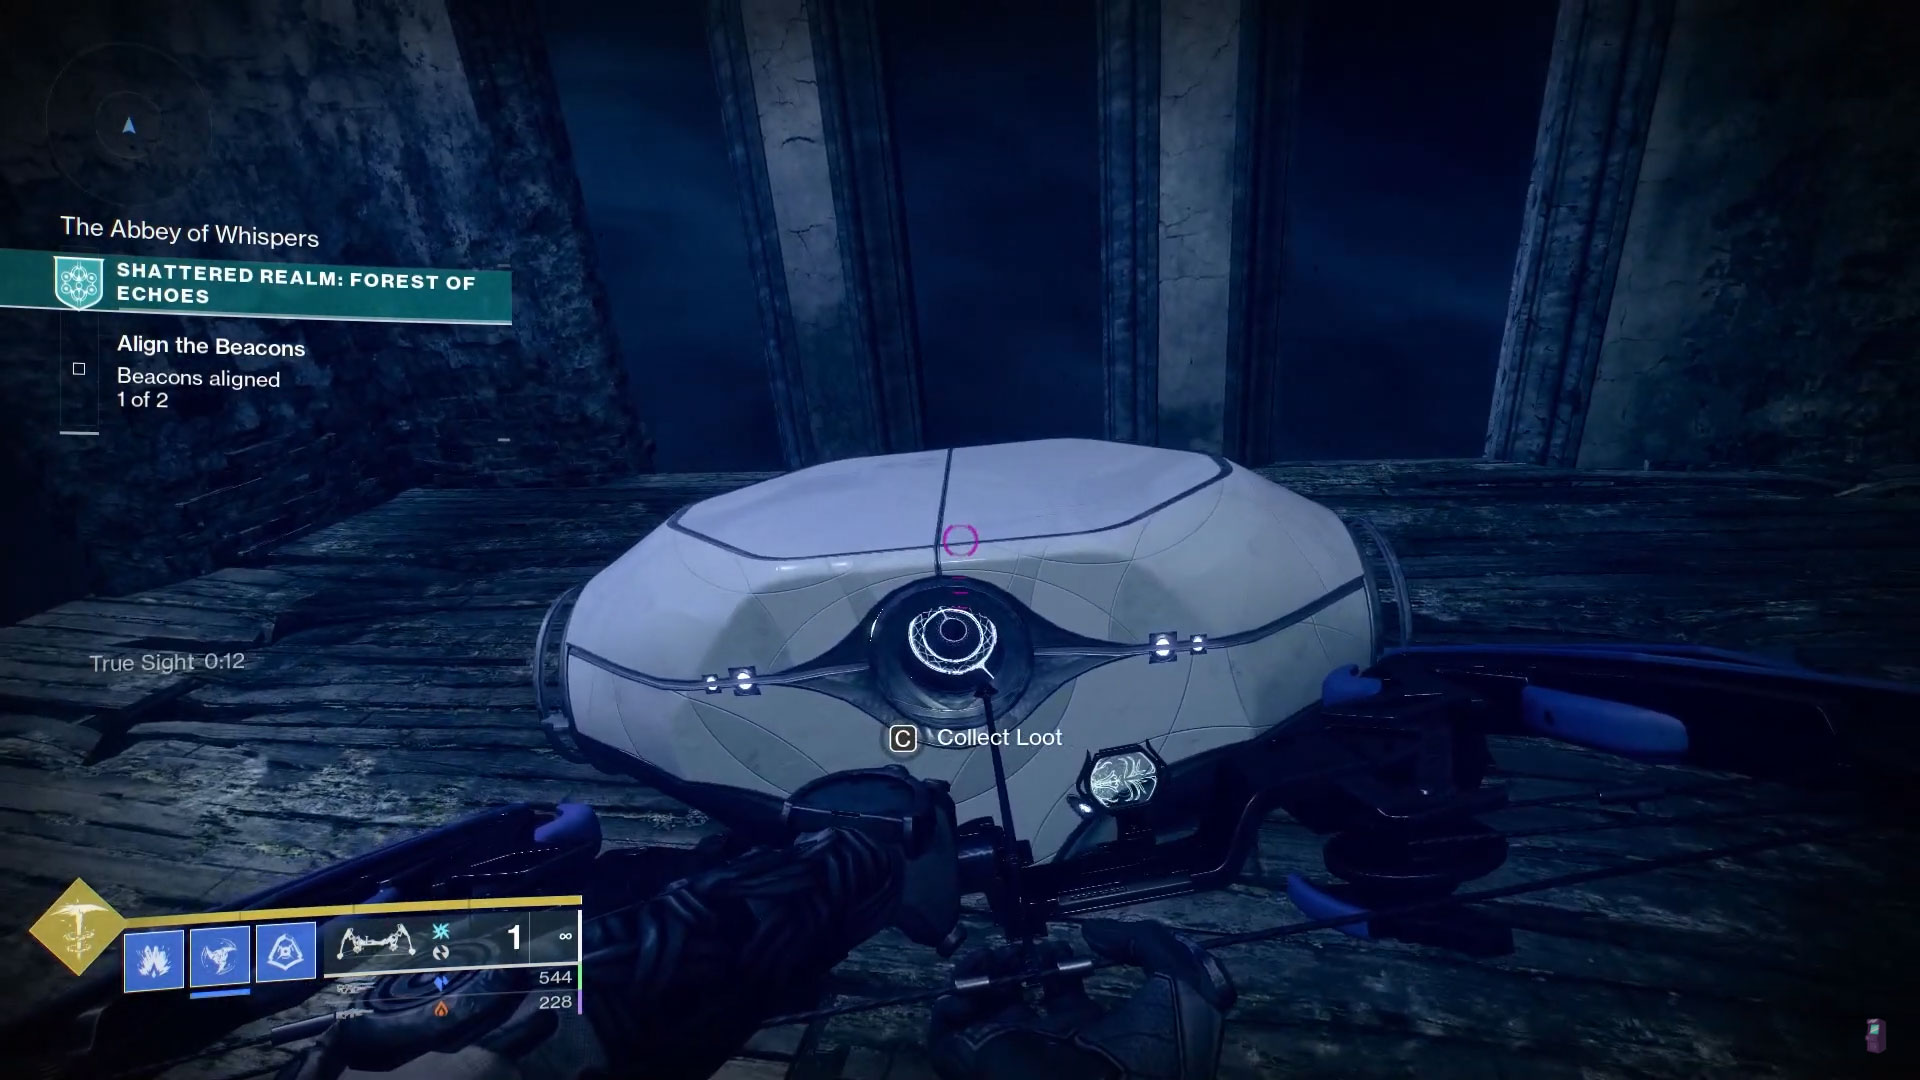
#13: The Abbey of Whispers (The Bells)
Head to the Cathedral and take the buffs from the two totems just inside of the entrance. Head towards the far end where the first beacon is located and you’ll see some previously hidden platforms appear leading up to the alcove above.
Look to the left side of this space to see more platforms that lead up. Take them until you reach the detached bell tower above the Cathedral’s roof. The Enigmatic Mystery chest is inside.
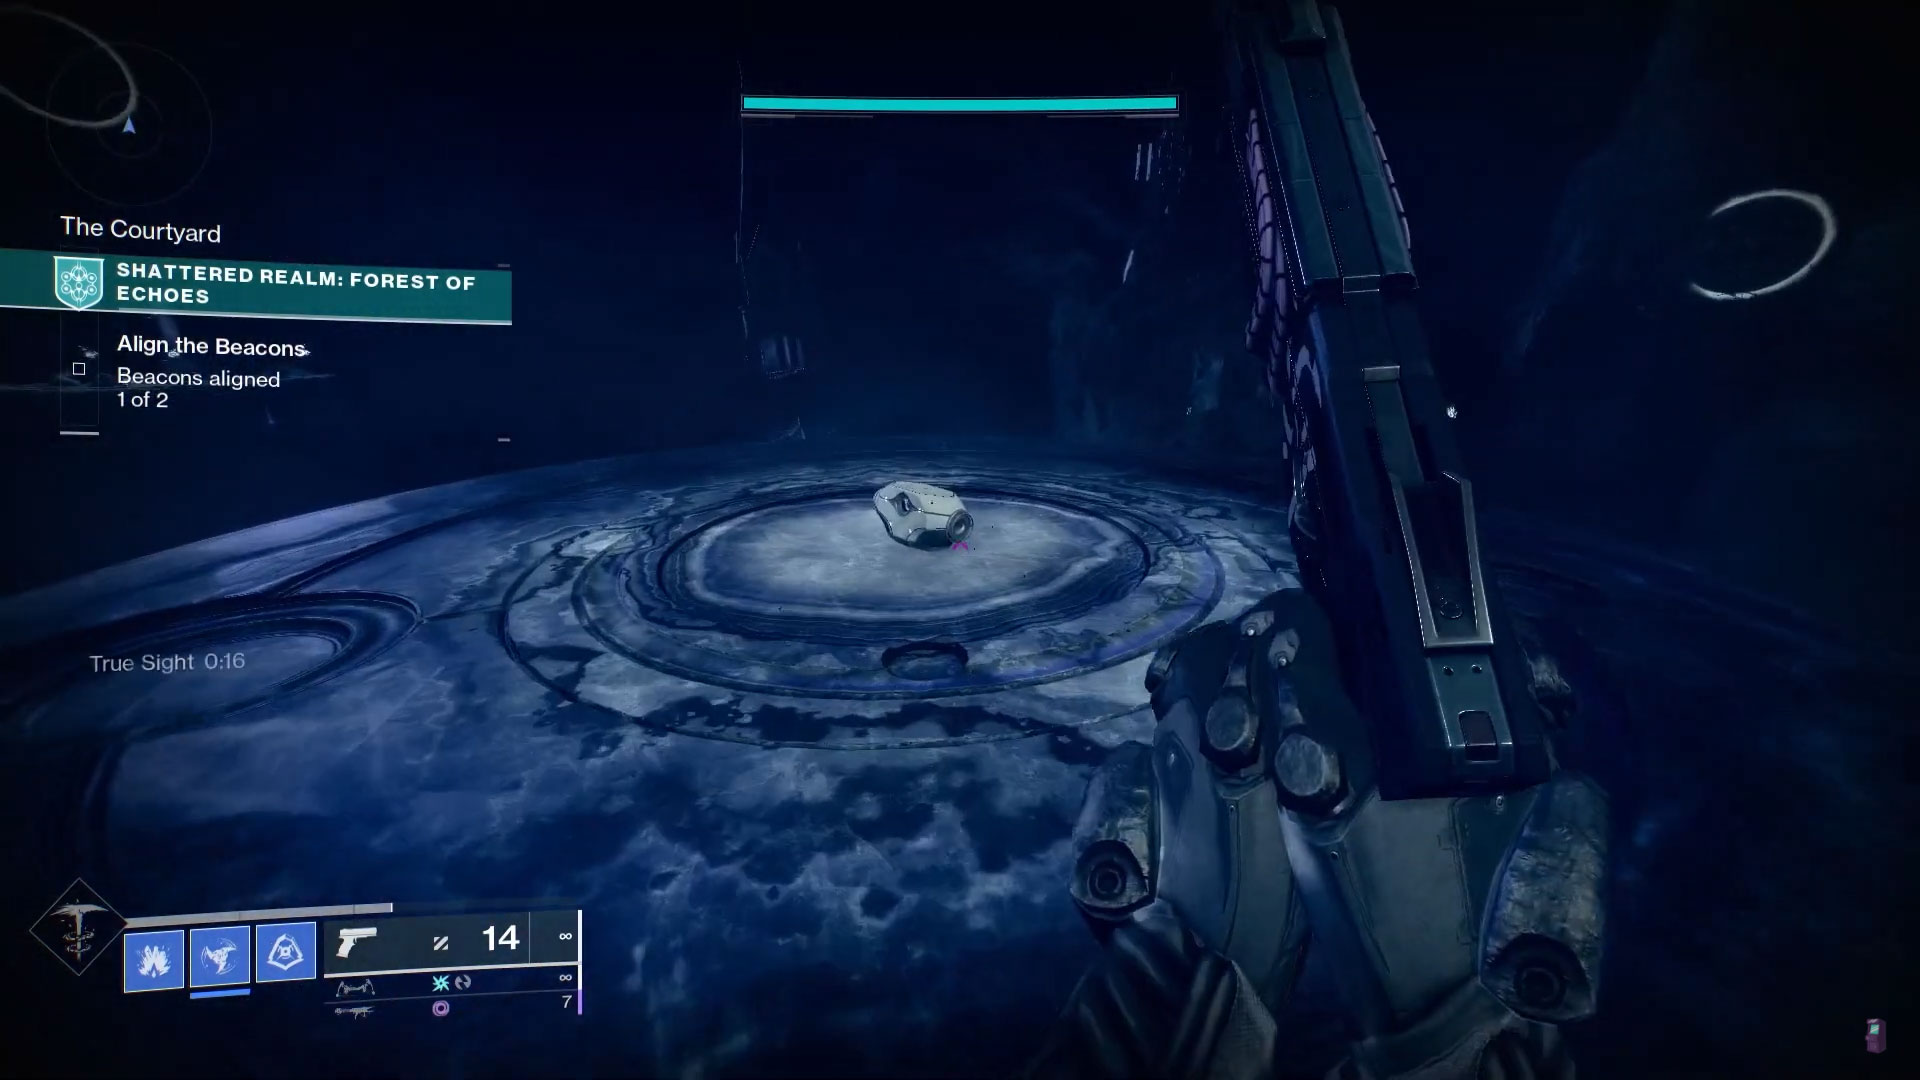
#14: The Courtyard (As Above, So Unseen)
Head back to the entrance to the Cathedral and get the True Sight buff from the totem inside. Turn around, go back through the entrance, and head towards the totem next to the statue to get the Safe Passage buff. Follow the platforms up to the large circular one where this Enigmatic Mystery chest is waiting for you.
#15: Vantage
Not yet attainable. Will update when available.
Debris of Dreams
The Debris of Dreams is the second wing of the Shattered Realm and it’s accessed by the doors on the right after going through the portal in the H.E.L.M. To collect the Trivial and Enigmatic Mysteries scattered throughout the Debris of Dreams, you’re going to need the Barrier Break and True Sight abilities unlocked on your Wayfinder’s Compass.
You can collect the hidden chests in Debris of Dreams in whatever order you wish. We’ve organized them based on how Guardians will encounter them as they play through the game mode.
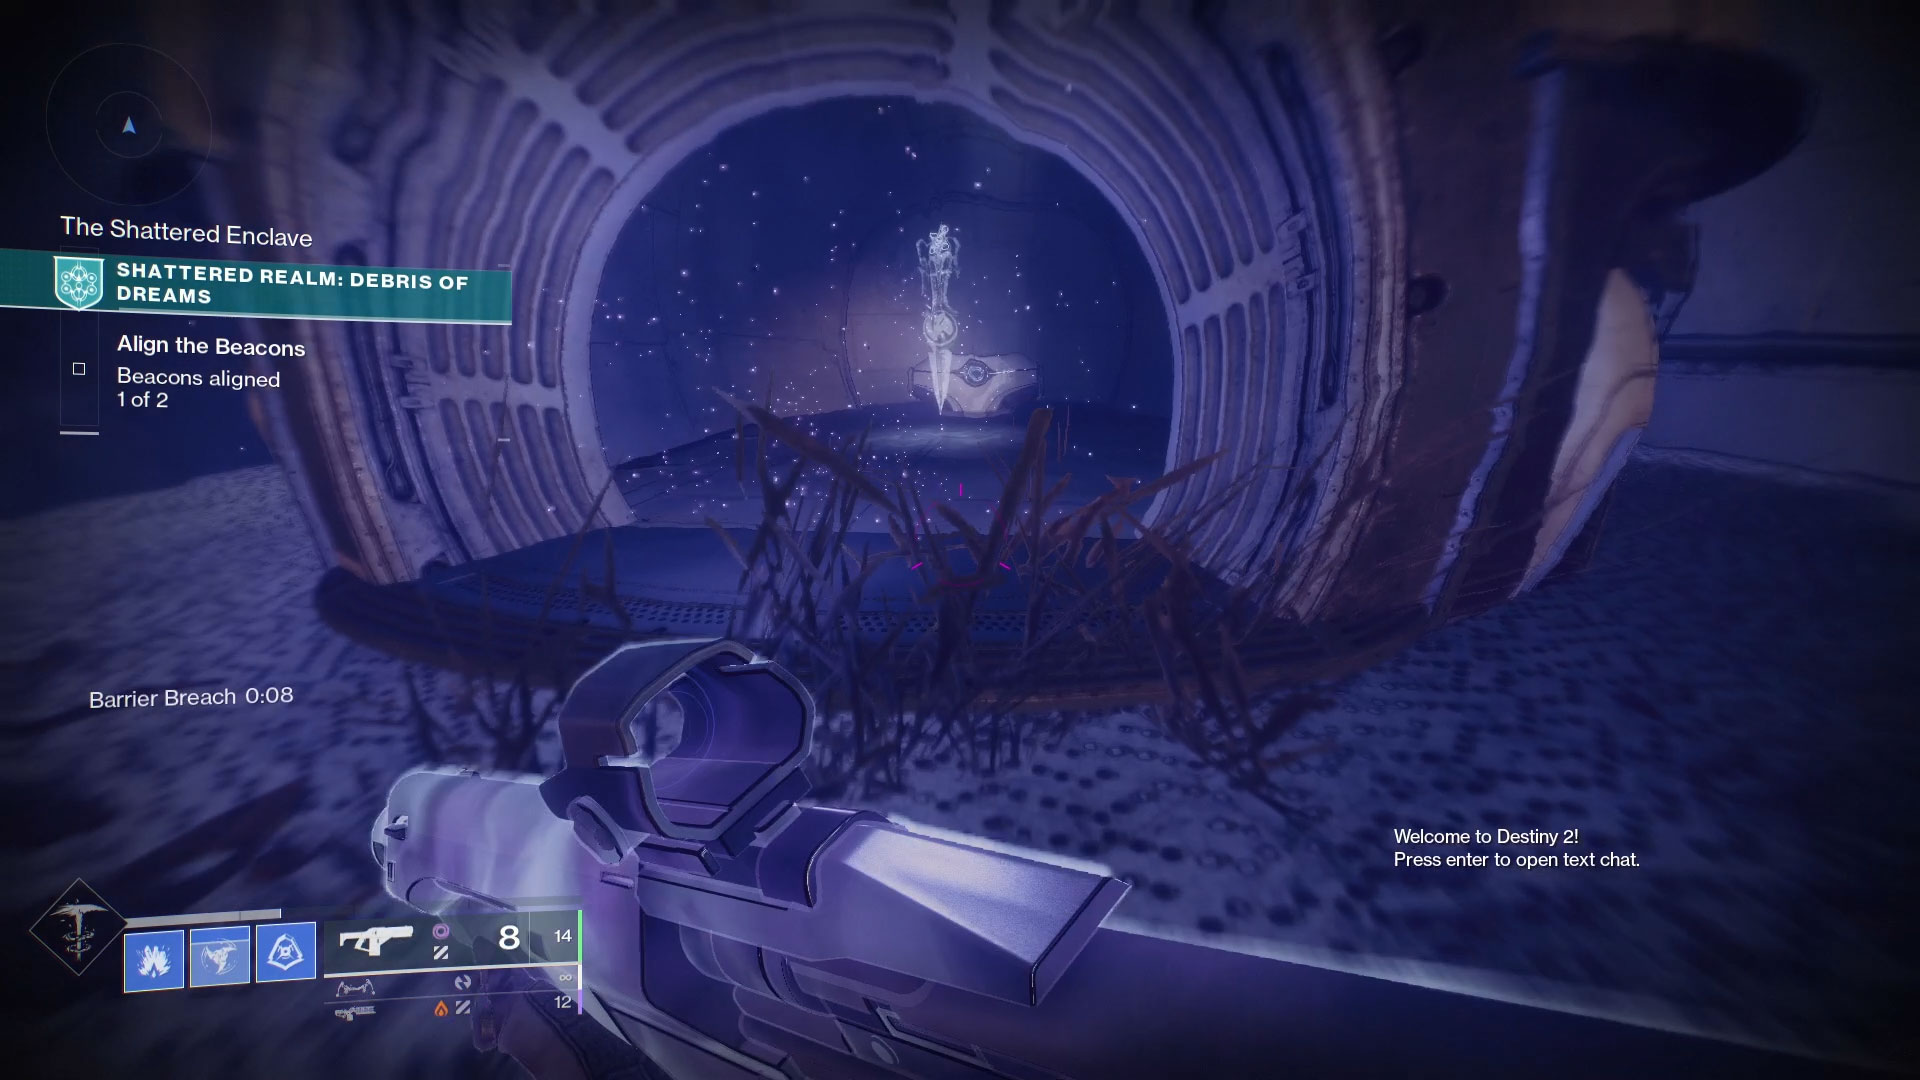
#1: The Shattered Enclave – Supply Stash
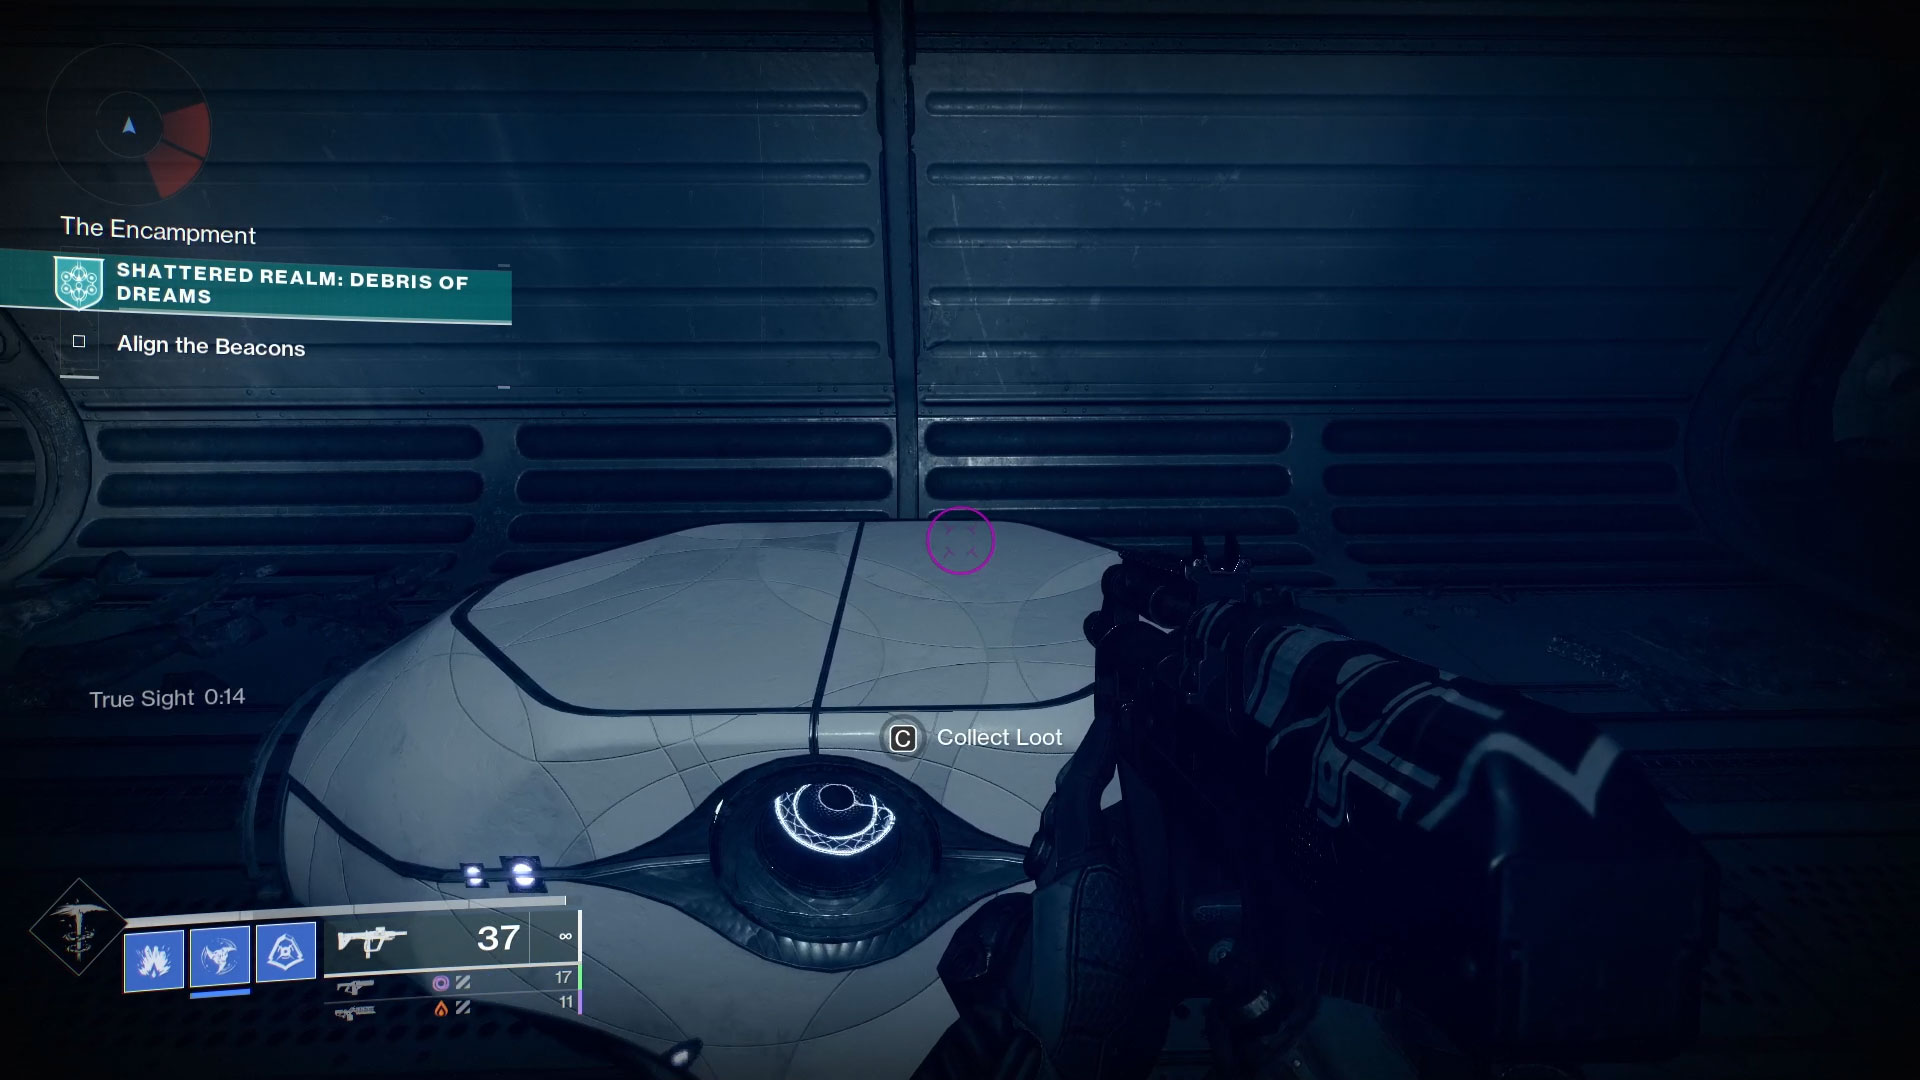
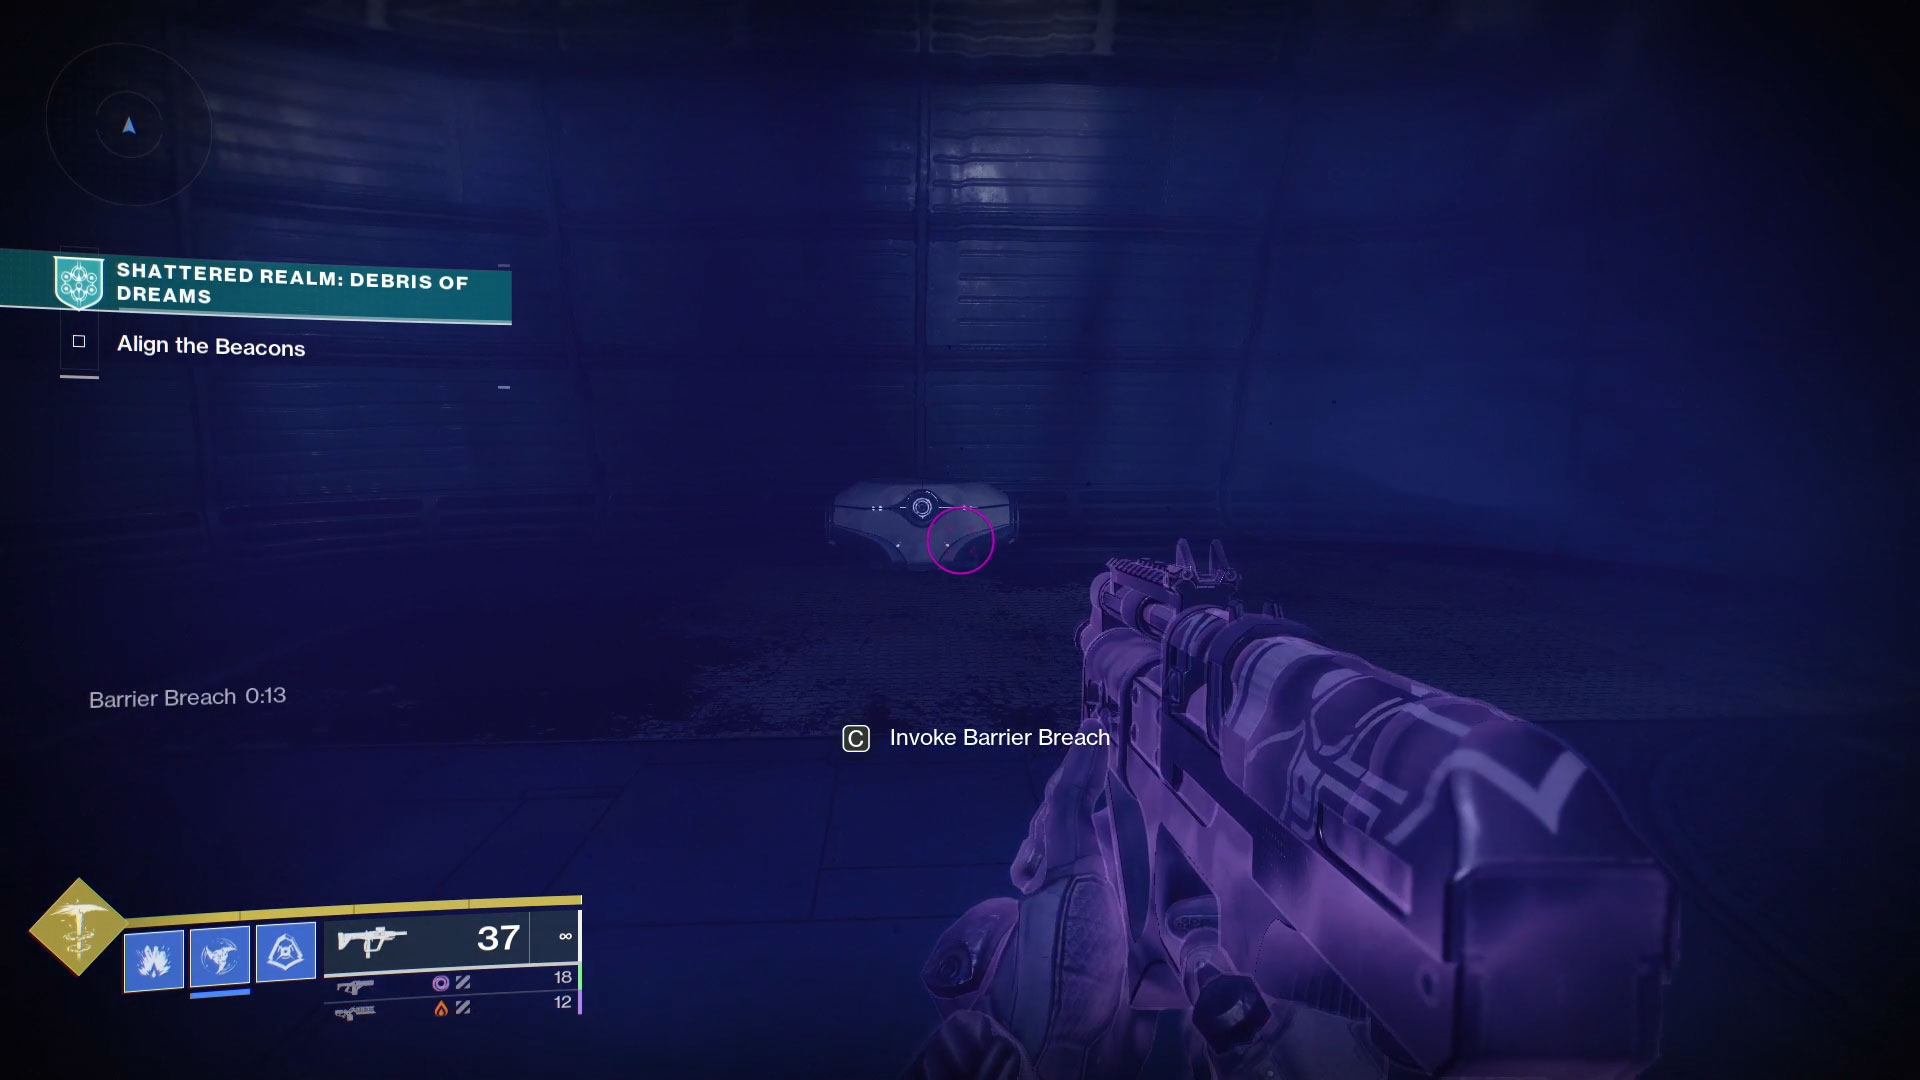
After you’ve finished the encounter at the first beacon, there’s a doorway leading outside that’s blocked by a barrier. Go to this barrier, get the Barrier Break buff from the totem, and hang a right once you’ve passed through the Barrier. Take care of the three Scorn that spawn and head to the detached hut in front of you. The Trivial Mystery chest is just inside.
If your barrier buff wears off before you can make it through the second barrier on the hut, you’ll need to go back inside the building for a fresh one.
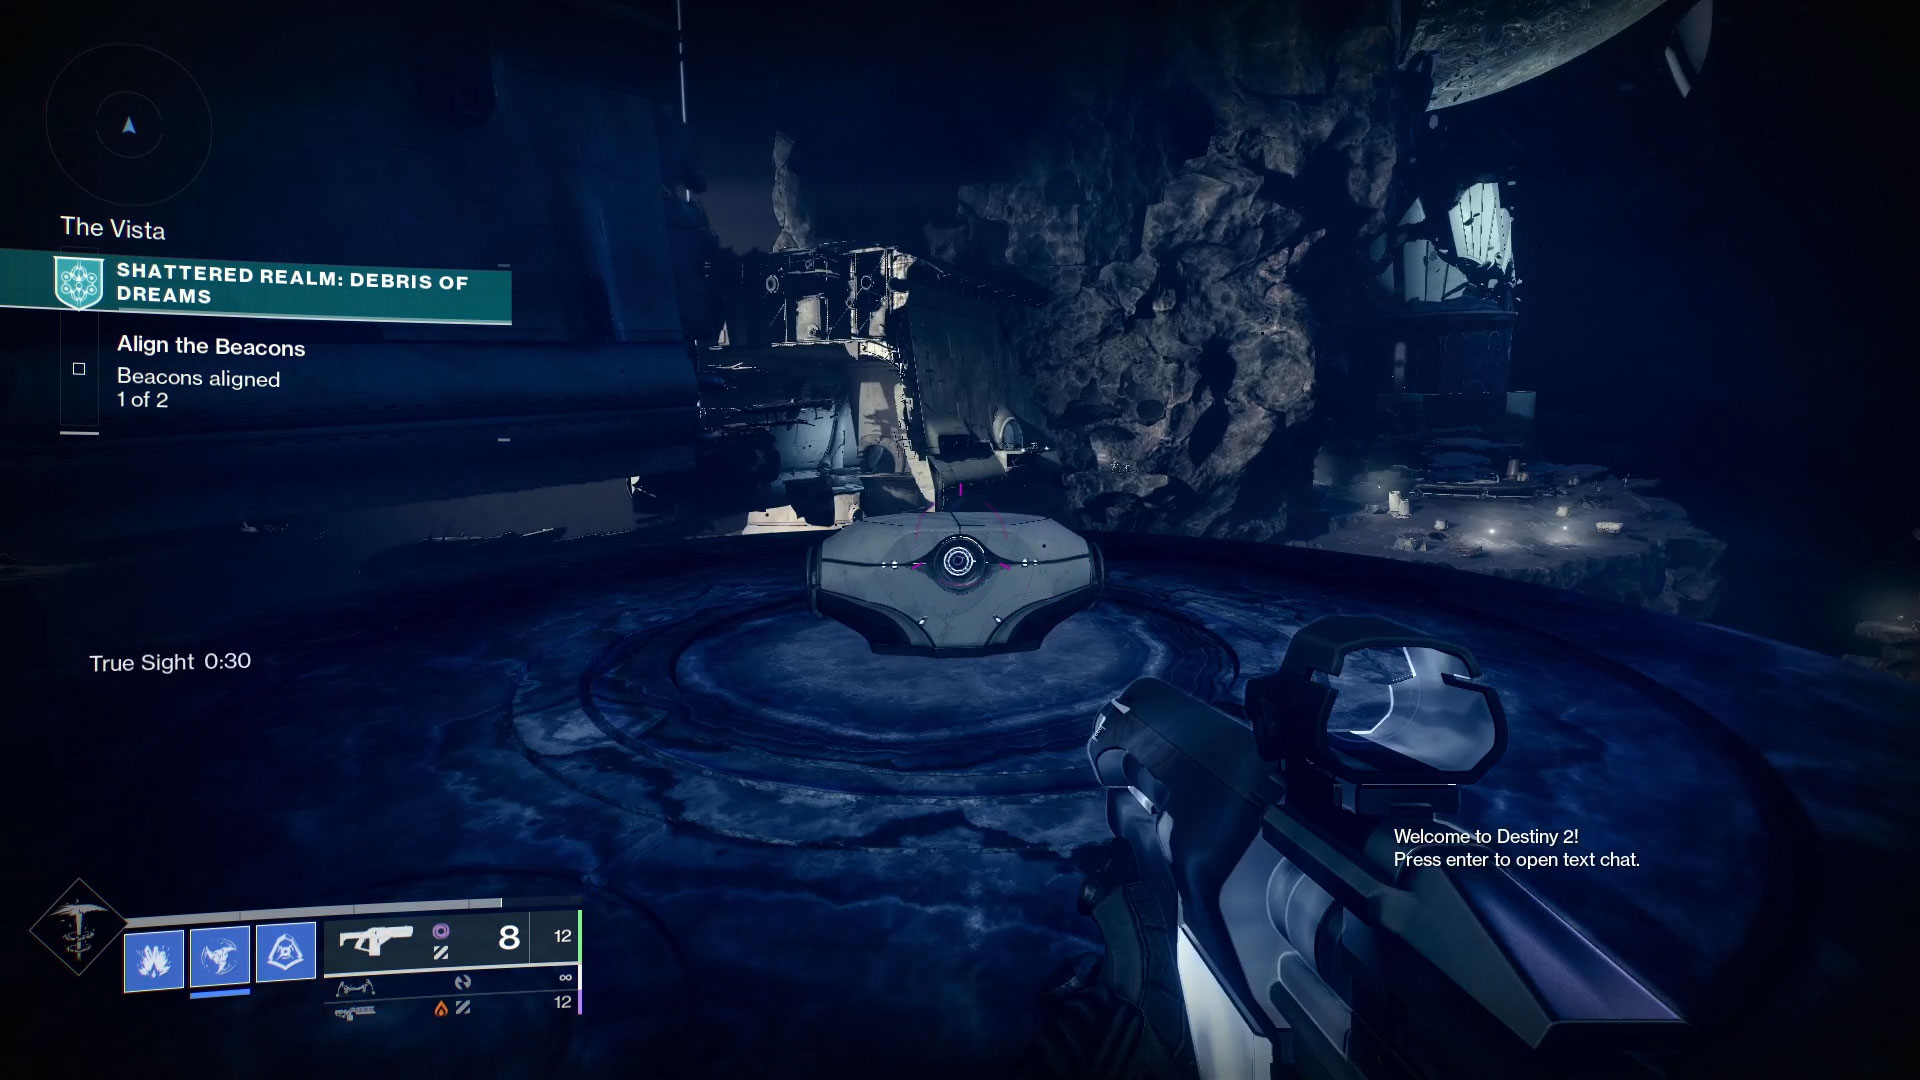
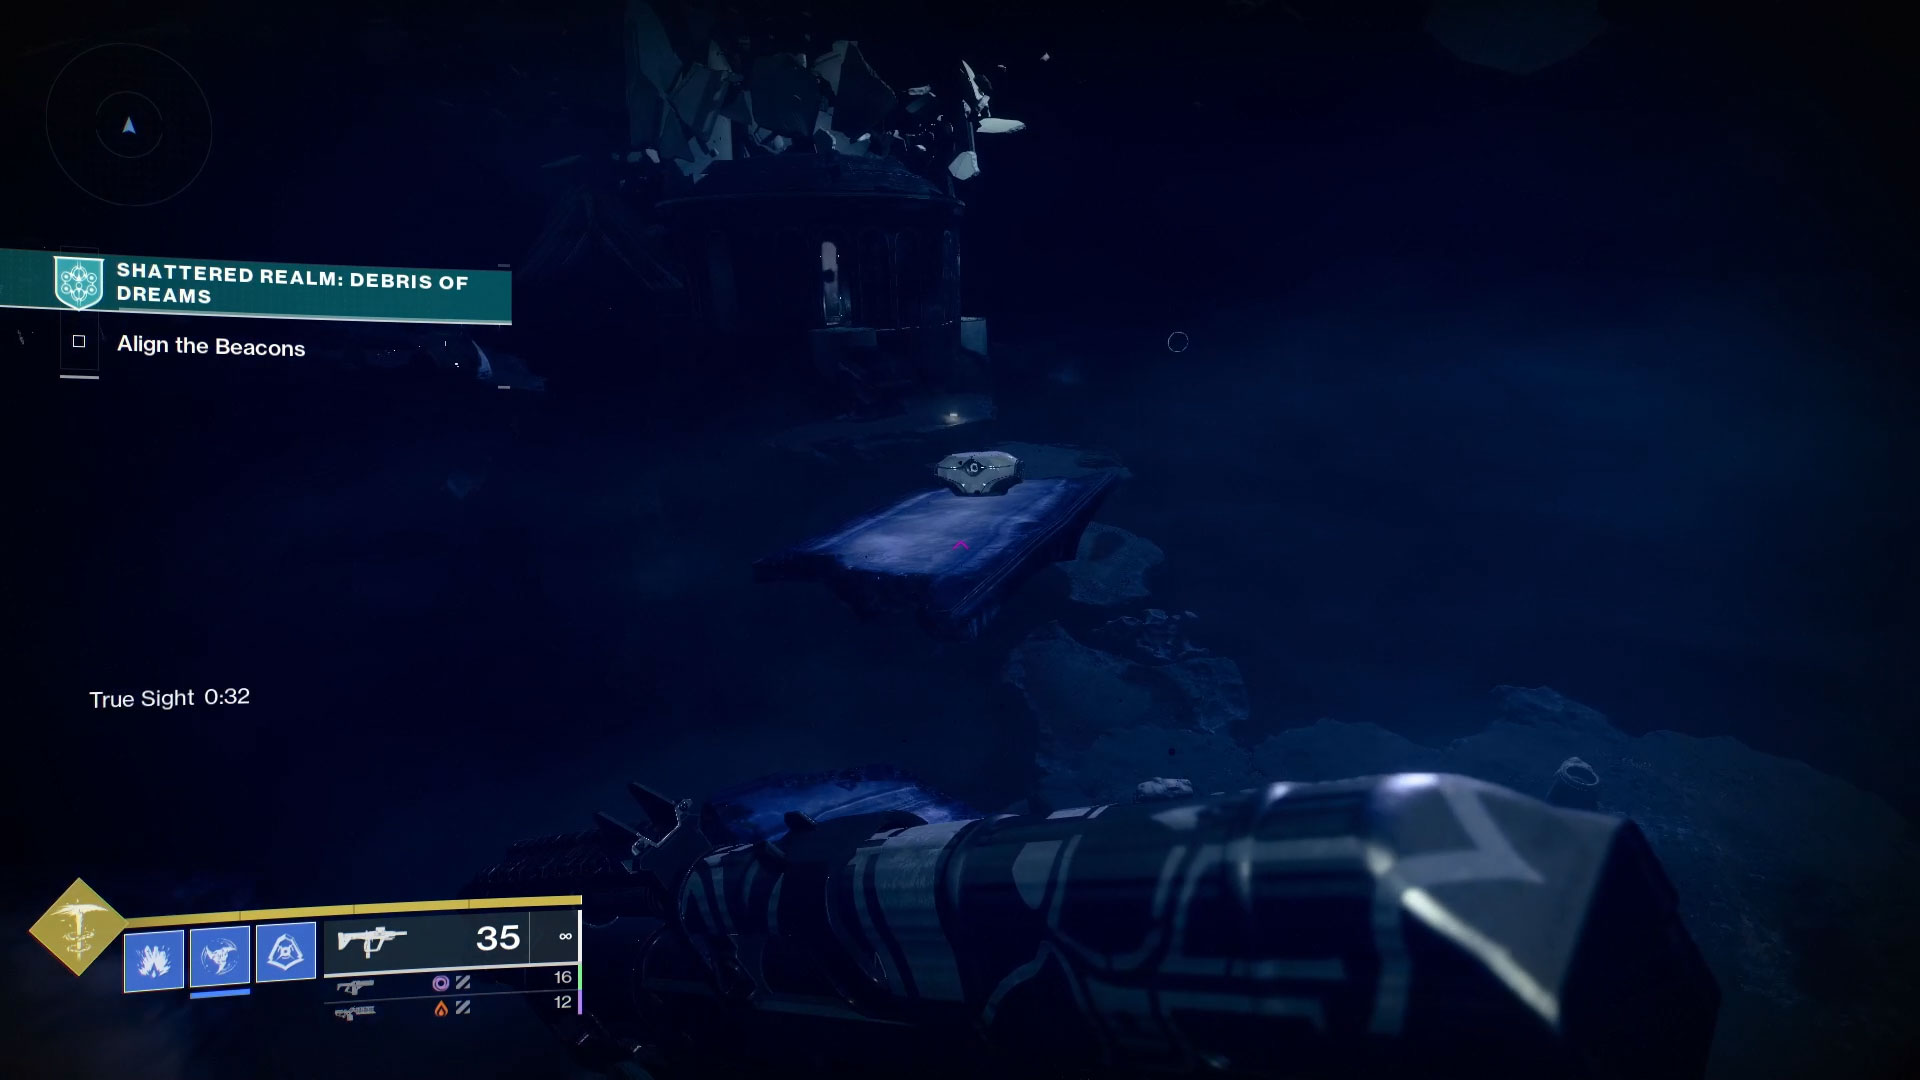
#2: The Vista – The Perilous Path
Head back to the pathway that leads up to the first beacon’s building. There’s a True Sight totem on the ridge overlooking the void. Activate the totem to snag the buff and a series of previously hidden platforms will materialize leading you over to the floating island. Handle the Scorn here and be mindful of the Screeb since the whole platform has the slow debuff on it. On the far side of the island from where you entered is another True Sight totem, snag the buff and you’ll see another series of hidden walkways leading up to a large circular platform. The second mystery chest is on said platform.
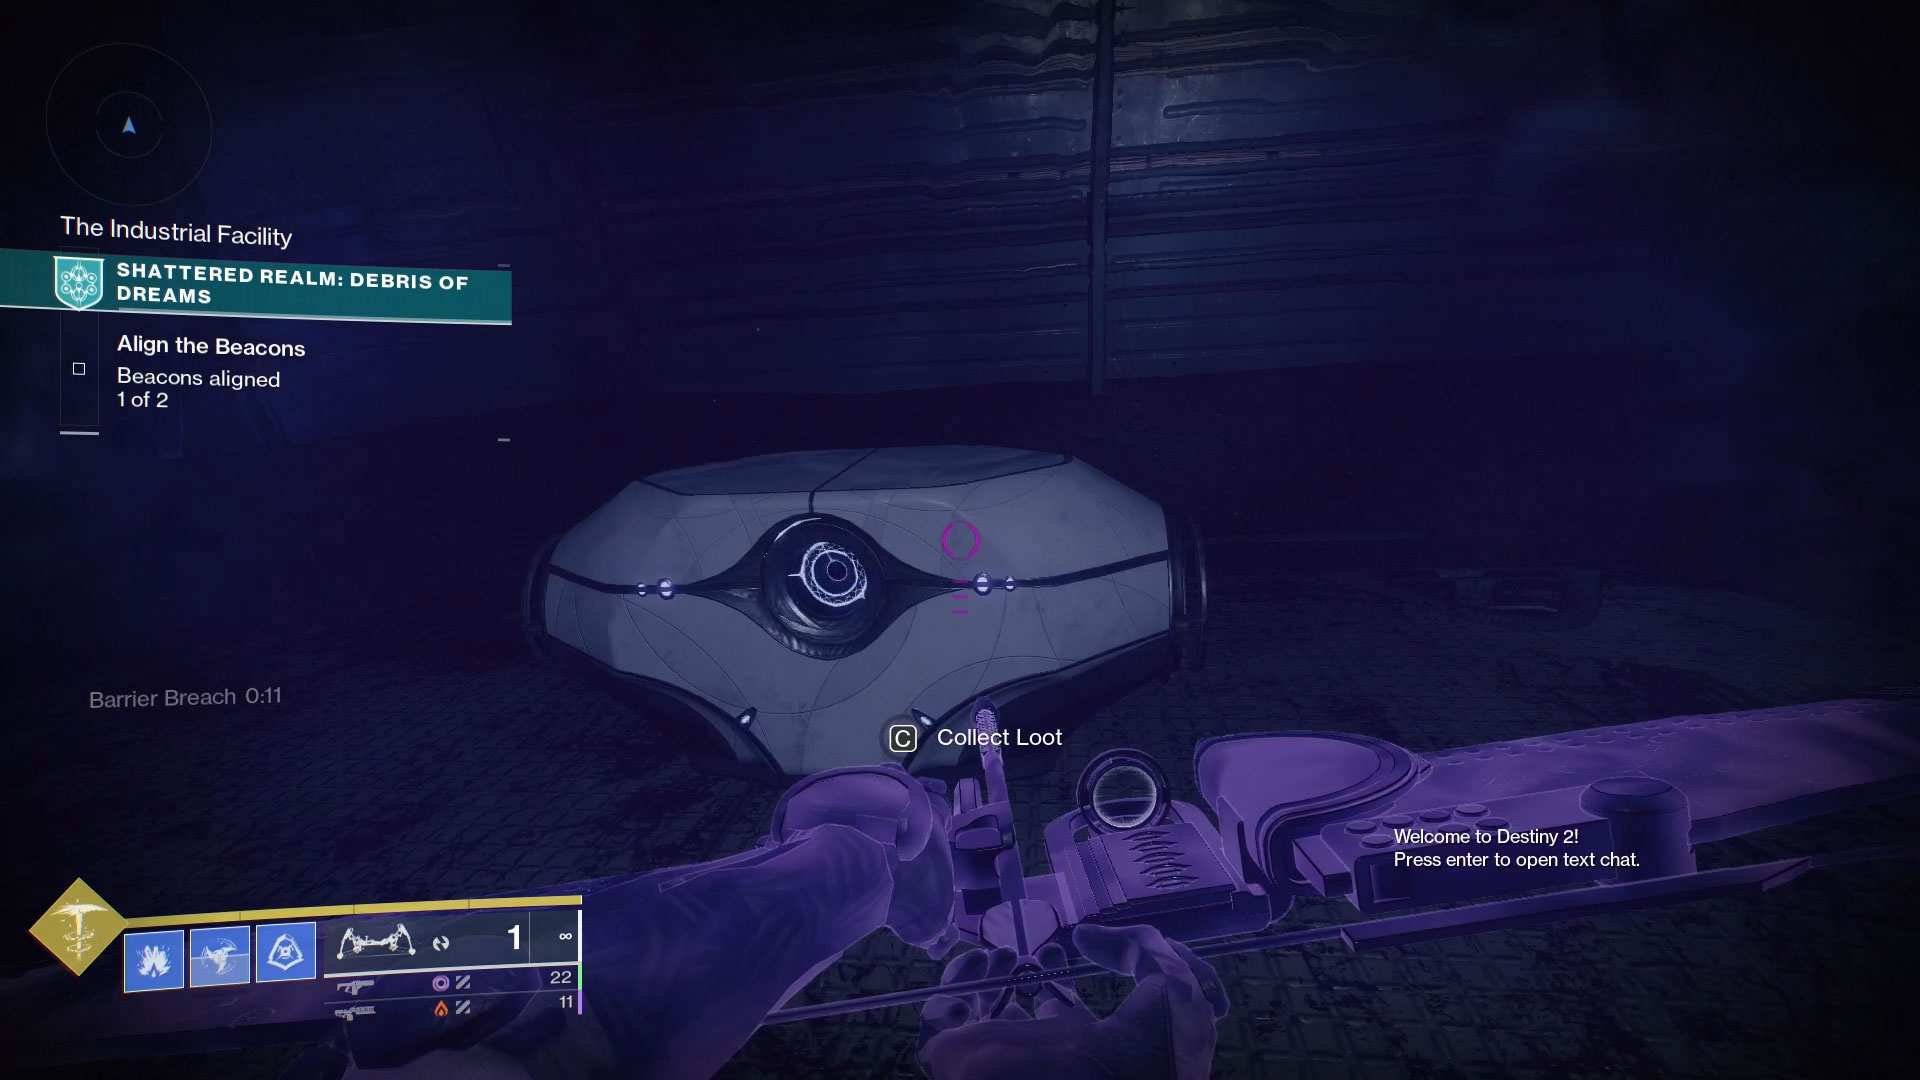
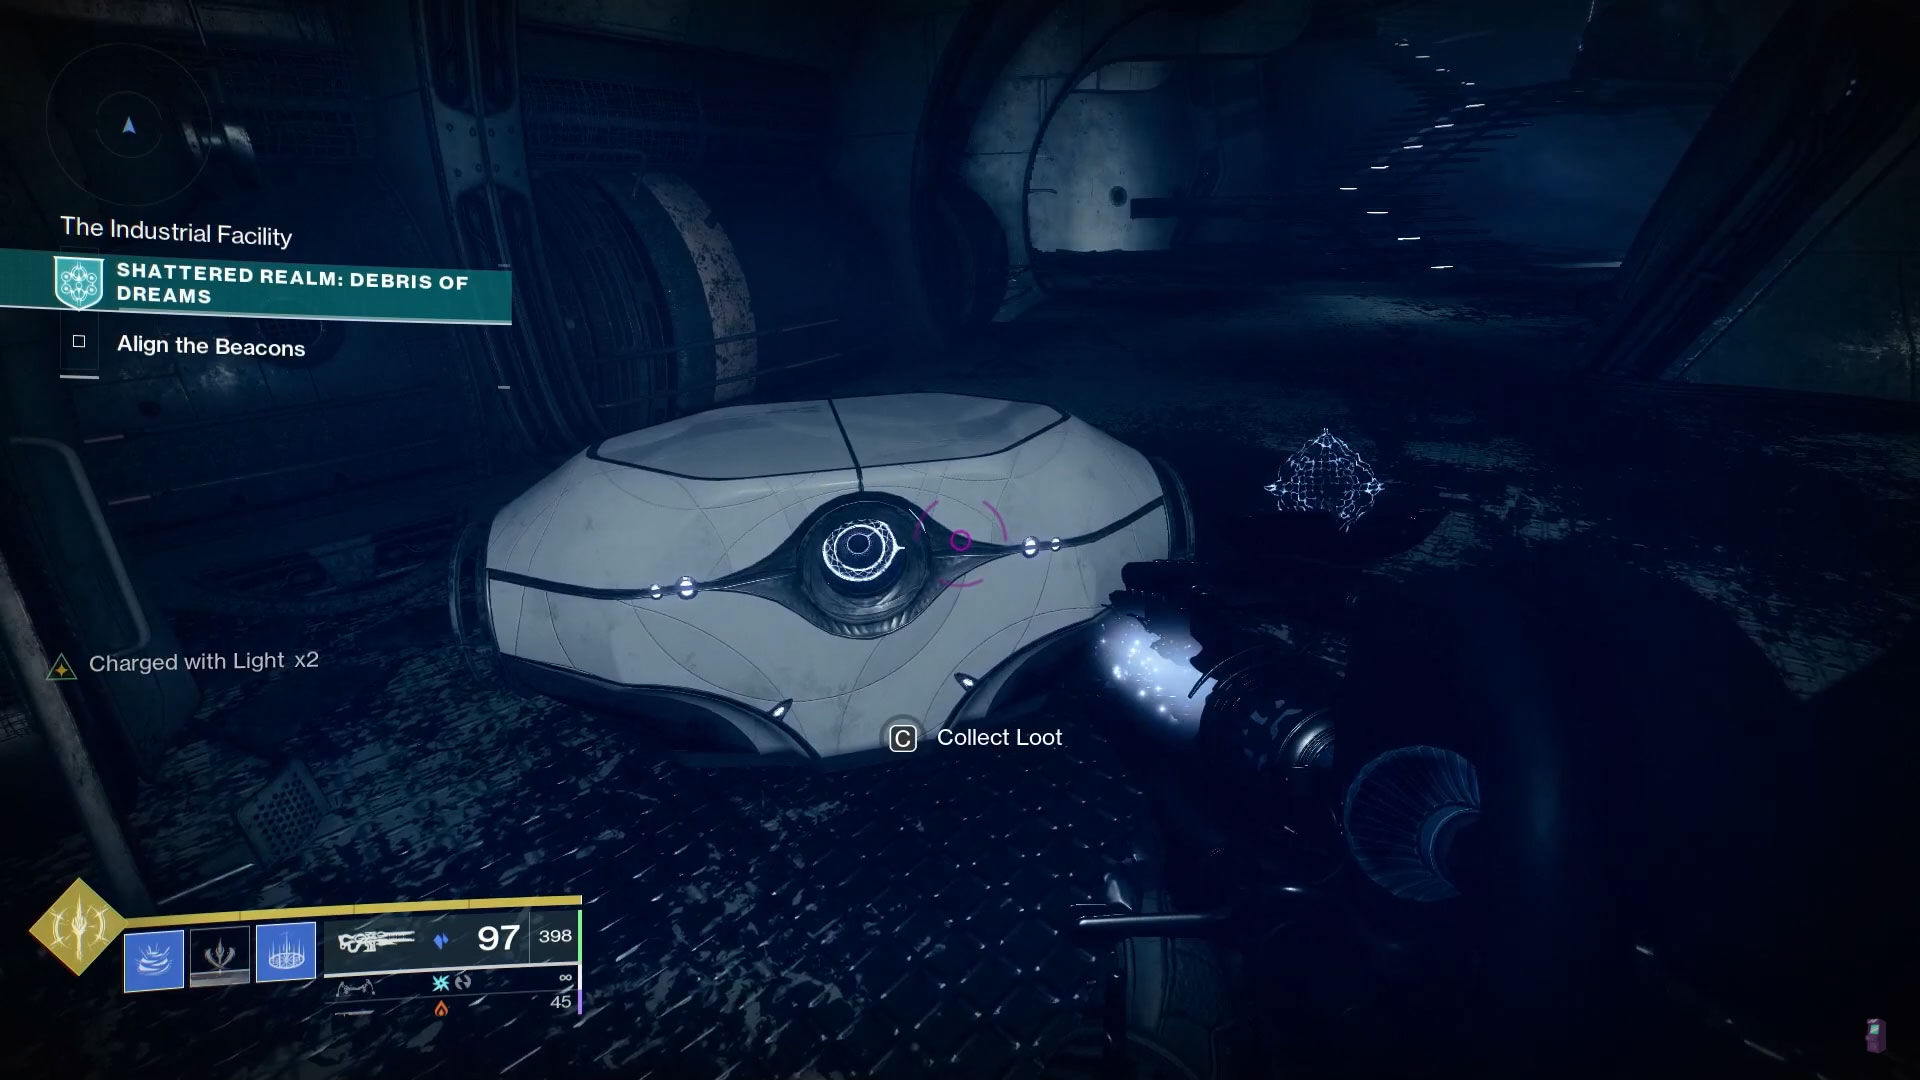
#3: The Industrial Facility – Refined Mystery
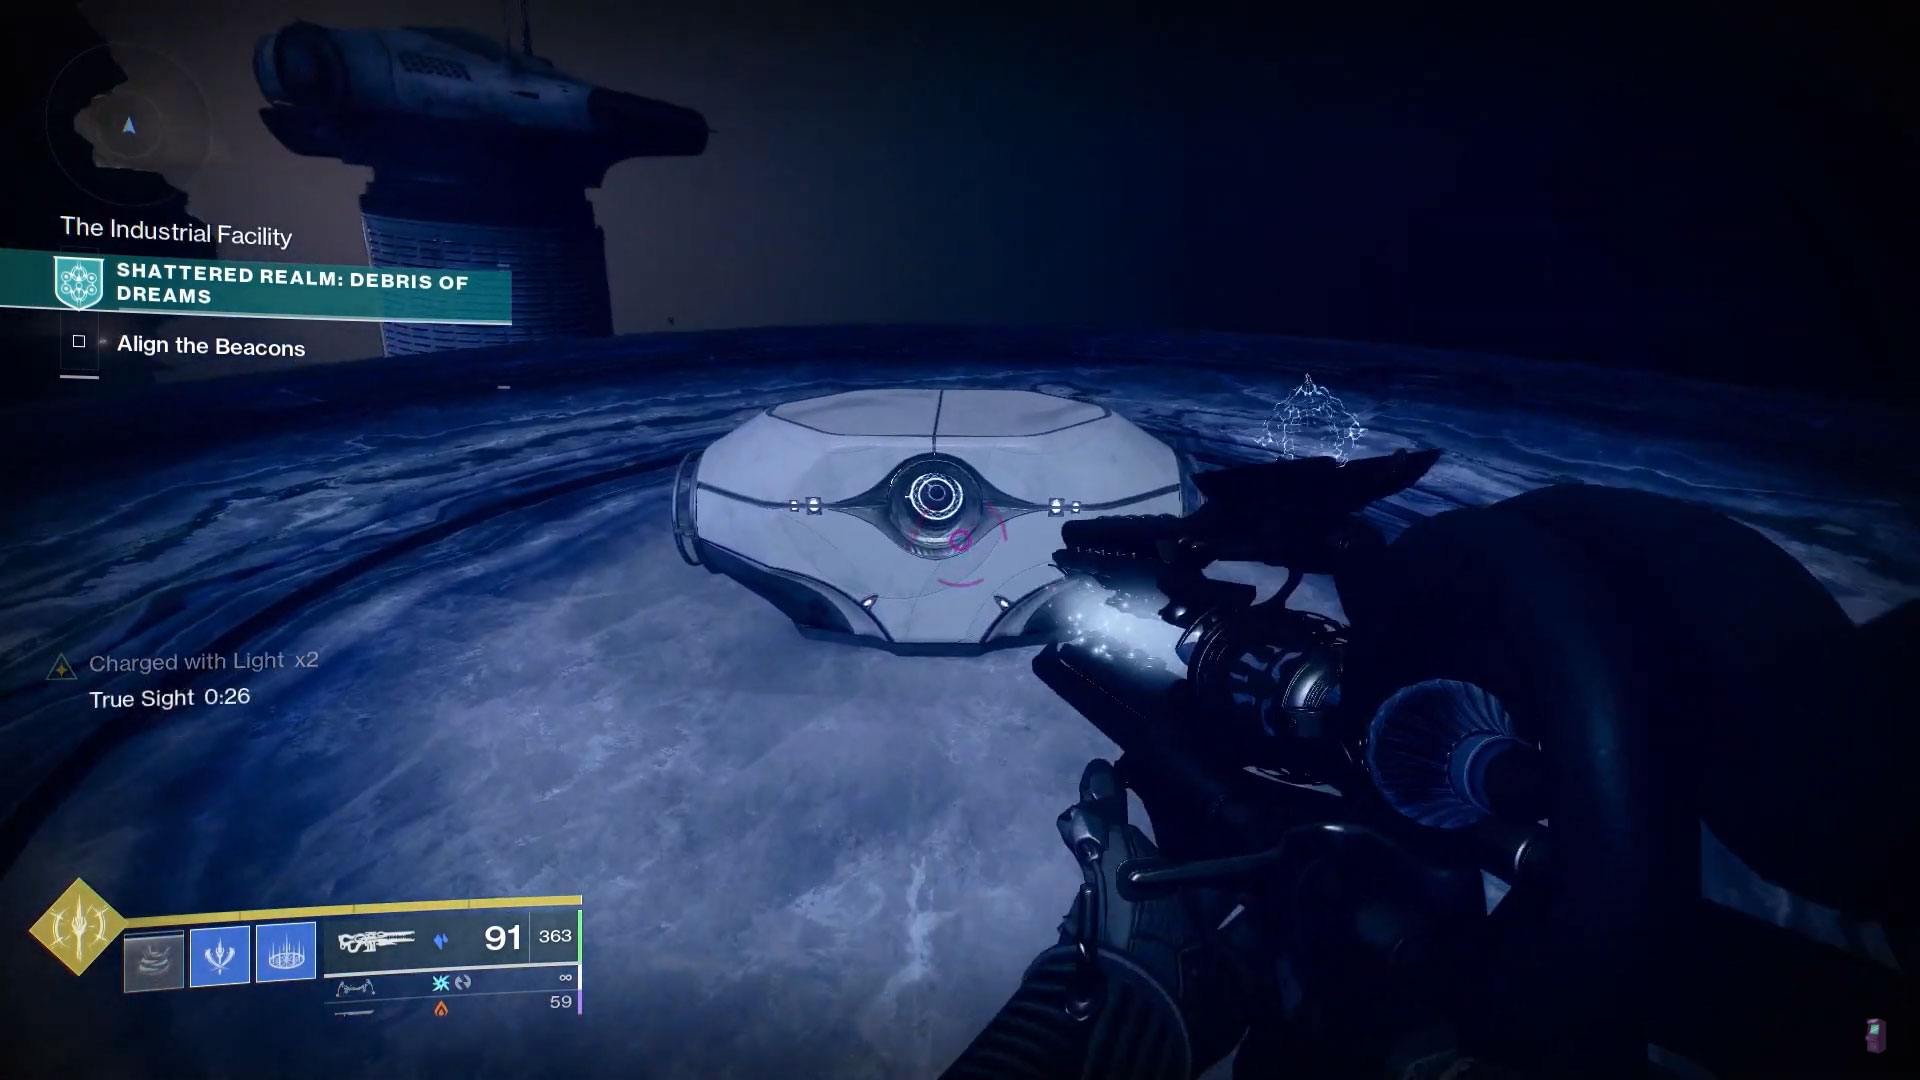
Head back to the Ruined Outpost, a.k.a. the first major platform that has the turbine in the ground. If you’re looking at the turbine from the entrance to the Shattered Realm, the path to the Industrial Facility is on the back right side of the platform. You’ll be able to see the structure once you get closer to the edge.
Hop across the gap to the platform on the other side and follow this pathway up to the equipment platform that’s hanging from a cable. Deal with the Scorn that spawn here. The hidden chest here is on the ground floor beneath the first stairs against the wall that faces the far set of stairs.
Jump down to the rocky surface and make your way to that cubby. You’ll see that you need the Barrier Break buff to get inside and there’s a totem just to the left of the doorway. Snag the buff, head inside, and open the chest.
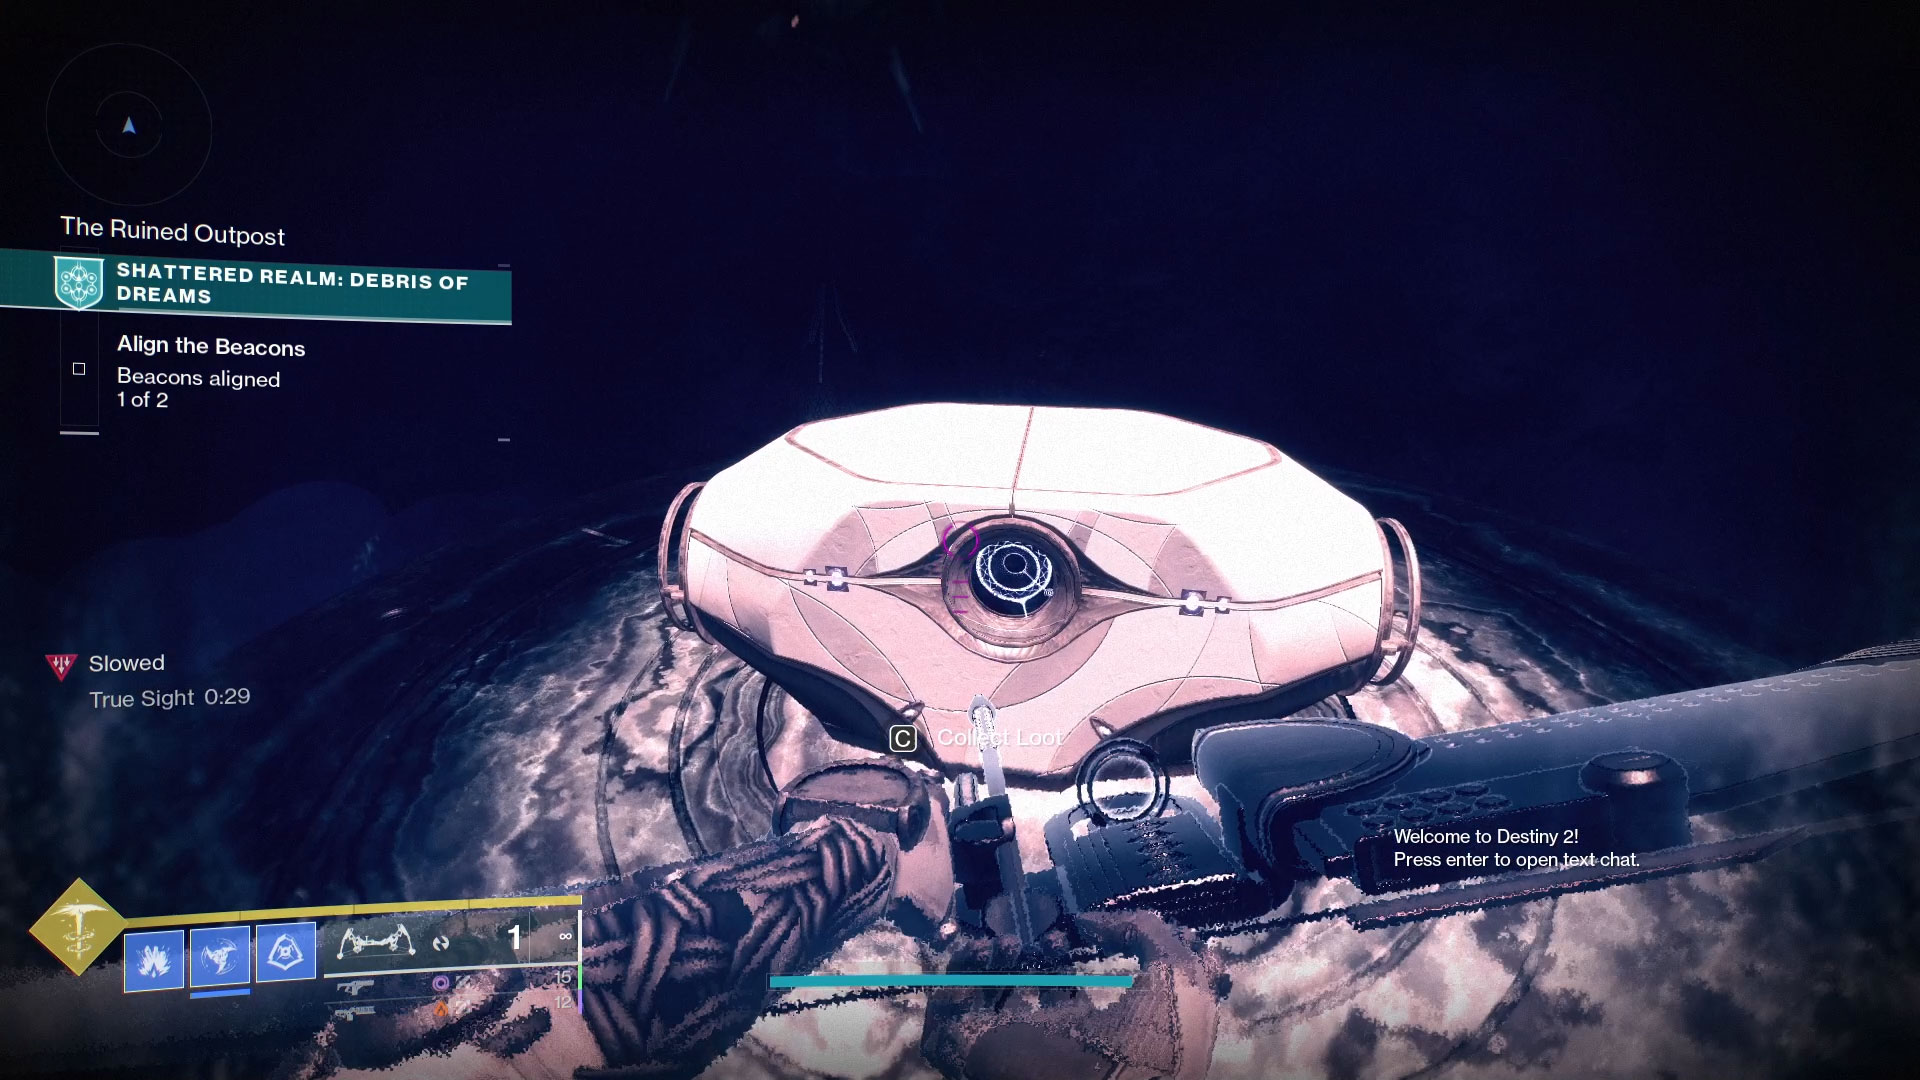
#4: The Ruined Outpost – Outpost Lost
Make your way back to the turbine platform. If you’re standing on the platform surrounding the turbine, look to the lanterns that lead you to the second beacon. There’s a pathway beneath them that leads down inside of the platform you were standing on. Follow it down until two Scorn spawn in front of you. Dispatch them and then turn right. You should see an cavern opening with a slow zone inside.
You should also be able to see two lit buff totems. The first one gives you a Safe Passage buff and the far one gives True Sight. Go to the far one. If you have trouble jumping up on top of the dais, there are some small boulders to the right that’ll help you up. Snag the buff and a series of hidden platforms will appear. Jump up to the circular platform and open the chest that’s there.
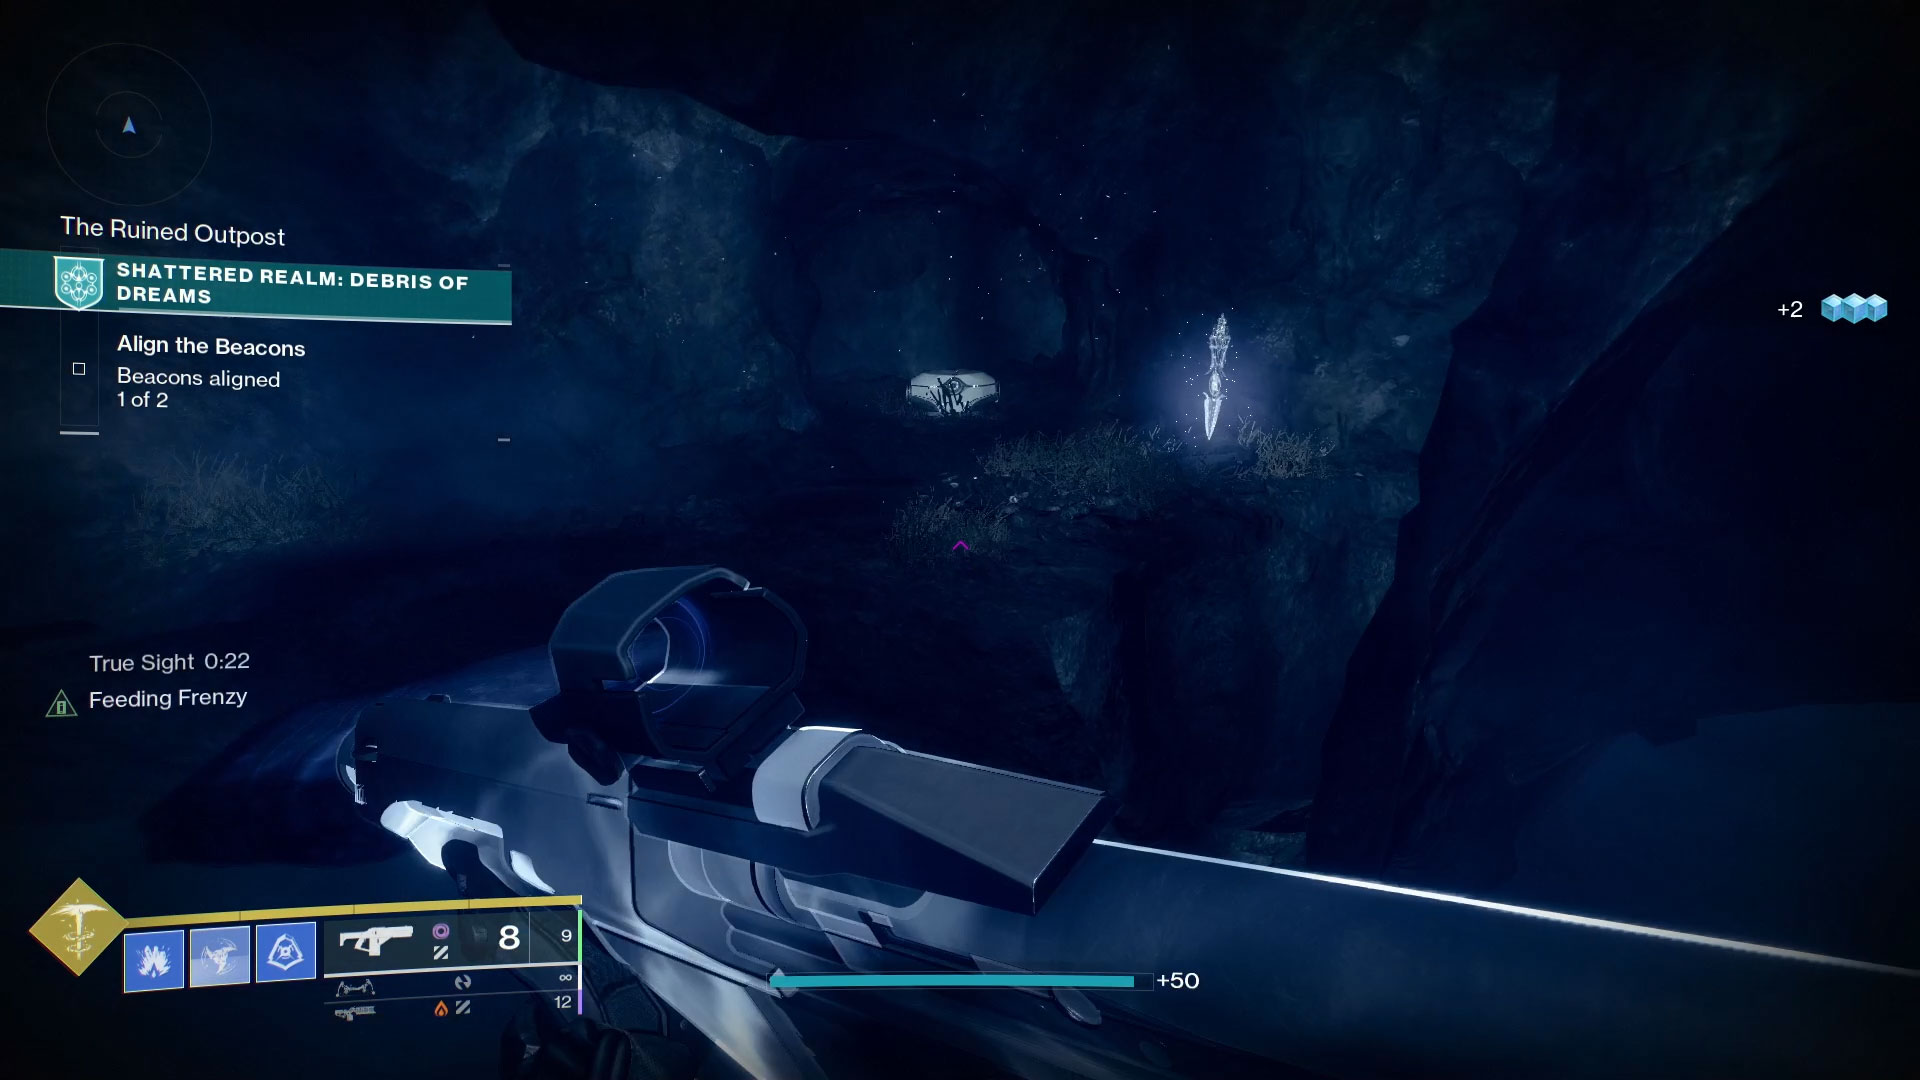
#5: The Ruined Outpost – The Underhang
This Trivial Mystery chest is at the very bottom of the Ruined Outpost, which is where you just were for chest #4 if you’re collecting them in order. If you aren’t there, please refer to the directions for that chest.
Follow those previously detailed steps and once you get to the two Scorn that spawn, go to the True Sight totem on the left. Activate it and follow the platforms down and around to the bottom of the Outpost. This hidden chest will be in an alcove directly in front of the last platform.
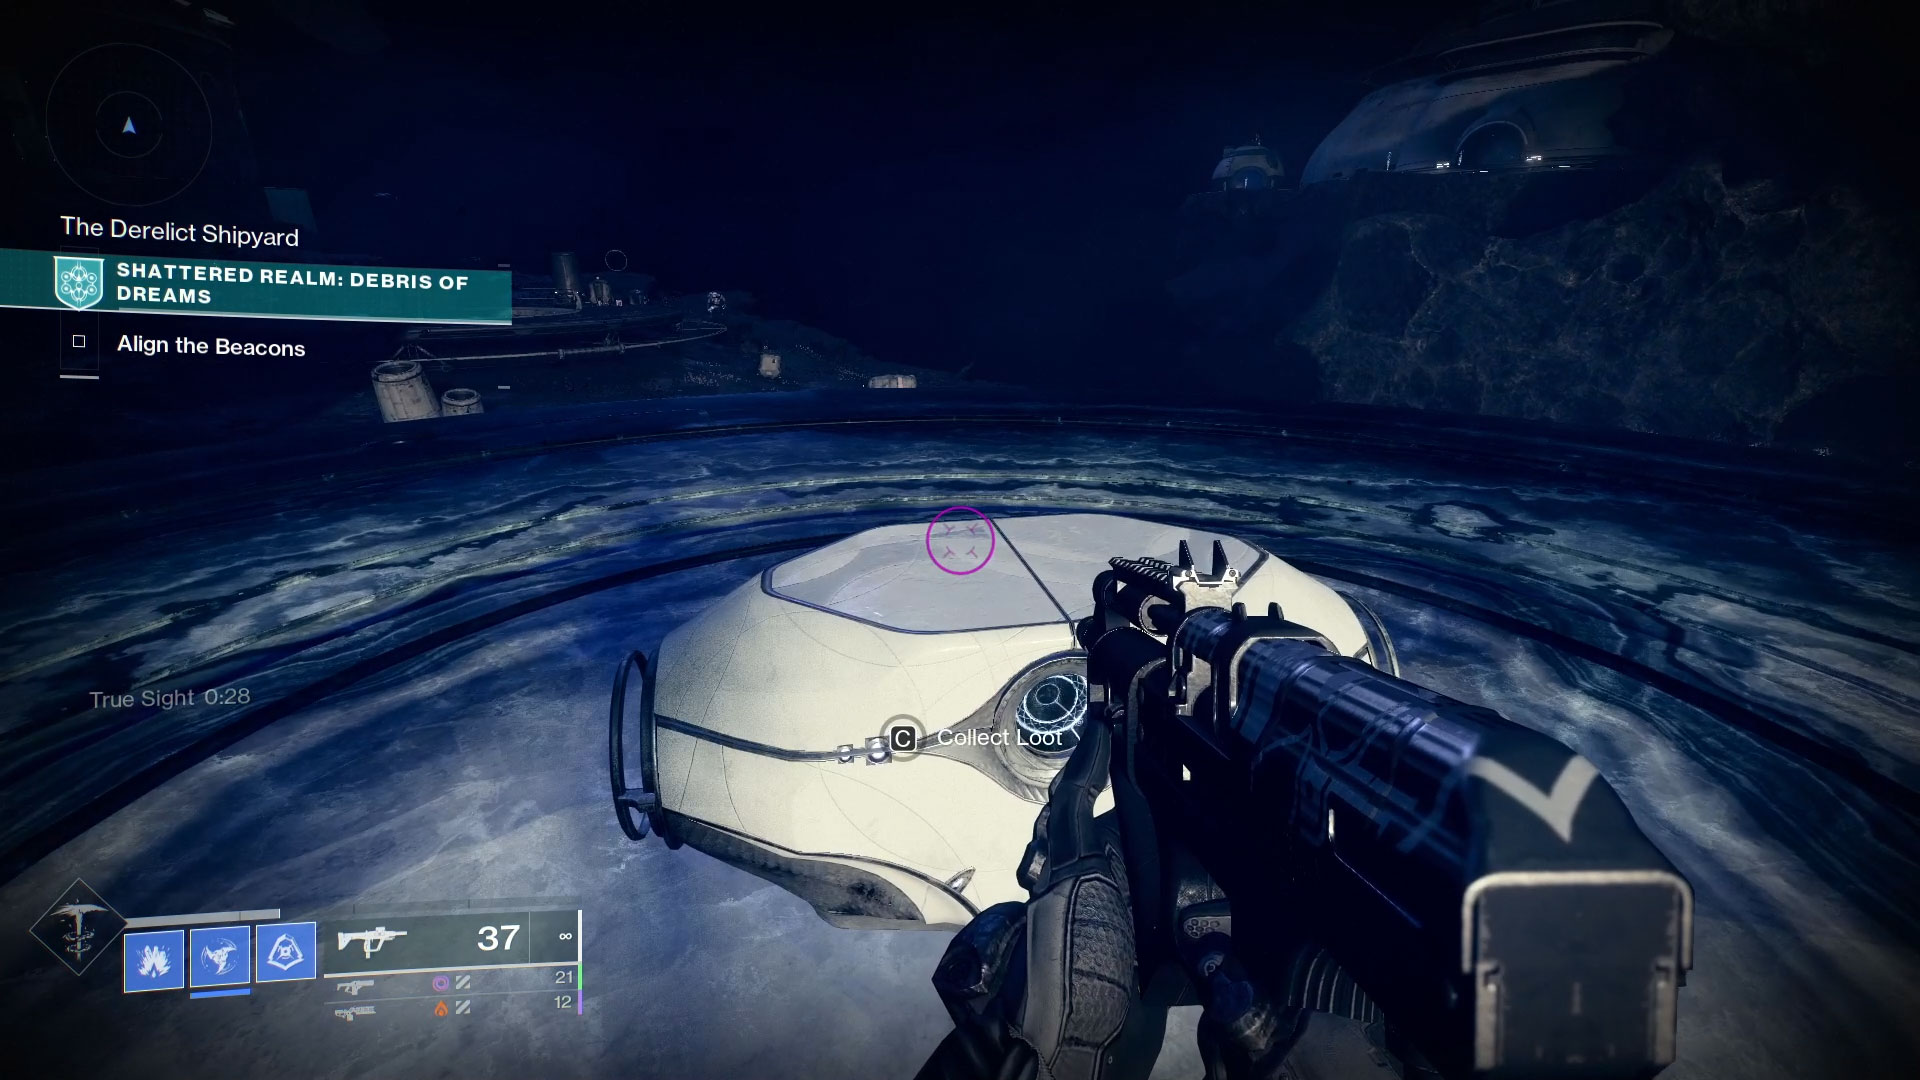
#6: The Derelict Shipyard: The Hidden Path
You’ll need to complete the Second Beacon encounter to collect this chest. Once you have, head back to the hangar’s entrance. Just outside of the entrance on the ridgeline below is a True Sight totem. Snag the buff and take the pathway around to a large circular platform. The chest can be found in the middle of said platform.
#7: The Derelict Shipyard: Concealed Stash
The only way you’d know that this hidden chest exists is if you stumbled across it on accident like I did. This chest is not behind a Barrier or next to a True Sight totem, but you will need the True Sight buff to find it.
You’ll want to make your way to the True Sight totem that you used to collect The Hidden Path’s chest. Snag the buff and head into the hangar. In front of you is a column ringed by a platform. Head inside there and make your way up to the top. Hang an immediate right and go straight ahead. Handle the Scorn that spawn in this large room and the chest will be along the wall nearest to where you entered the space.
#8: The Derelict Shipyard: Secret Stash
From the last chest, turn left. There it is. Grab the Barrier Break buff and head inside.
#9: The Ruined Outpost – Shipyard Secrets
Make your way to the third and final beacon. If you’re looking at the beacon, swing to your left until you see the metal platform at the edge of the ridge to the arena. Head over to the back left side of this grating and look down. Move to the edge of the platform so you can see through the grating. Below you on a ridge is a lit totem. Hop off the grating and down there. Activate the totem to get the True Sight buff and go to the chest on the final floating platform.

#10: The Shattered Enclave – Enclave Enigma
Make your way to the True Sight totem between the building that houses the first beacon and the floating island. Snag the buff and traverse the platforms to the island. Deal with the Scorn there and then take the True Sight buff and the Safe Passage buff in that order. Go to the boulder to your left with the active totem on it and follow the platforms up to a large circular platform over the center of the island. The chest will be in its center.
#11: Industrial Facility – The Envisioned Ascent
Contrary to its name, this hidden chest is actually between the Industrial Facility and The Overlook. You’ll need to defeat the Scorn drilling party that spawns after you’ve beaten the encounter at the first beacon to reach it. There will be a notice in your buffs on the left side of your screen that will confirm that they’ve spawned.
Head back to the Ruined Outpost platform, the one with the turbine in its center, and the drilling party will be beyond it and to the right. Deal with the enemies here and there will be a charge leftover where the drill was. Pick that up and take it over to the Industrial Facility. Go to the Barrier totem from the Refined Mystery chest and take the buff so you can go inside. On the right side of the room is a teleporter that will take you to the Overlook.
Deal with the Scorn and deposit the charge. Turn around and to your right near the ridgeline is a True Sight totem. Take the buff and take the platforms directly in front of you. They’ll lead you to a large circular platform floating in between the two islands. Open the chest and you’ve claimed this Trivial Mystery.

#12: The Overlook – The Hidden Refuge
Since you already know how to get to The Overlook, make your way back there and snag the True Sight buff again. Instead of going straight ahead, turn to your right and look to where you deposited the charge. Below it and to the left is a series of now visible platforms that will take you down to this hidden chest.
#13: Industrial Facility – Refined Power
From the last chest, make your way back up to the surface of The Overlook. There’s a giant piston just like the ones in the Hollowed Lair strike. Hop on it and wait until it spits the charge you deposited back out. You need to take this over to the Industrial Facility.
Go snag the True Sight buff and follow the platforms that took you to the Envisioned Ascent chest. You’ll be able to land on the roof of the facility. Hop down and go through one of the doors that leads inside. Dunk the charge and handle the Scorn that are trying to wail on you.
Once they’re dealt with, follow the waypoint on your screen to a terminal. Activate it and this Ascendant Mystery chest will spawn.

#14: Derelict Shipyard – Sealed Stash
The next two chests are part of an encounter in the Derelict Shipyard. Go to this area and head up the central shaft that takes you to the teleporter to the final beacon. Instead of going left at the top of the ladder, go to the door in front of you and use the terminal on the right to unlock it. Inside, there’s a Scorn Fight Club going on. Show them the error of their ways.
Once they’re dealt with, go to the door that’s sealed by a barrier, take the buff, and go through. To your immediate right is the chest that’s being secured by two laser trip mines. Destroy the mines and open the chest.
Quick note: You should have Scorn Cache Passcode in your buff section. This is important because you need 3x of this buff to open the final chest. Keep that in mind.

#15: Derelict Shipyard – The First Rule
From where you just left off on the previous chest, turn around and go to the far side of the room (destroy the laser trip mine first) and up the stairs on your right. (You don’t need the Barrier Break buff like I had in the video.)
Quick note: If you take the Safe Passage buff before the stairs, you’ll spawn a raiding party in the next room. If you’re cool with that, go for it. If not, don’t.
Go through the barrier on the far side of the next room and down the stairs to the doorway. Don’t run through. There are 4 laser trips mines on the other side. Destroy them and hang a right. You should have a waypoint on your map, but if you don’t, stay on this path and follow it up to the building up ahead. You’ll come to a doorway inside with a Barrier Break totem outside of it.
Take the buff and go in. Up the stairs will be a miniboss and defeating him will give you Scorn Cache Password x2.
To get the final password, head back outside and jump down to the main platform with the turbine on it. Go to the turbine and jump down inside of the Ruined Outpost. The final miniboss will be down here and you’ll now have Scorn Cache Password x3.
Head back to the Derelict Shipyard so you can get back to the Scorn Fight Club room. On the left side of it is a chest that’s surrounded by a shield and has 3x Scorn Braziers arrayed in front of it. Transmit the passcodes on each of them to drop the shield so you can open this Ascendant Mystery chest.
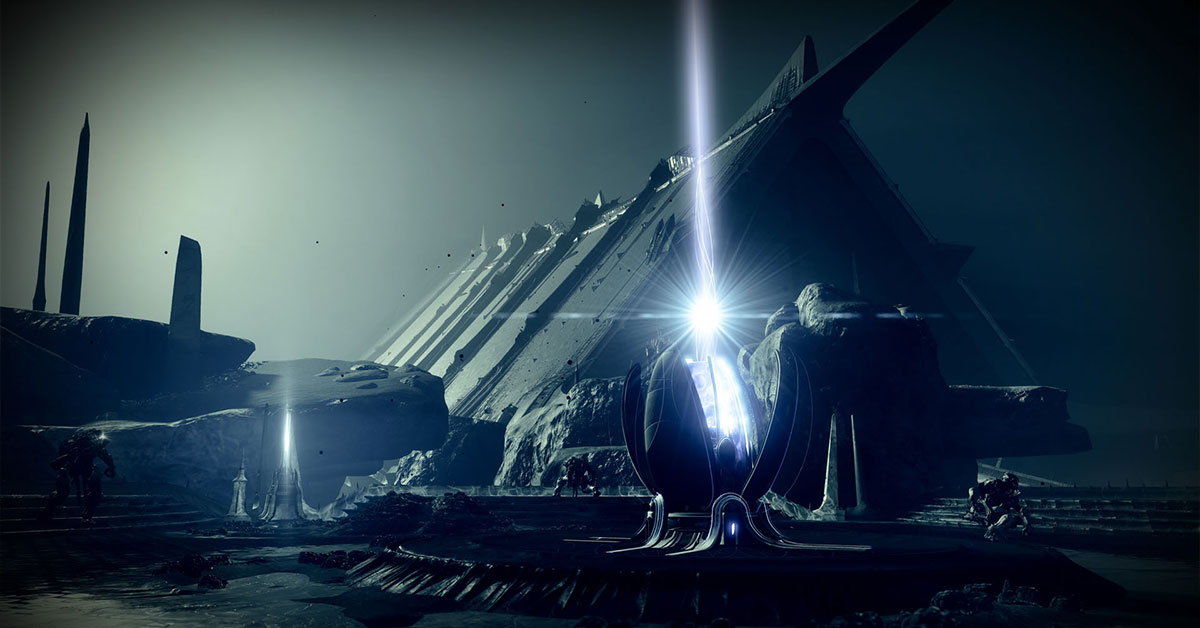
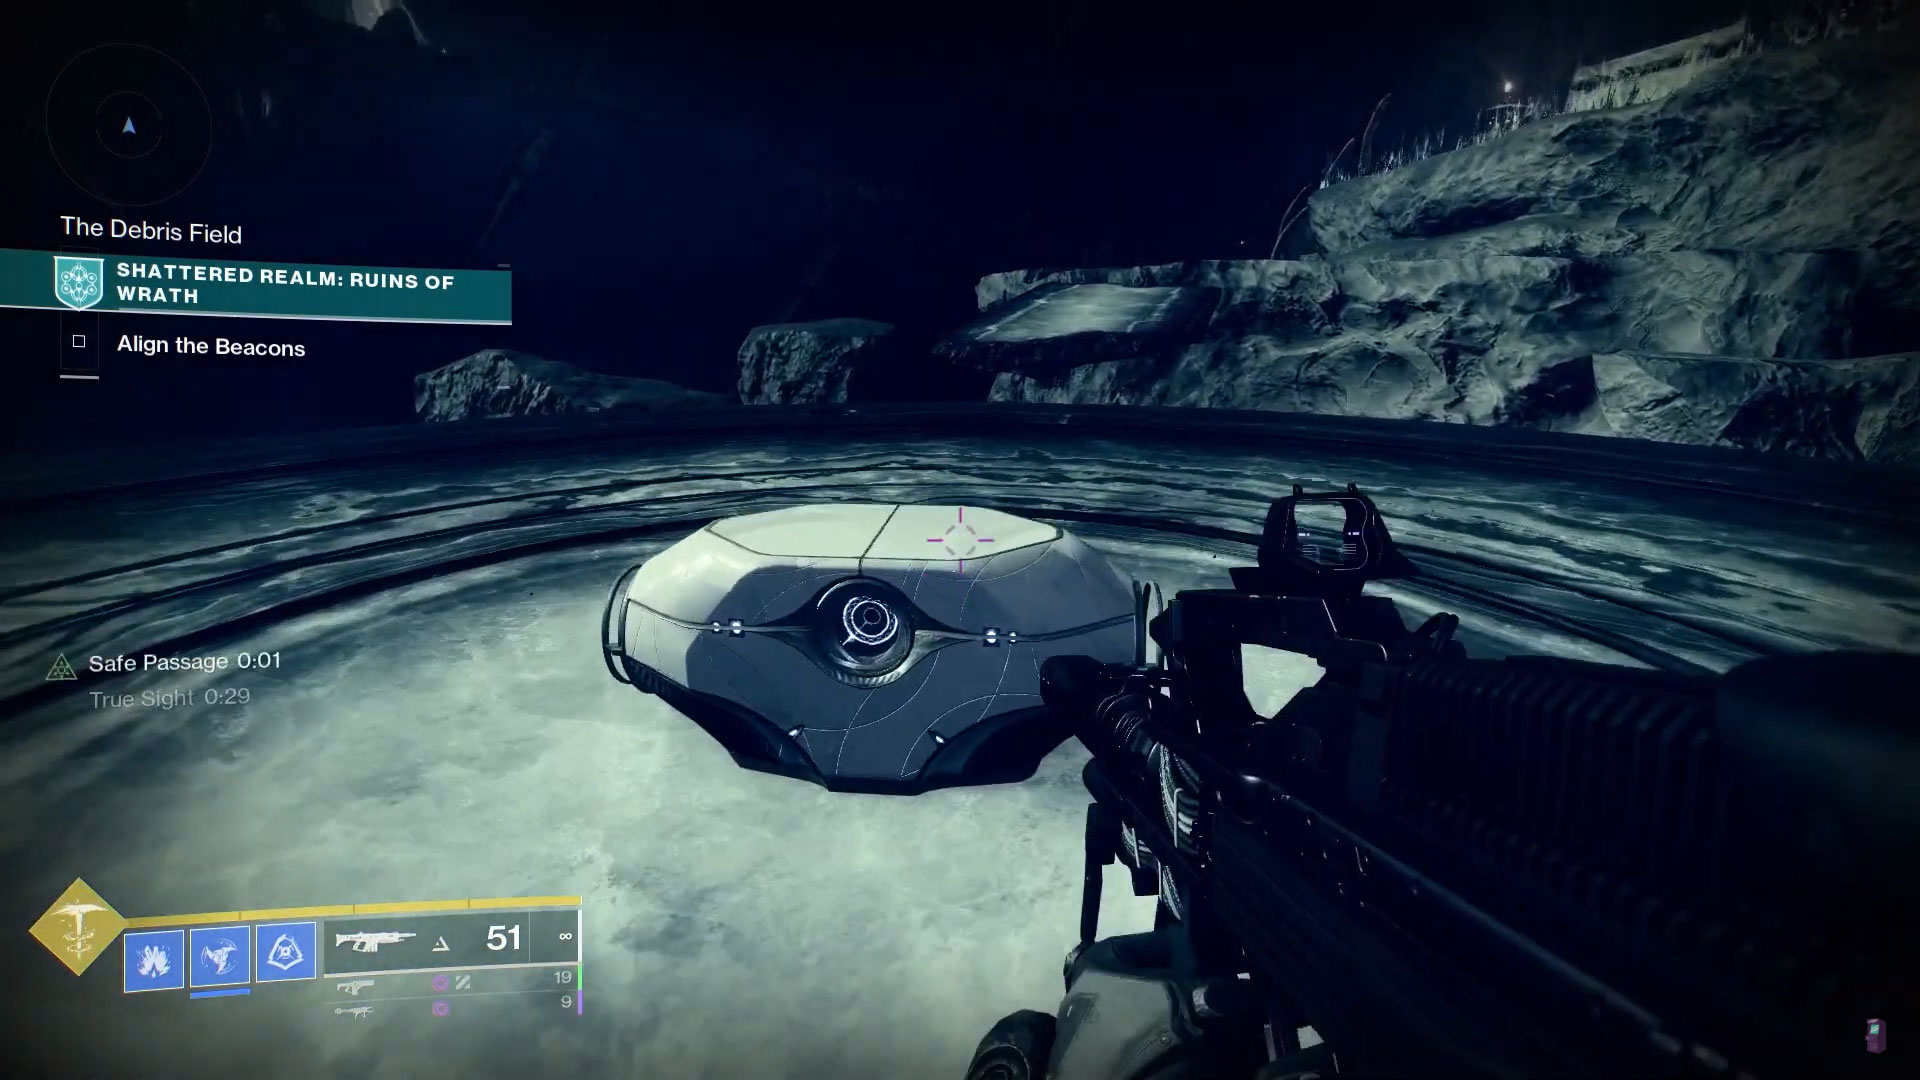
Ruins of Wrath Trivial Mysteries
Ruins of Wrath is the third and final wing of the Shattered Realm and Guardians can access it by selecting the icon in the H.E.L.M. There are currently 10x Trivial & Enigmatic Mysteries that can be collected inside of this branch. You’re going to need all three abilities unlocked on the Wayfinder’s Compass to collect these hidden chests.

#1: In Light’s Breach
After aligning the first beacon, backtrack to the circular platform you passed on the way to the beacon that has the True Sight totem on it. Activate the totem to get the buff and some hidden platforms will appear above you. Jump up to these platforms and follow them to the large circular platform that appears. The hidden chest will be on this floating island.

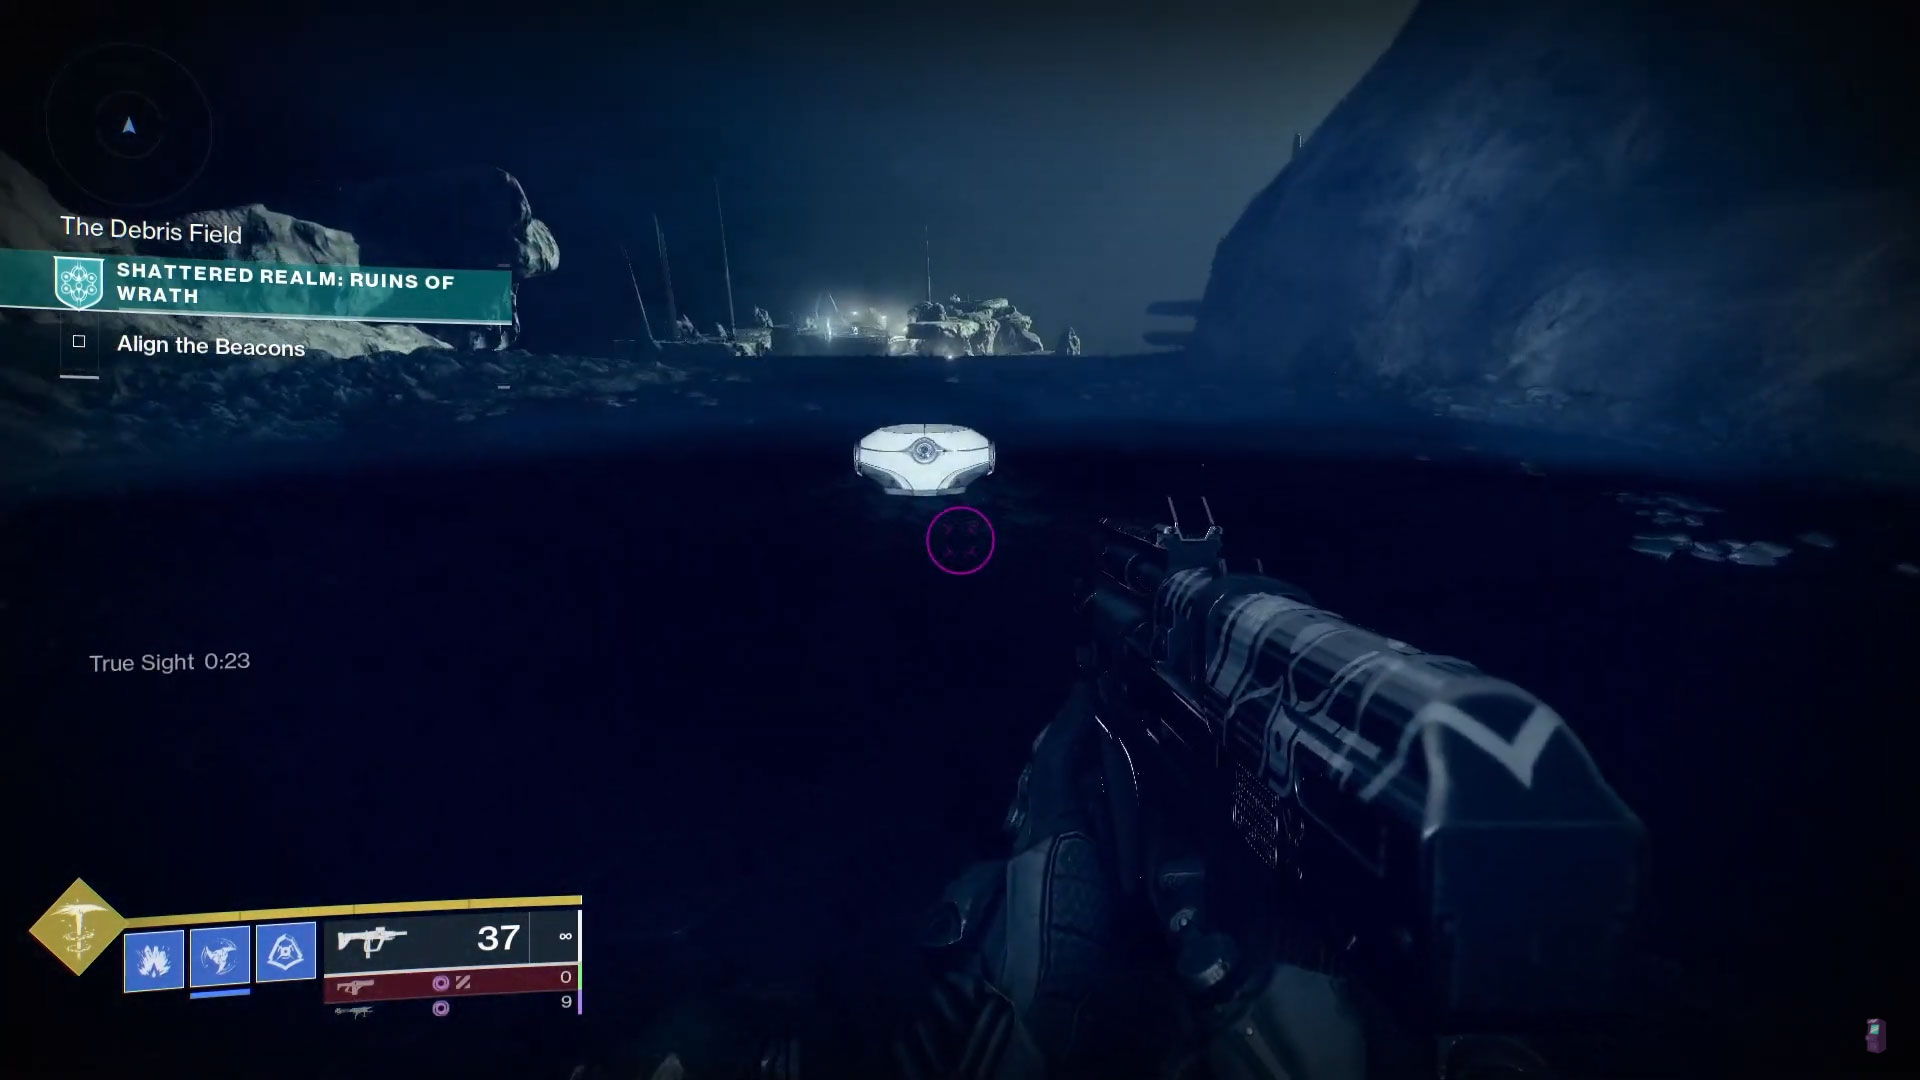
#2: Below
From the totem on the circular platform, look back towards the main entrance to the Ruins of Wrath and head towards the island across the way. There’s a secondary ledge tucked under the surface that you can get to by following the platforms down. Take care of the Hive here and snag the Barrier Break buff from the totem. Head towards the far side of the island from where you entered and the barrier will be on your right. Head inside and open the chest.

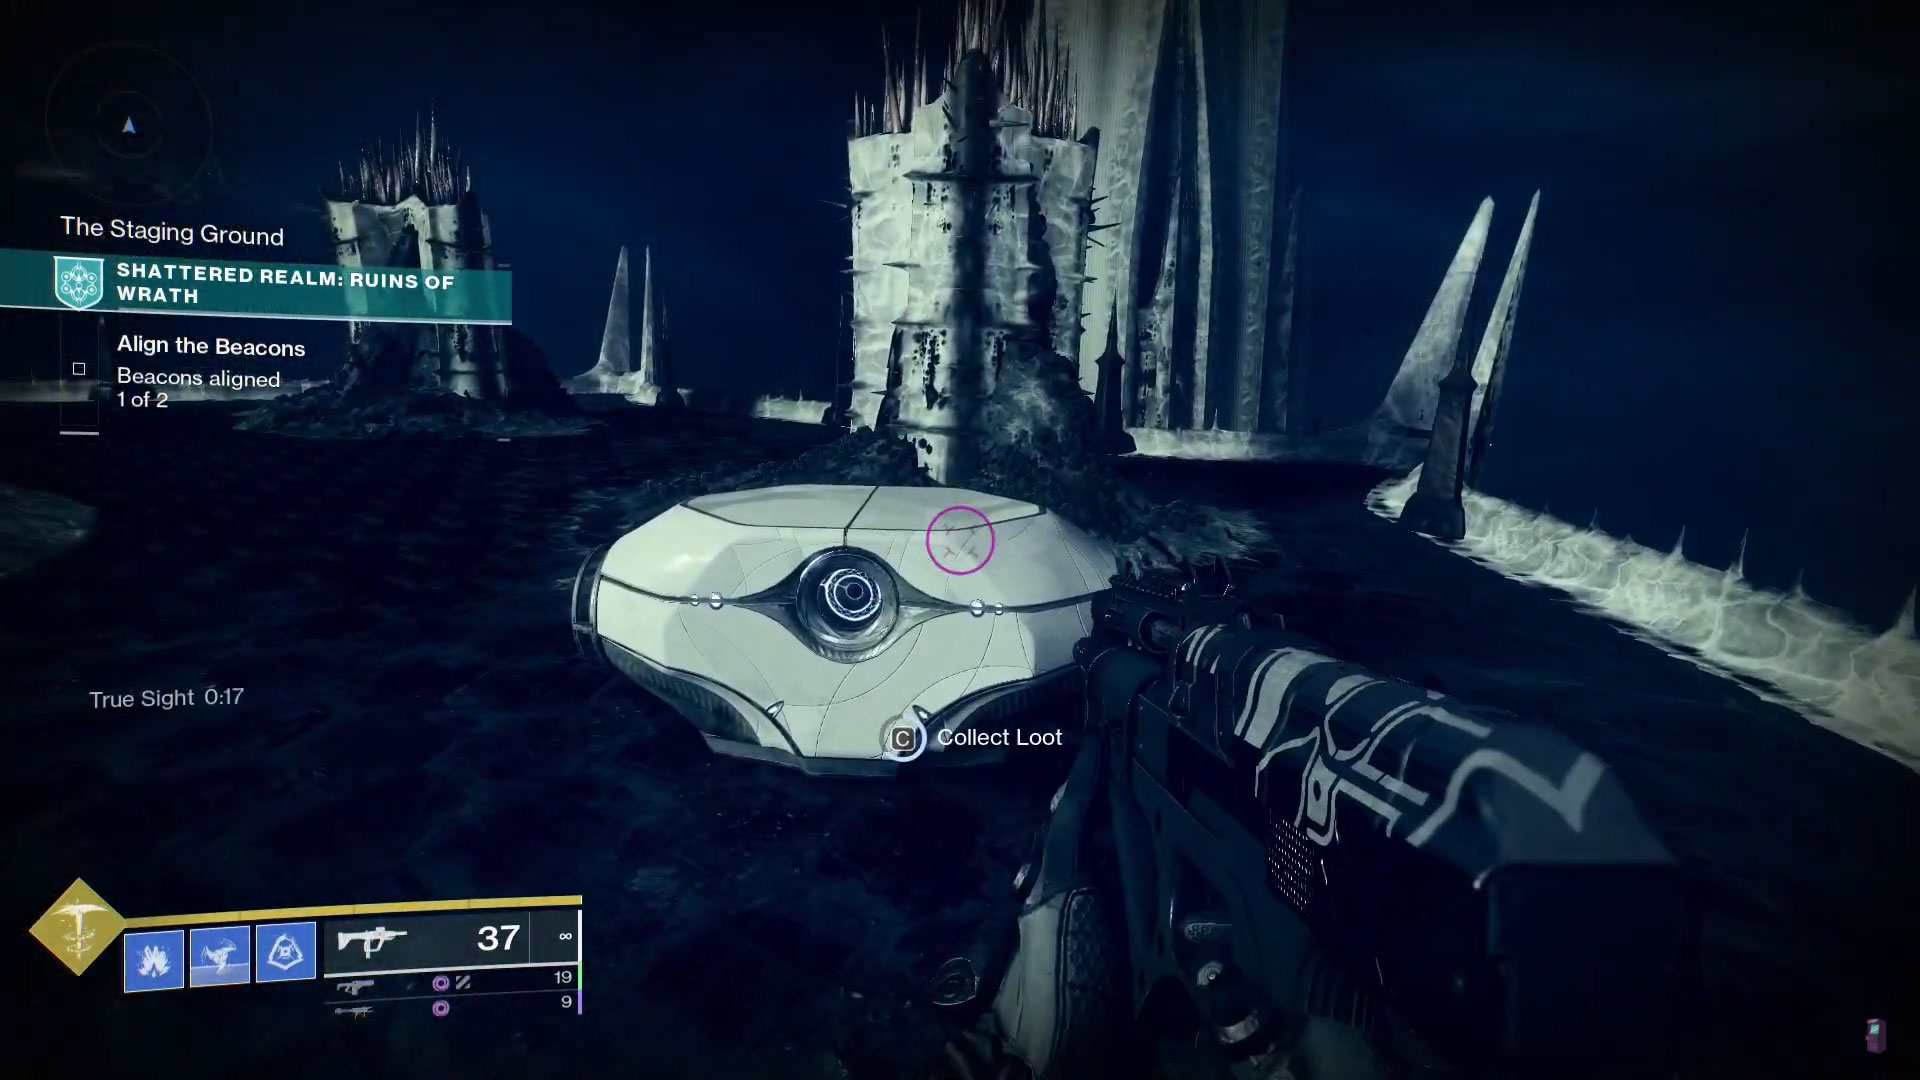
#3: Aloft, Adrift
Head back to the first beacon and looks towards it so that the Ascendant Portal and the Dreadnaught far off in the distance are behind the beacon itself. Head towards the totem on the left side of the platform you’re on. Activate this totem to get the True Sight buff and take the floating platforms to the island in the distance. Follow the path around the right side of the island and snag the Barrier Break buff as you pass the totem. The barrier you need to go through is around the corner along the left wall. Head inside and open the chest.
#4: Turret Treasure
From the same starting position as the last chest, head to the right instead. Keep heading in that direction until you reach the courtyard to the tower. Snag the buff from the True Sight totem on the left side of the courtyard and follow the floating platforms up to the top of the turret where you’ll find the 4th hidden chest.
#5: Howardite Cache
Make your way over to the second beacon, complete that encounter, and then head to the far end of the island closest to the Dreadnaught. At the top of the ridge is a True Sight totem that’ll cause a chain of platforms to appear. Take these platforms to the other island across the void and head into the alcove that’s to the right of where you hop onto the island. Get the Barrier Break buff from this totem and cycle around to the left side of the island where you’ll find the Barrier you need to go through.

#6: Impactor Cache
Make your way over to the archipelago that’s in the center of the Ruins of Wrath. If you’re coming from the 5th chest, the 6th chest is going to be on the far right side of this chain of islands. However, you’ll need to snag the Safe Passage buff from the totem on the center platform. Once you’ve got the buff, head to the chest and open it up.
#7: Pallasite Cache
Head back to the central platform in the archipelago and snag the True Sight buff from the totem that’s at the edge. A hidden ramp that leads to a circular platform will appear. The 7th chest is at the center of this island.

#8: Chrondite Cache
After collecting the 7th chest, keep following the platforms up to the next area. There’s a slow zone immediately to your right after you land and there’s a flat structure at the center of this space with the 8th chest on it. You can get on top of this structure in one of two ways. First, there’s a Safe Passage totem on the far side that’ll negate the slowing effect. This will let you just jump up there. Secondly, you can go to the other structure across the road and get enough air so that you land on top of the structure even with the slowing effect.

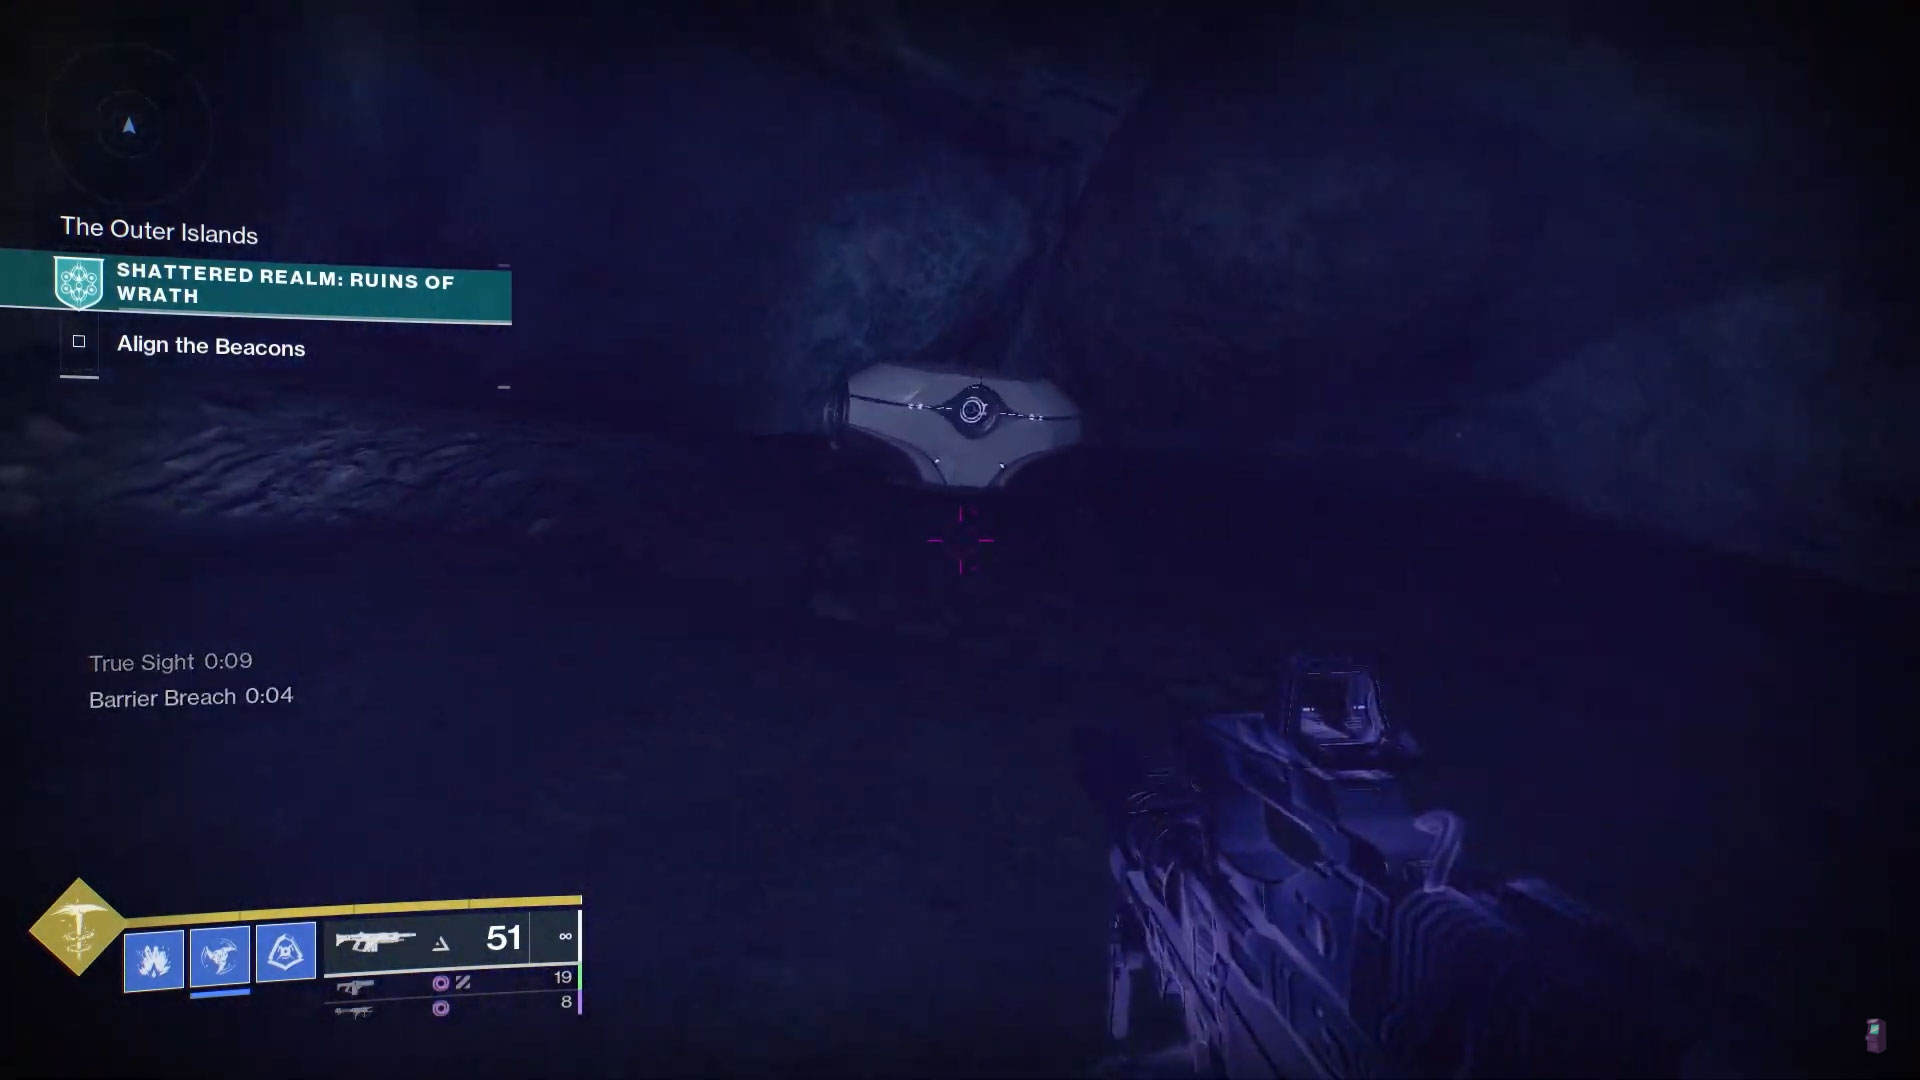
#9: Kamacite Cache
On the far side of the platform that held the 8th chest is a set of ribs sticking out of the ground. Take the path that leads back towards the entrance to Ruins of Wrath. Follow it as it veers to the left and down. After hopping down to the platform below, there’s a Barrier Break totem just before you enter a tunnel. Snag the buff and follow the tunnel until you reach the Barrier. Head through and open the chest.
#10: Eclipsed Cache
Make your way back to the Barrier Break totem you just used on the 9th chest and get the buff again. Head back to the room where the 9th chest was and refresh your Barrier Break buff. Hang a right as you leave that room and hop up to the platform above you. Take that path through the ribs and around to the left until you reach another totem which gives you the True Sight buff. Go through the barrier in front of you and follow the floating platforms to the top of the building you were in to find the 10th chest.
Time is of the essence here so you’ll want to max out your agility and use a movement speed exotic if you have one.

Kenny Empey
Kenny is a lifelong gamer that enjoys writing in-depth guides for RPGs, JRPGs, strategy, and FPS games. You can follow him on Twitter, YouTube, or Twitch to stay up to date with the latest content and guides from ArcadeHaven.io