All Ascendant Anchor Locations
Find out every location to all known Ascendant Anchors in Destiny 2 during Season of the Lost.
In part 1 of the Wayfinder’s Voyage, Mara Sov tasks you with going to the EDZ to collect Parallax Trajectory. You can earn Parallax Trajectory in a variety of ways, but the quickest way to get a lot of it is to collect Ascendant Anchors. Guardians will be able to collect a large amount of this currency each week by finding Ascendant Anchors in the wild.
The anchors in the EDZ and the Shattered Realm are part of the Ascendant Ballast I seasonal challenge. Since this follows the format of a multi-part challenge, we’ll undoubtedly have more anchors to pick up in different branches of the Shattered Realm and other patrol zones as the season progresses. We’ll update this guide as those anchors become available.
Check out our complete guide for every known Ascendant Anchor location.
Ascendant Anchor Locations
- European Dead Zone (EDZ)
- The Tangled Shore
- The Moon
- Shattered Realm: Forest of Echoes
- Shattered Realm: Debris of Dreams
- Shattered Realm: Ruins of Wrath
EDZ Ascendant Anchor Locations
There are 22 Ascendant Anchors spread throughout the EDZ and all of them are located in zones with a transmat point so you don’t need to spend a lot of time on your sparrow going from zone to zone.
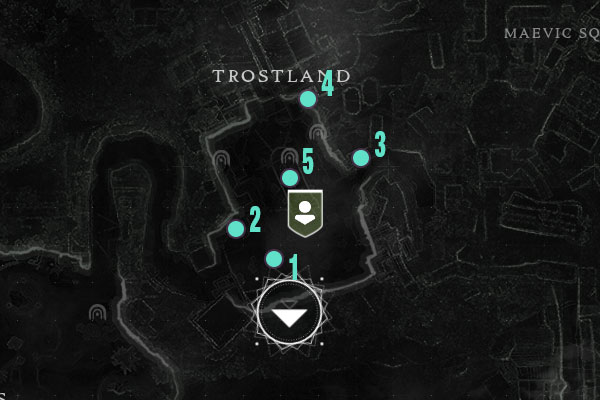
Trostland
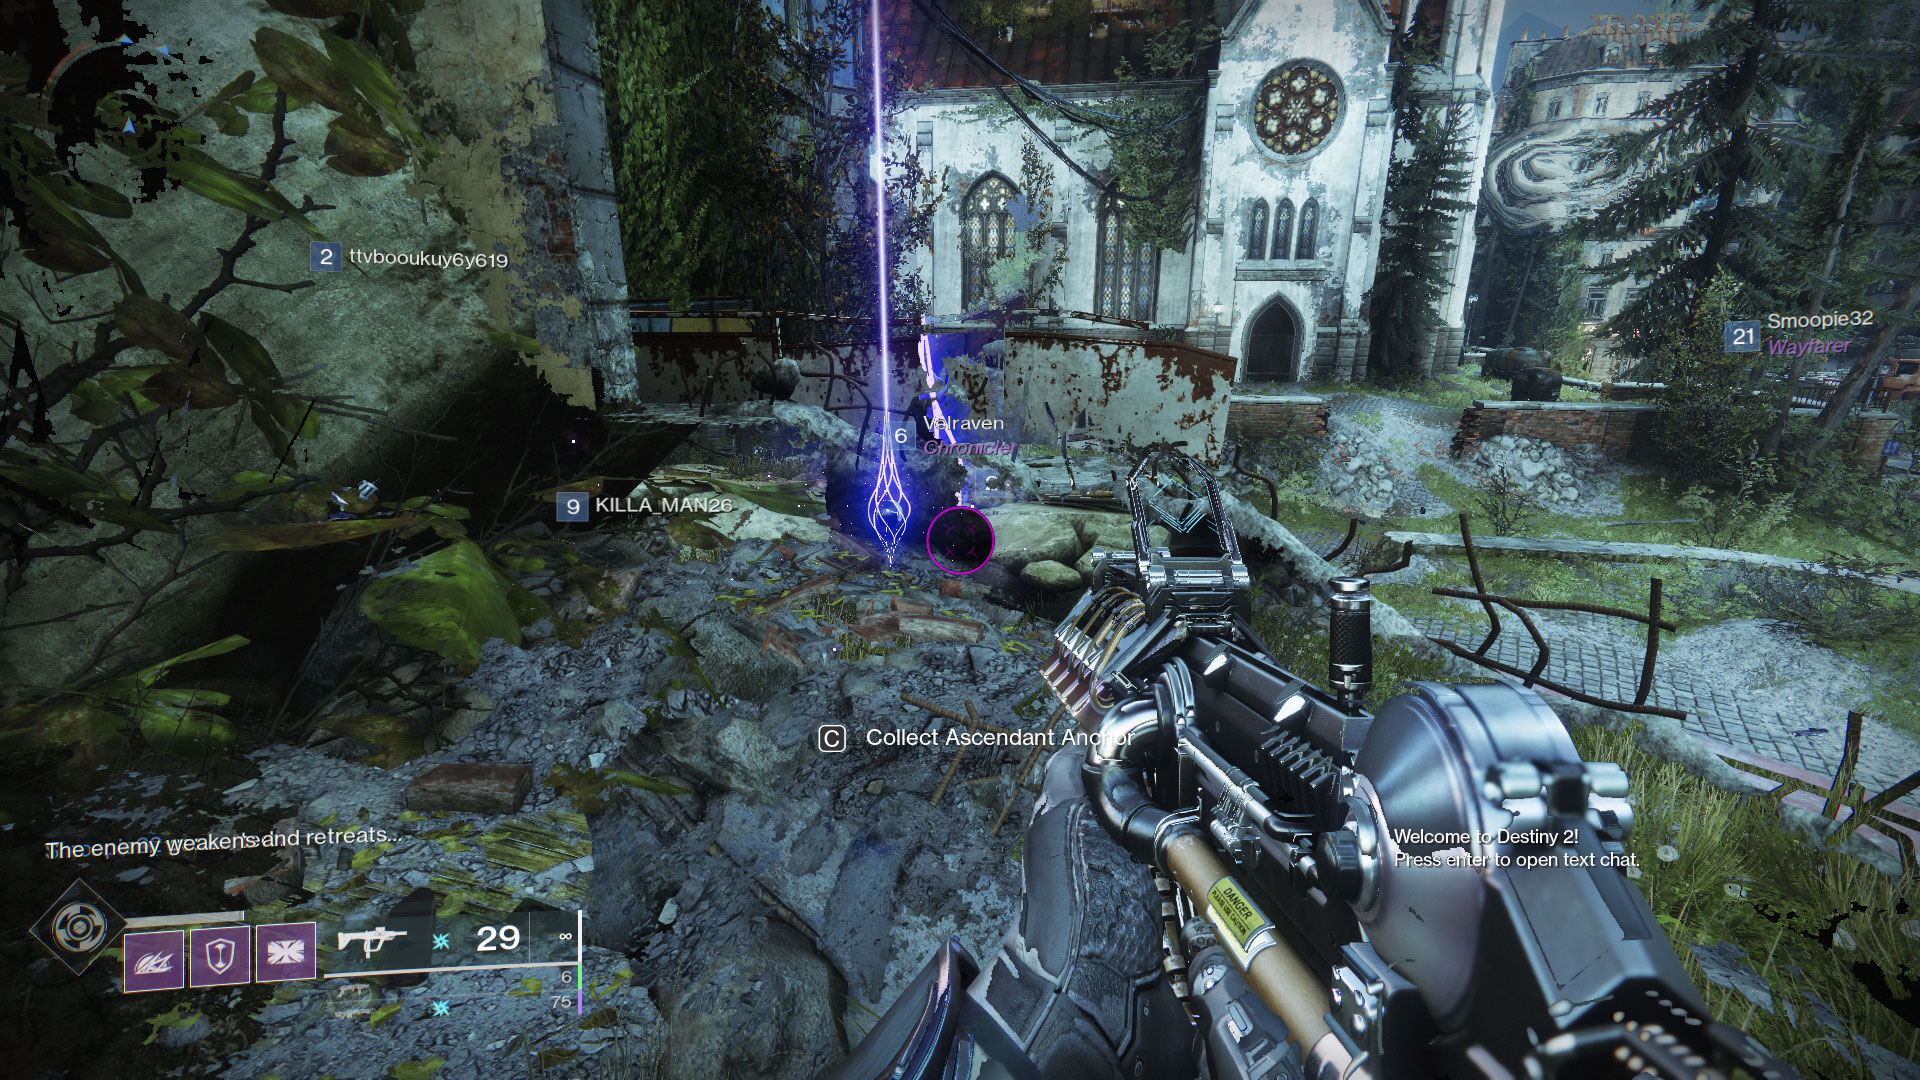
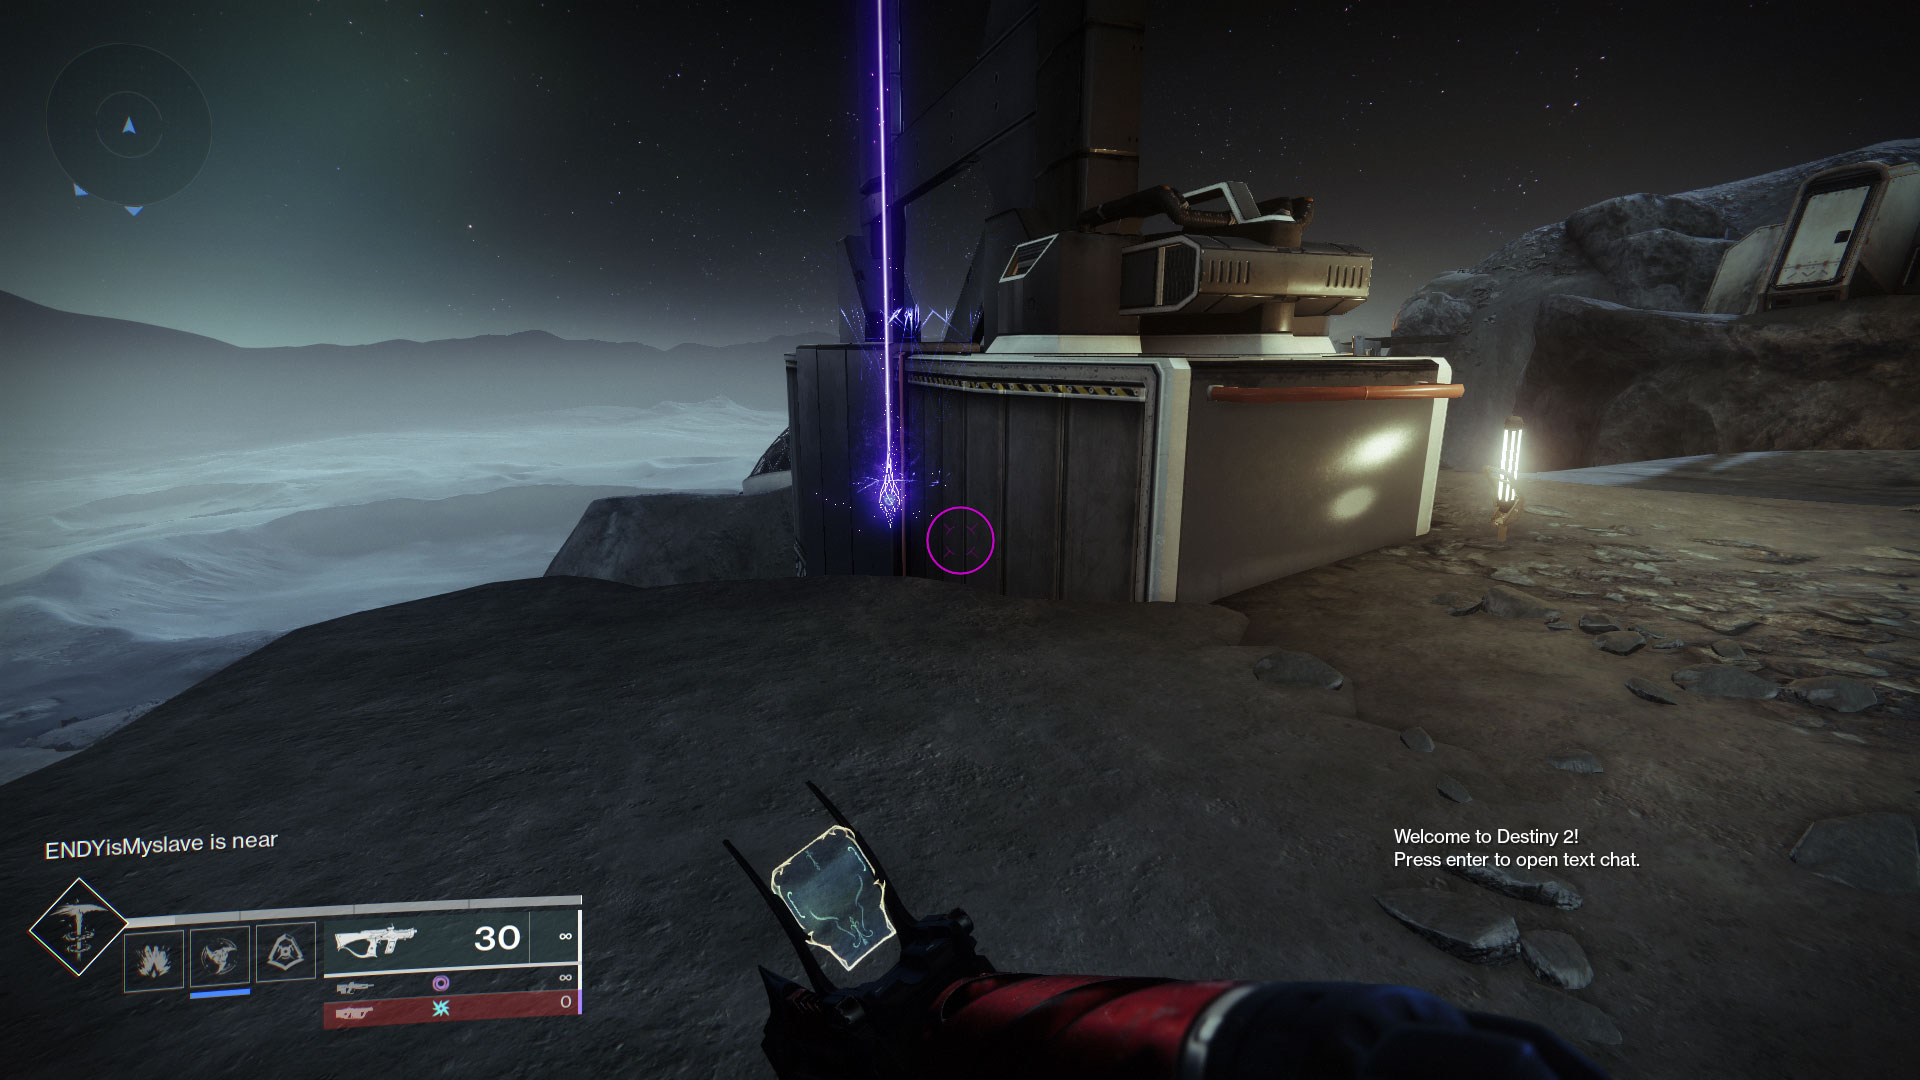
- #1: As soon you teleport to Trostland, the Ascendant Anchor will be directly in front of you. It’s the purple pillar of light situated above a floating Awoken artifact.
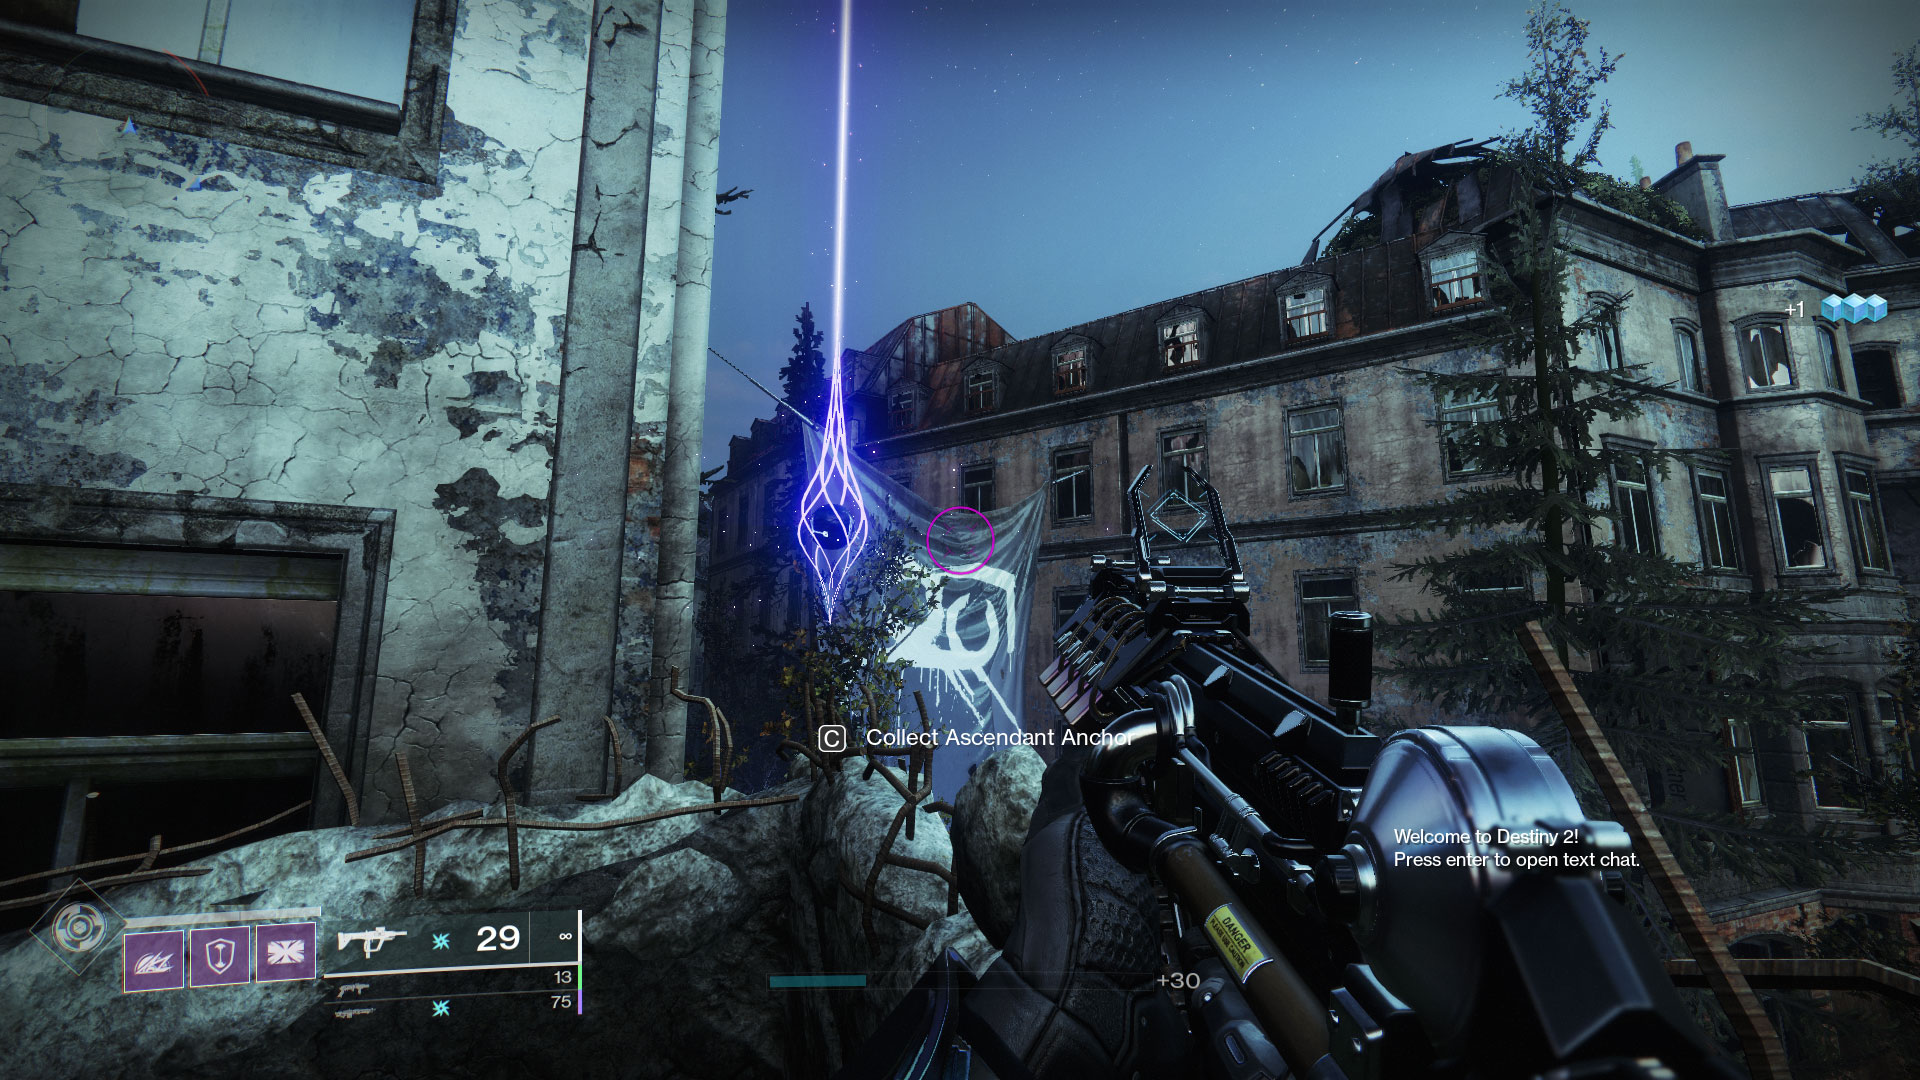
- #2: This Anchor is located across the road from the first anchor in an alcove in the ruined building that overlooks one of the Glimmer drill public event spawn points.
- #3: You can find this anchor on the far side of Trostland in the ruined building on the left side of the road that leads to the Lake of Shadows strike. When you hit that fork, hang a left, and then take your first right into that building. Follow the stairs, look up, and the Ascendant Anchor will be near the top on the left side.
- #4: You’ll find this anchor in the back right corner of Trostland on the second floor of the ruined building to the North of the Ruined Terminus lost sector.
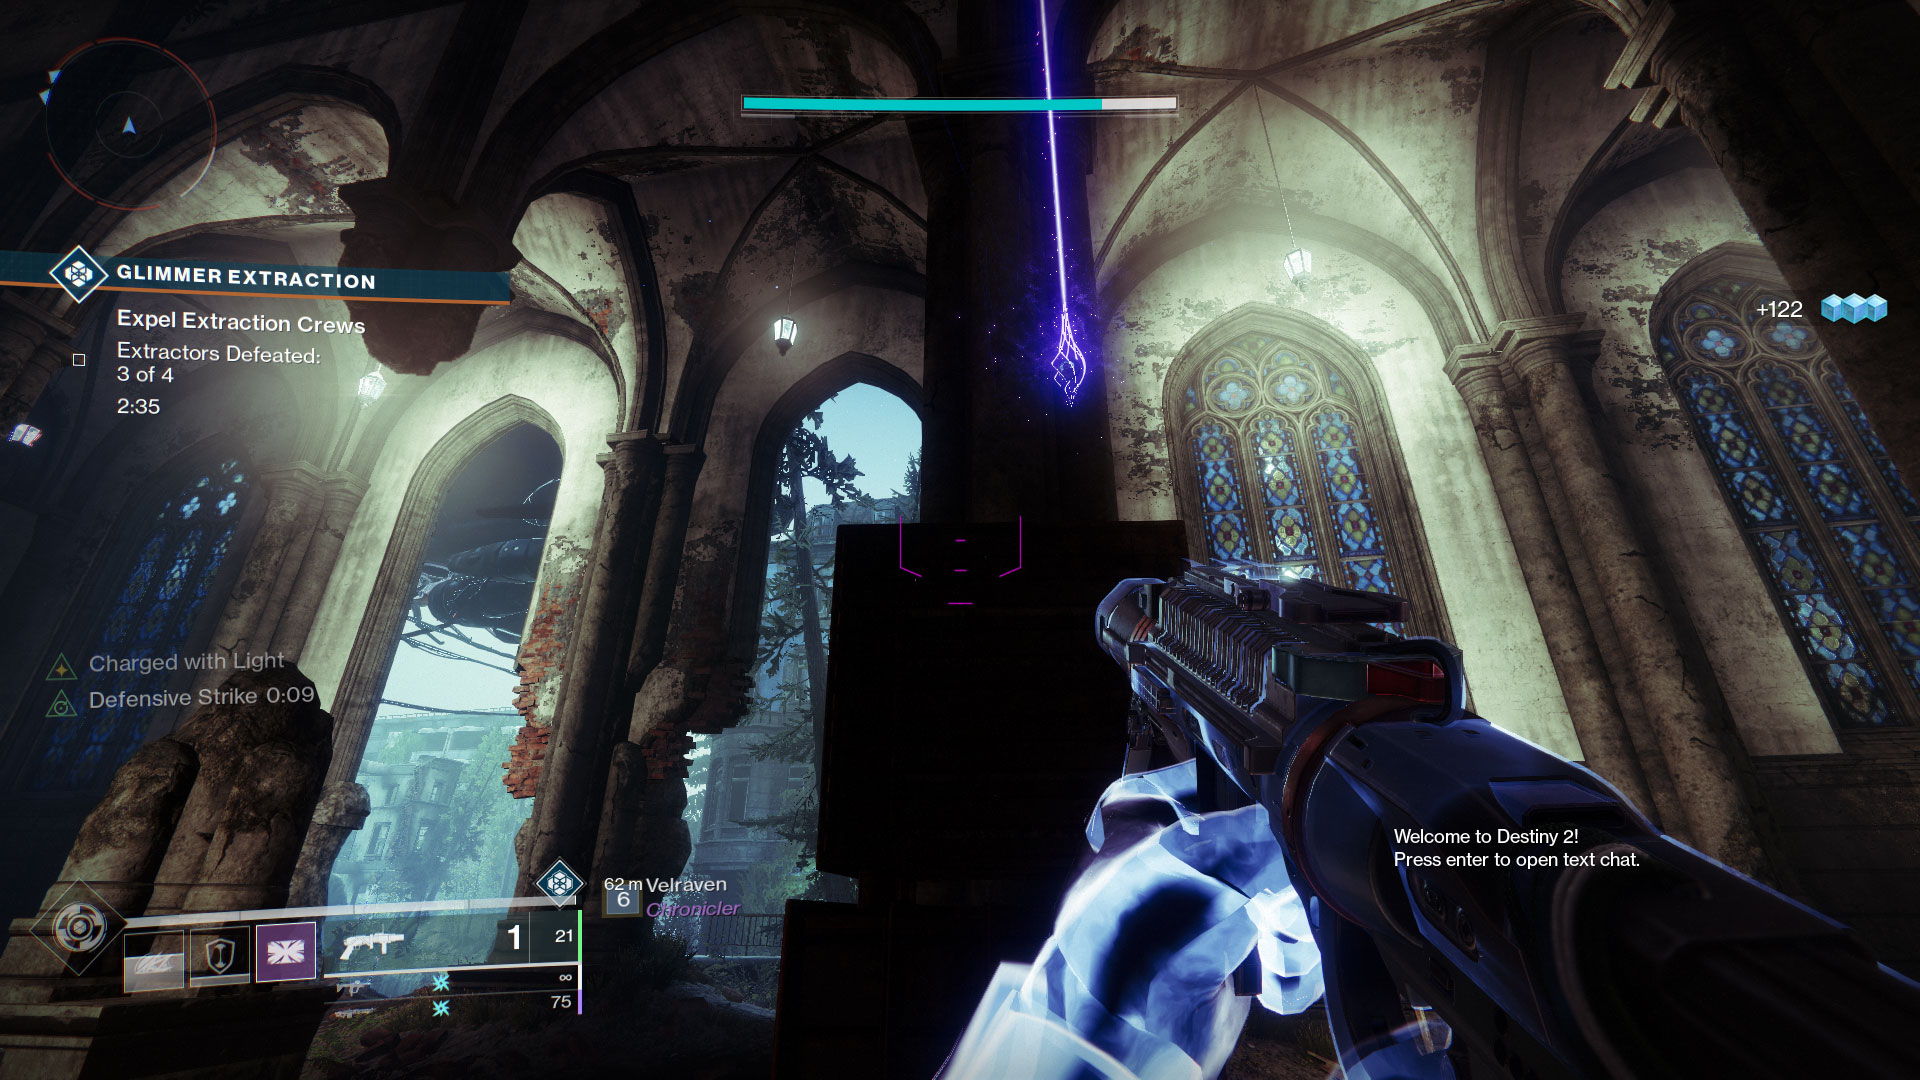
- #5: Go inside the chapel at the center of Trostland and the anchor will be on top of some crates in the center of the building.


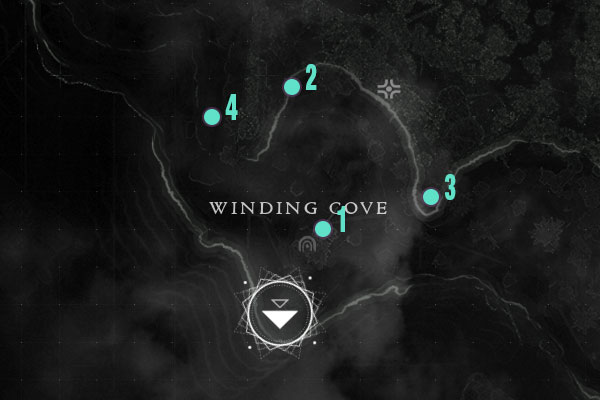
Winding Cove
- #1: After zoning in at the Winding Cove transmat point, this anchor is on stop of the craggy stones just North of The Weep’s lost sector entrance.
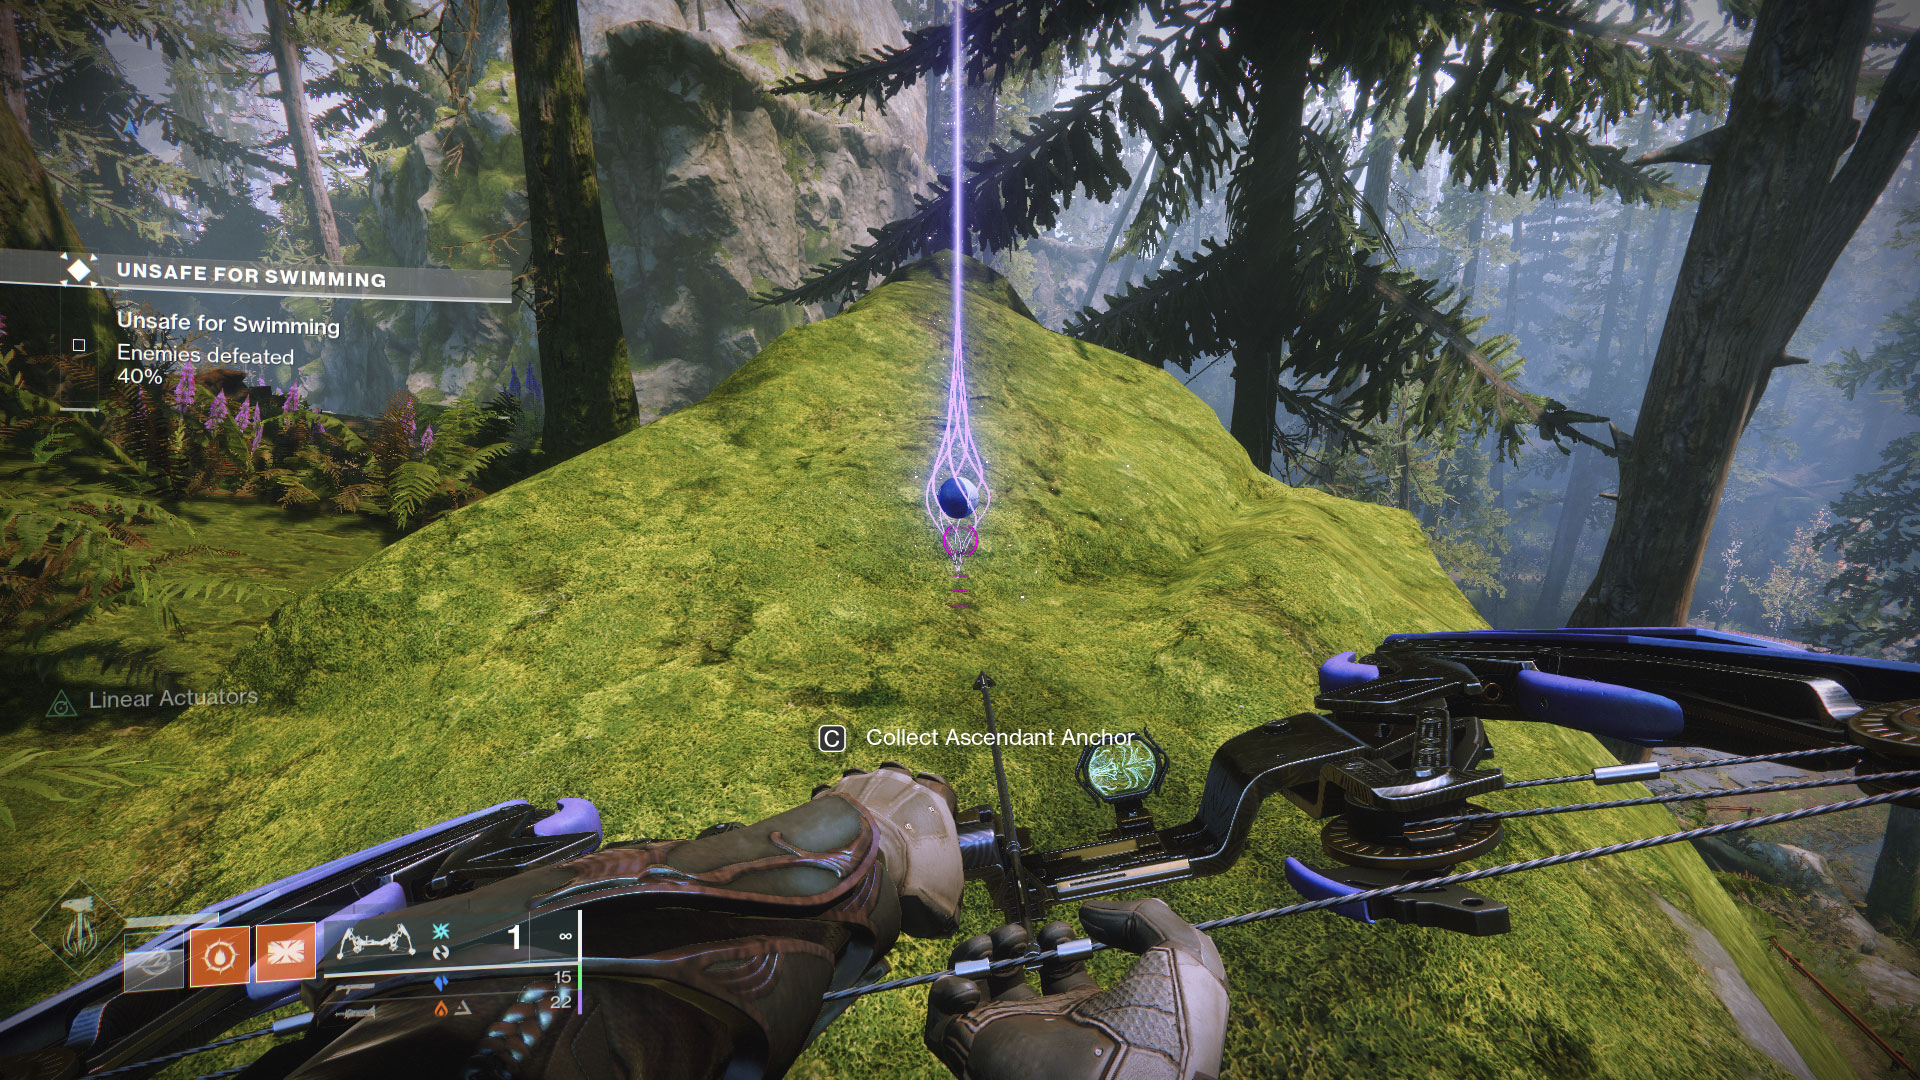
- #2: Head to the NW corner of the Winding Cove and take the road that loops around that back wall. The Ascendant Anchor will be on the cliff up and to the left that overlooks like road. Another way to visualize it is that it’s on the opposite side of the ship from where Xur spawns when he’s in the EDZ.
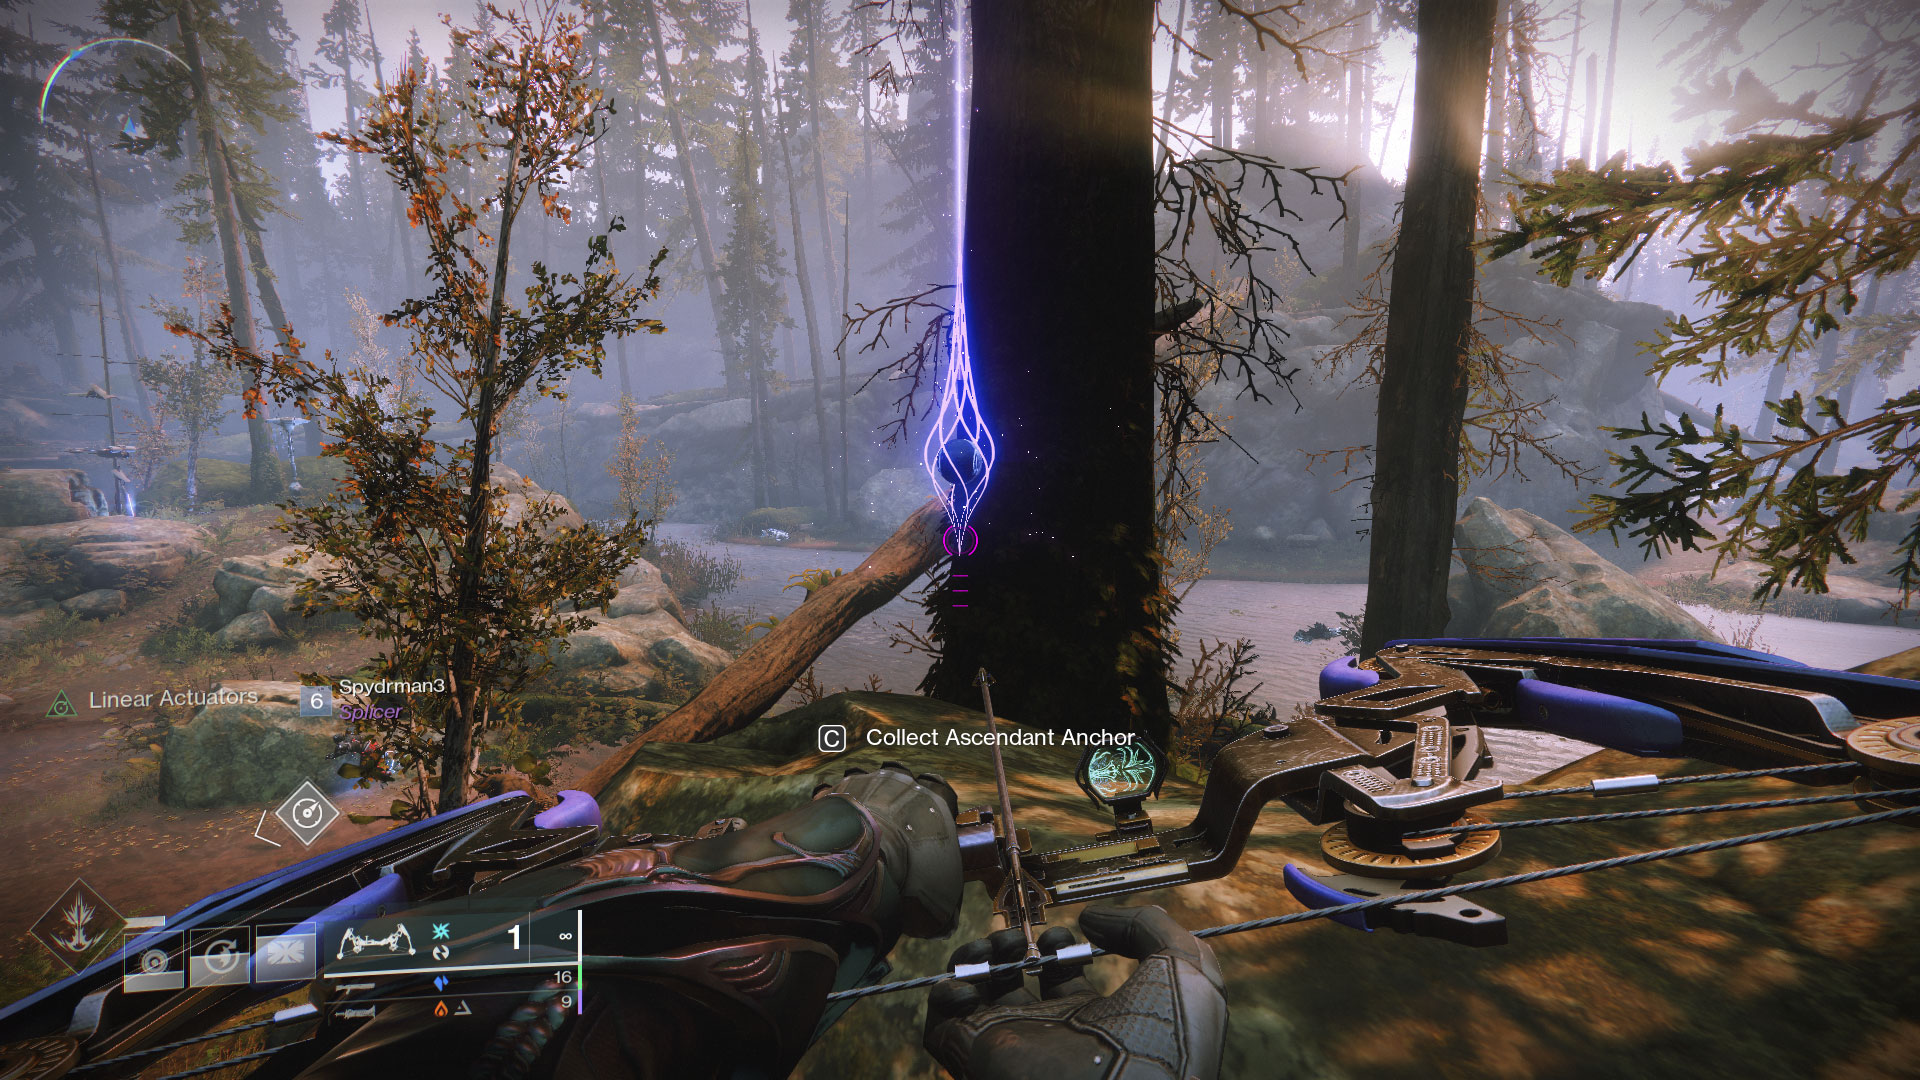
- #3: The eastern road out of the Winding Cove forks with one road leading down and the other up. Take the left road that goes up and once you’re at the top, look to your right and the anchor will be on top of a stone that overlooks the way to The Outskirts.
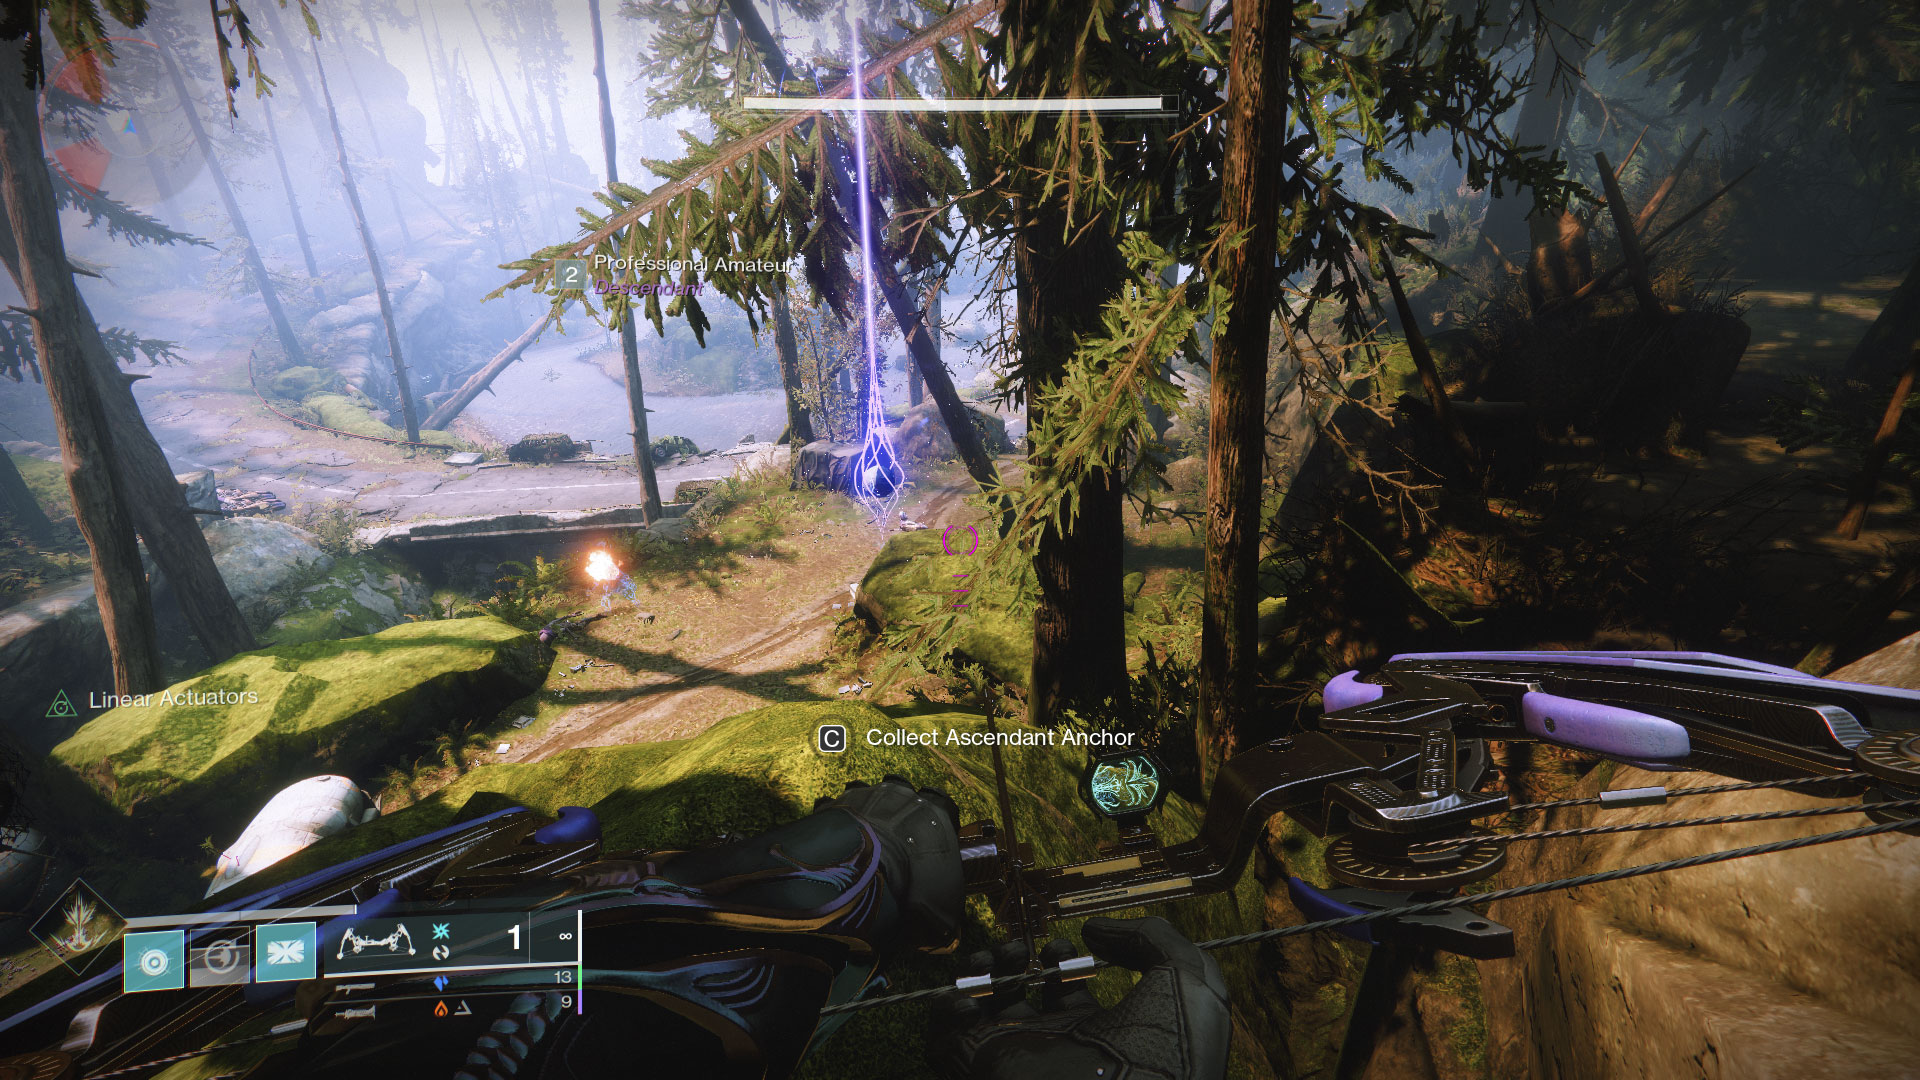
- #4: The last anchor in this zone is on a cliff that overlooks the Northwest road that goes towards Firebase Hades just outside of the main zone. Ride your sparrow over here, hop off, jump on top of the cliff, and back track towards the Winding Cove. The anchor will be on your left.

The Gulch
- #1: As soon as you teleport in, the anchor will be directly in front of you.
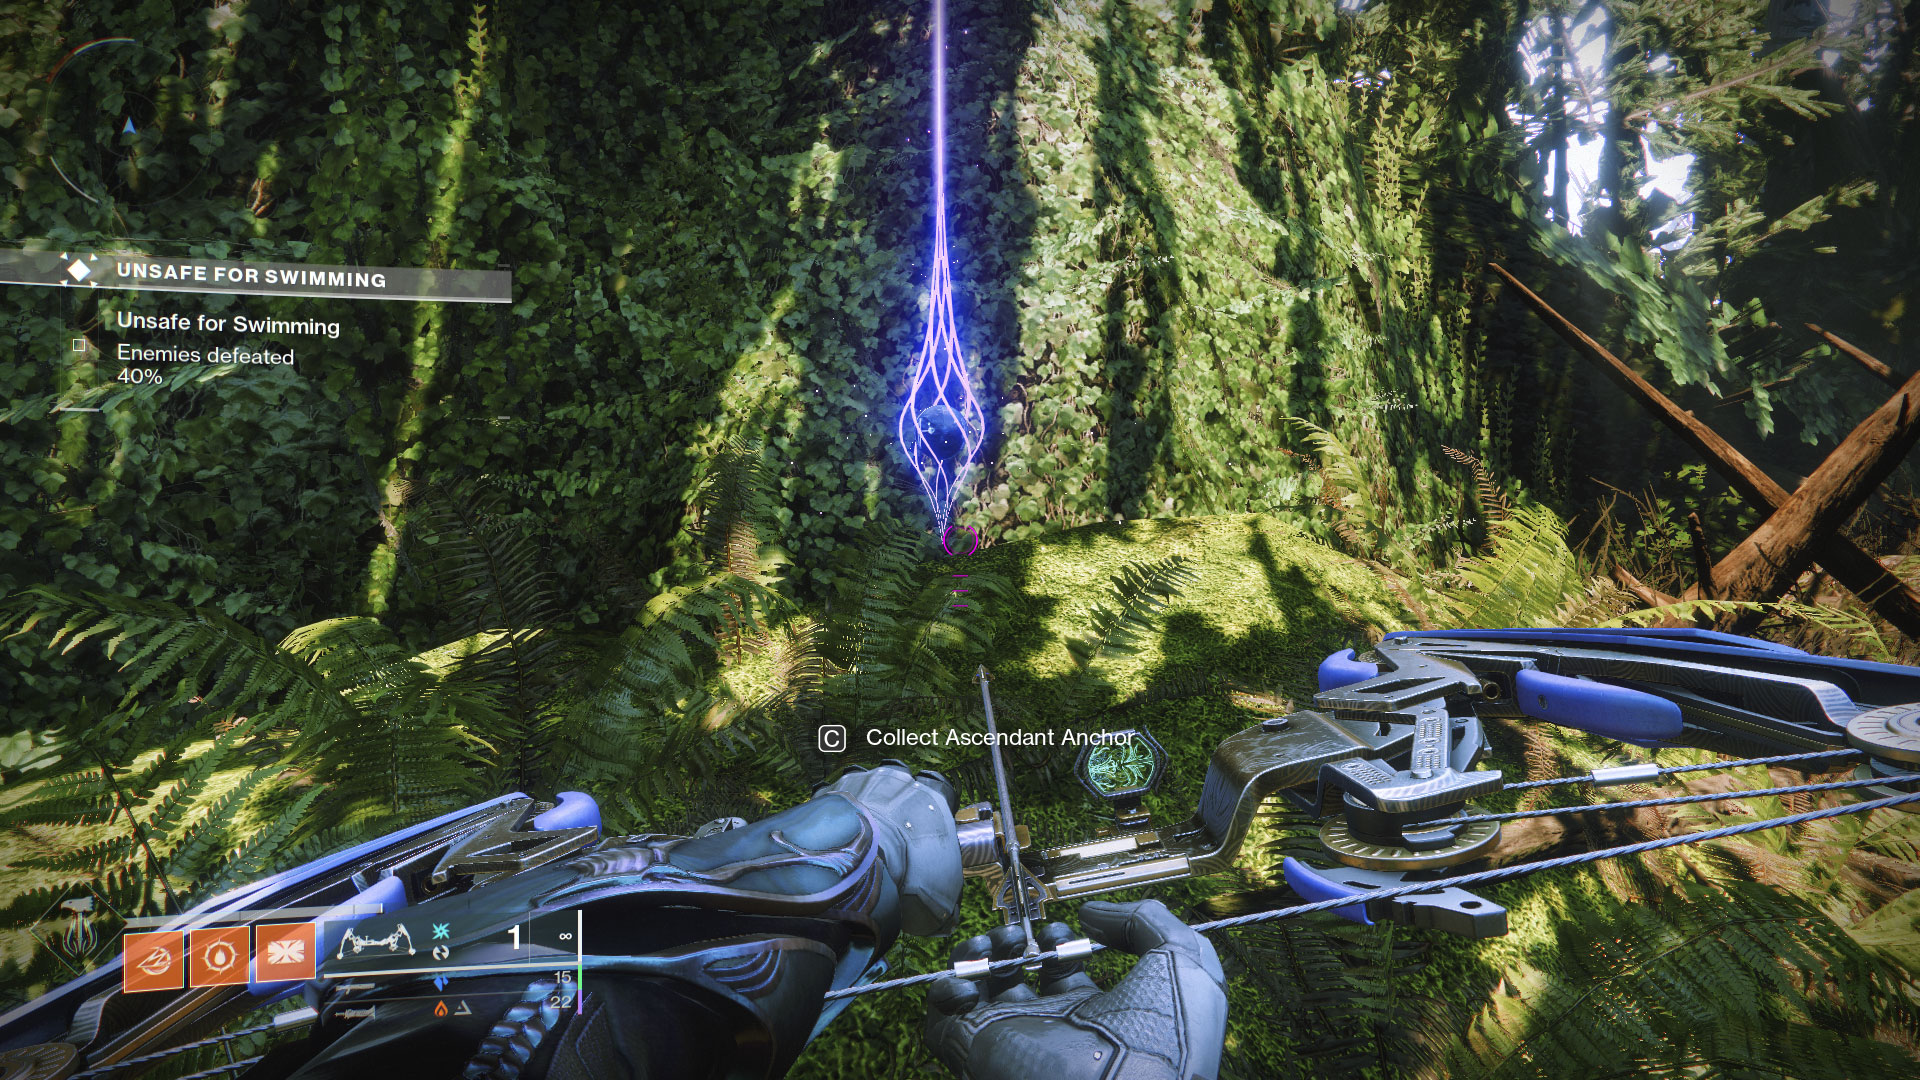
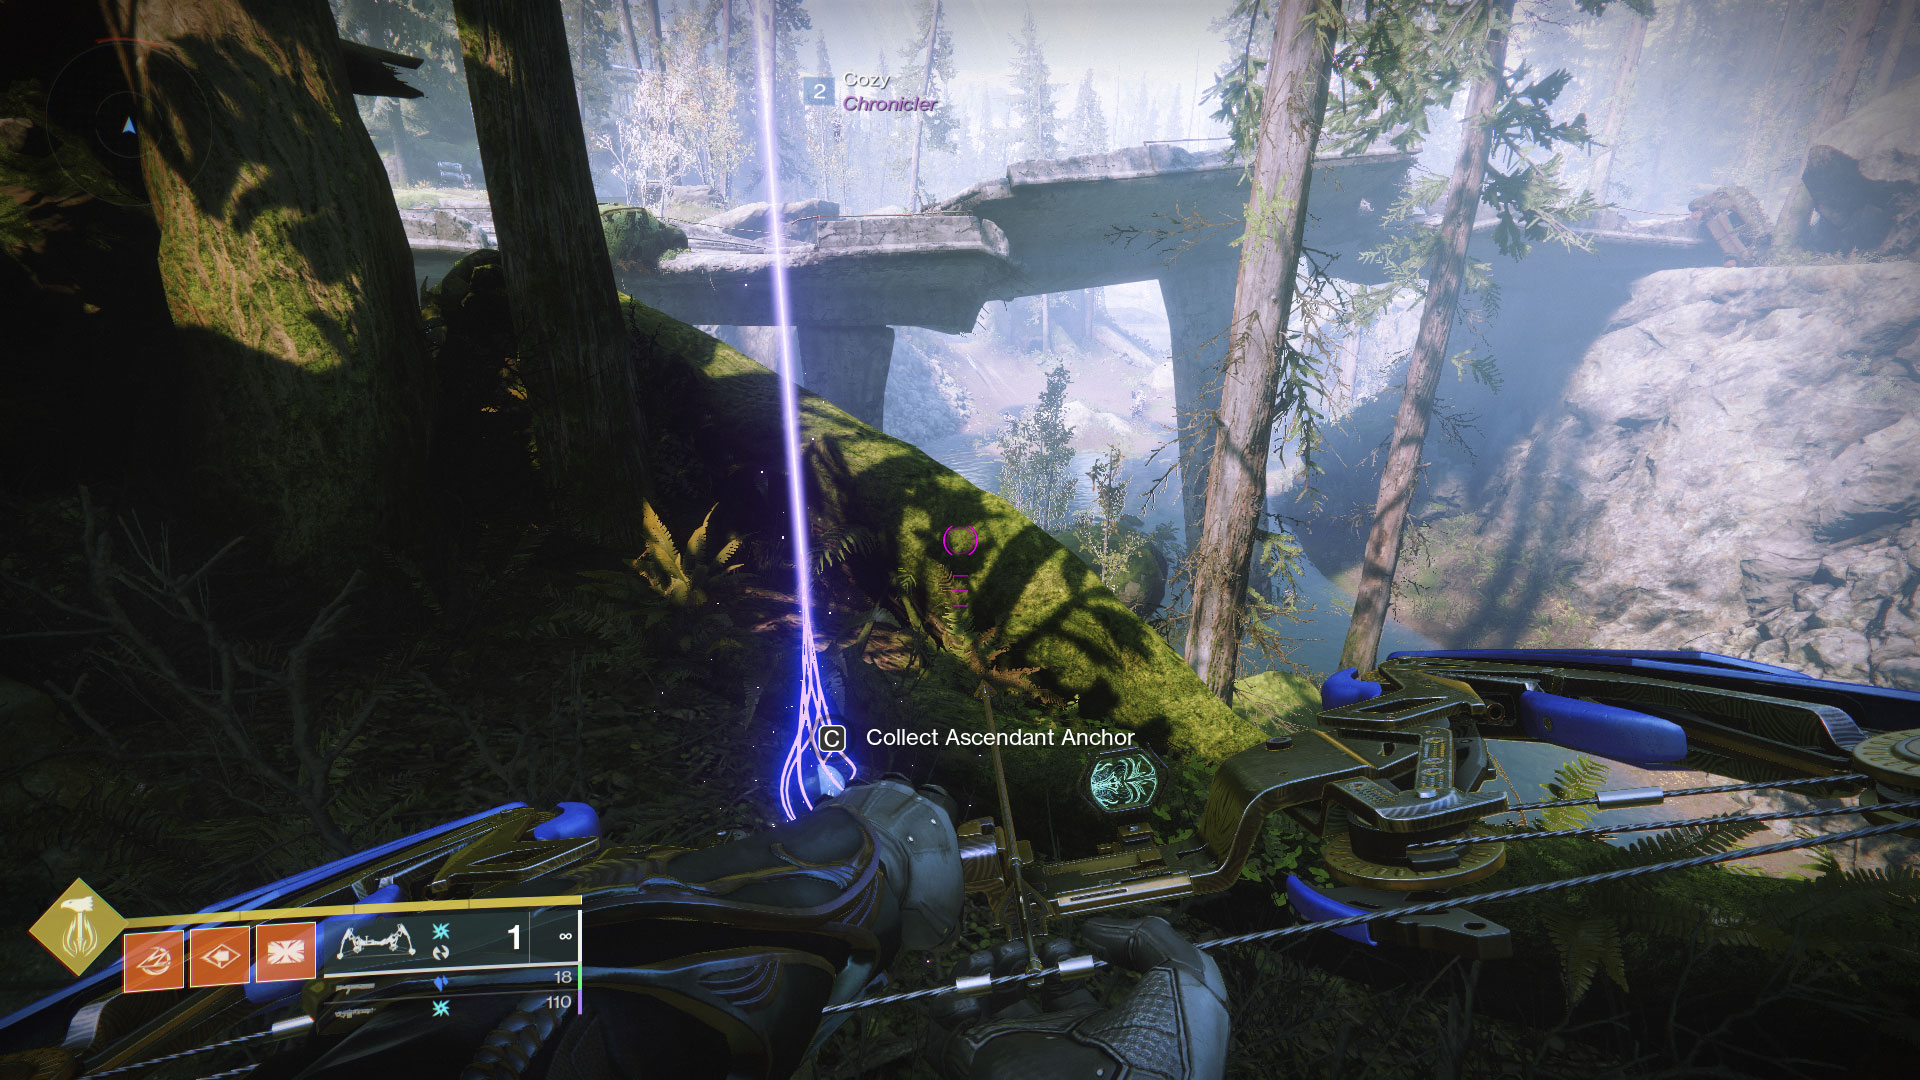
- #2: From the transmat point, follow the road that leads down and veers left and turns into a broken bridge. Once you reach the overhead sign and abandoned truck on the right side of the road, stay to the right and hop over the radio equipment there. The beacon for the anchor is right behind some fallen trees.
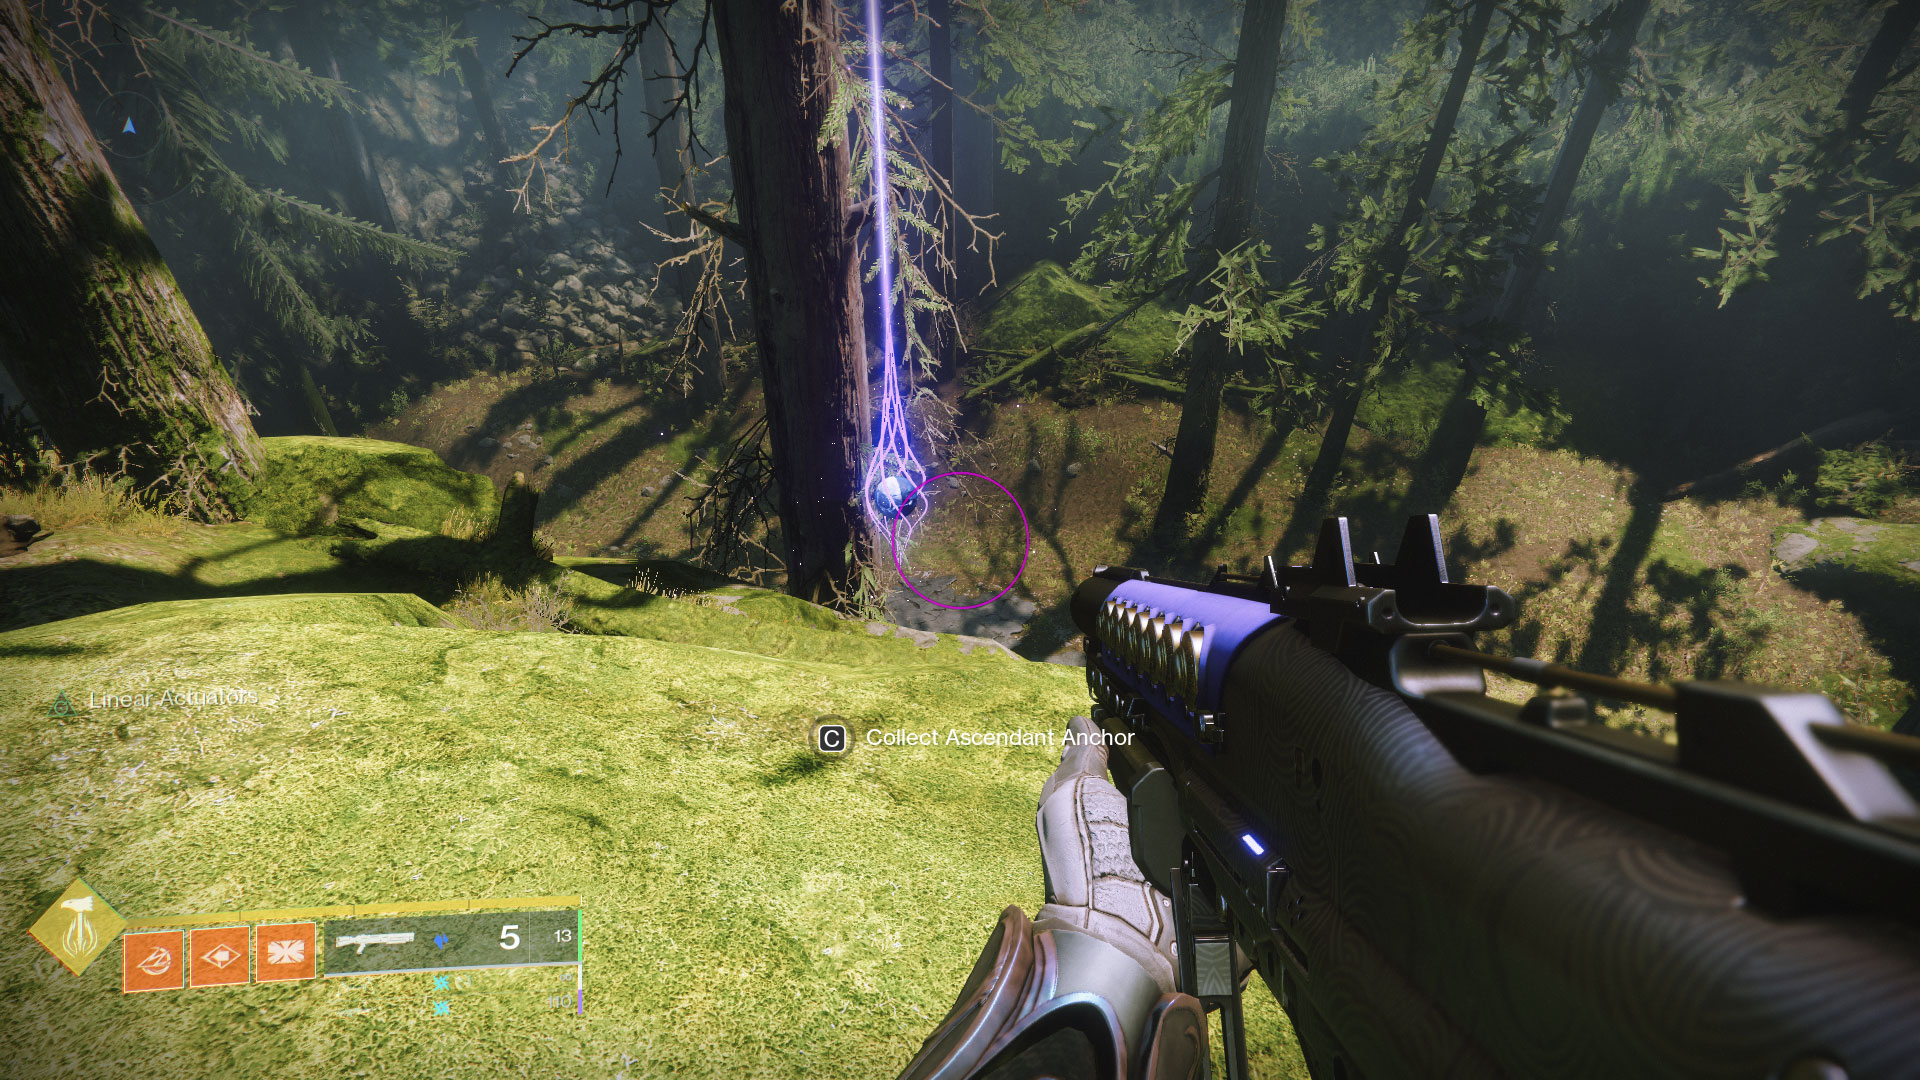
- #3: Go back to the broken bright and keep following that down toward the main area of the Gulch. Once you reach an abandoned car overgrown by plant life next to some large stones. Hop on top of those stones and follow the road up. The beacon should be clearly visible now up and to your left.
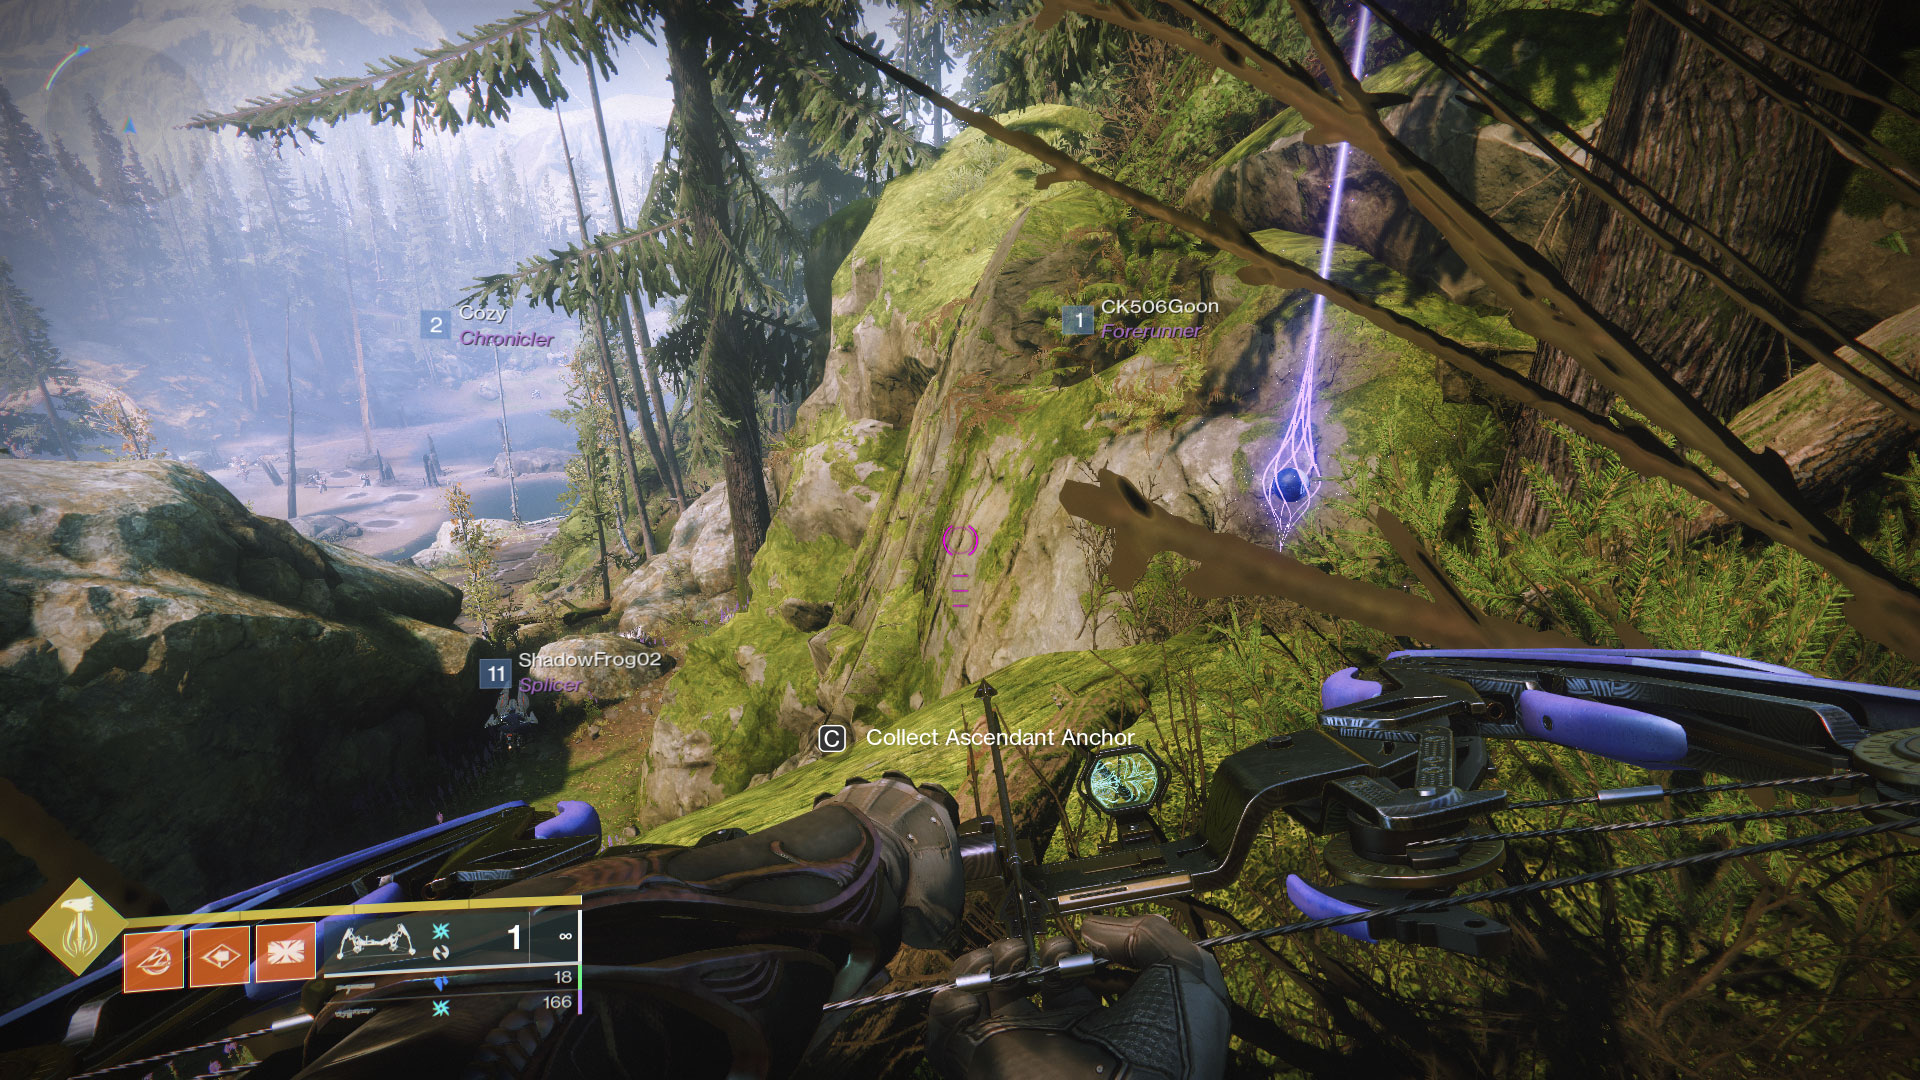
- #4: There’s a cave in the Northwest corner of the zone where Cabal will continuously spawn from. Heads towards this cave and on top of the entrance is a path that leads up. Follow this path up and the anchor will be at the end of it overlooking the zone.
- #5: (Not in video) Take the Northern road that goes towards the Sludge and stop as it starts to veer to the right. Look up and to your right towards the abandoned facility there. The anchor will be on an outcropping of stones that overlooks the road.
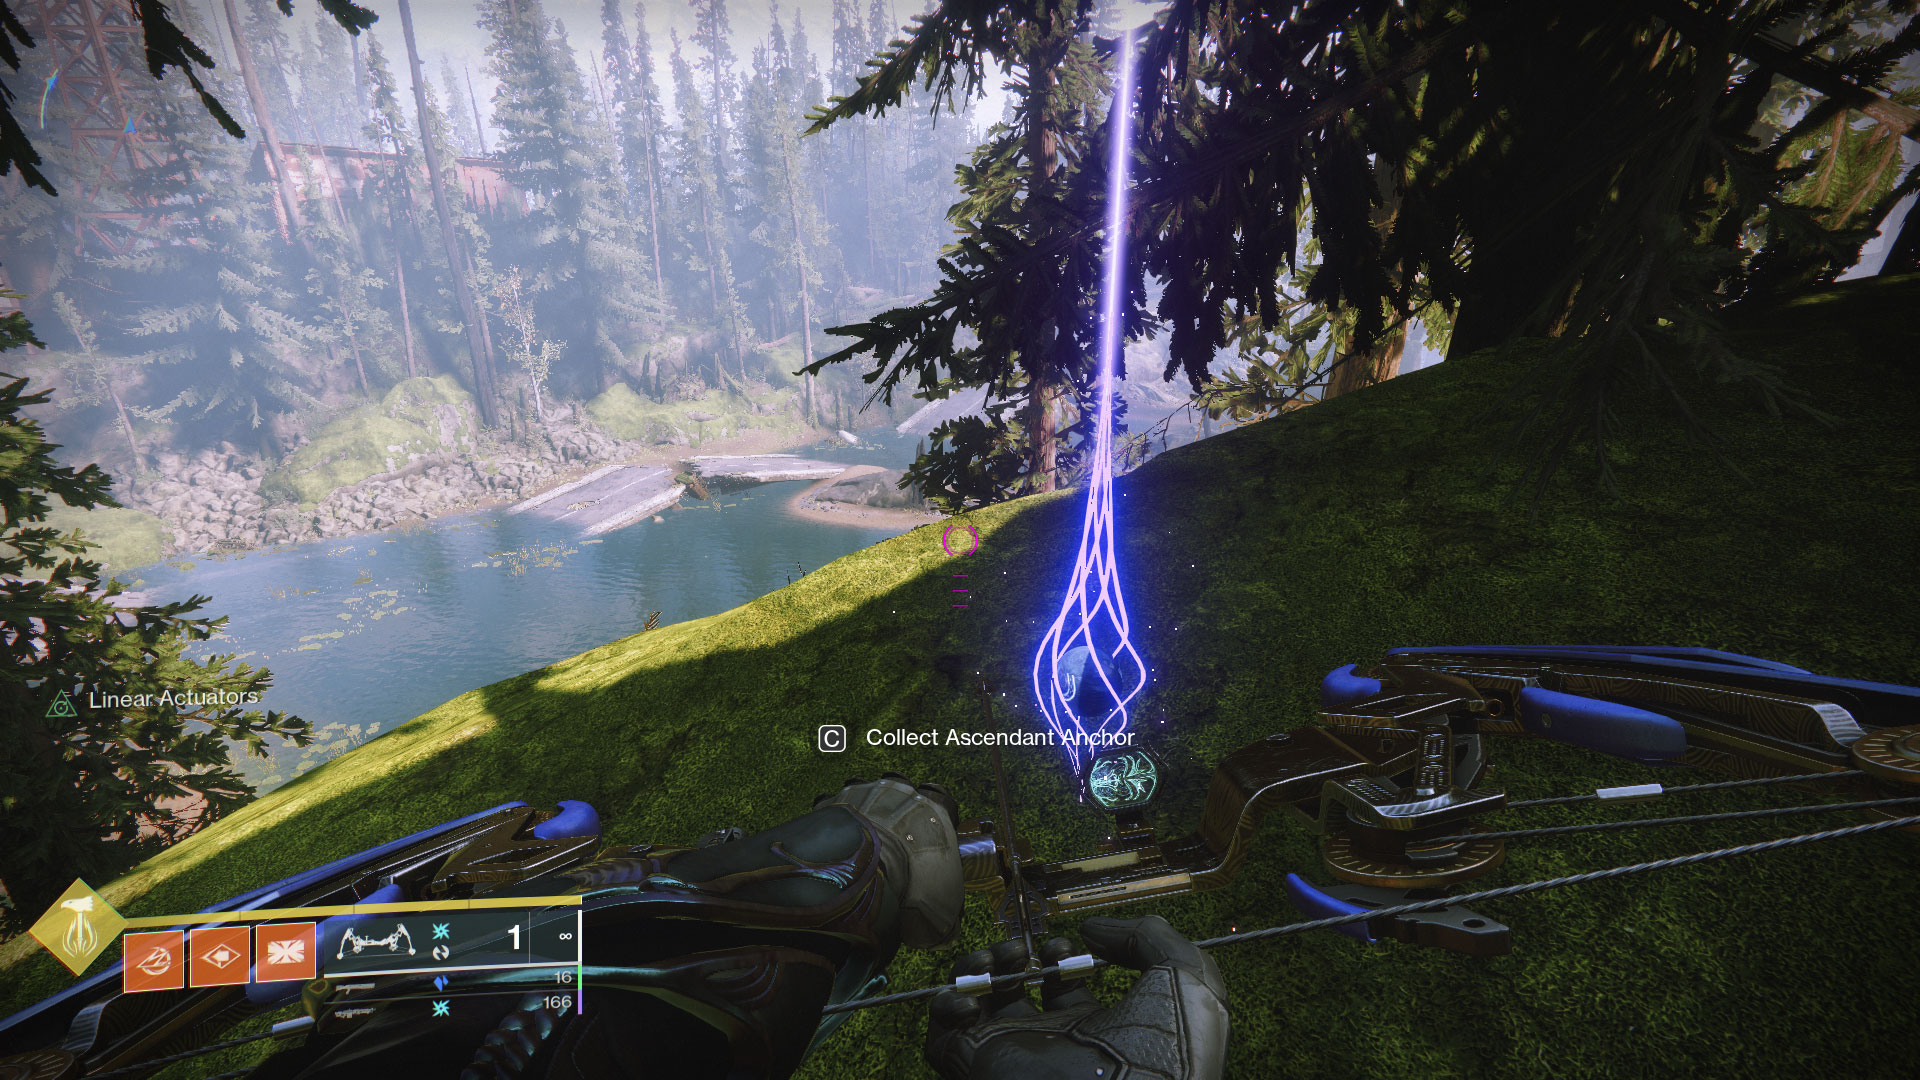

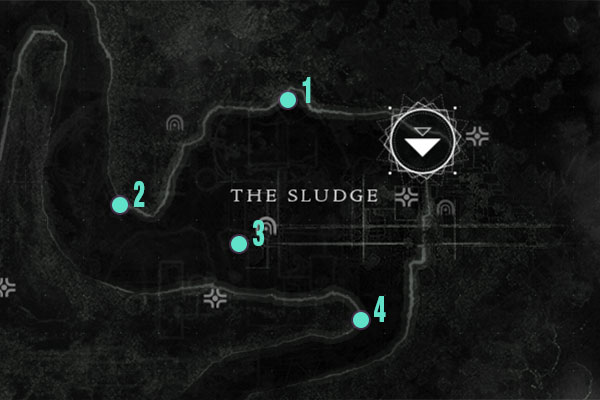
The Sludge
- #1: After teleporting to The Sludge, go straight ahead and take a right on the path that leads to where the Shard of the Traveler is located. The anchor will be on the left side of this path.
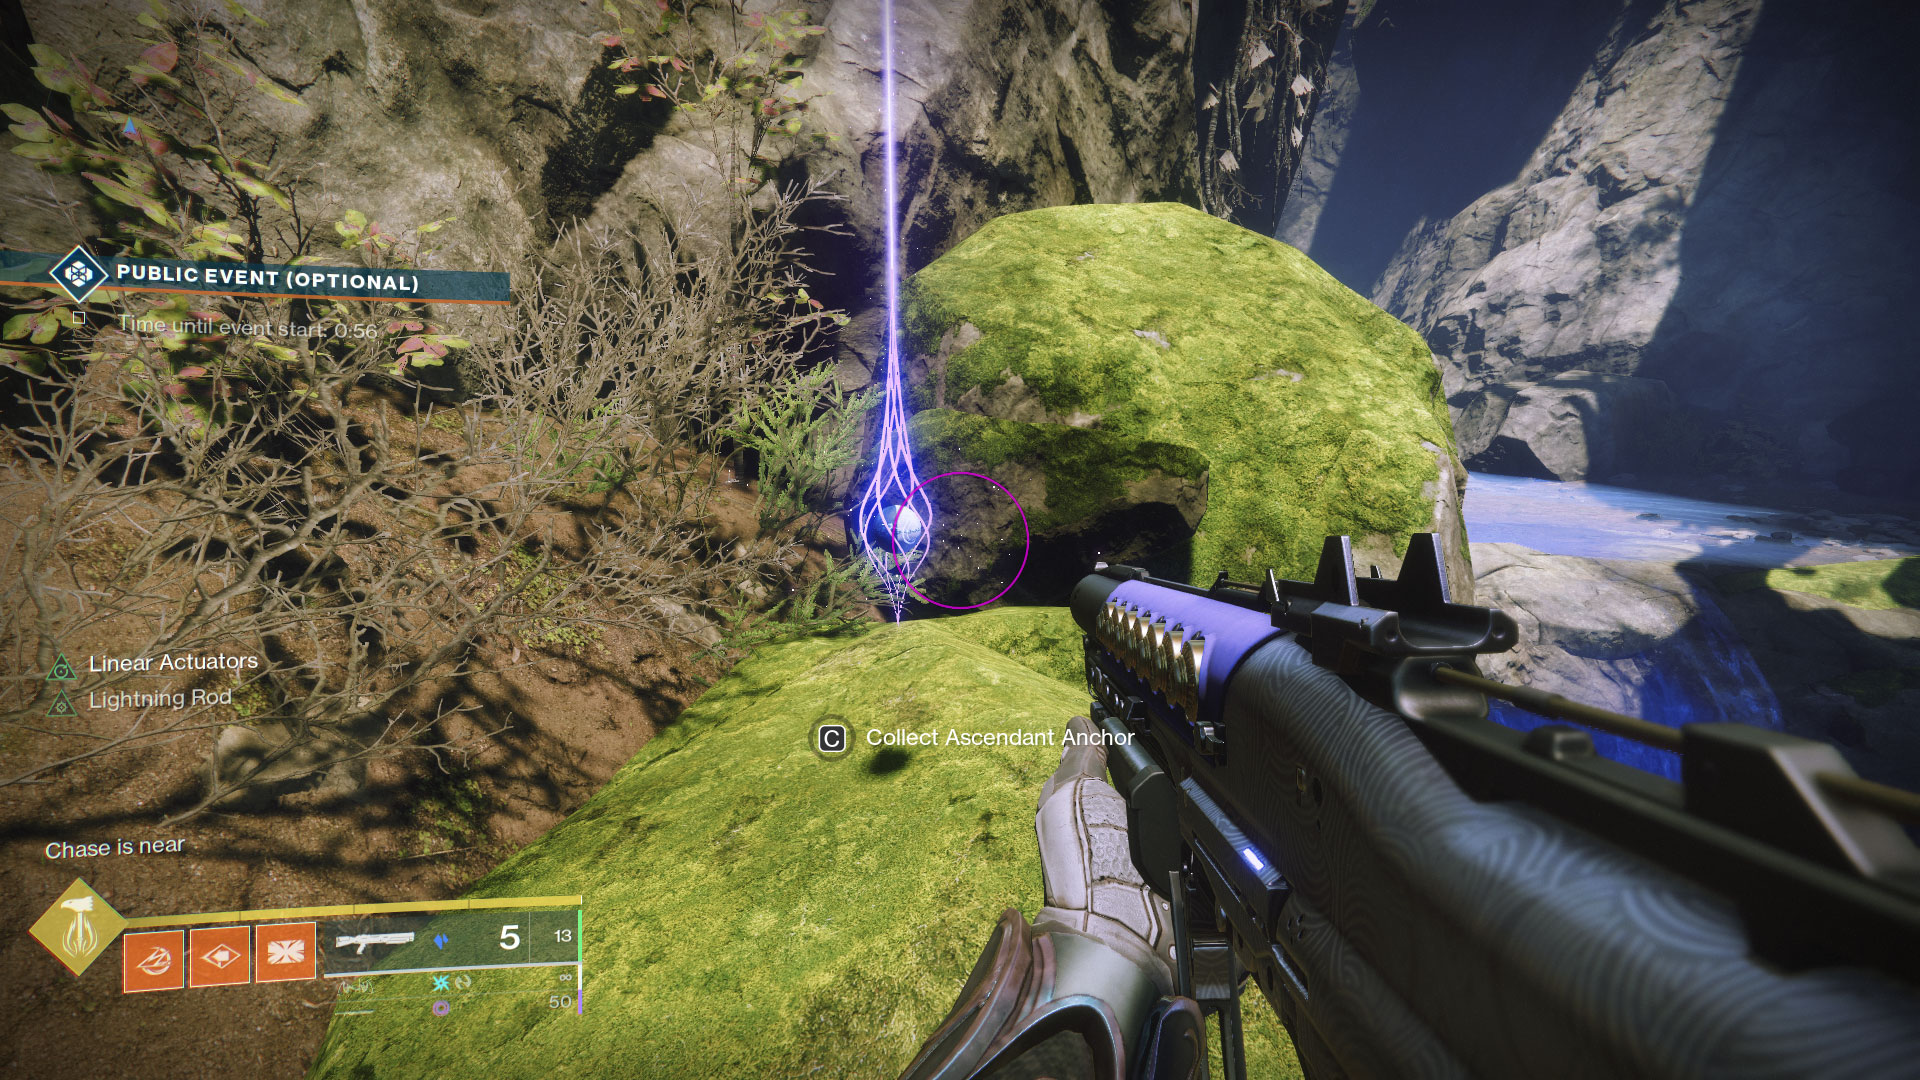
- #2: Ride your sparrow to the Western road that leads out of the zone and the anchor will be on on top of some boulders on the right side of the road.
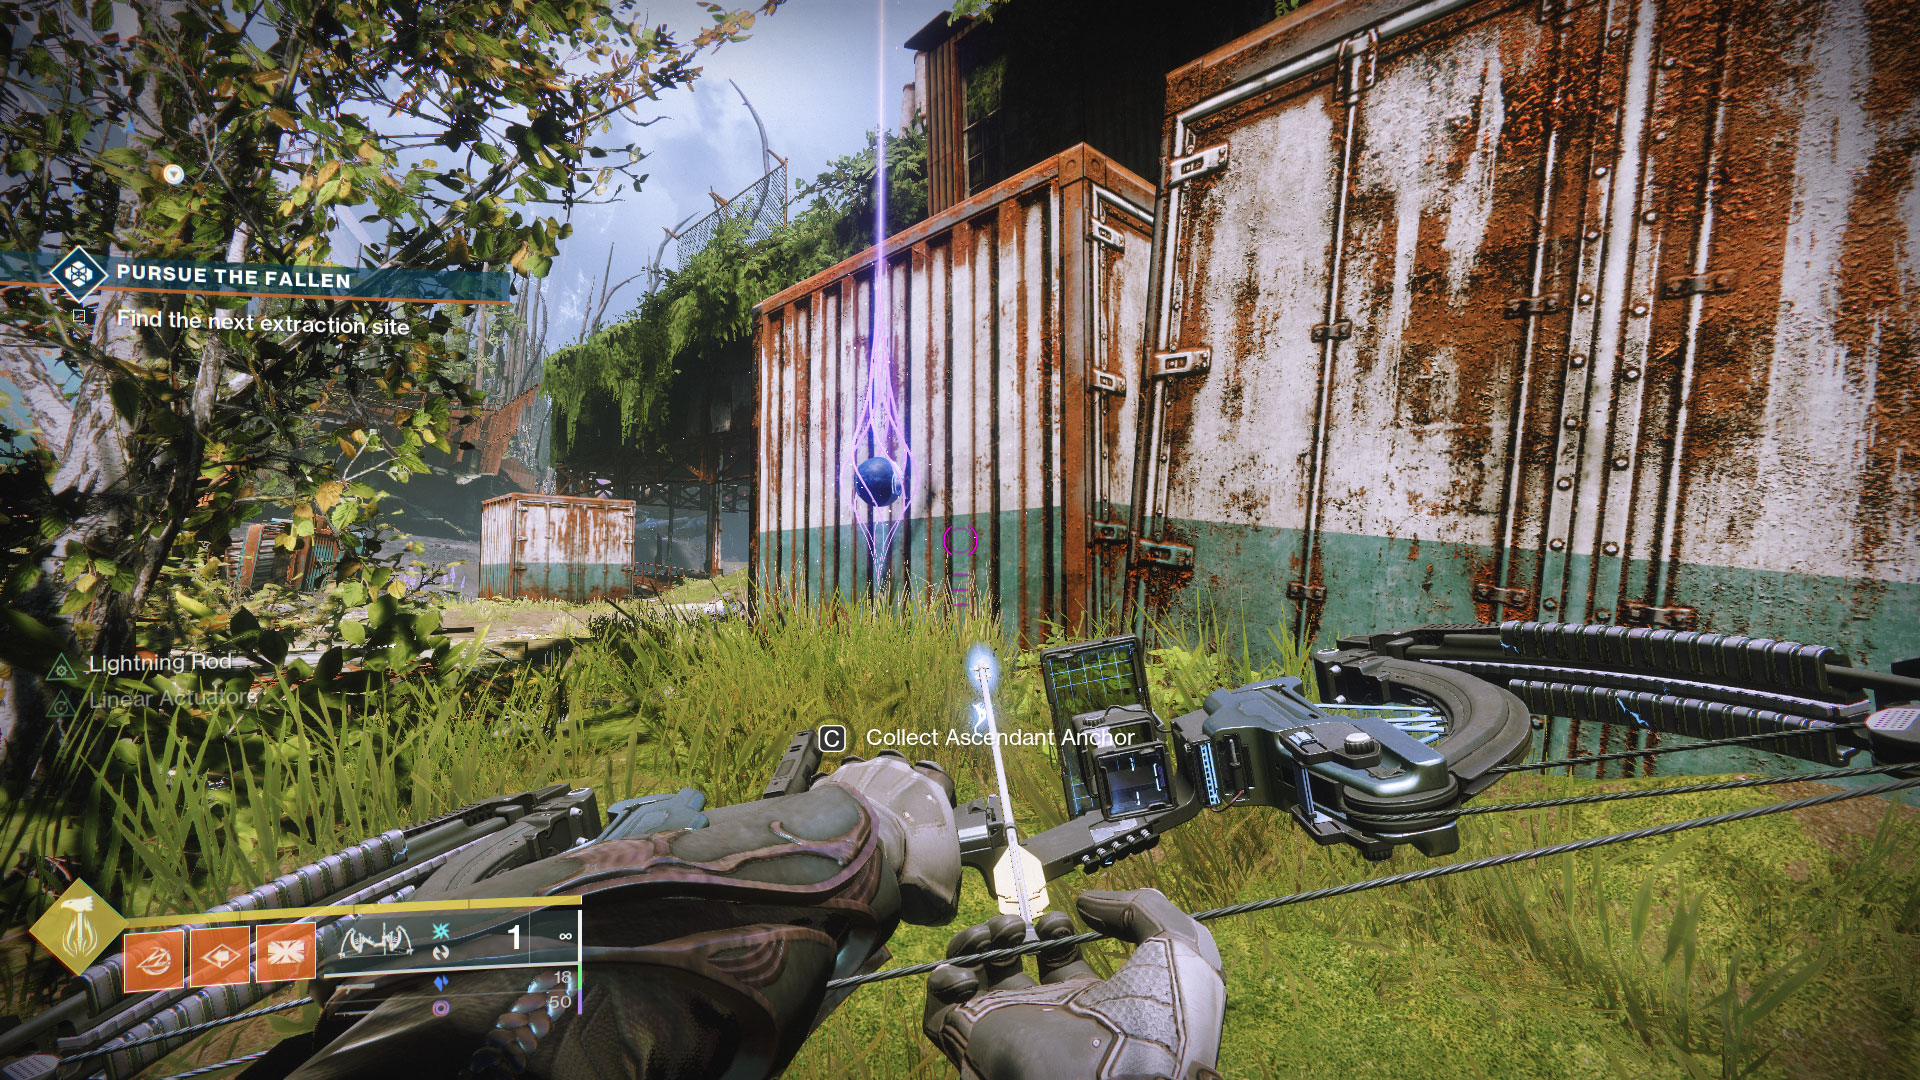
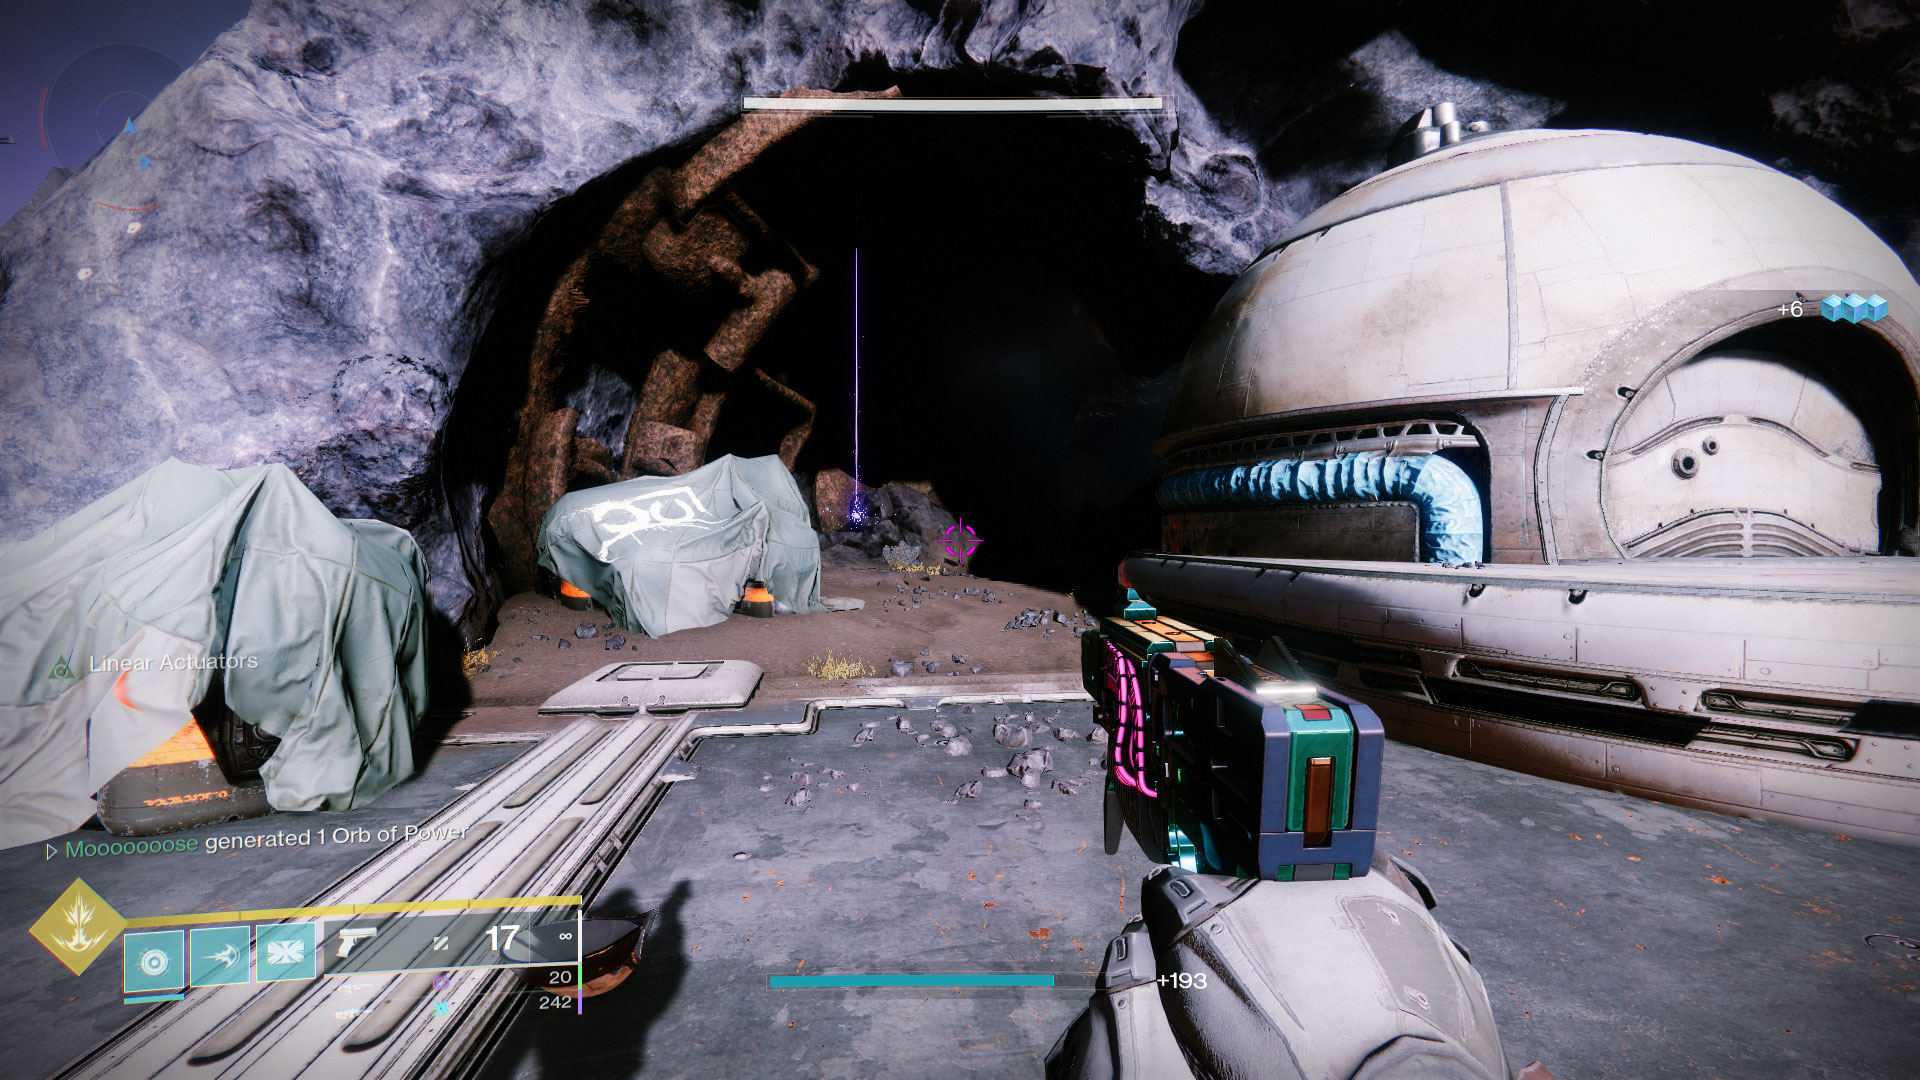
- #3: This anchor is right behind that large rusted cistern that’s next to one of the Glimmer drill public event spawn points.
- #4: Ride your sparrow towards the Southern road that goes towards the Outskirts and the anchor will be behind a tree on the right side of the road.


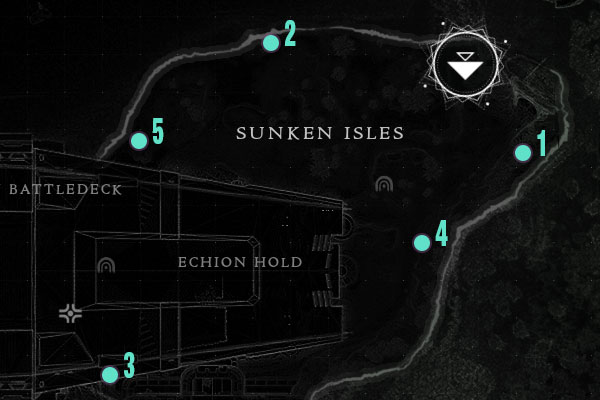
Sunken Isles
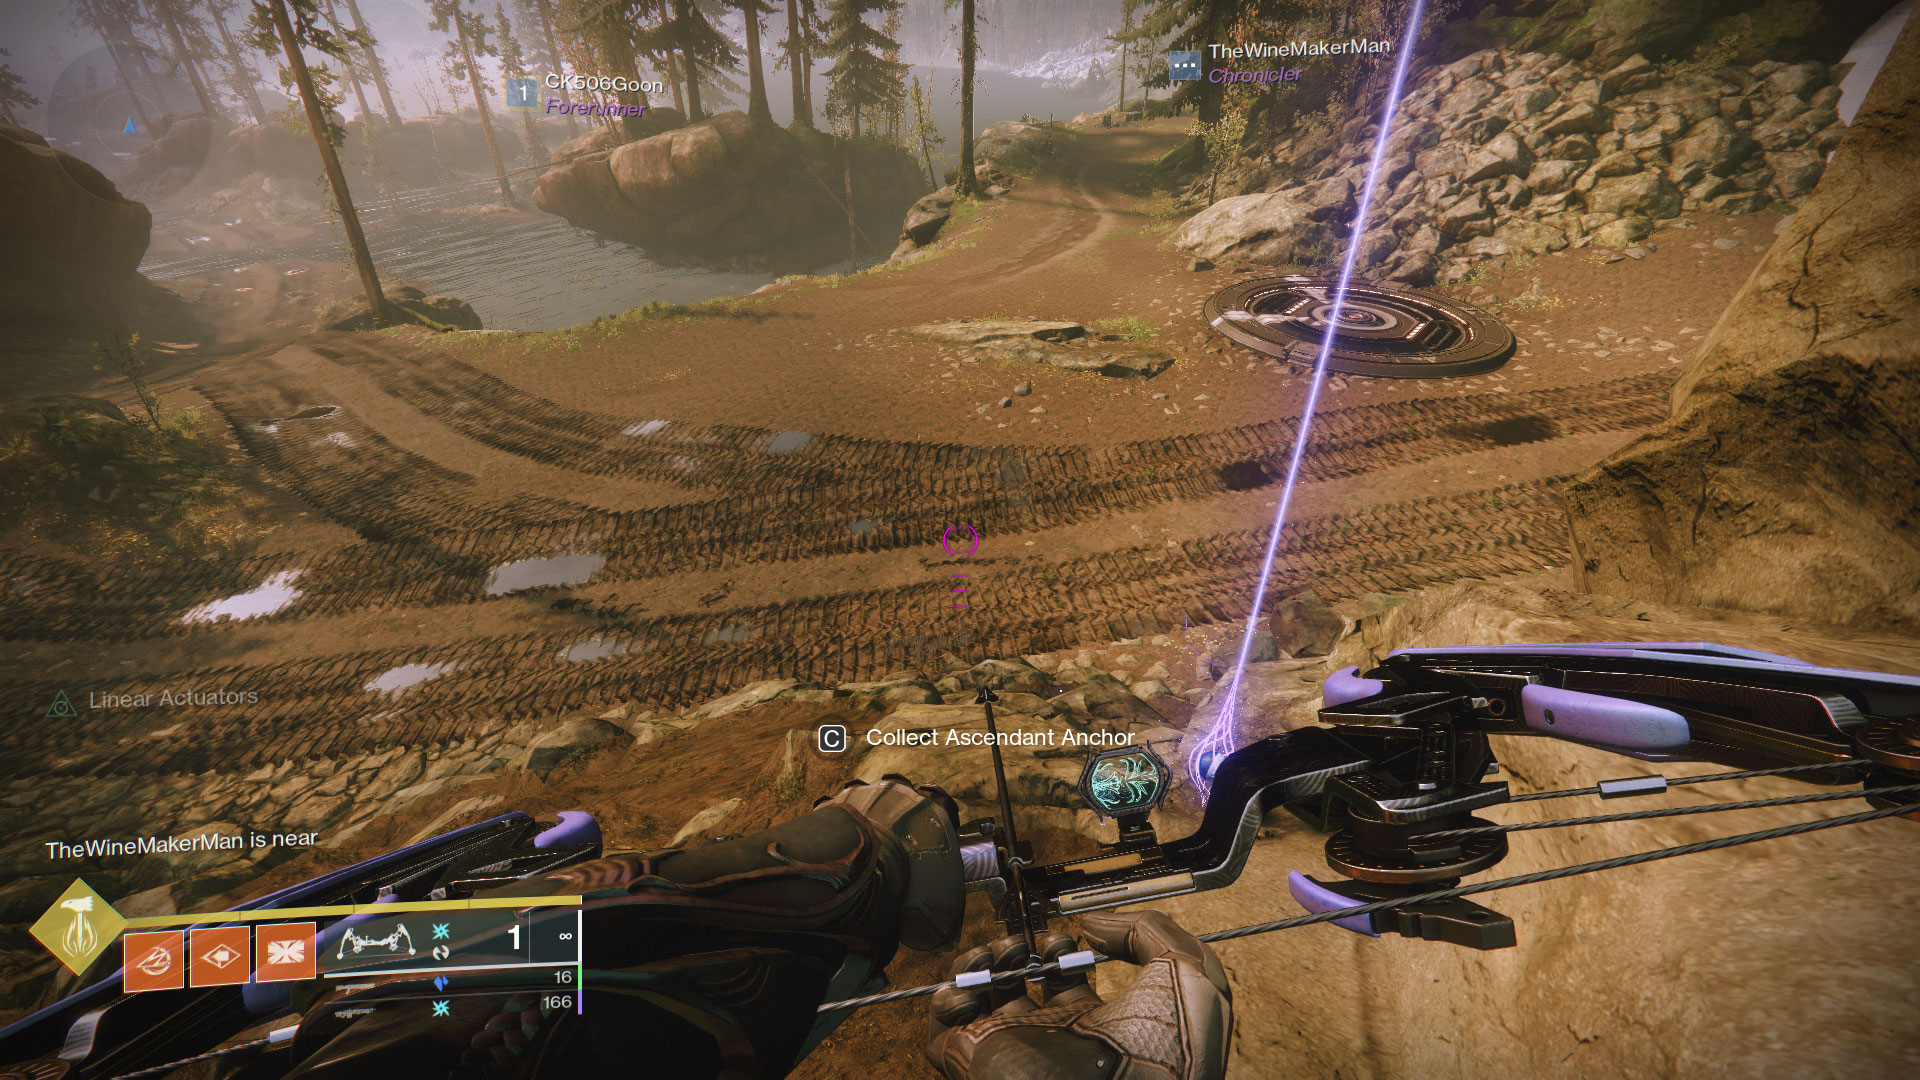
- #1: From the transmat point, go straight ahead. The anchor is on top of some boulders on the other side of the main road into the Sunken Isles.
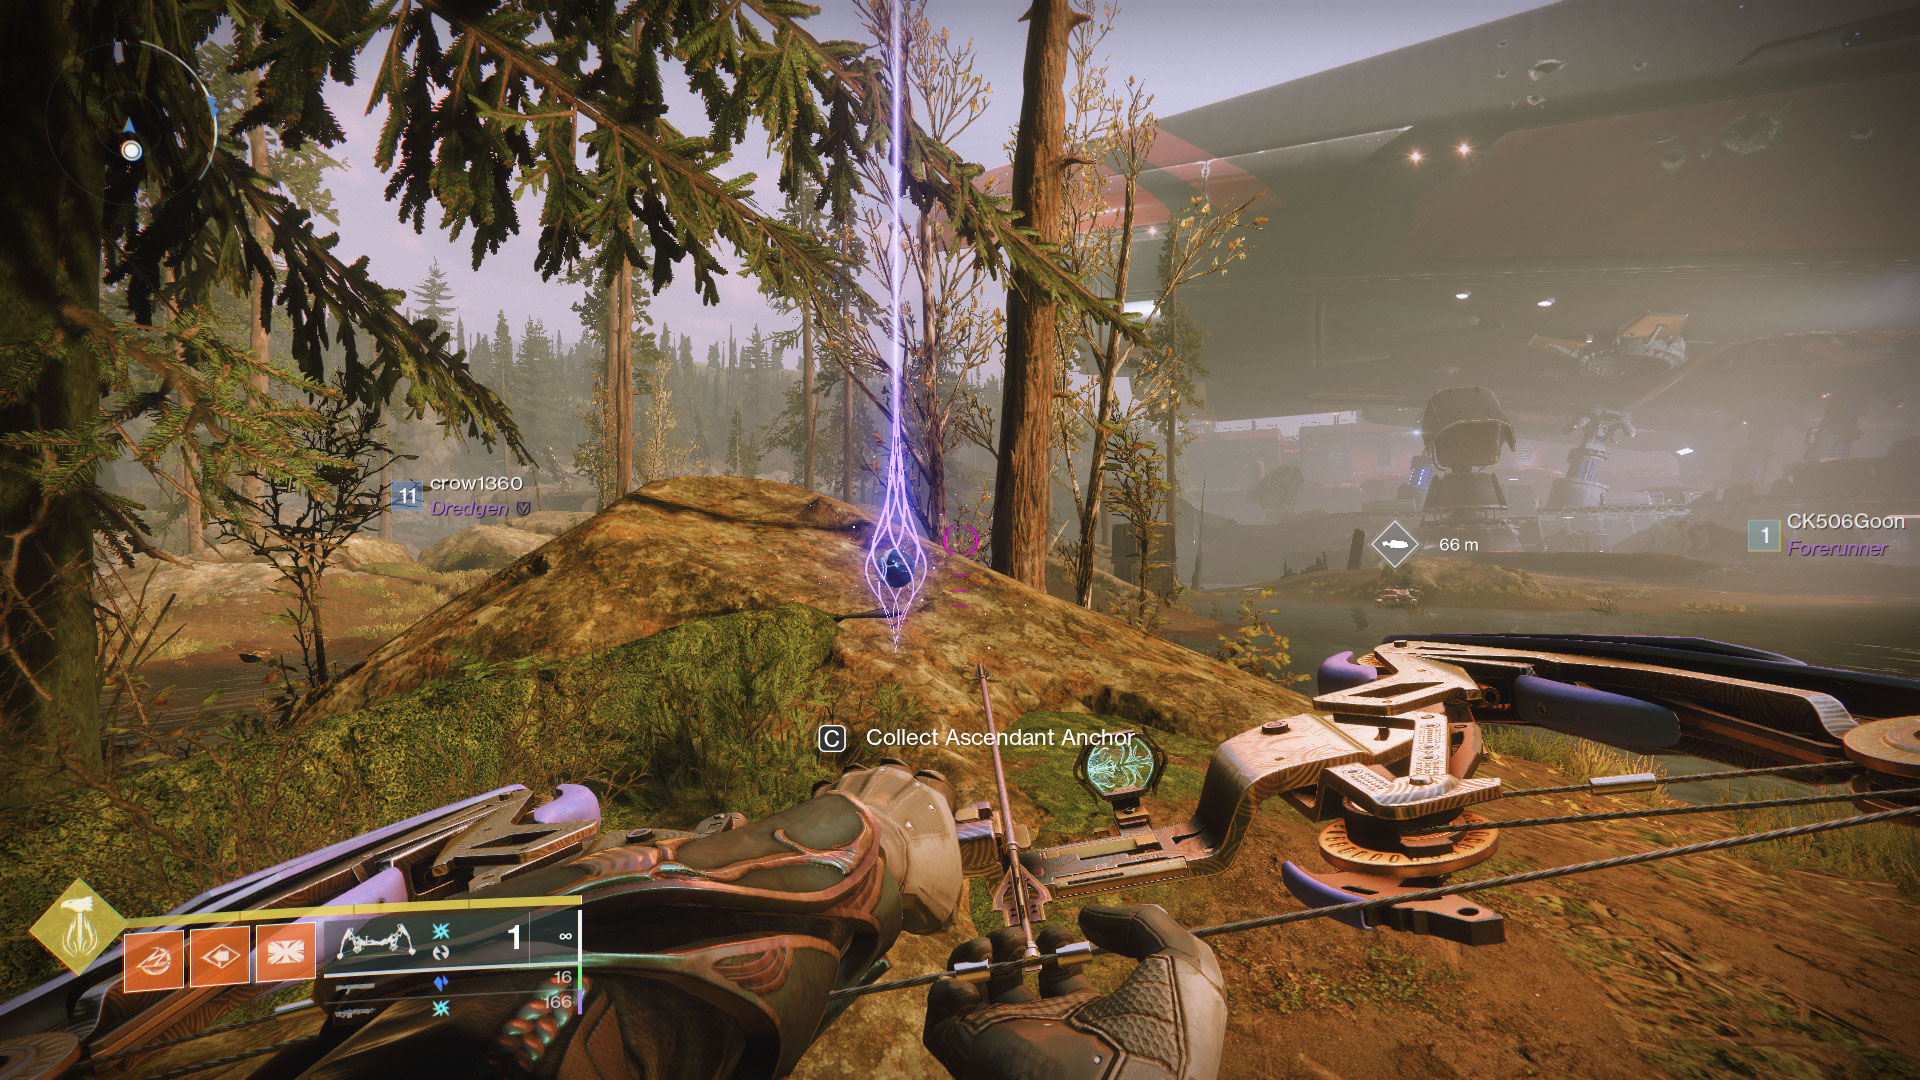
- #2: This Ascendant Anchor is right next to where Randal the Vandal spawns in the Northern section of this zone. Head to where the Fallen Walker and Injection Rig public event spawns and you’ll see the beacon.
- #3: Tucked away in the Southwest part of this zone, you won’t be able to see this anchor unless you’re inside of Echion Hold, the area that goes towards the latter half of the Arms Dealer Strike. Ride your sparrow and look between the Cabal structure to the South and the cliff face to the West.
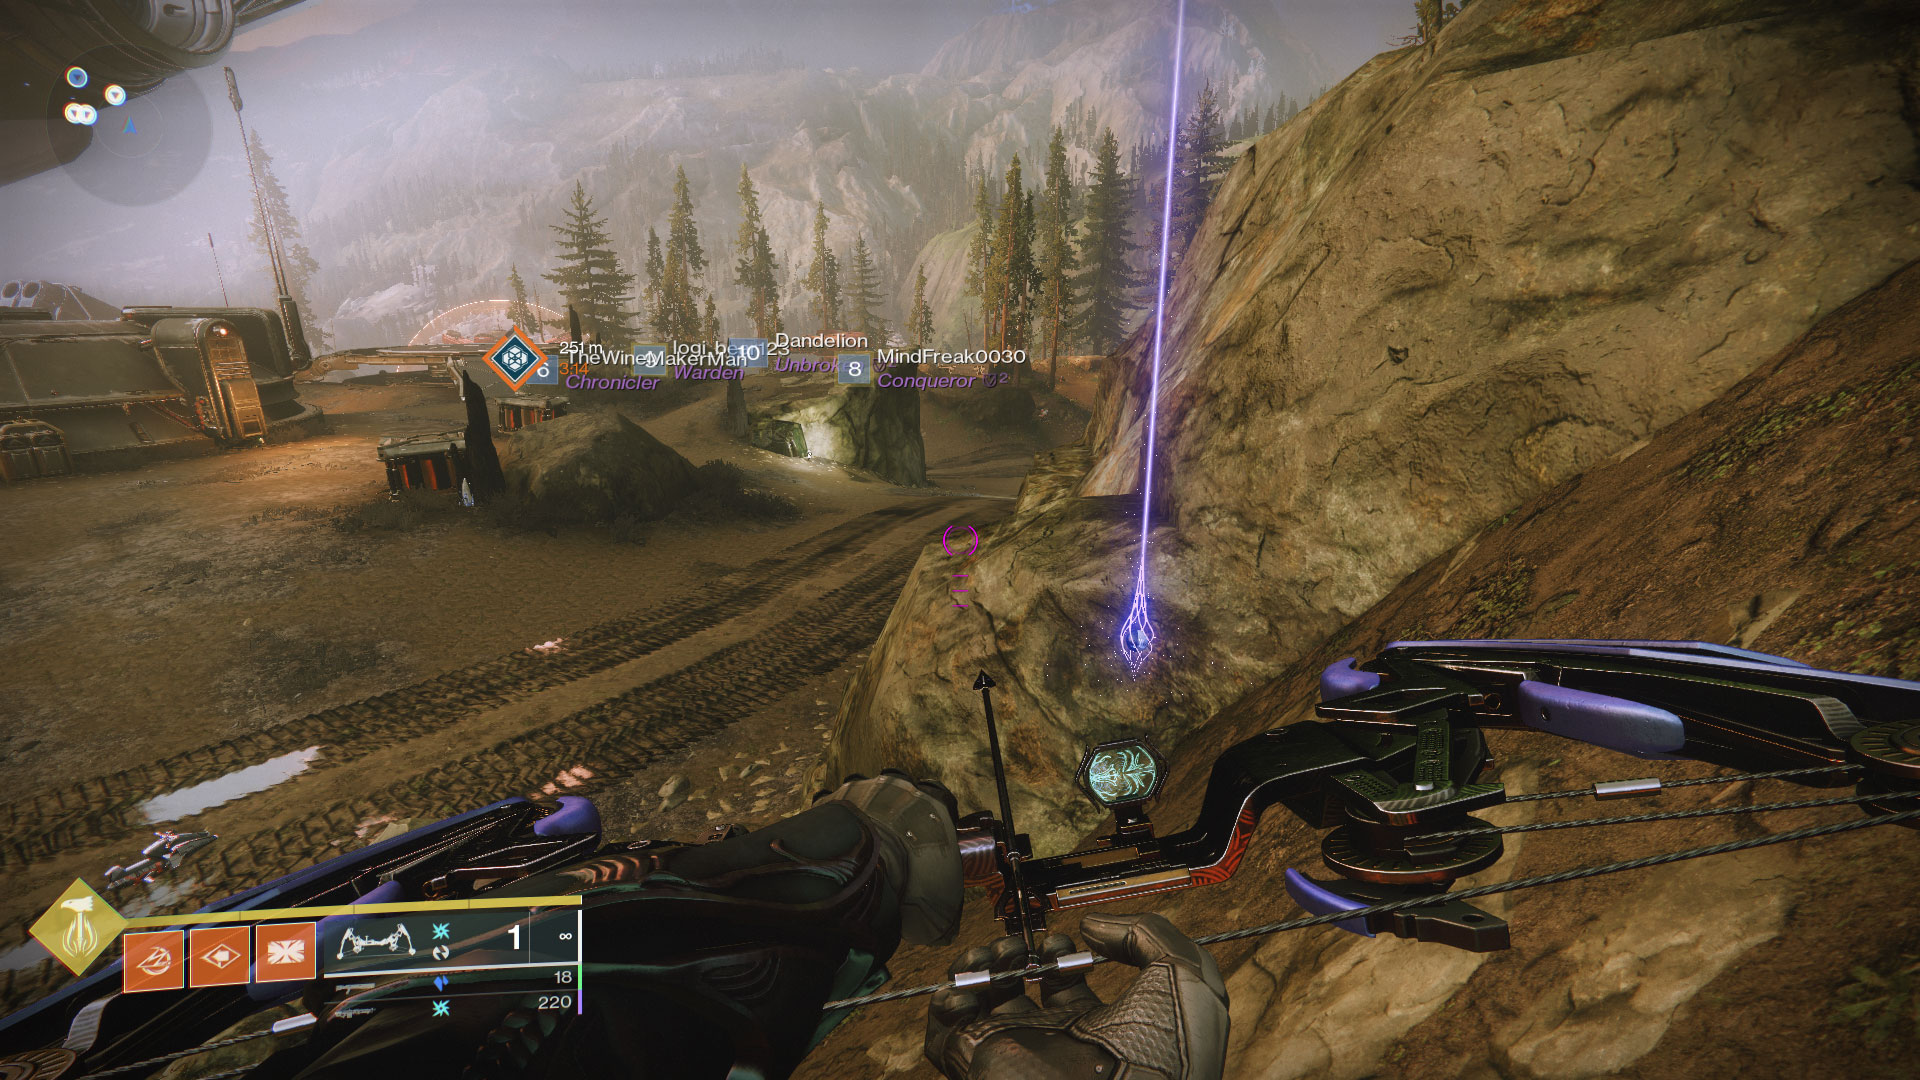
- #4: This anchor is to the Southeast of the entrance to The Quarry lost sector. You’ll be able to see the beacon sitting on top of the boulders on the Eastern side of the road fairly easily.
- #5: The final anchor in this zone is in the Northwest section. If you take the path that goes towards the Skydock IV lost sector, you’ll be able to see the beacon on the Western side of the road as you near the tunnel underneath the Cabal base.


The Tangled Shore Ascendant Anchor Locations
There are a grand total of 16x Ascendant Anchors for Guardians to collect in the Tangled Shore and they can be found in Thieves’ Landing and Soriks’s Cut.
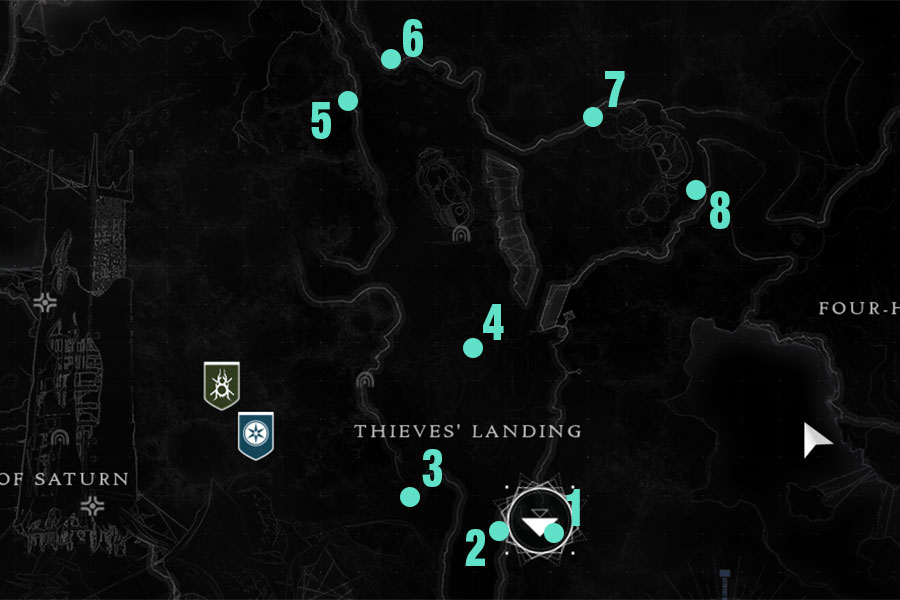
Thieves Landing
There are 8x anchors scattered across Thieves’ Landing for you to collect.
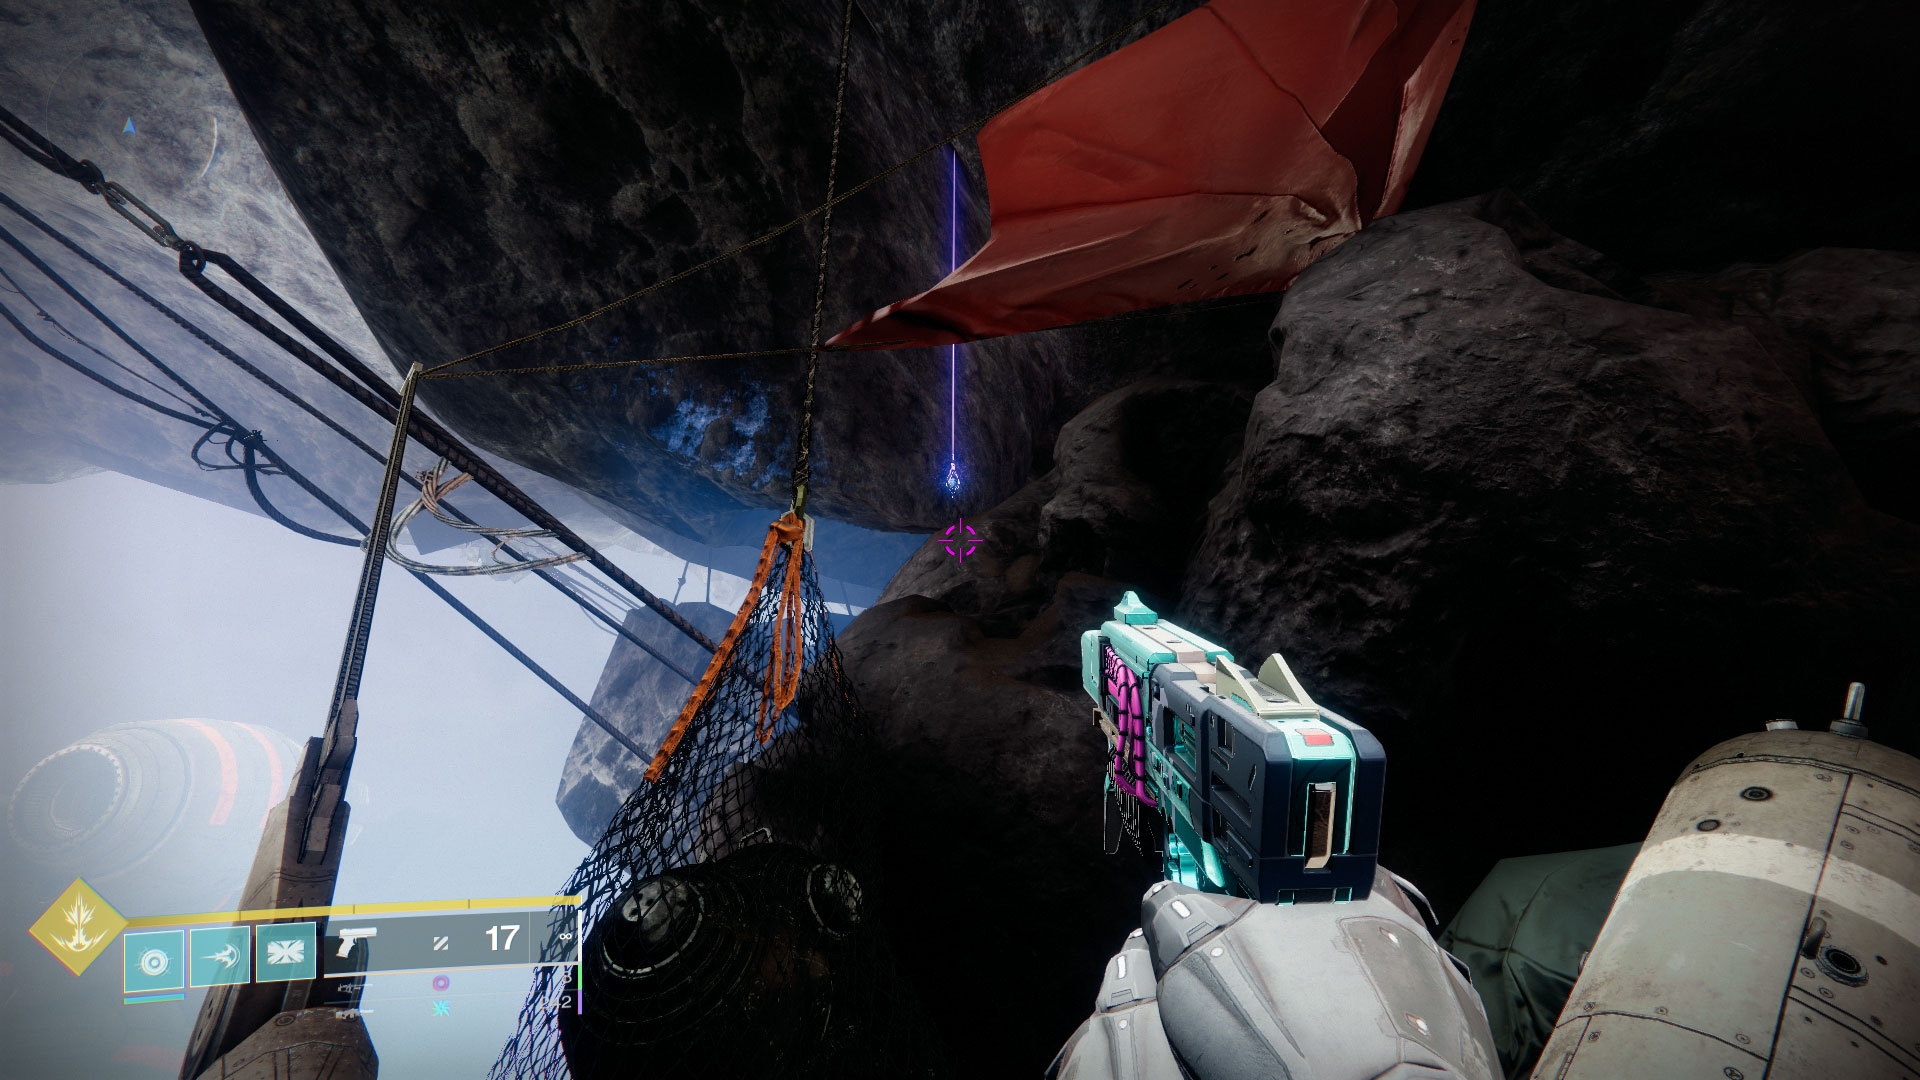
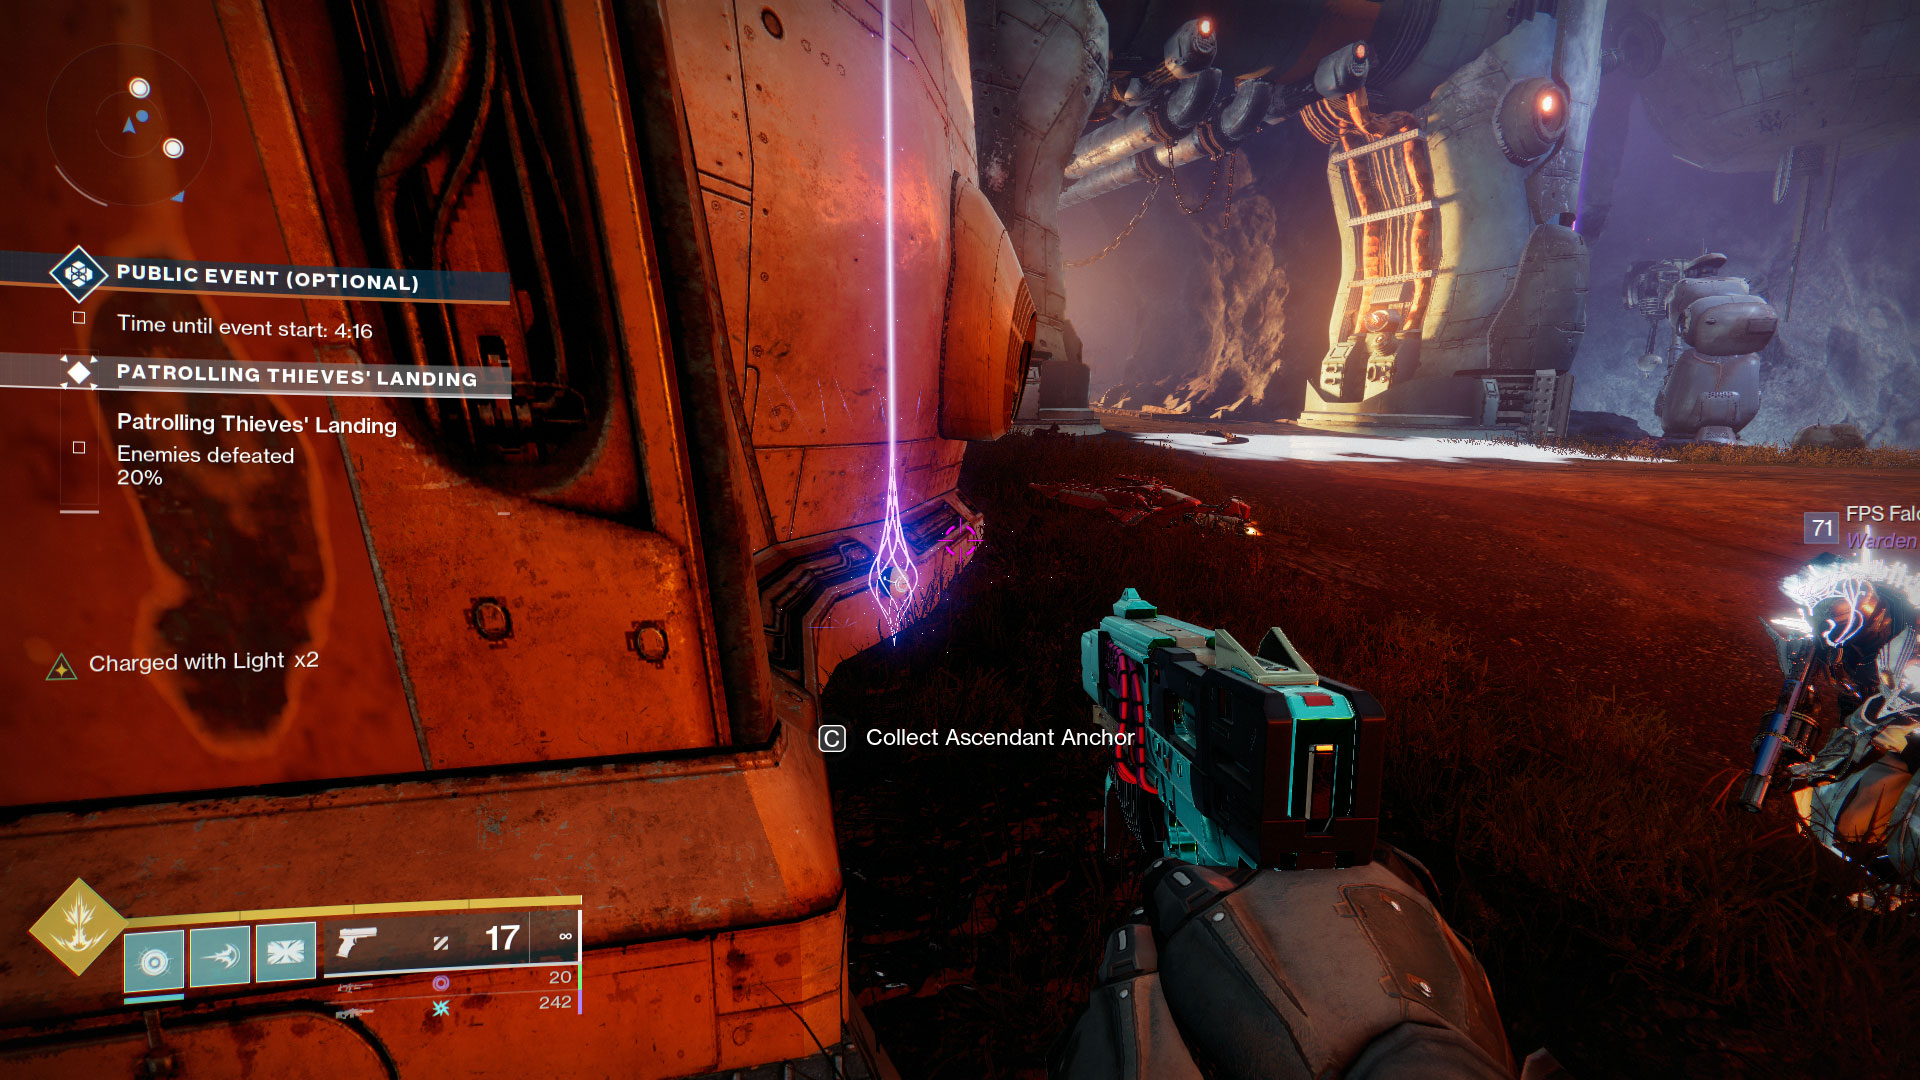
#1: Behind the Transmat Point
After you spawn in at the transmat point, turn around and look up. The anchor will be on the craggy ridge above you.
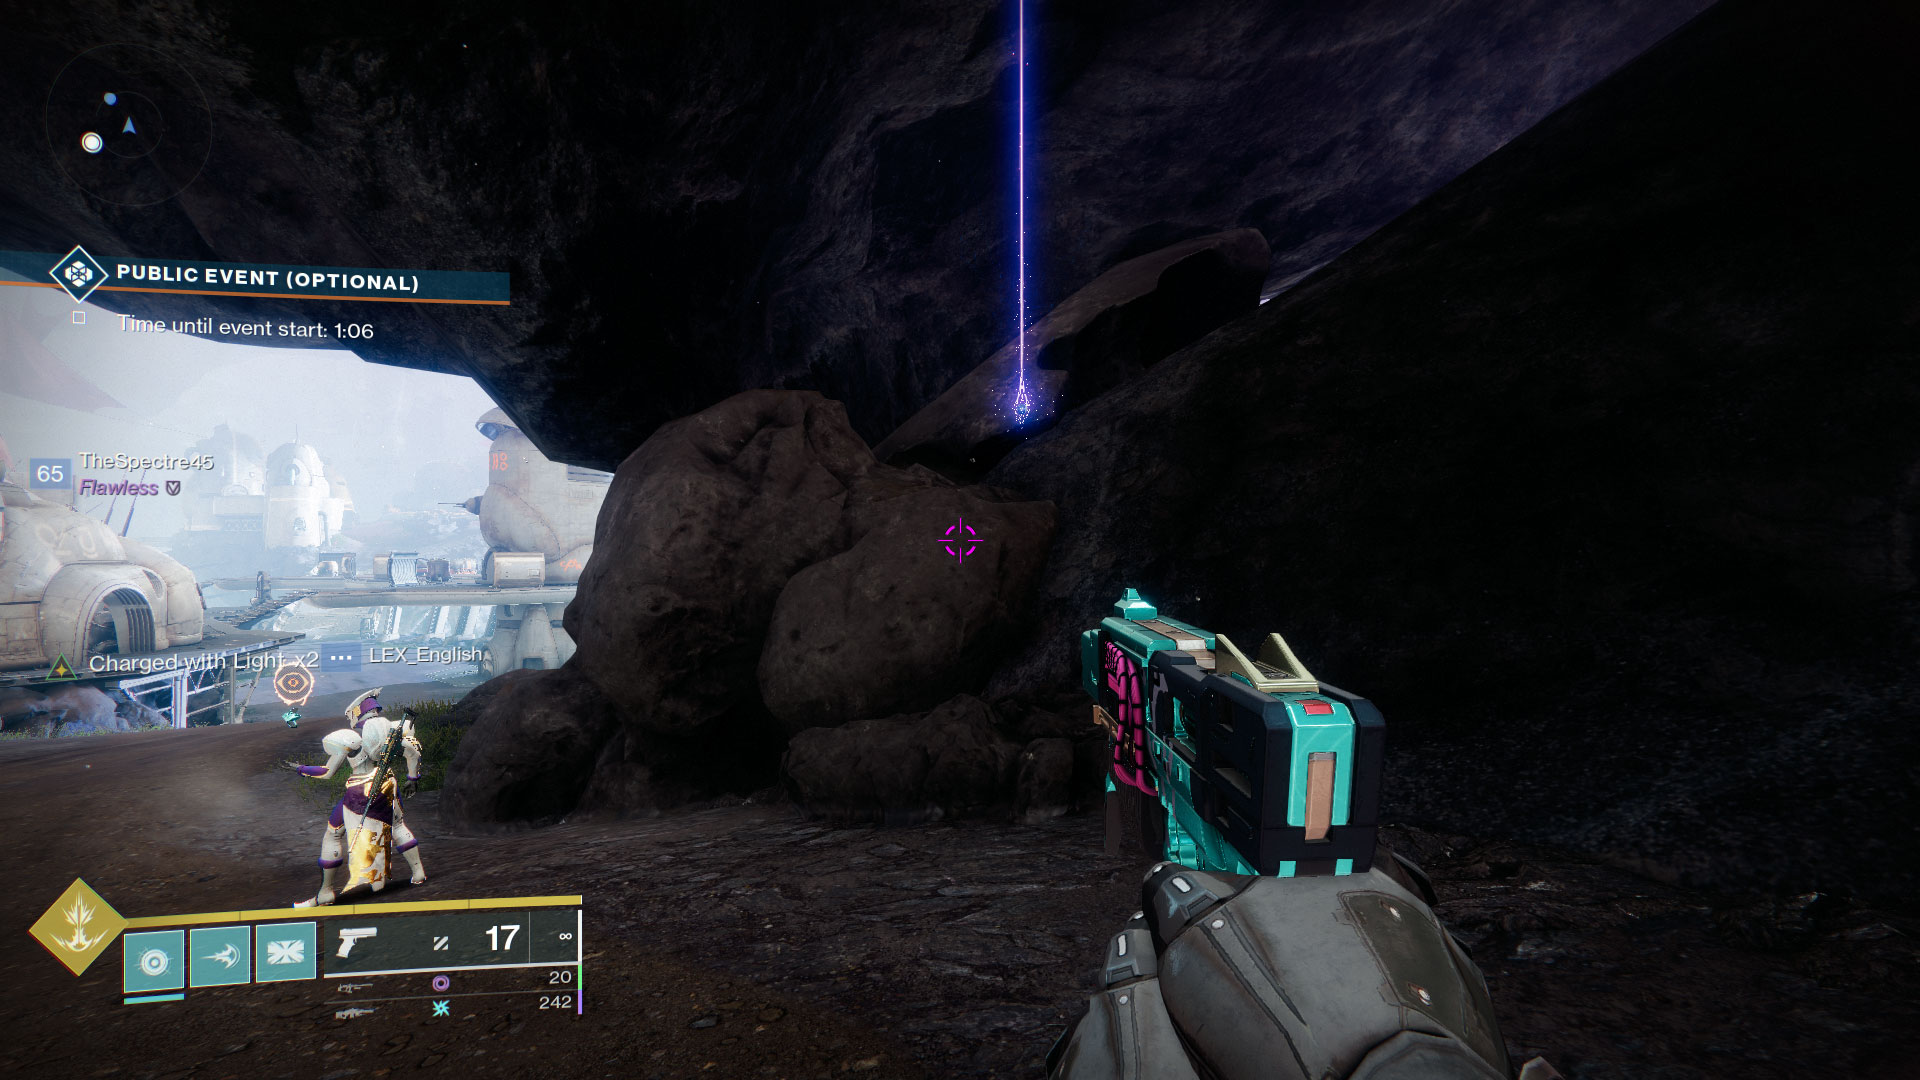
#2: Road Towards Jetsam of Saturn
From the transmat point, hop on your sparrow and take the first left. Just around the first bend and behind a pile of boulders is the second anchor.

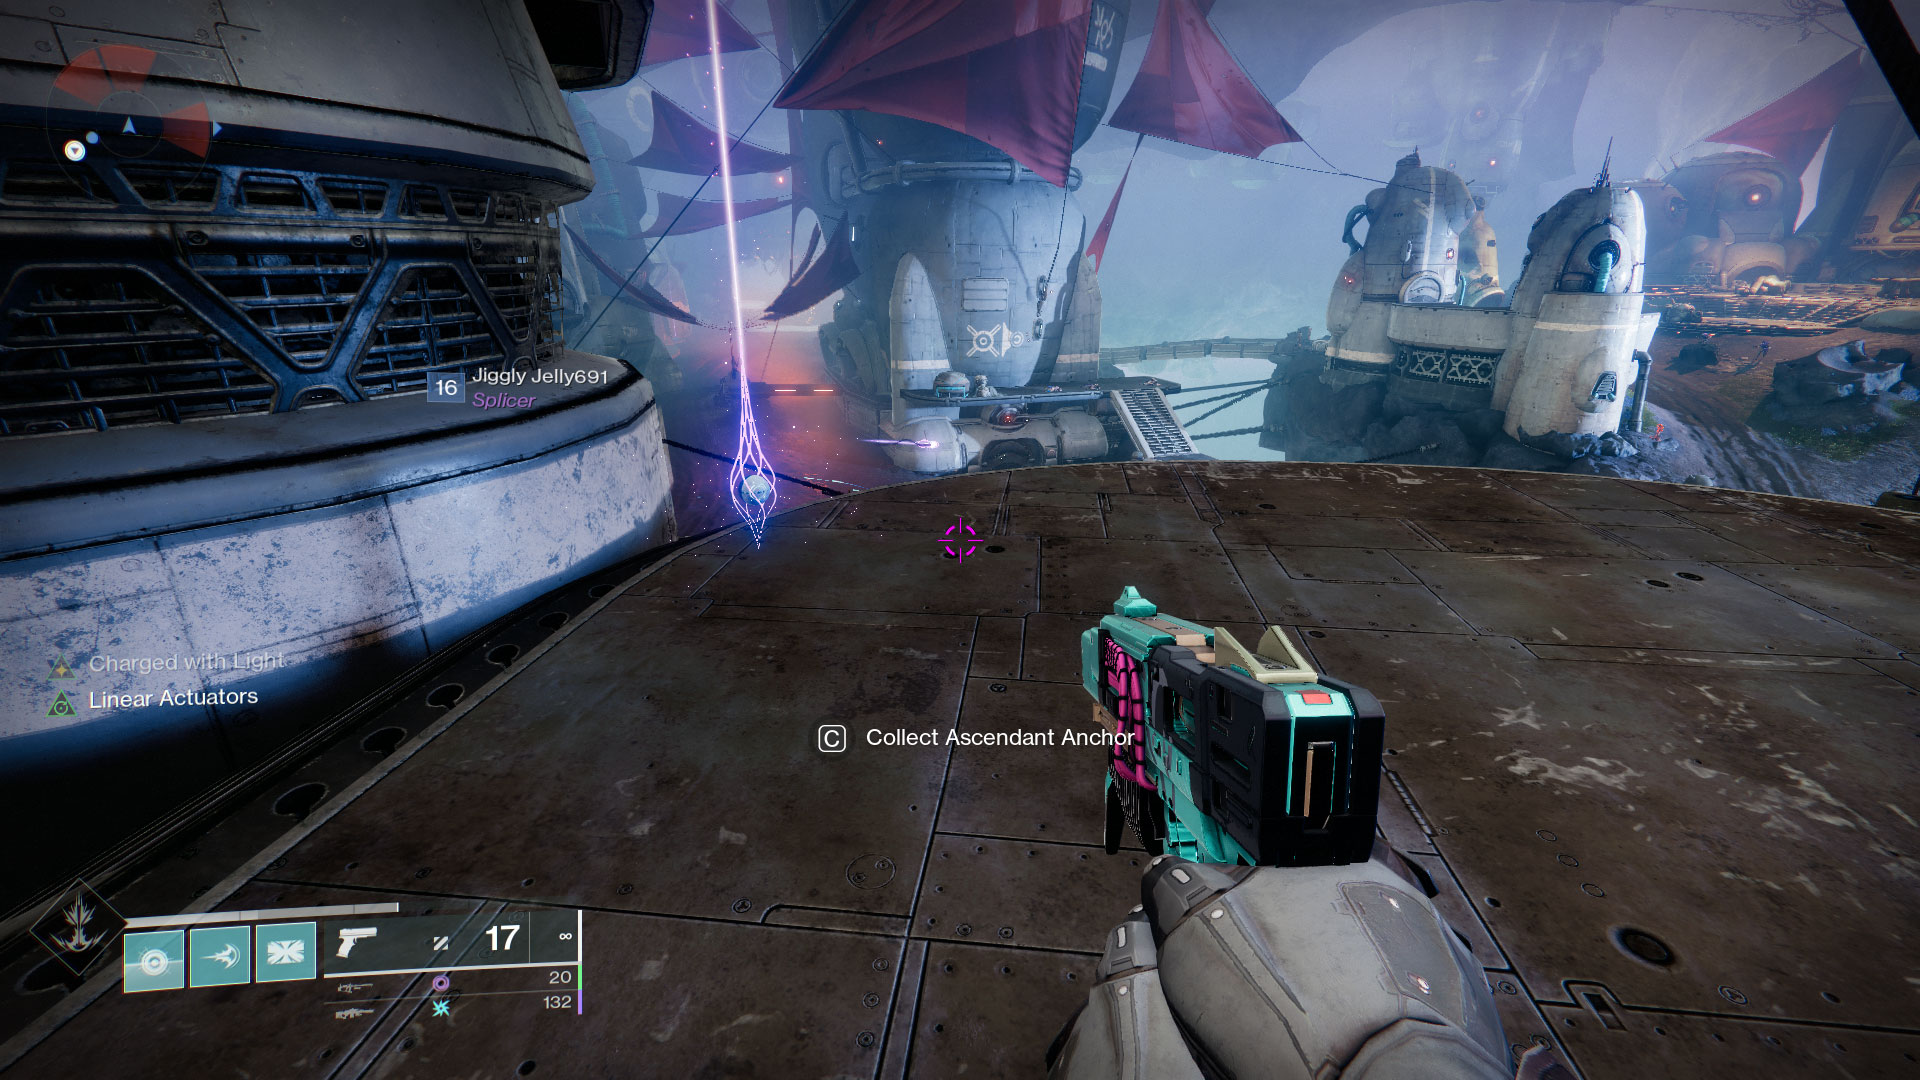
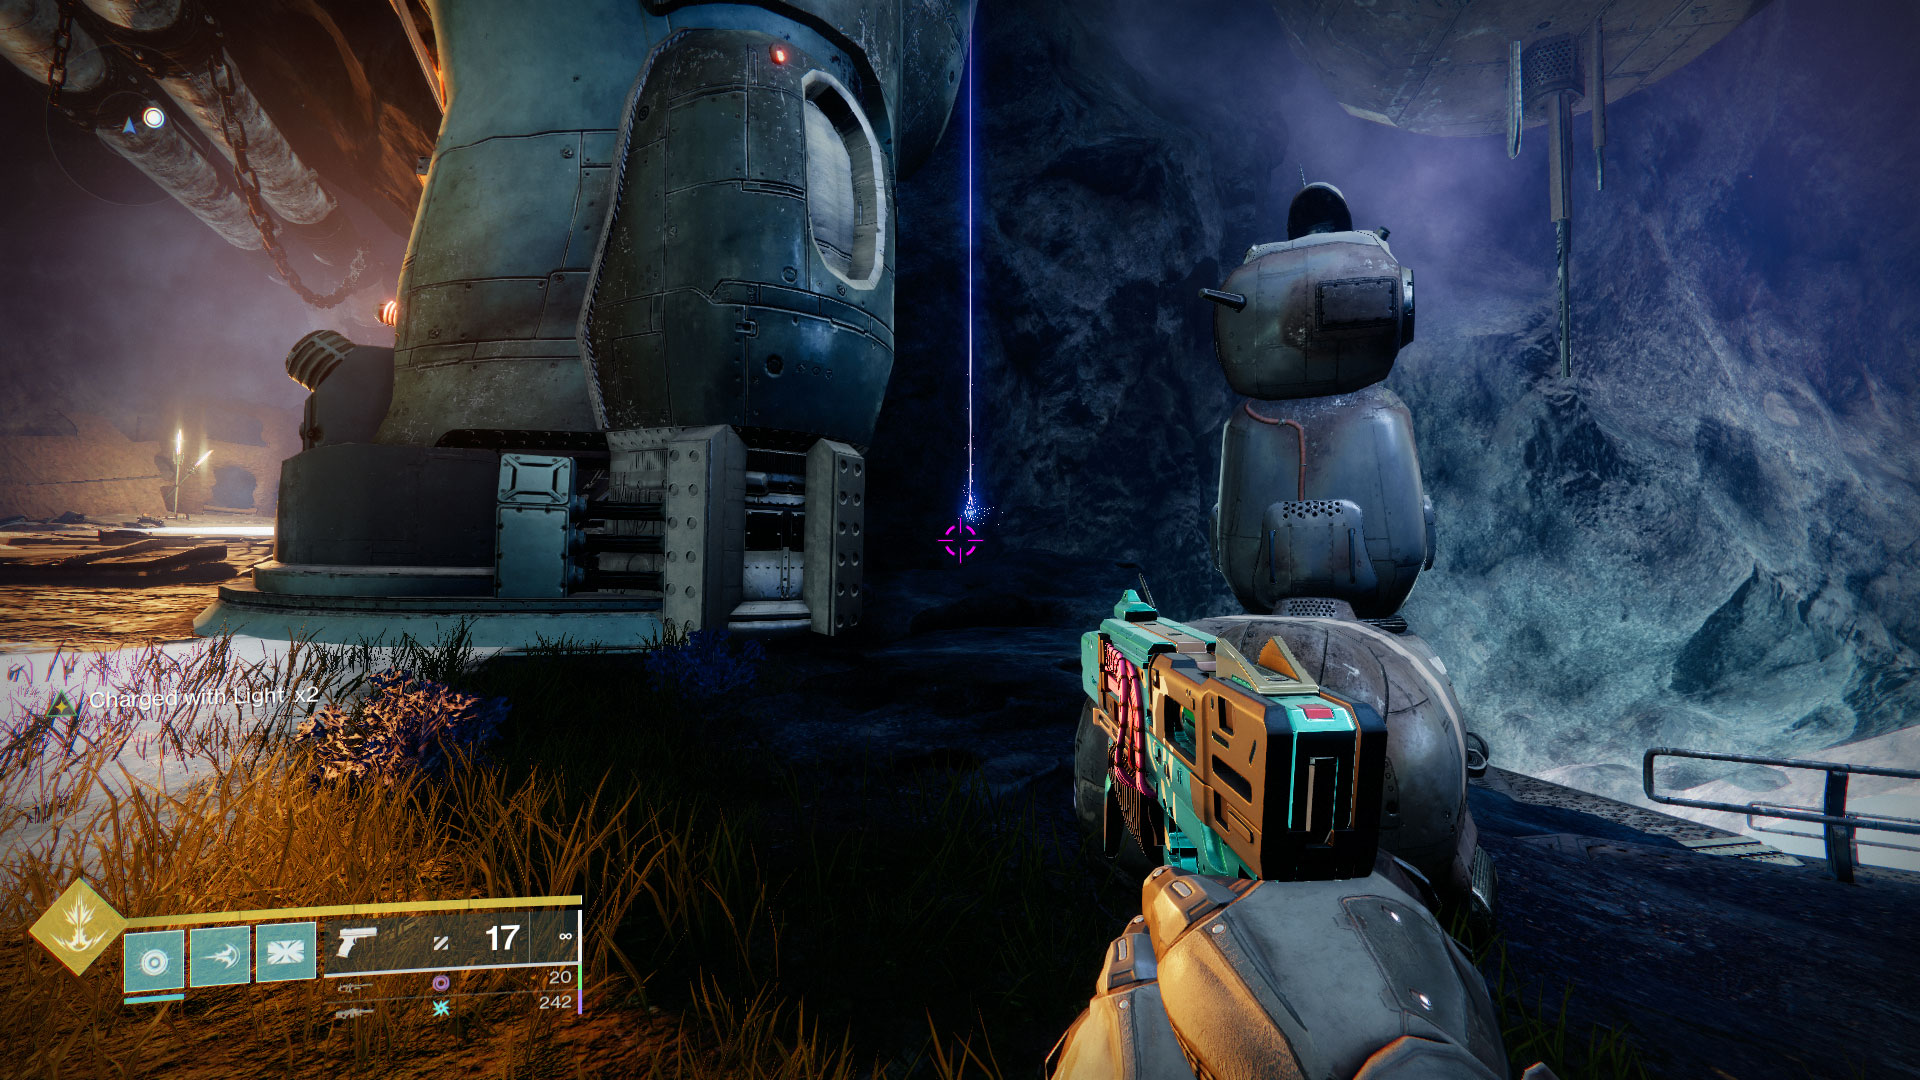
#3: Entrance to Spider’s Den
If you don’t already know where the Spider is, select the transmat point in Thieves’ Landing. Once you spawn in, go straight ahead of you to the far wall. Turn to your left after you go up the first set of stairs and look to your left. The third anchor will be nestled in an alcove on the left.
#4: Top of Central Building
From the third anchor, simply turn around and look towards the central building in Thieves’ Landing. Climb up to the roof and look at the giant antenna array sticking out of it. The fourth anchor is at the base of it.
#5: Left Side of Northern Tunnel
If you take the main road from the transmat point that runs closest to the far wall, follow that North until you see a large tunnel. This road will take you to Soriks’s Cut and our fifth anchor is on the left side just outside of an alcove where you can usually find a chest and a patrol.
#6: Right Side of Northern Tunnel
From the fifth anchor, look at the tunnel and go to the right side of it. The sixth anchor is on a rocky protrusion between the tunnel entrance and some Fallen equipment.
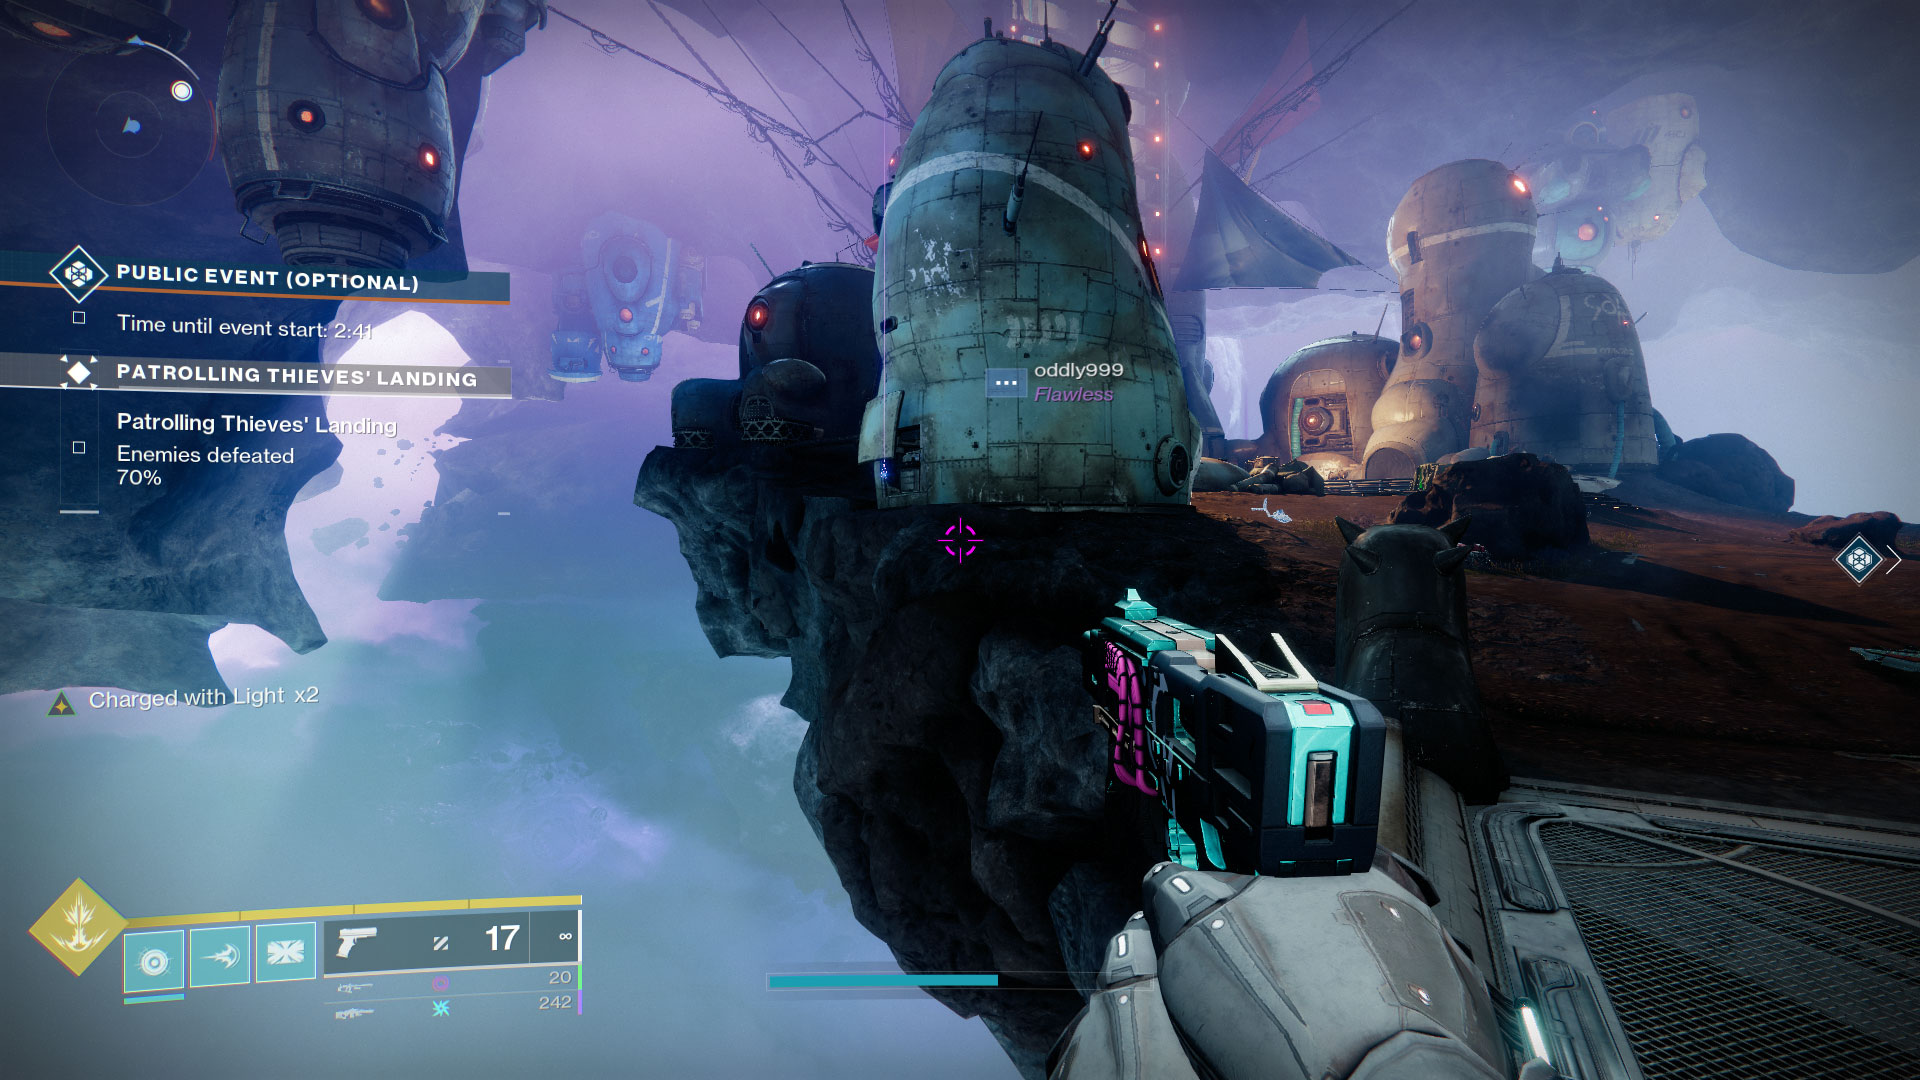
#7: Road Headed to Four-Horn Gulch
In the Northeaster section of Thieves’ Landing is a separate platform that leads towards Four-Horn Gulch. There are two ways to get on this island and the 7th anchor is by the Northern one. There’s a large piece of Fallen tech next to the bridge and the anchor is on its back side.

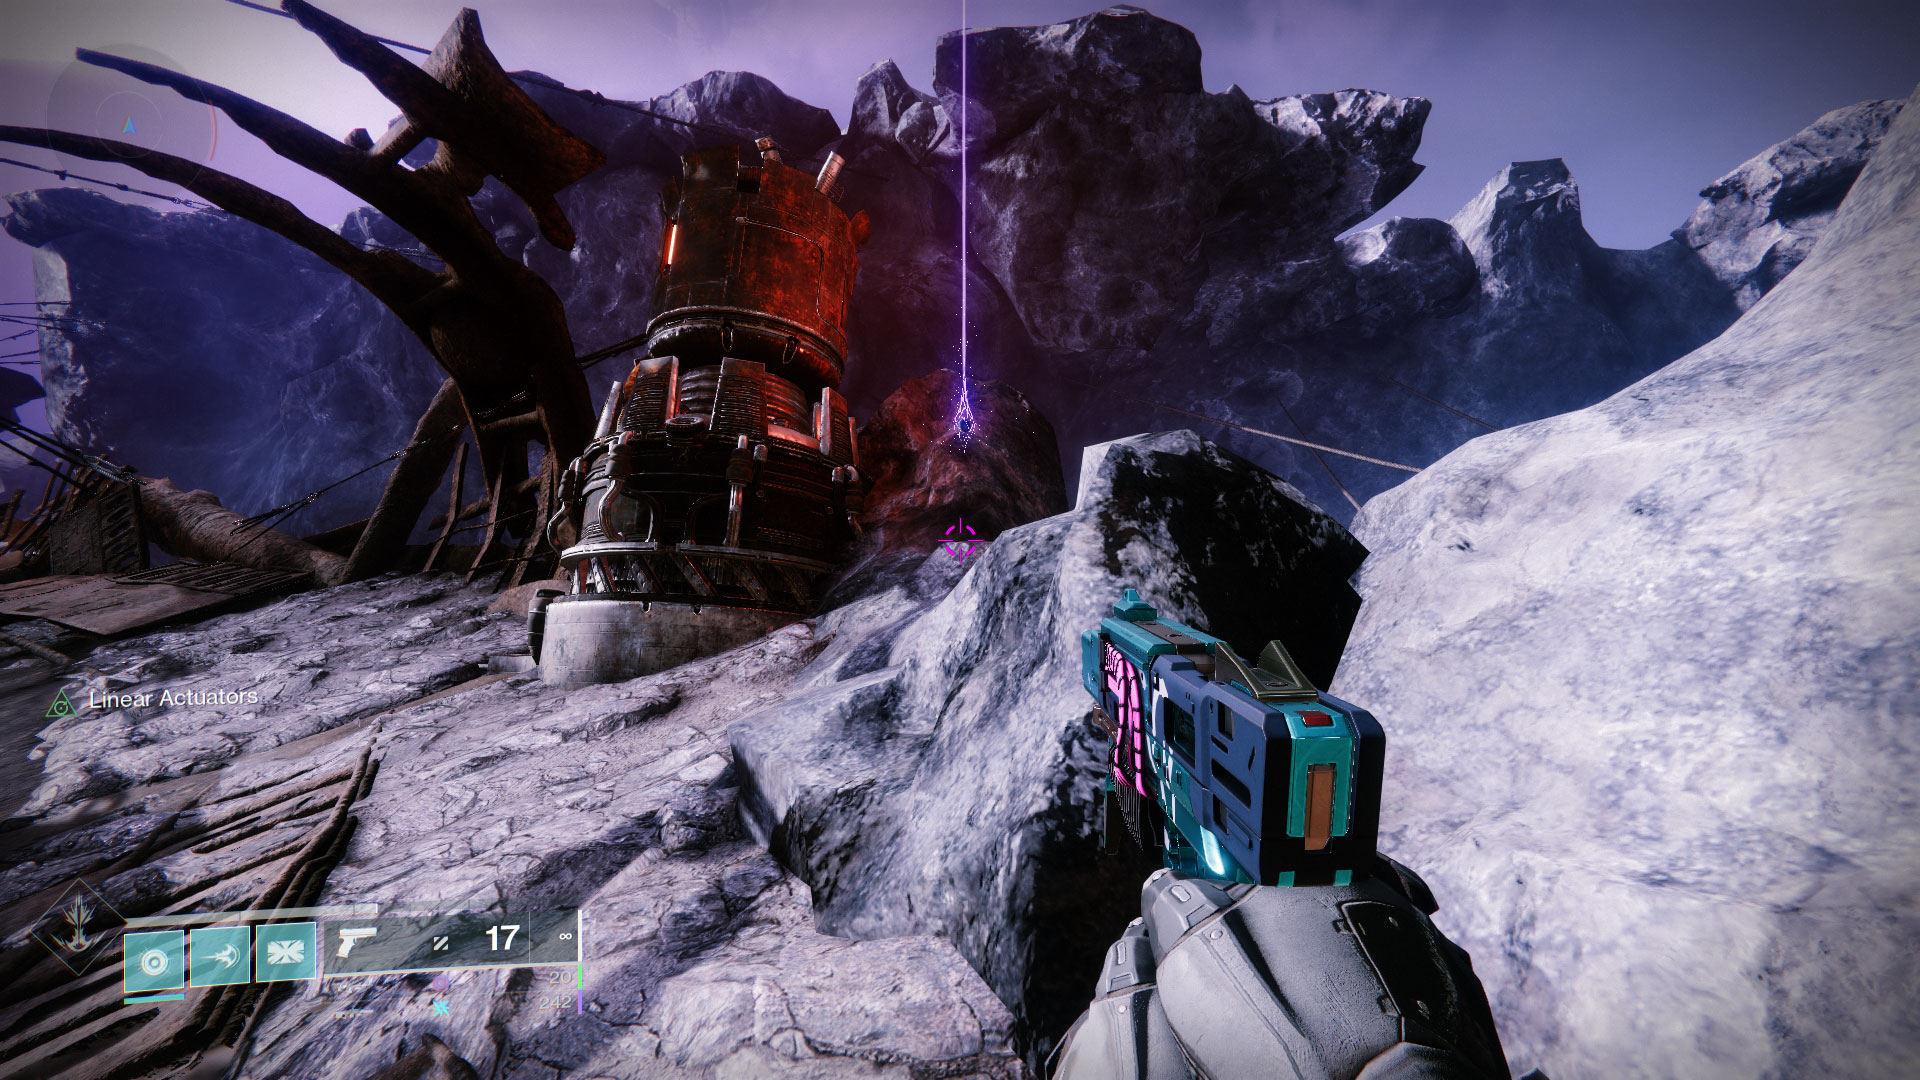
#8: Rocky Outcropping Near Gravity Well
This anchor is hidden rather well since you can’t see its beam of light from the rest of the zone. If you’re looking at the gravity well that takes you to Four-Horn Gulch, you’ll want to climb up the structures on your left. The anchor is on a rocky outcropping behind these buildings.

Soriks’s Cut
The simplest way to collect the anchors in Soriks’s Cut is to just go in a clockwise circle from the transmat point around the zone. However, I’ll still explain each anchor in detail just in case you aren’t sure which ones you’ve already collected.

#1: Left of the Transmat Point
Select the transmat point for Soriks’s Cut. After you’ve spawned in, there’s a dirt road right in front of you. Go to that, hang a left, and look to your left after you pass the first structure on your left. The anchor will be on your right.

#2: Eastern Road from Transmat Point
Continue down the path mentioned in the previous anchor. A short distance away on the right side of this road is the second anchor.
#3: Road Leading to Thieves’ Landing
Get back on the road you were just on and keep going in the same direction. Ahead and to the left is a bridge that will take you back to Thieves’ Landing. The third anchor is on some stones on the right side of this bridge.
#4: Behind Building on the Southern Ridge
From the third anchor, look to the southwest towards the giant dynamo and you’ll see a building in front of you. The fourth anchor is behind this building on the left side.
#5: Outside of Giant Dynamo
Continue towards the giant dynamo from the 4th anchor. You should be able to see the beacon for the fifth anchor just outside the dynamo on a rocky ridge.
#6: Sulfur Pools
Cut across the road that leads into the dynamo to where the sulfur pool is. The sixth anchor is atop a ridge overlooking these pools on the left side.
#7: Inside Dynamo
Take the road back to the dynamo and stay to the left. Hop over the boulders on the left side and keep moving forward. The 7th anchor will come into view once you’re around the bend.
#8: Northeastern Cave
The final ascendant anchor in Soriks’s Cut is near the transmat point in a cave on the Northeastern section of the zone. There’s usually a Solar-shielded Centurion guarding the entrance. The anchor will be just inside the cave entrance.
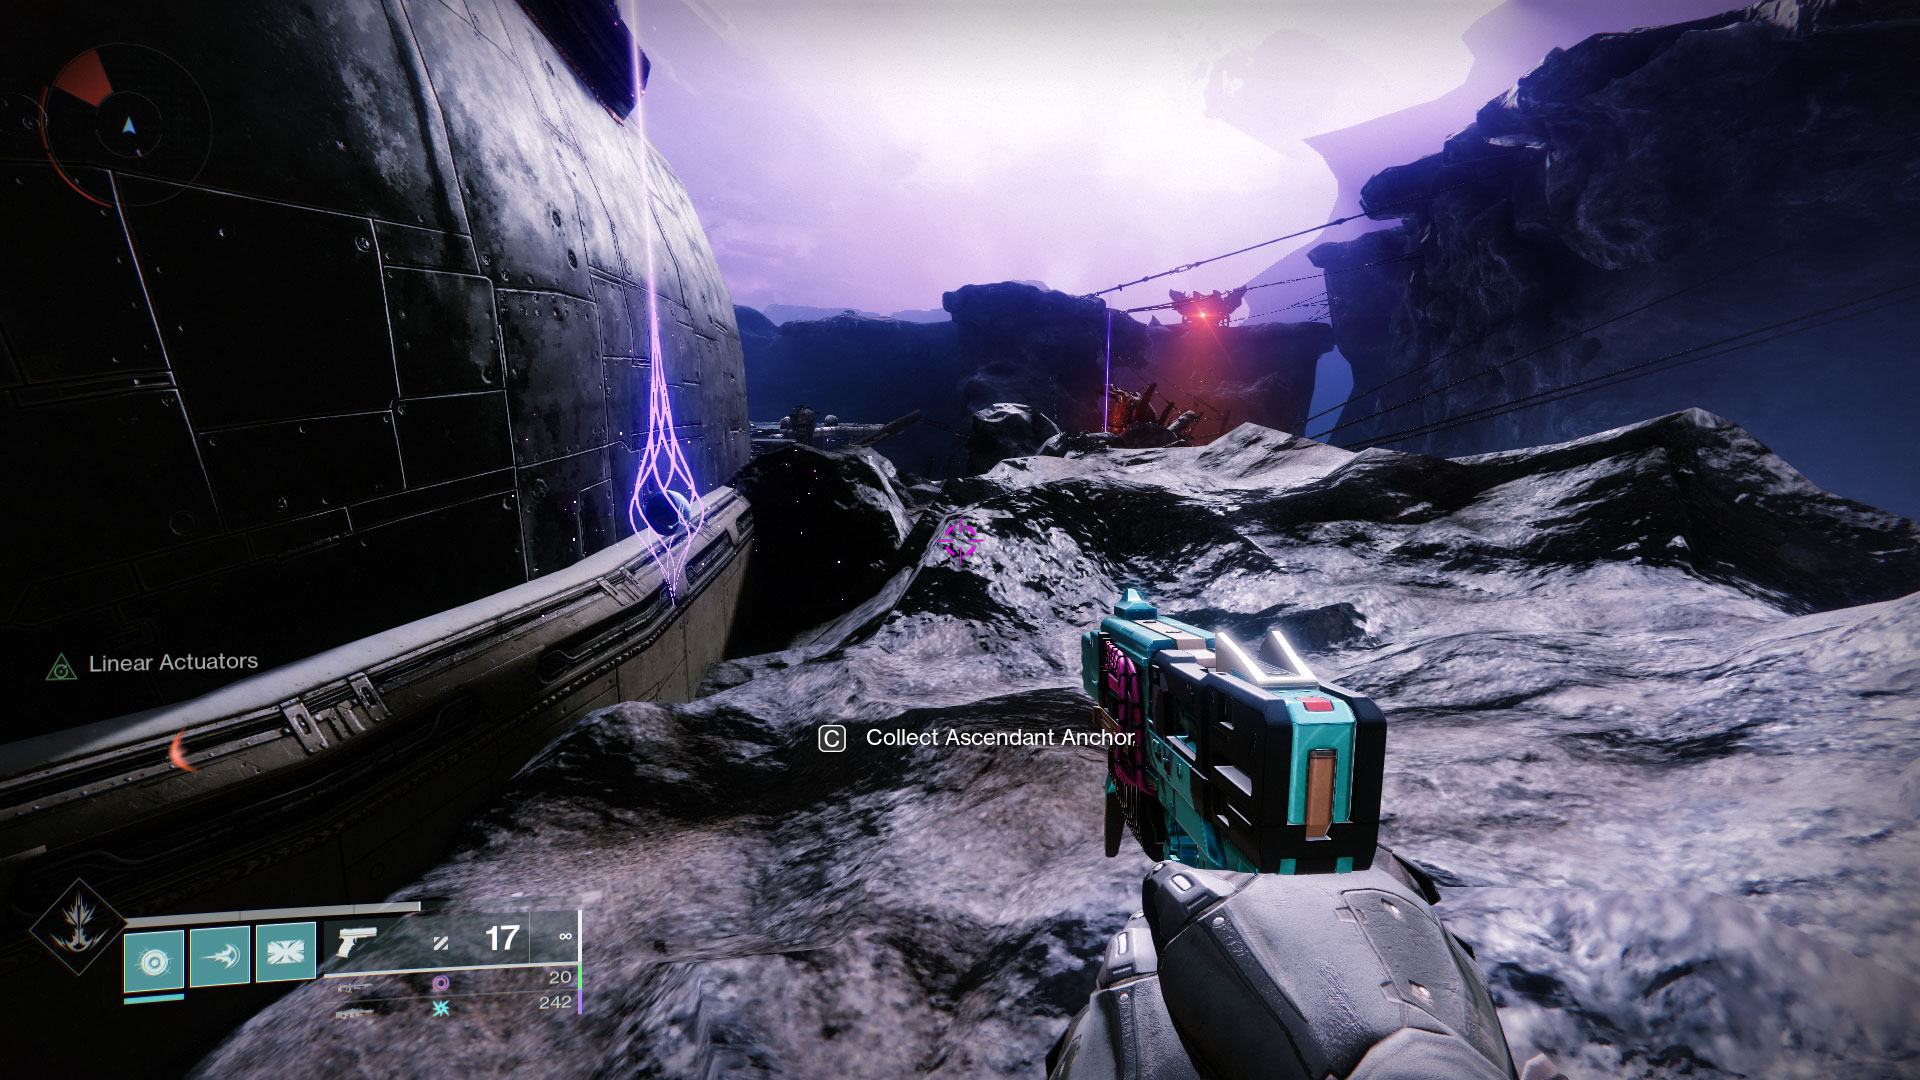
The Moon Ascendant Anchor Locations
Guardians can collect 12 Ascendant Anchors on the Moon with 7x in Sorrow’s Harbor and 5x around Eris Morn in Sanctuary.
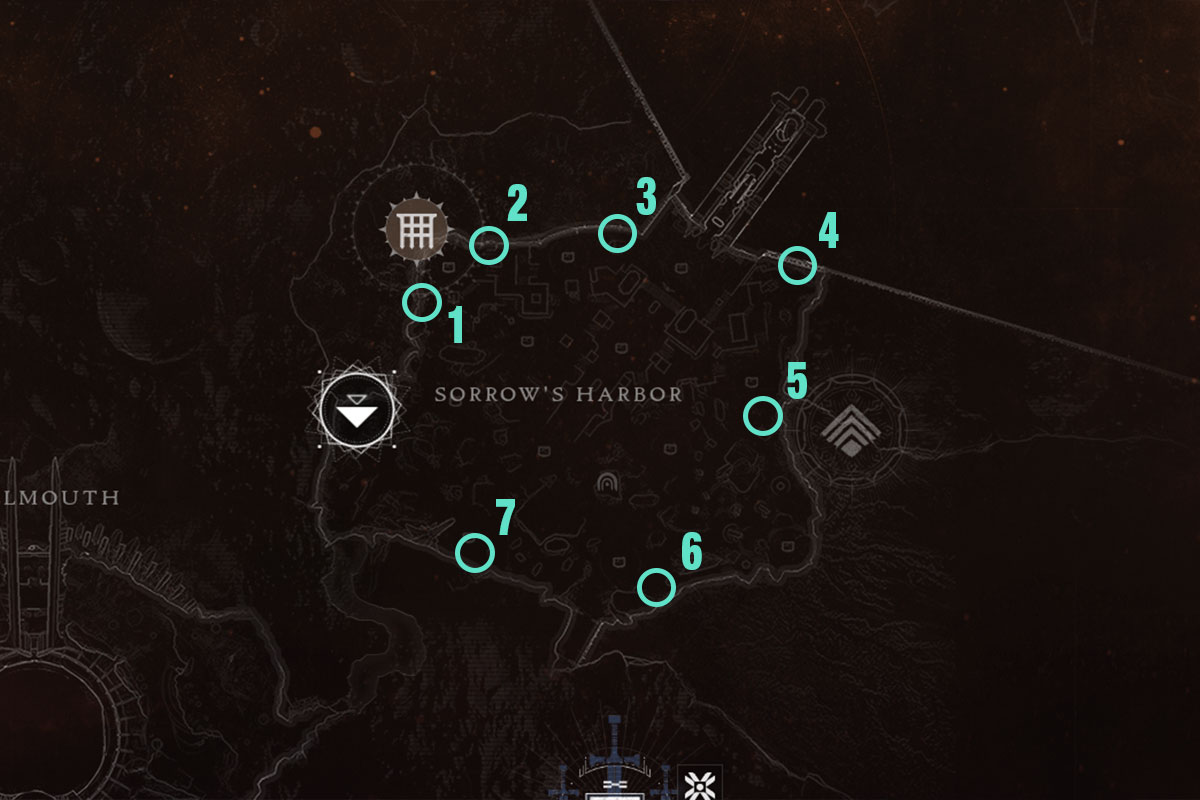
Sorrow’s Harbor
There is a grand total of 7x Ascendant Anchors for Guardians to collect in Sorrow’s Harbor on the Moon. The Altars of Sorrow public event will be going on at the same time that you’re collecting these anchors so keep your head on a swivel for any Ogres that get a bit froggy and want to give you a taste of their eye beam.
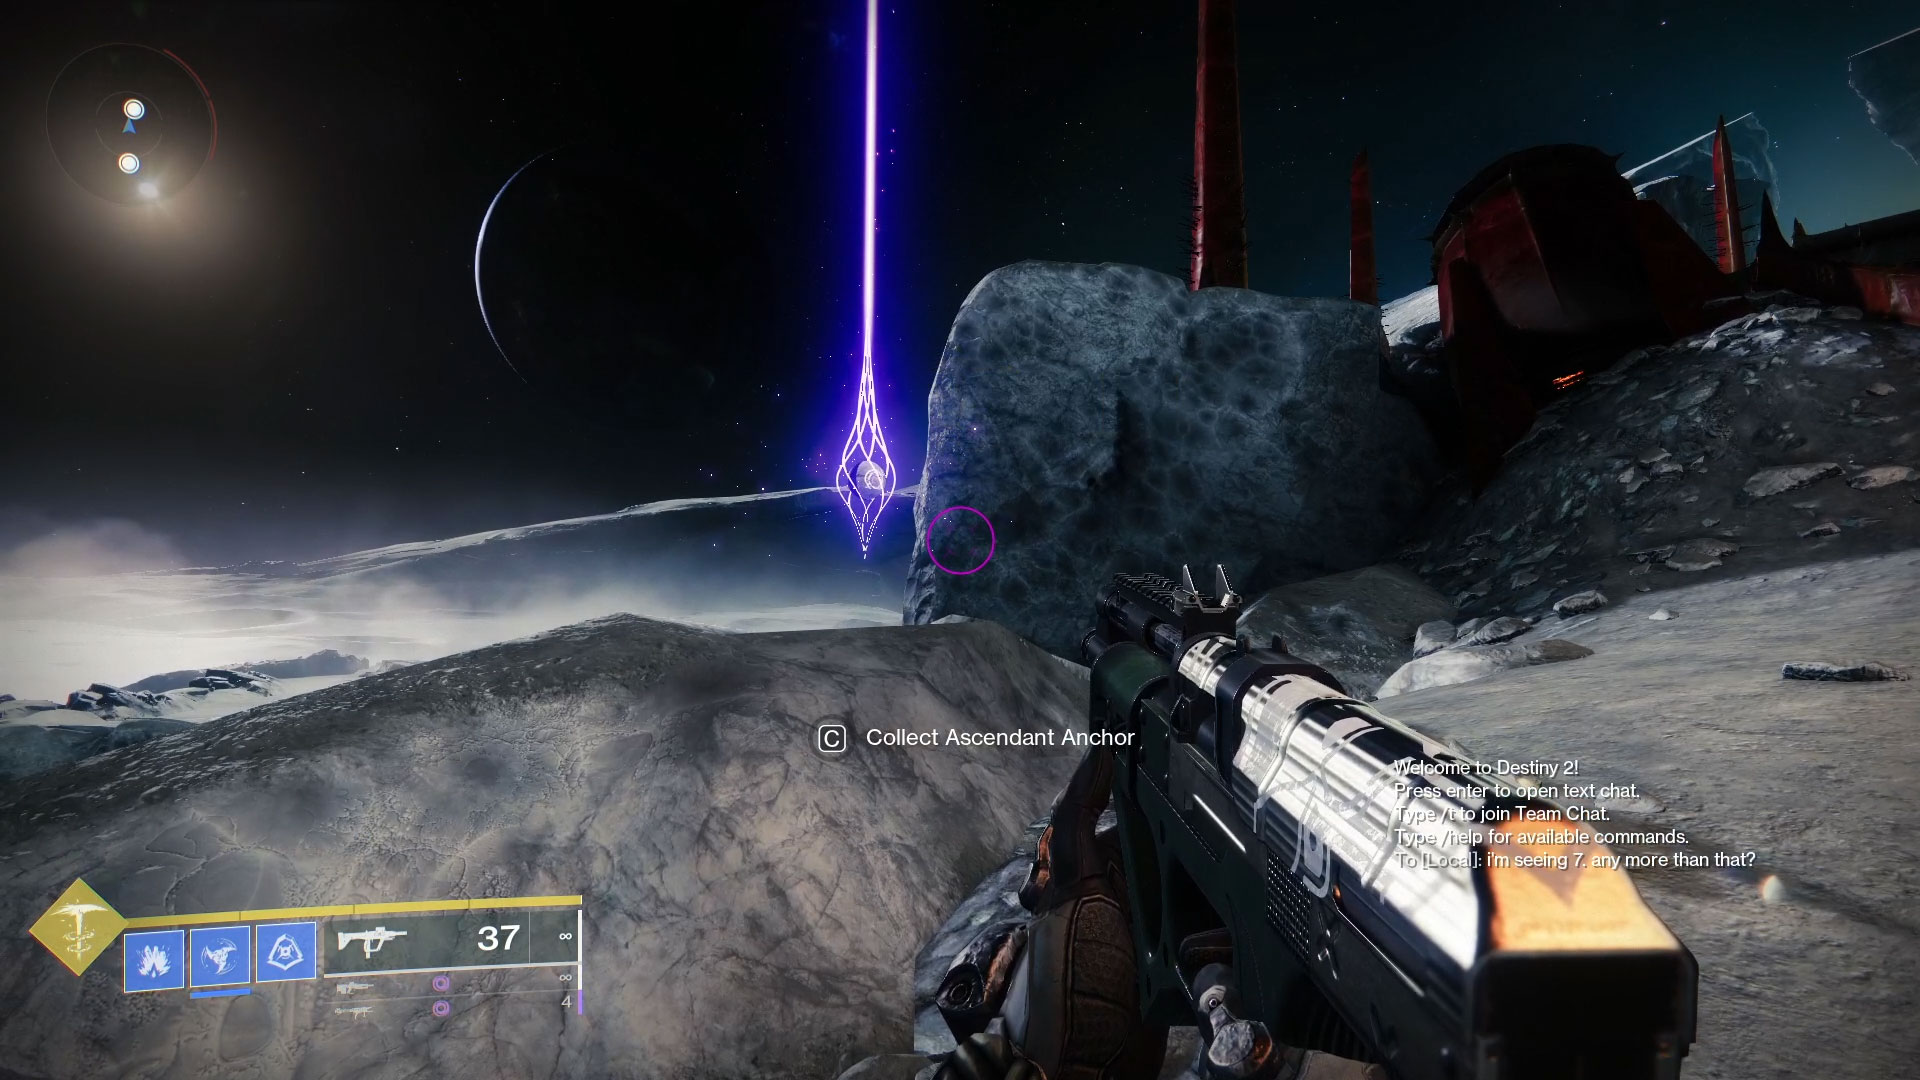
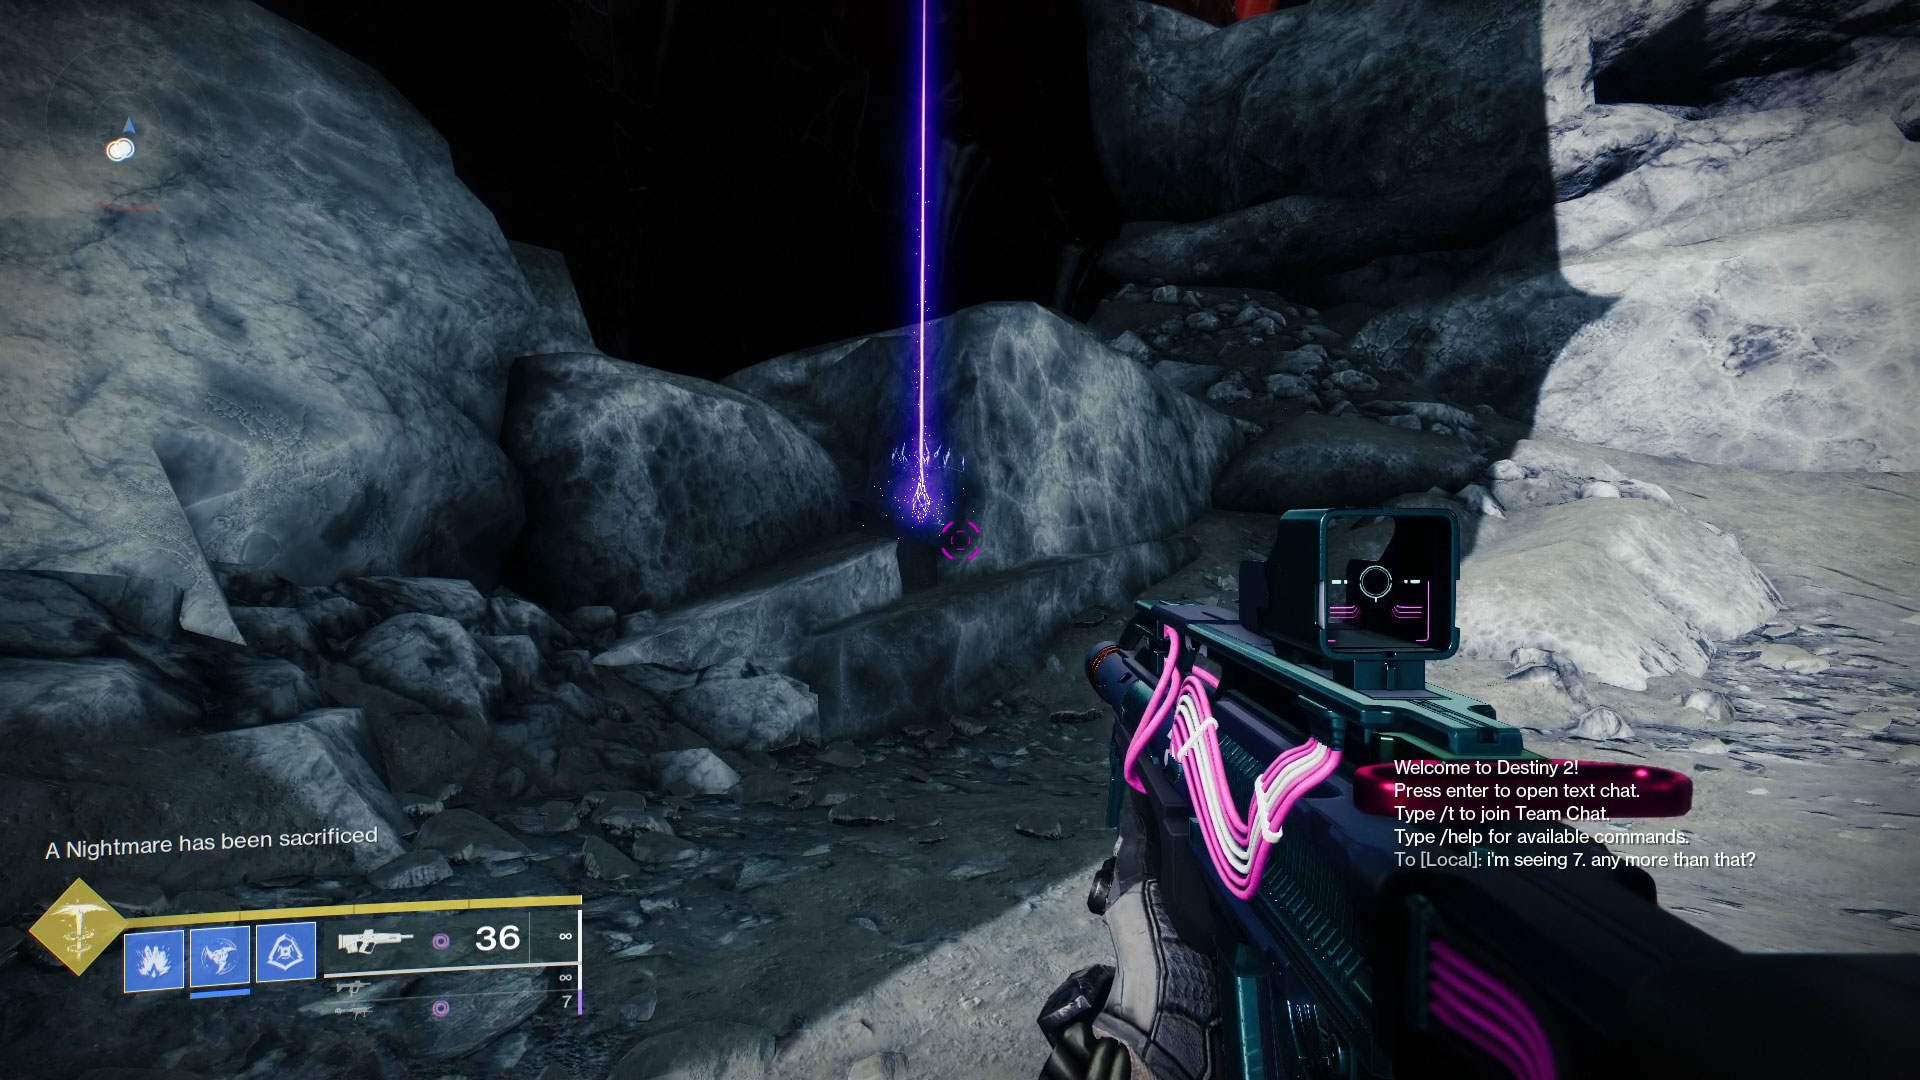
#1: Northwestern Ridge
From the transmat point, hop on your sparrow and stay close to the ridge on your left. You’ll be able to see the first anchor just before the first set of stairs. Head over to the ridge and snag the anchor.

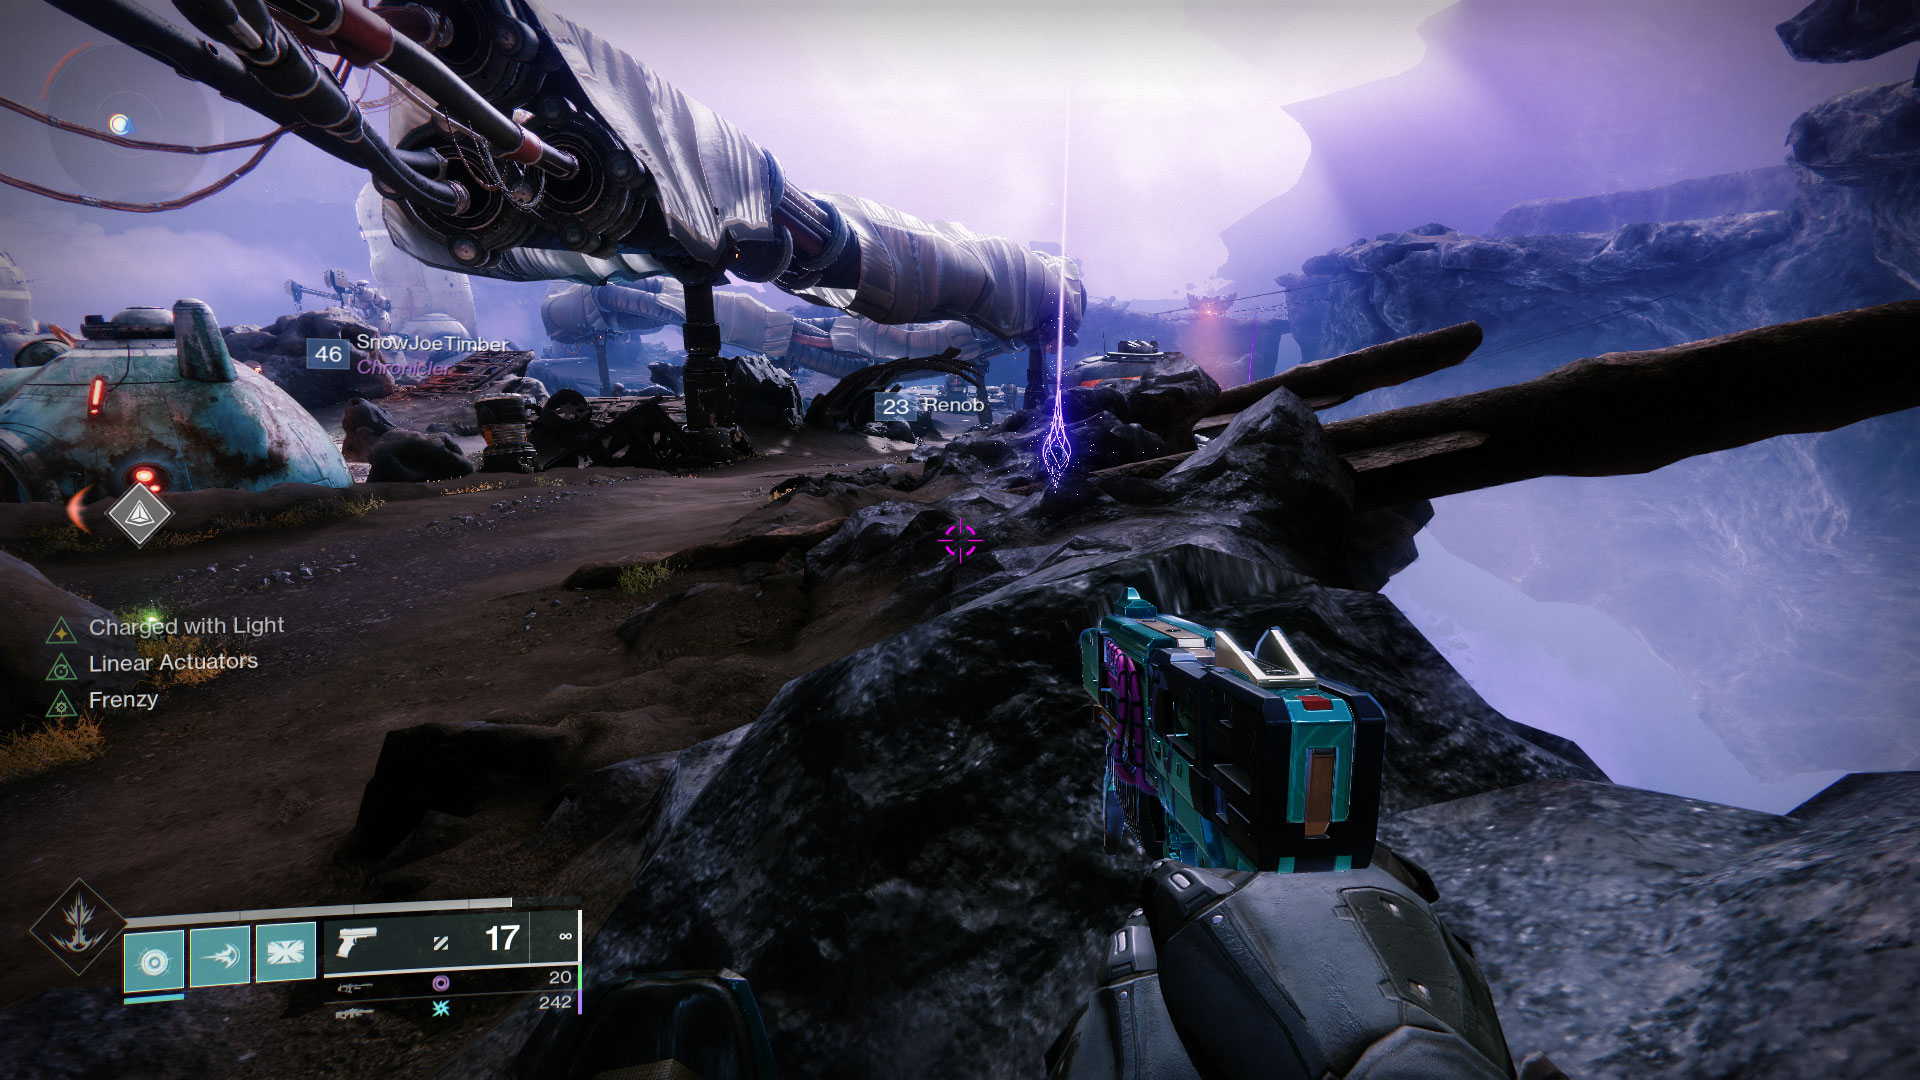
#2: Northern Stairs
From the last anchor, head up the stairs heading towards the Scarlet Keep and stay close to the ridge. On the other side of the altar at the top of these stairs is the second set of stairs and the anchor is off to the left of them on what looks like a pile of Hive refuse.
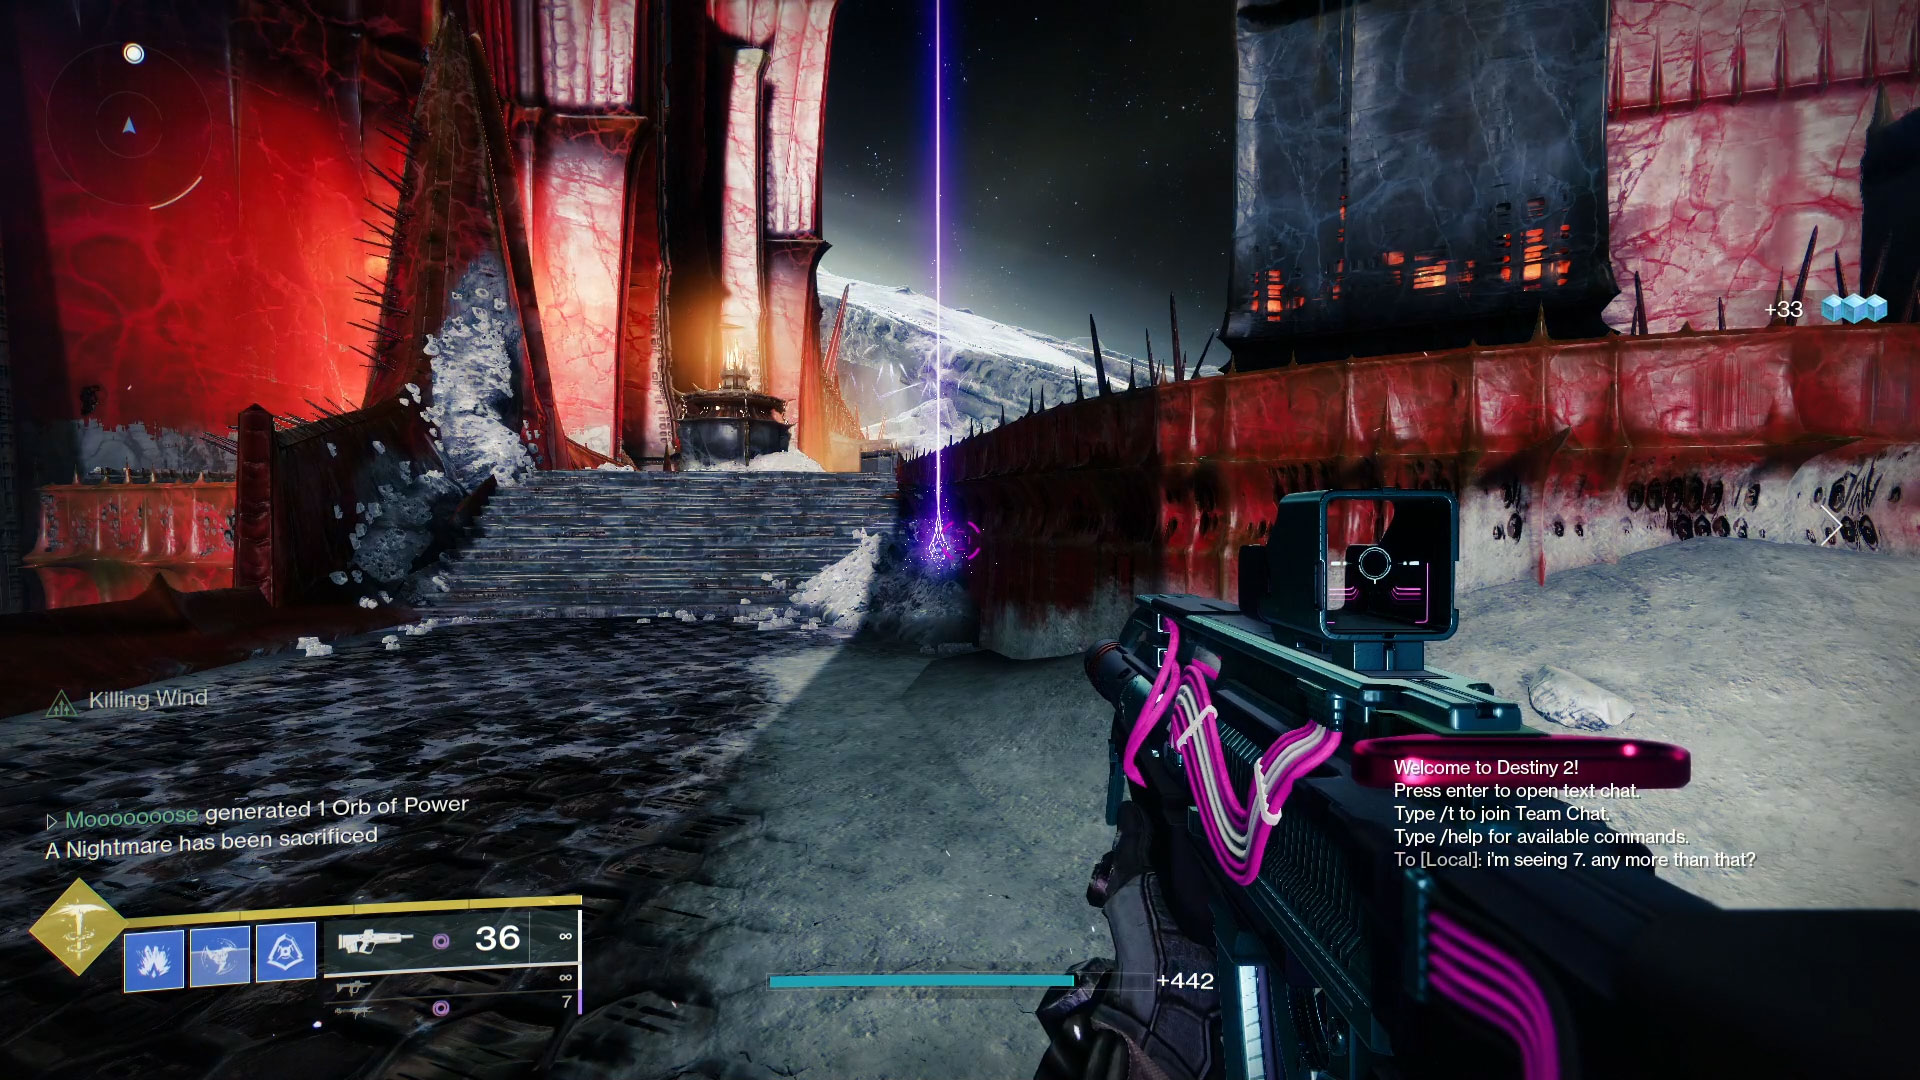
#3: Road to Scarlet Keep
From the second Anchor, head up those stairs to the landing and take care of the Hive that are on the Altar between you and the Keep. The third anchor is at the base of a bulwark on the other side of the Altar.
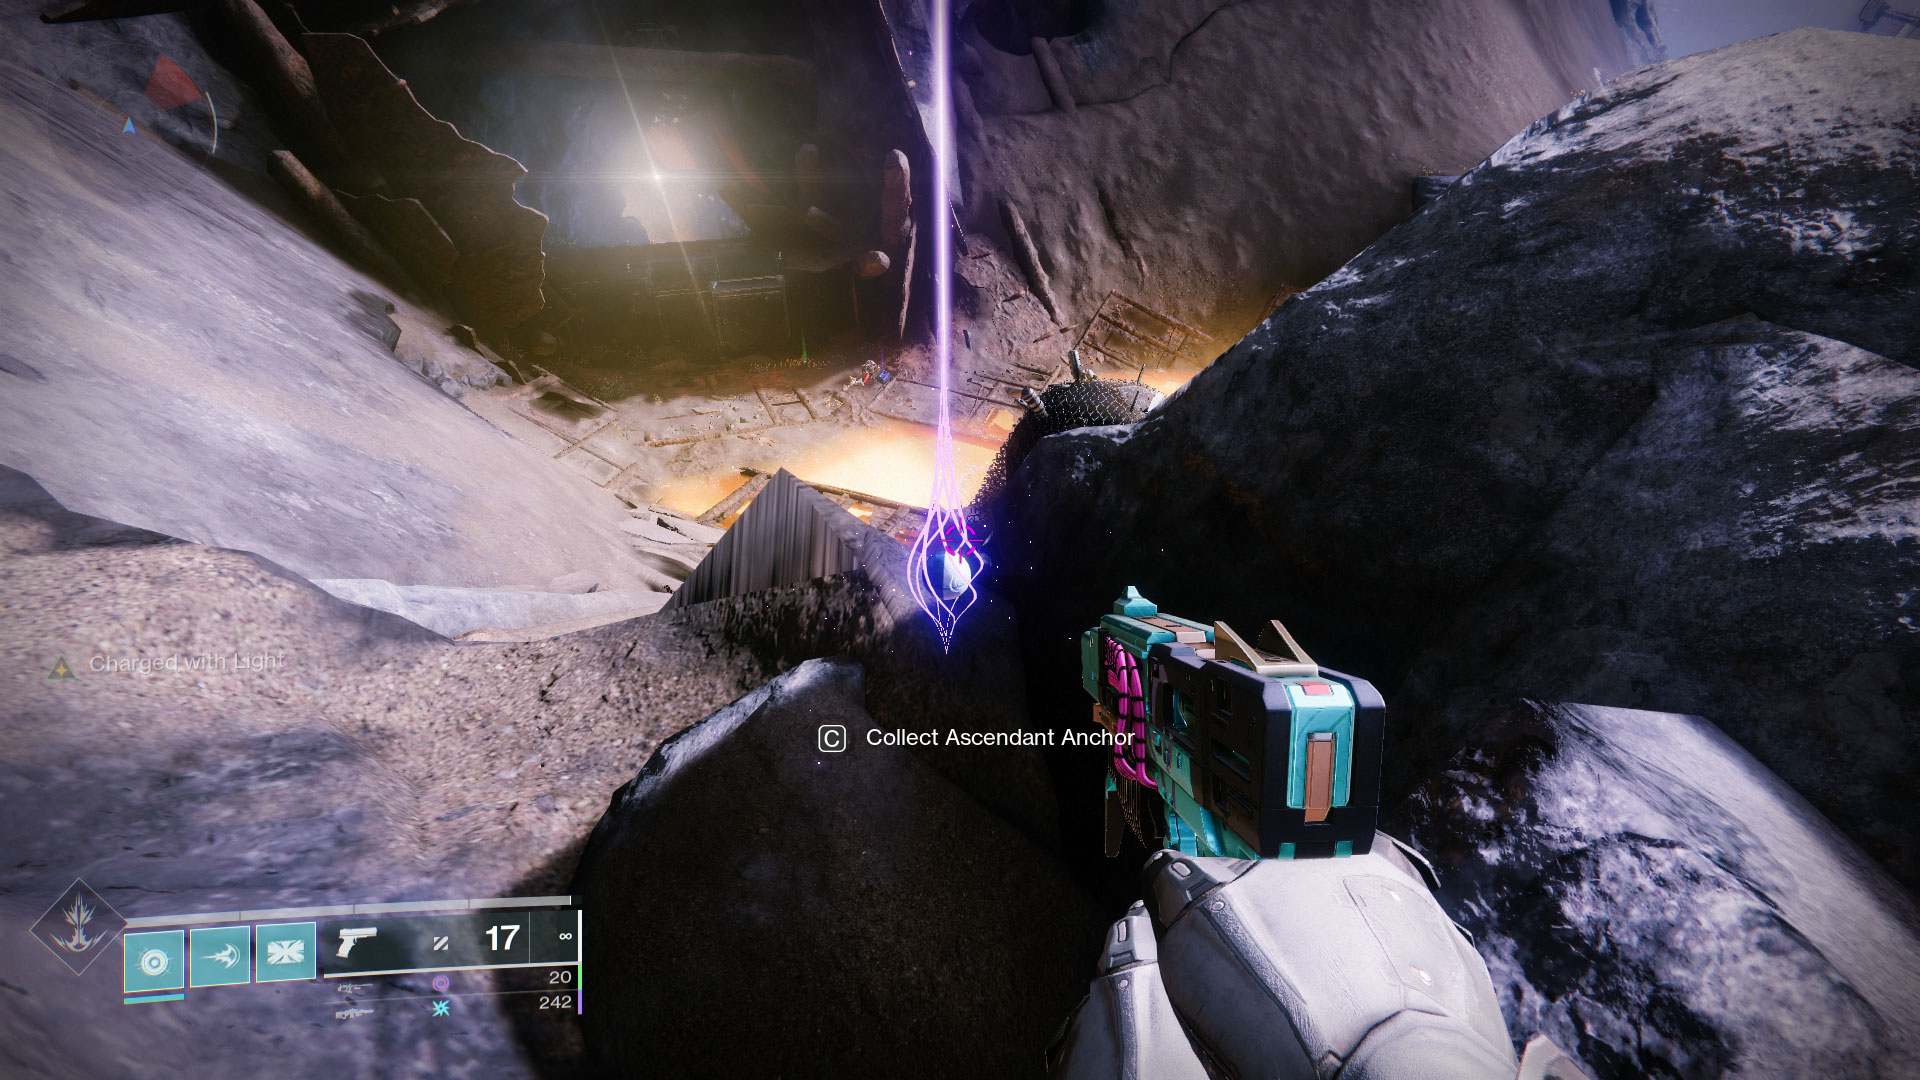
#4: Northeastern Rubble
Hop on your sparrow and cross the main Altar where the final boss to the Altar of Sorrows public event spawns. Stay to the left, head down the stairs, and head to the back left corner where you should see the fourth Anchor nestled amongst some boulders.

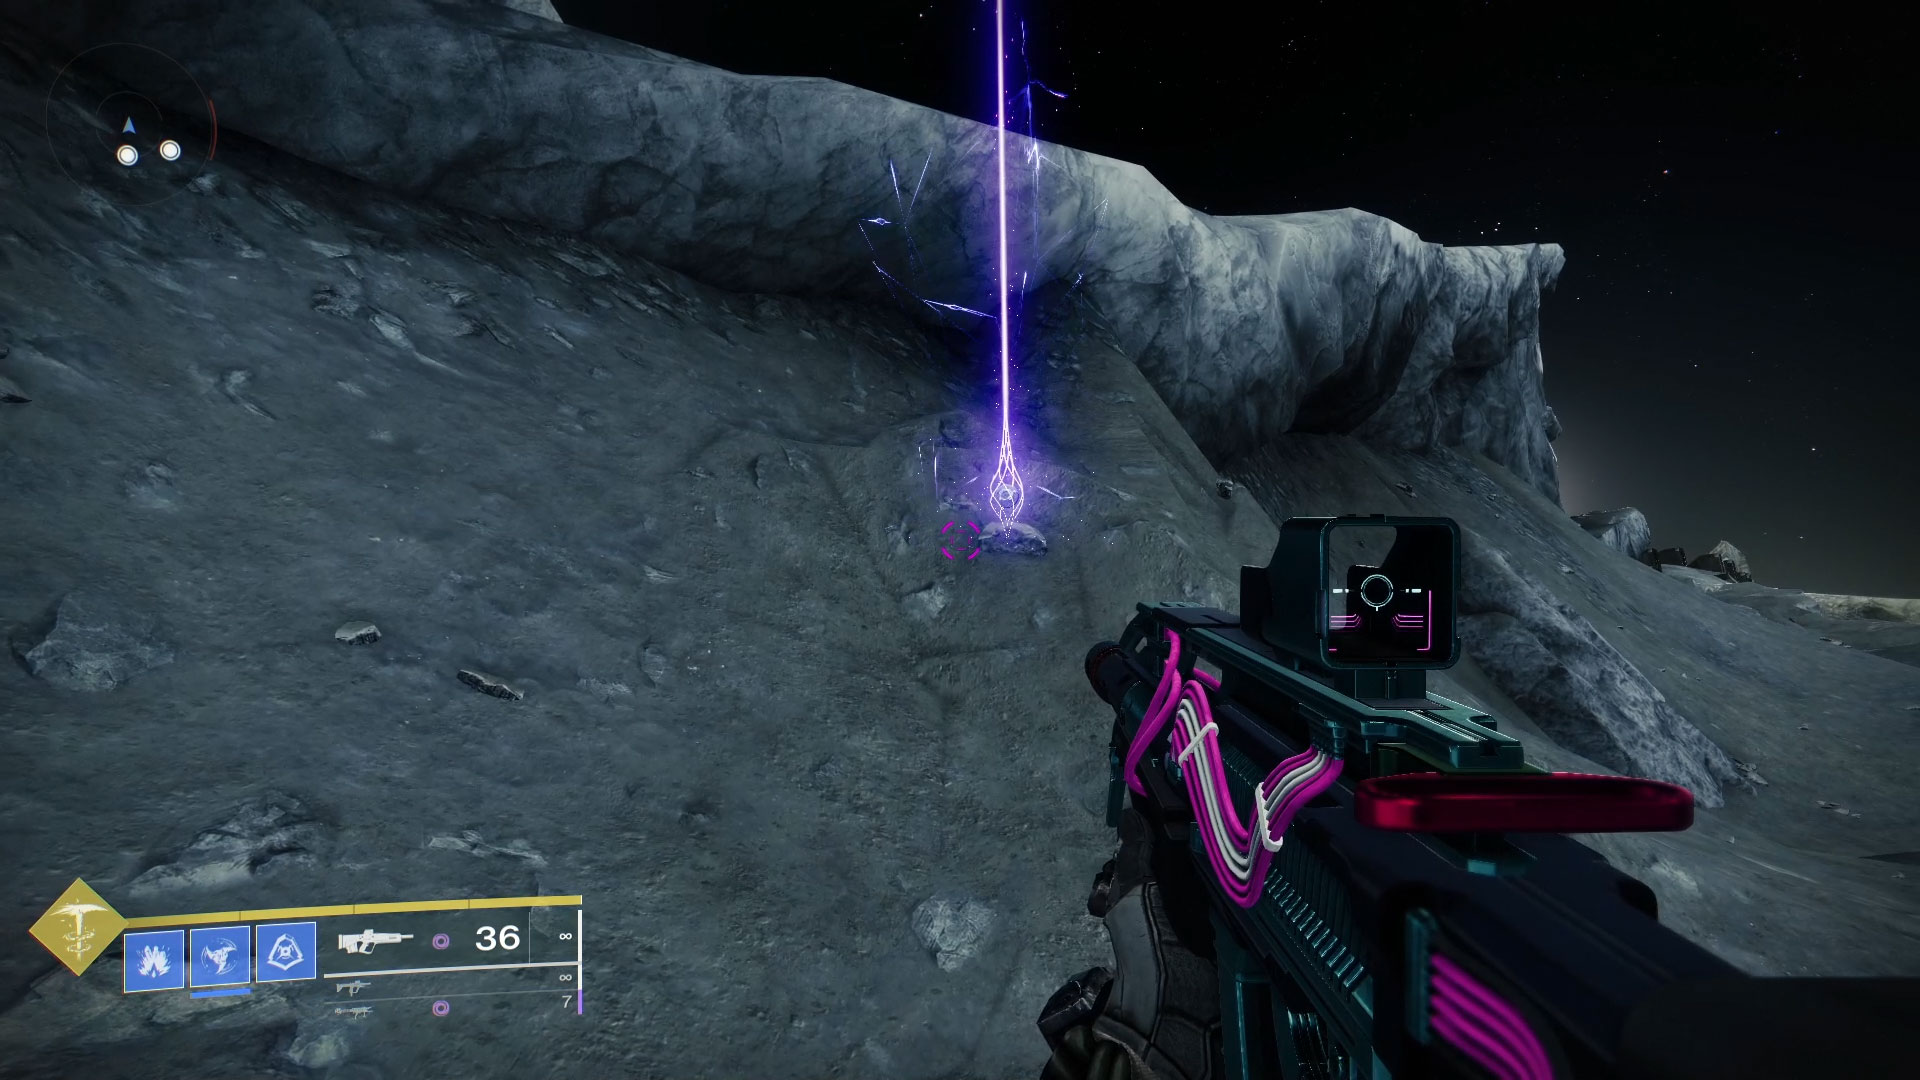
#5: Eastern Lunar Crag
If you’re looking at the fourth anchor, turn around and go straight ahead to the next Altar that’s just outside the Red Walls. The fifth anchor is to its left nestled against a small, rocky crag.

#6: Southern Lamp
From the fifth Anchor, hop on your sparrow and keep the ridge on your left. Follow it around past the Altar at the top of the hill and across the bridge to the lamp. The sixth anchor will be just to its left.
#7: Southwestern Altar
Hop on your sparrow and head back towards the transmat point for Sorrow’s Harbor. Go past the first Altar and through the ravine until you reach the second Altar. The last Anchor will be under a rocky overhang to its left.
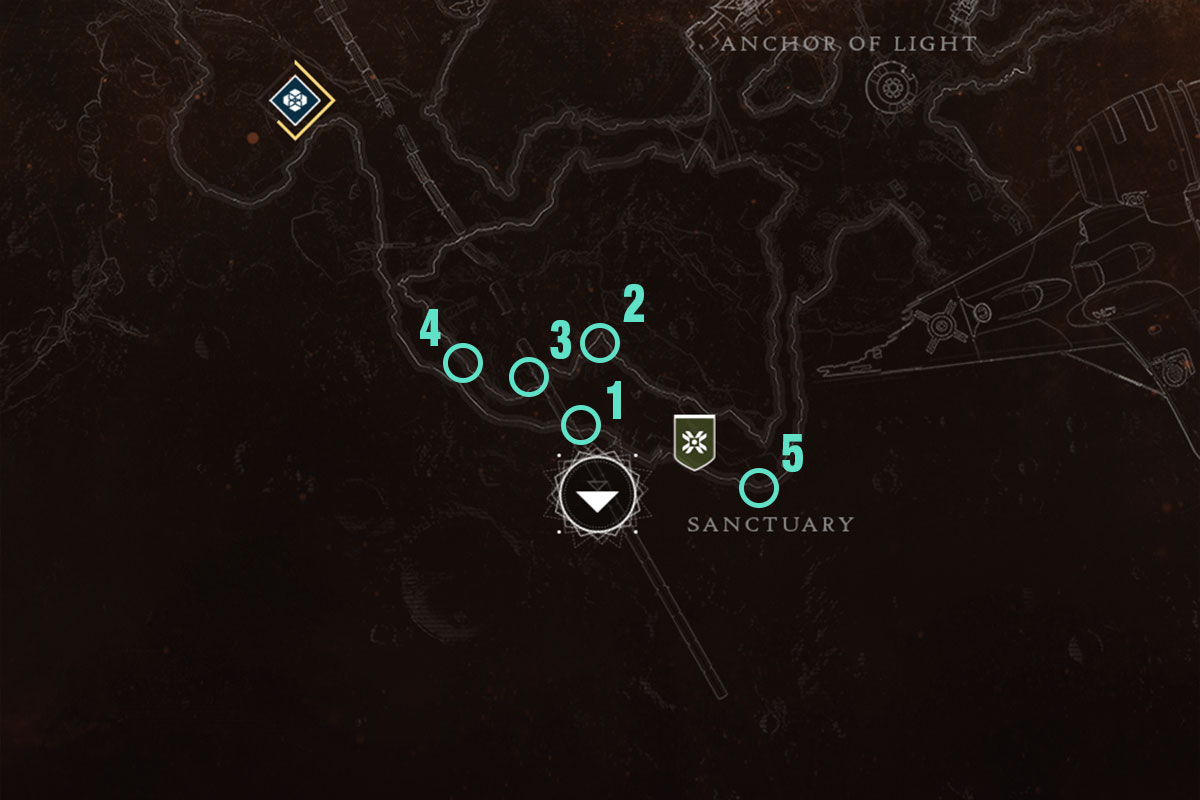
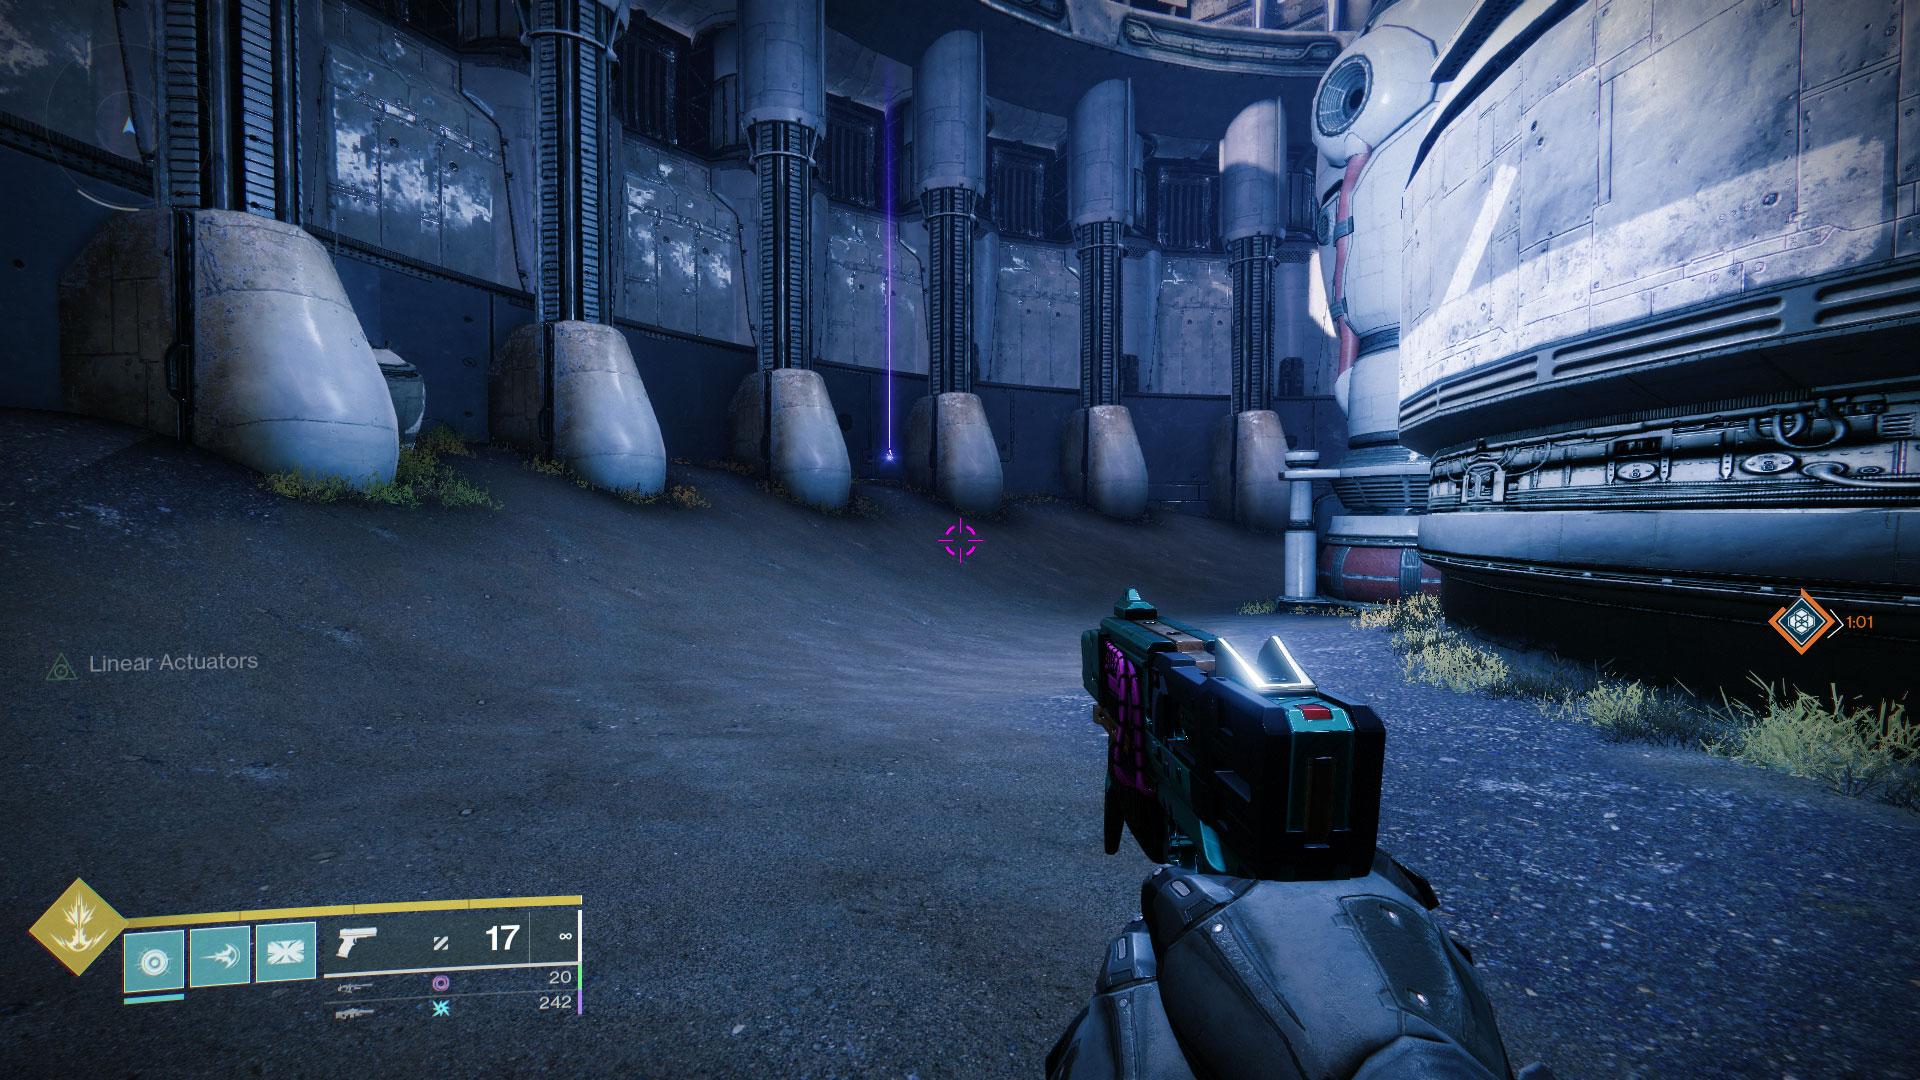
Sanctuary
There are 5x Ascendant Anchors to collect in Sanctuary with the bulk of them in the Northwestern part of this zone.
#1: Solar Panels
Take the transmat point at Sanctuary to teleport there. Once you spawn in, you should be able to see the purple beacon behind the solar panel bank on your left. Hop over them and collect this anchor.

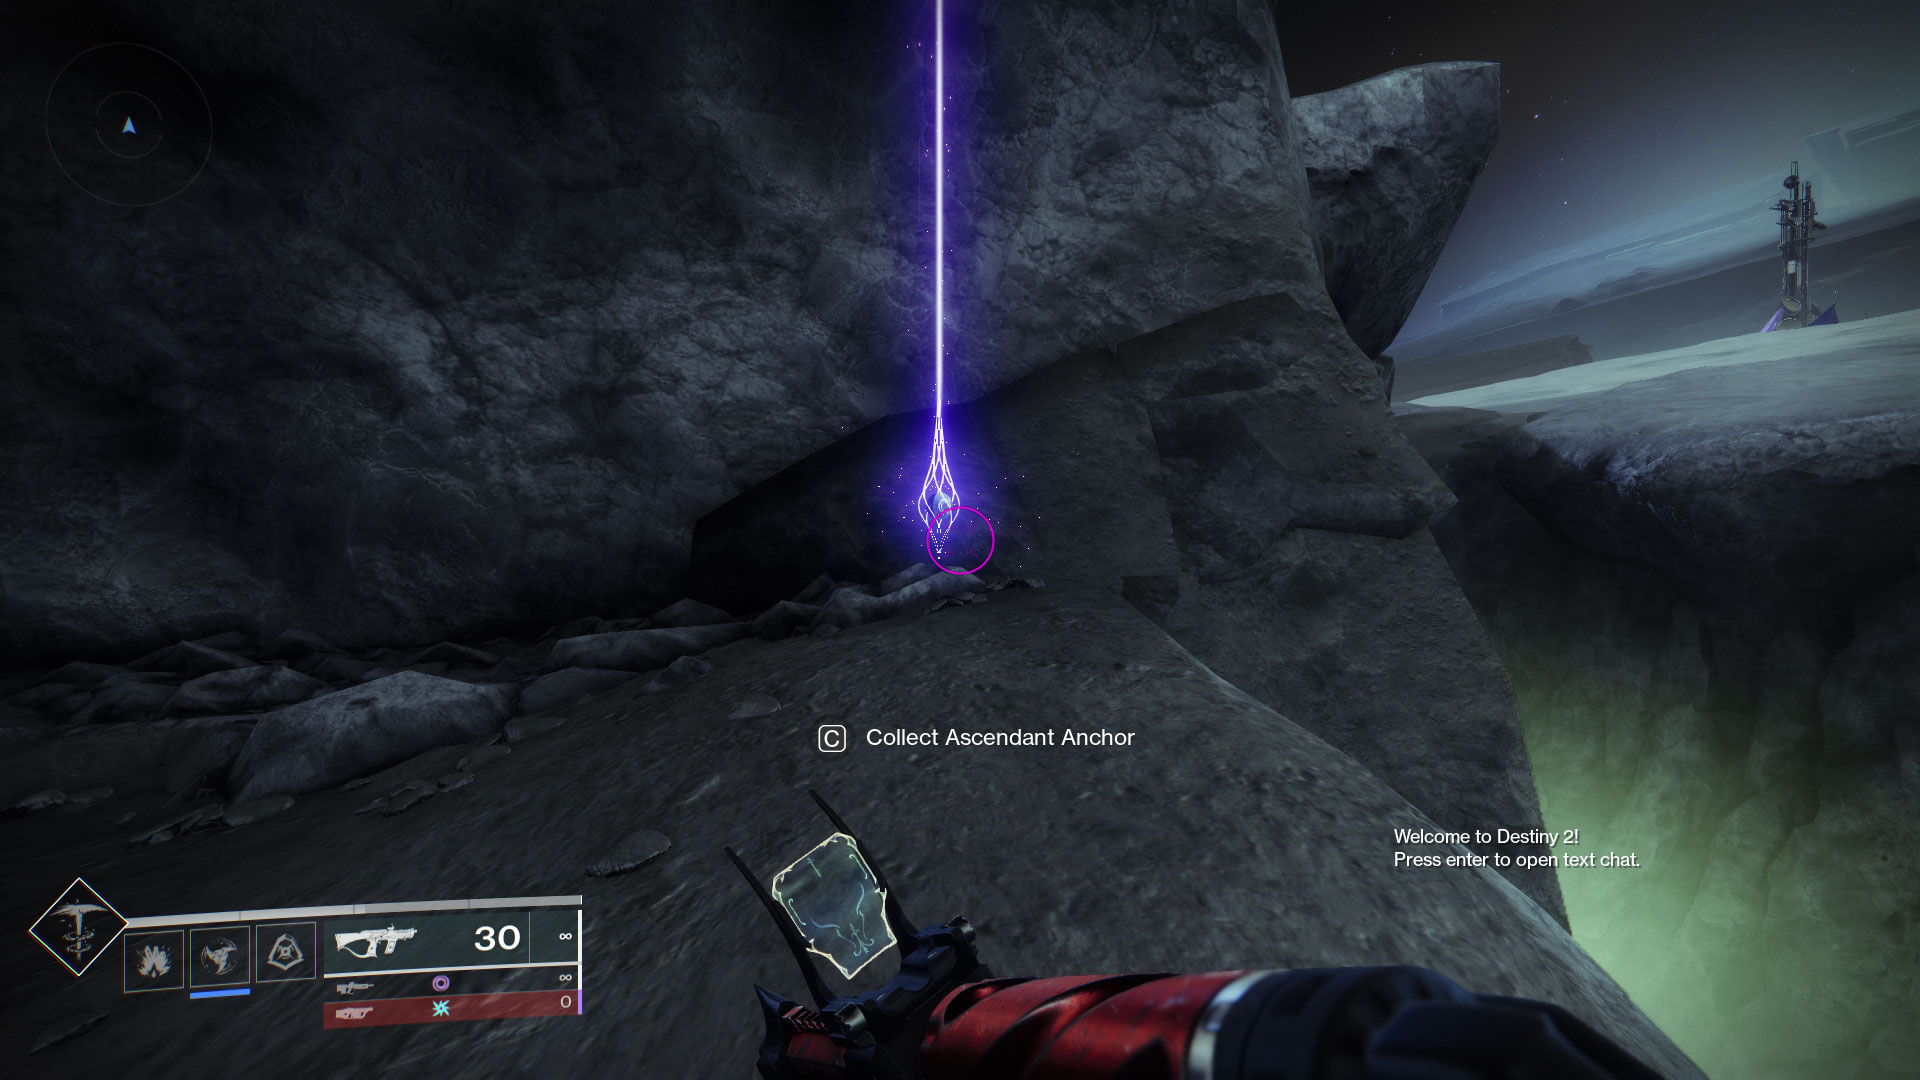
#2: Northwestern Cliff
This anchor is located between the bridge support column and cliff face against the Northwestern ridge. You might have some difficulty seeing the beacon, but hop over or go around the support foundation and you’ll see it nestled there in the alcove.
#3: Bridge Support
Turn back towards the transmat point from the second anchor, hop over the busted pod in front of you to the next bridge support. The anchor is on the side nearest the transmat point.
#4: Road to Archer’s Line
Hop on your sparrow and take the Western road that leads to Archer’s Line. Once you pass over the fallen metal lattice on the road, you should see the beacon come into view on the right side of the road just before the crevasse full of green gas.

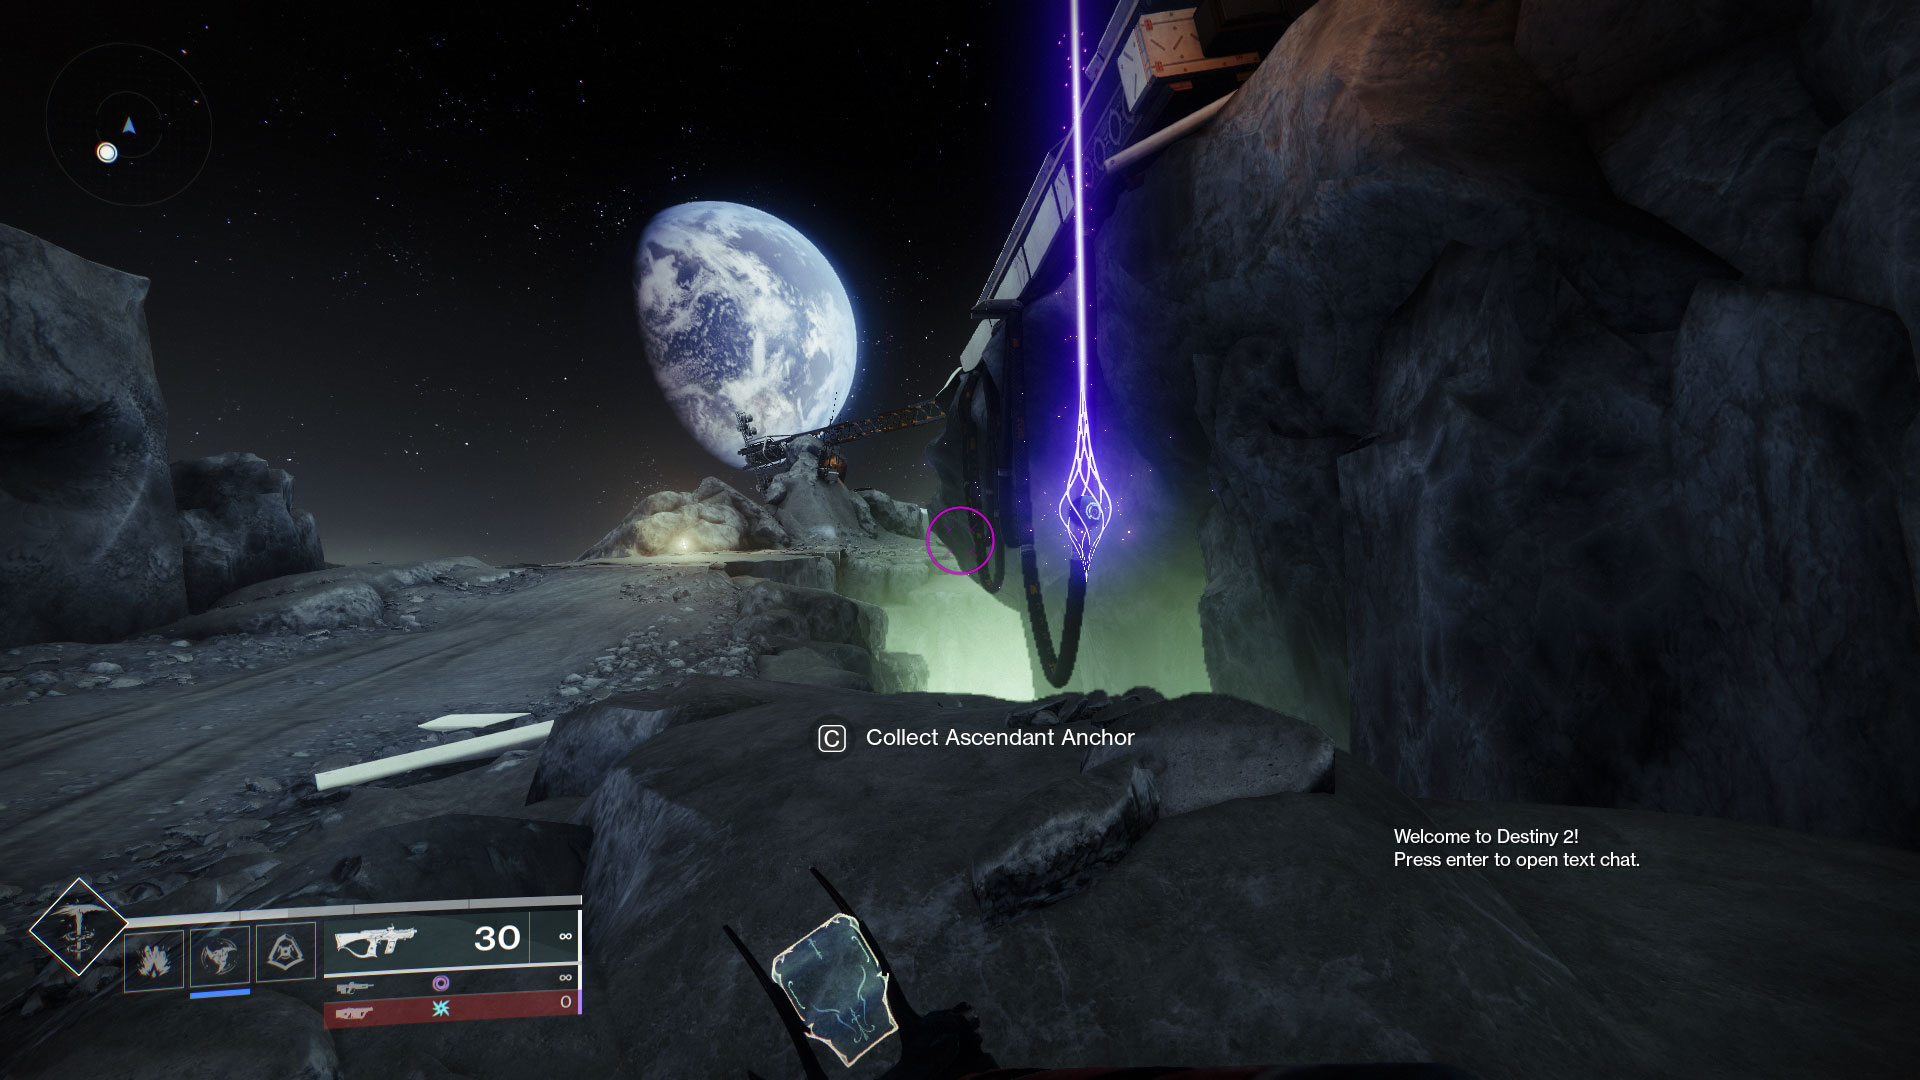
#5: Road to Anchor of Light
Take your sparrow back through Sanctuary and take the road that leads East to the Anchor of Light. You should see the beacon as soon as you pass through Sanctuary, but if you don’t, it’s on top of the hill just after the road veers left towards Anchor of Light. Climb the cliff face to snag the last anchor.
Shattered Realm: Forest of Echoes
There are a total of 10 Ascendant Anchors in the Forest of Echoes. Since there isn’t a map of the Shattered Realm, I’ve organized the anchors in the order that you can collect them. In order to collect all 10, you’ll need to have already run Forest of Echoes once before and have the Barrier ability unlocked on your Wayfinder’s Compass. You’ll also need to do some light backtracking for a couple of anchors since the Barrier totem activates after defeating certain encounters.
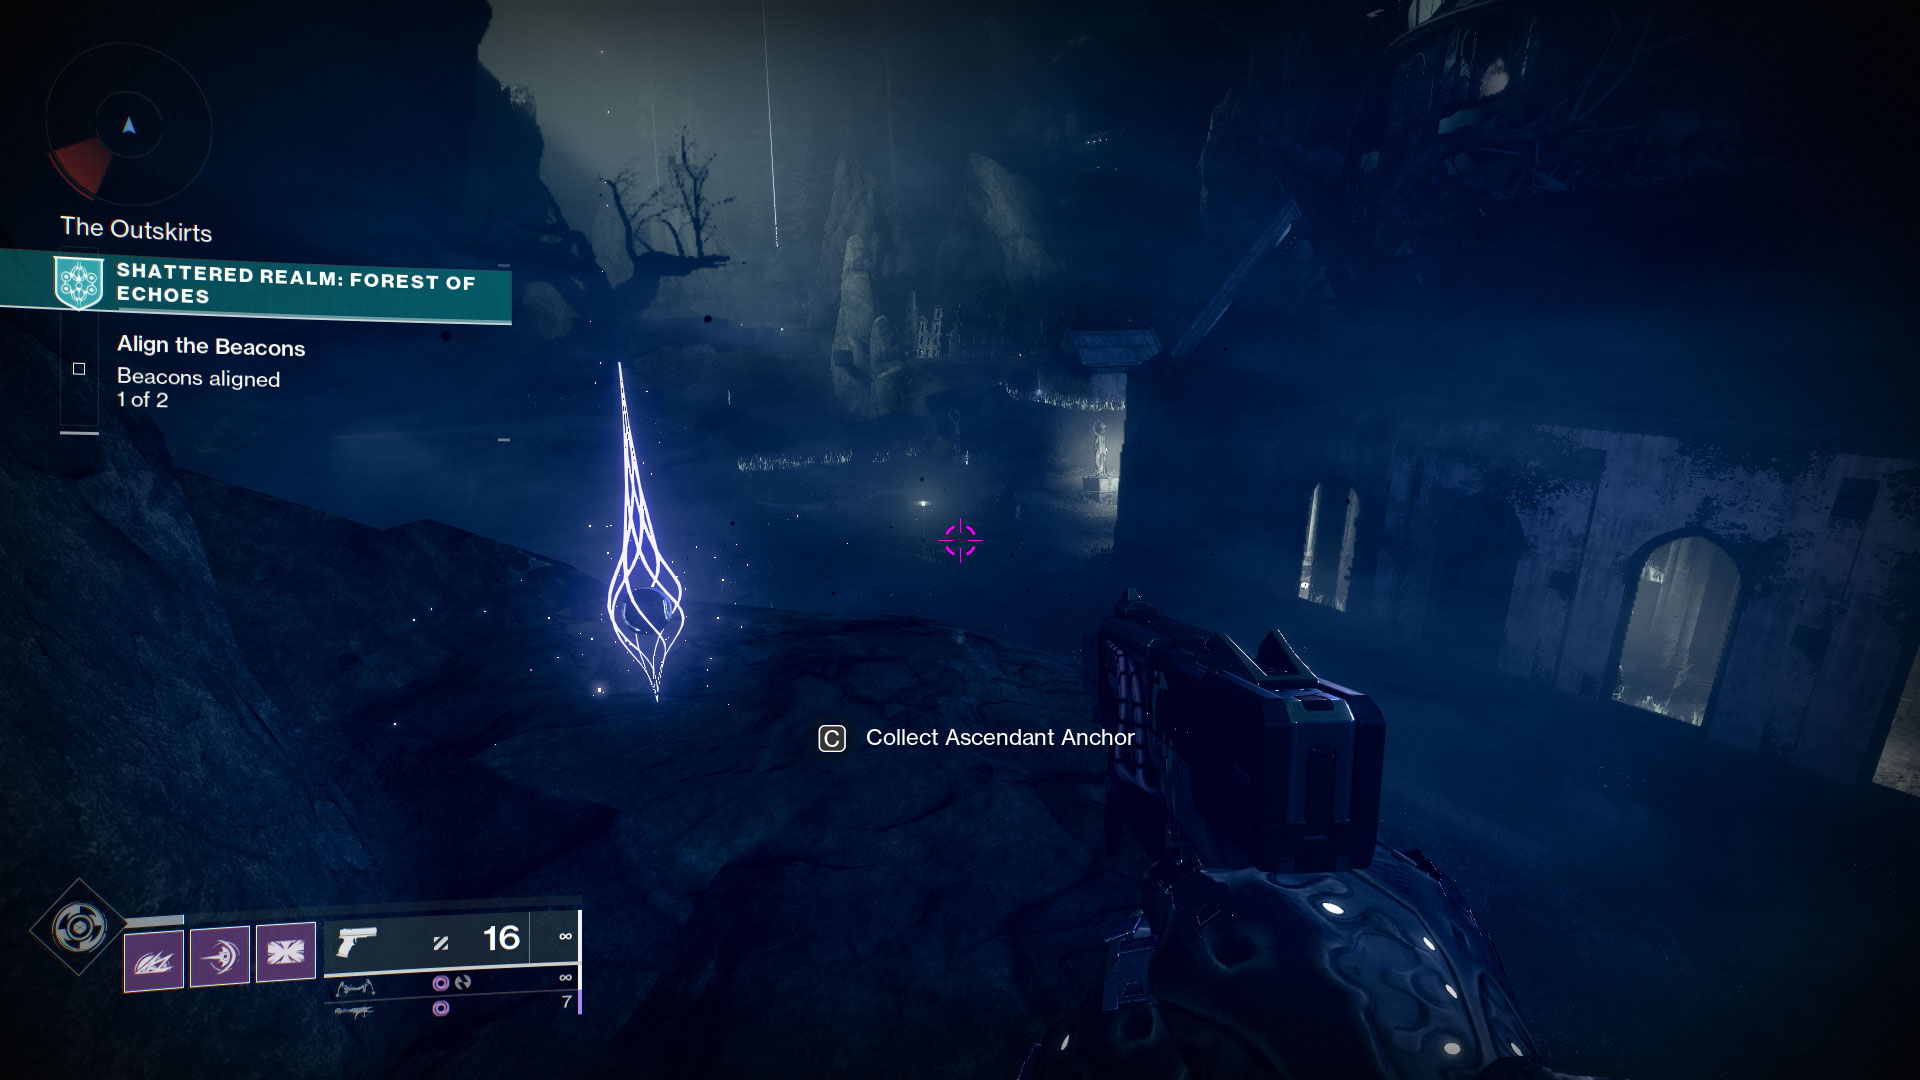
#1: Next to the Gnarled Tree
The first anchor is going to be on the main road. After loading into the activity and going through the portal in the H.E.L.M., simply follow the path down until you reach the first cluster of Taken enemies. Clear these mobs and the anchor will be on the far side of the large, gnarled tree that’s in the middle of the road.

#2: Behind the First Building
After collecting the first Ascendant Anchor, turn to your right and look for a small stone building with a glowing doorway. This is one of the barriers I mentioned earlier and we’ll come back to this shortly. The second anchor is located behind this building. Simply run around the back and you’ll see it.
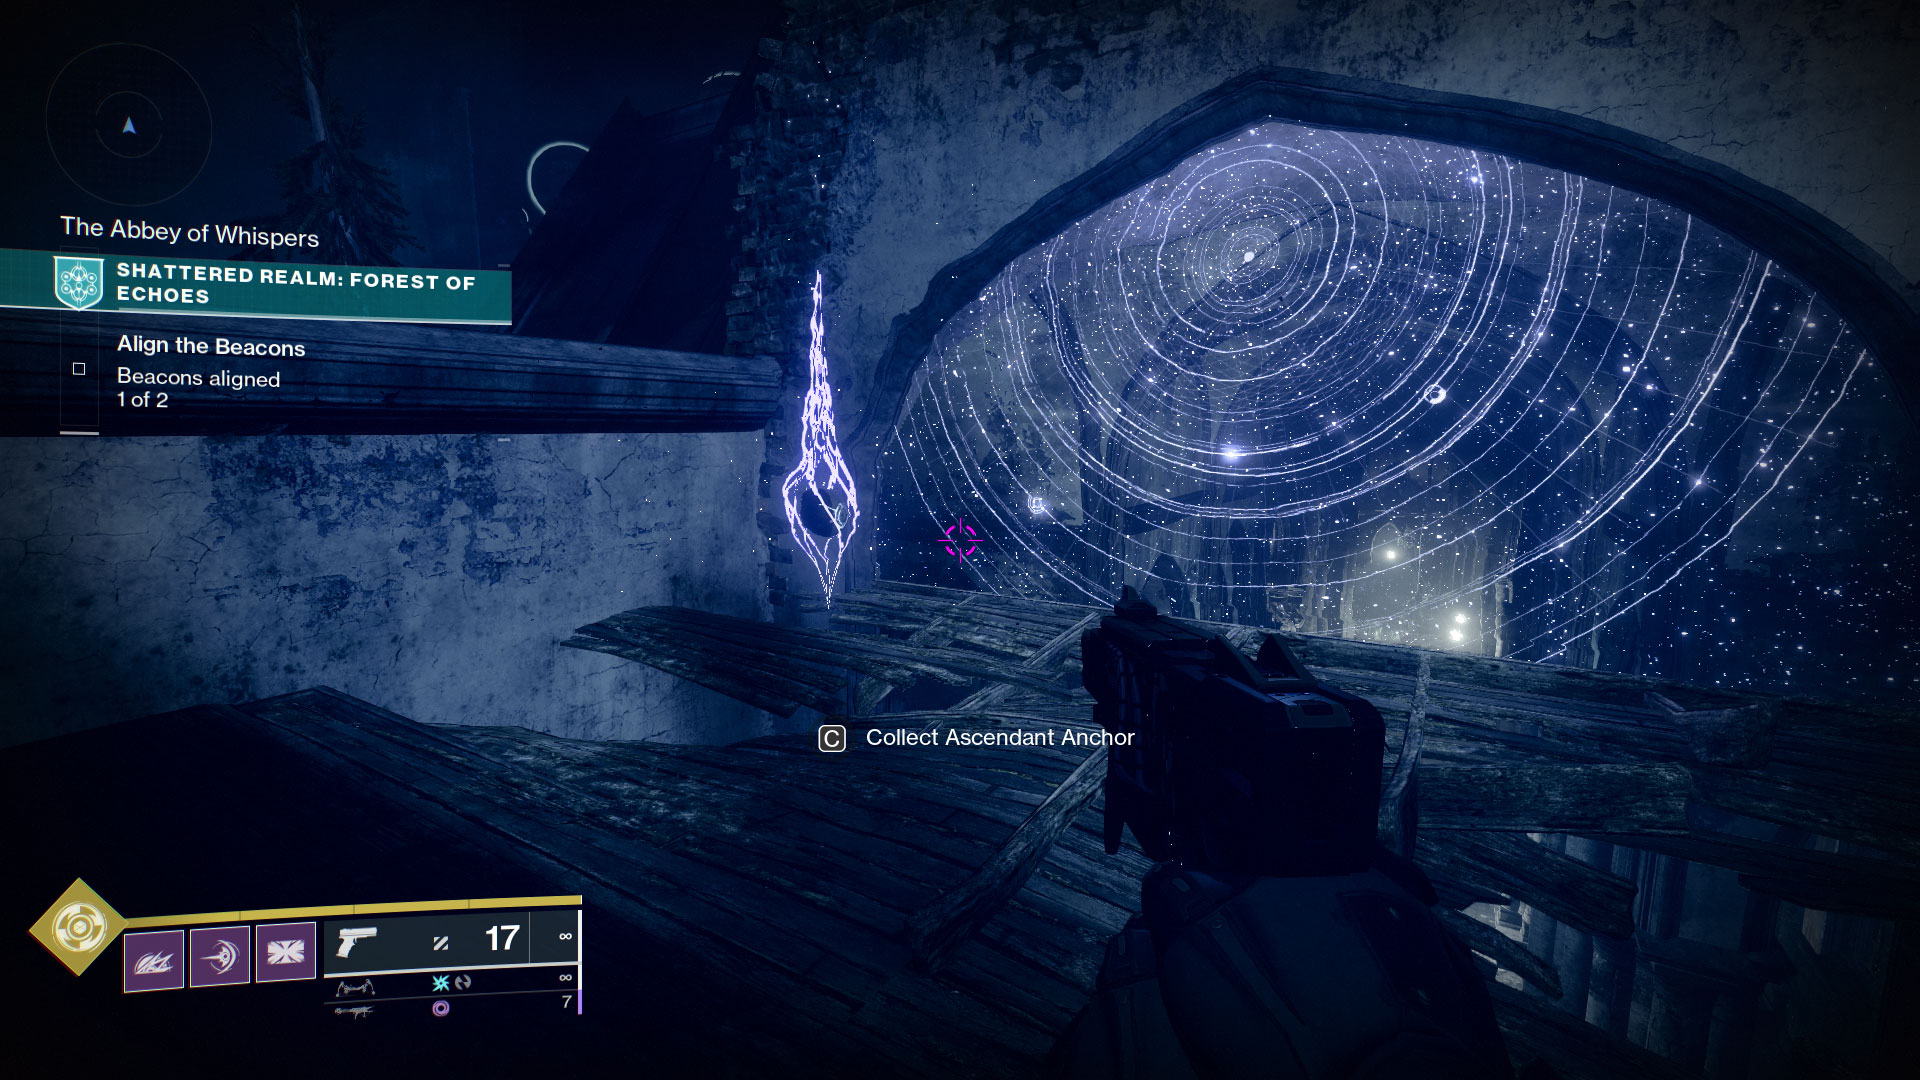
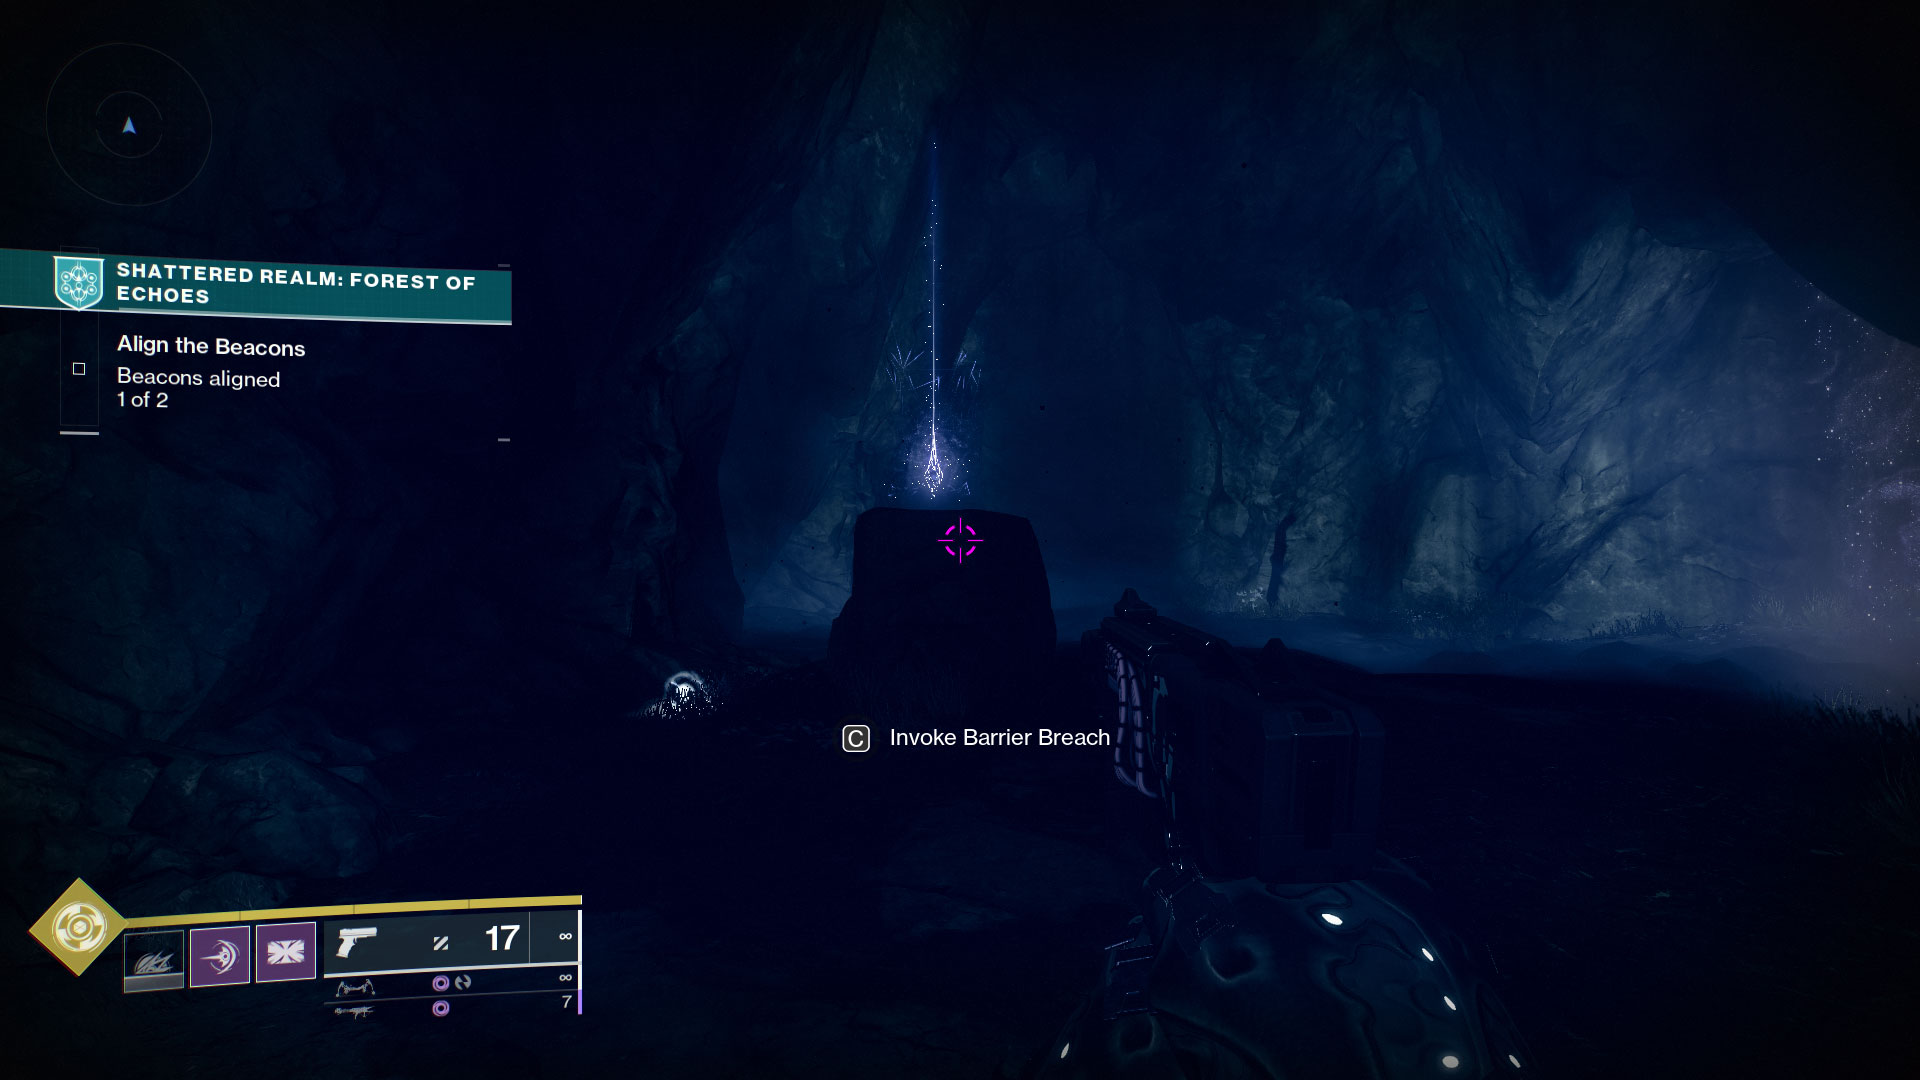
#3: Top of the Cathedral
You won’t be able to get this anchor until after you align the first beacon. The totem you use to invoke Barrier Breach is deactivated until you’ve beaten the encounter. Once you’ve cleared the area of Taken enemies, go back to the Cathedral’s entrance and get the barrier buff from the totem on the right side of the room. Run towards the beacon and jump up through the barrier into the alcove that overlooks the Cathedral floor.
#4: Overlooking the Cathedral
Hop down from the alcove where you picked up the third anchor and go outside of the cathedral through the door on your left. Directly in front of you will be a segmented stone walkway that leads up a cliff. Sitting atop an outcropping of stone overlooking the Cathedral is the 4th Ascendant Anchor.

#5: Inside the First Building
For this anchor, you’ll need to backtrack to the first building we came across. Just outside of the entrance is a Barrier totem. Snag the buff and go through the barrier. Hop down into the tunnels, follow the corridor to the fork, and take a left. Down this hallway is the 5th anchor.
#6: Inside the First Barrier
You’ll need to backtrack one last time to the Gnarled Tree where you picked up the first anchor. If you look back towards the entrance to the Shattered Realm, there’s another barrier beneath an even larger tree. Grab the Barrier buff and head through the barrier. Once inside, you’ll need to dispatch the 3 Taken enemies. Go down to the bottom level where the totem is. Look to your left and the 6th anchor will be right in front of you.

#7: In the Town Square
There’s a bit of a hike to the next anchor. Go back to the Gnarled Tree and take the path towards the second beacon. After a while, you’ll come across a section of architecture that looks like a ruined Town Square. Defeat the Taken that have set up shop there. After it’s clear, jump up to the second level of the first building, turn right, hop up to the next level, and you should see the next anchor’s beacon just on the other side of the wall in front of you.
#8: Cavern Beneath the Town Square
From the last anchor, hop down from the ruined buildings and go towards the right side of the Town Square. There’s a path between the ruined building and the cliff face on the left. You’ll know you’re in the right place when you see a totem that will need the True Sight ability to be activated.
You’ll need to take a bit of a leap of faith here, but there’s a walkway down and to your left that leads to a cavern. When you see the next totem, you’ll know you’re in the right place. Go down here and clear out the handful of Taken in the cavern. This anchor is on the opposite wall across the cavern.
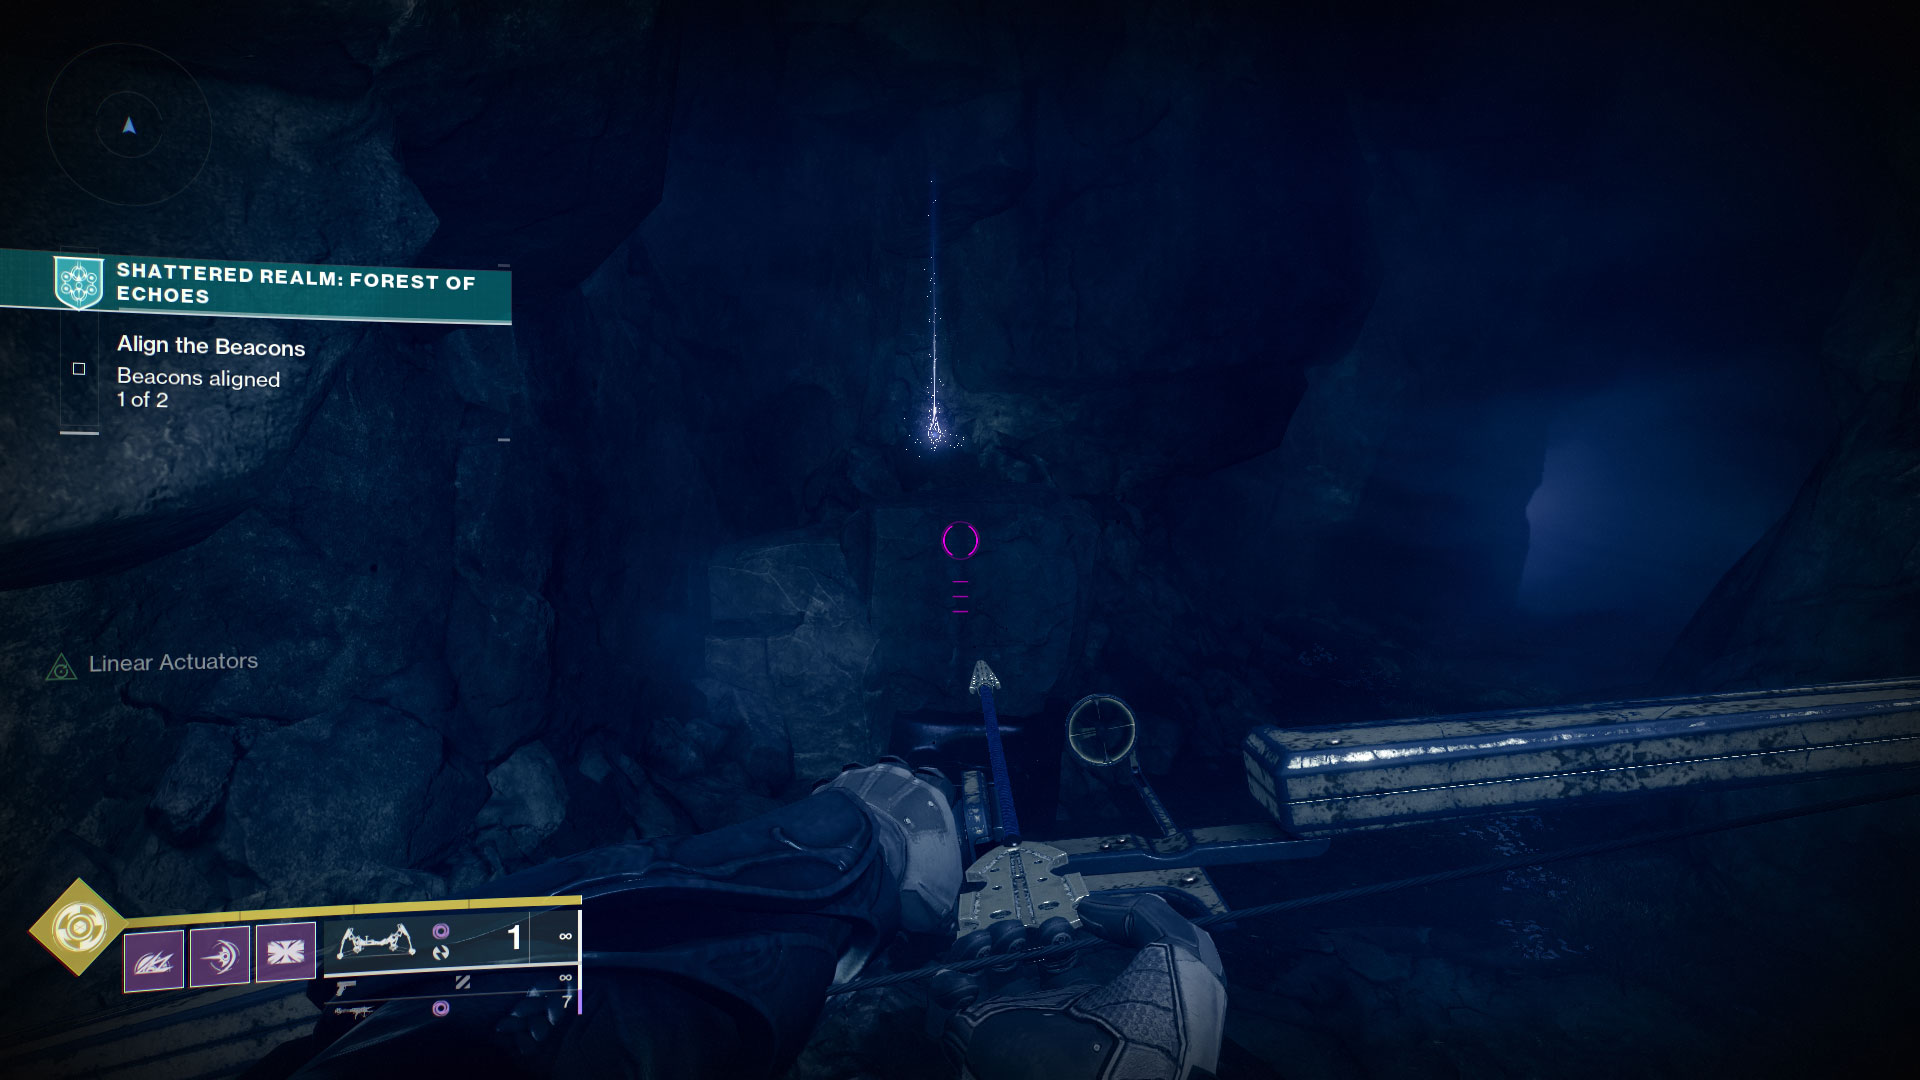
#9: Inside the Water Wheel
Backtrack to the Town Square and continue making your way to the second beacon. On the path up to the beacon, there’s a stone structure that’s blocked off by a barrier. On the left side of this structure is a water wheel that has the 9th Ascendant Anchor sitting on the axle.

#10: Beyond the Second Beacon
The 10th and final Ascendant Anchor is on a floating island beyond the second beacon. From the beacon, climb the rides in front of you until you reach the top. Veer to the right and go to the edge. You’ll see an island below you that has 3 totems and the last anchor.
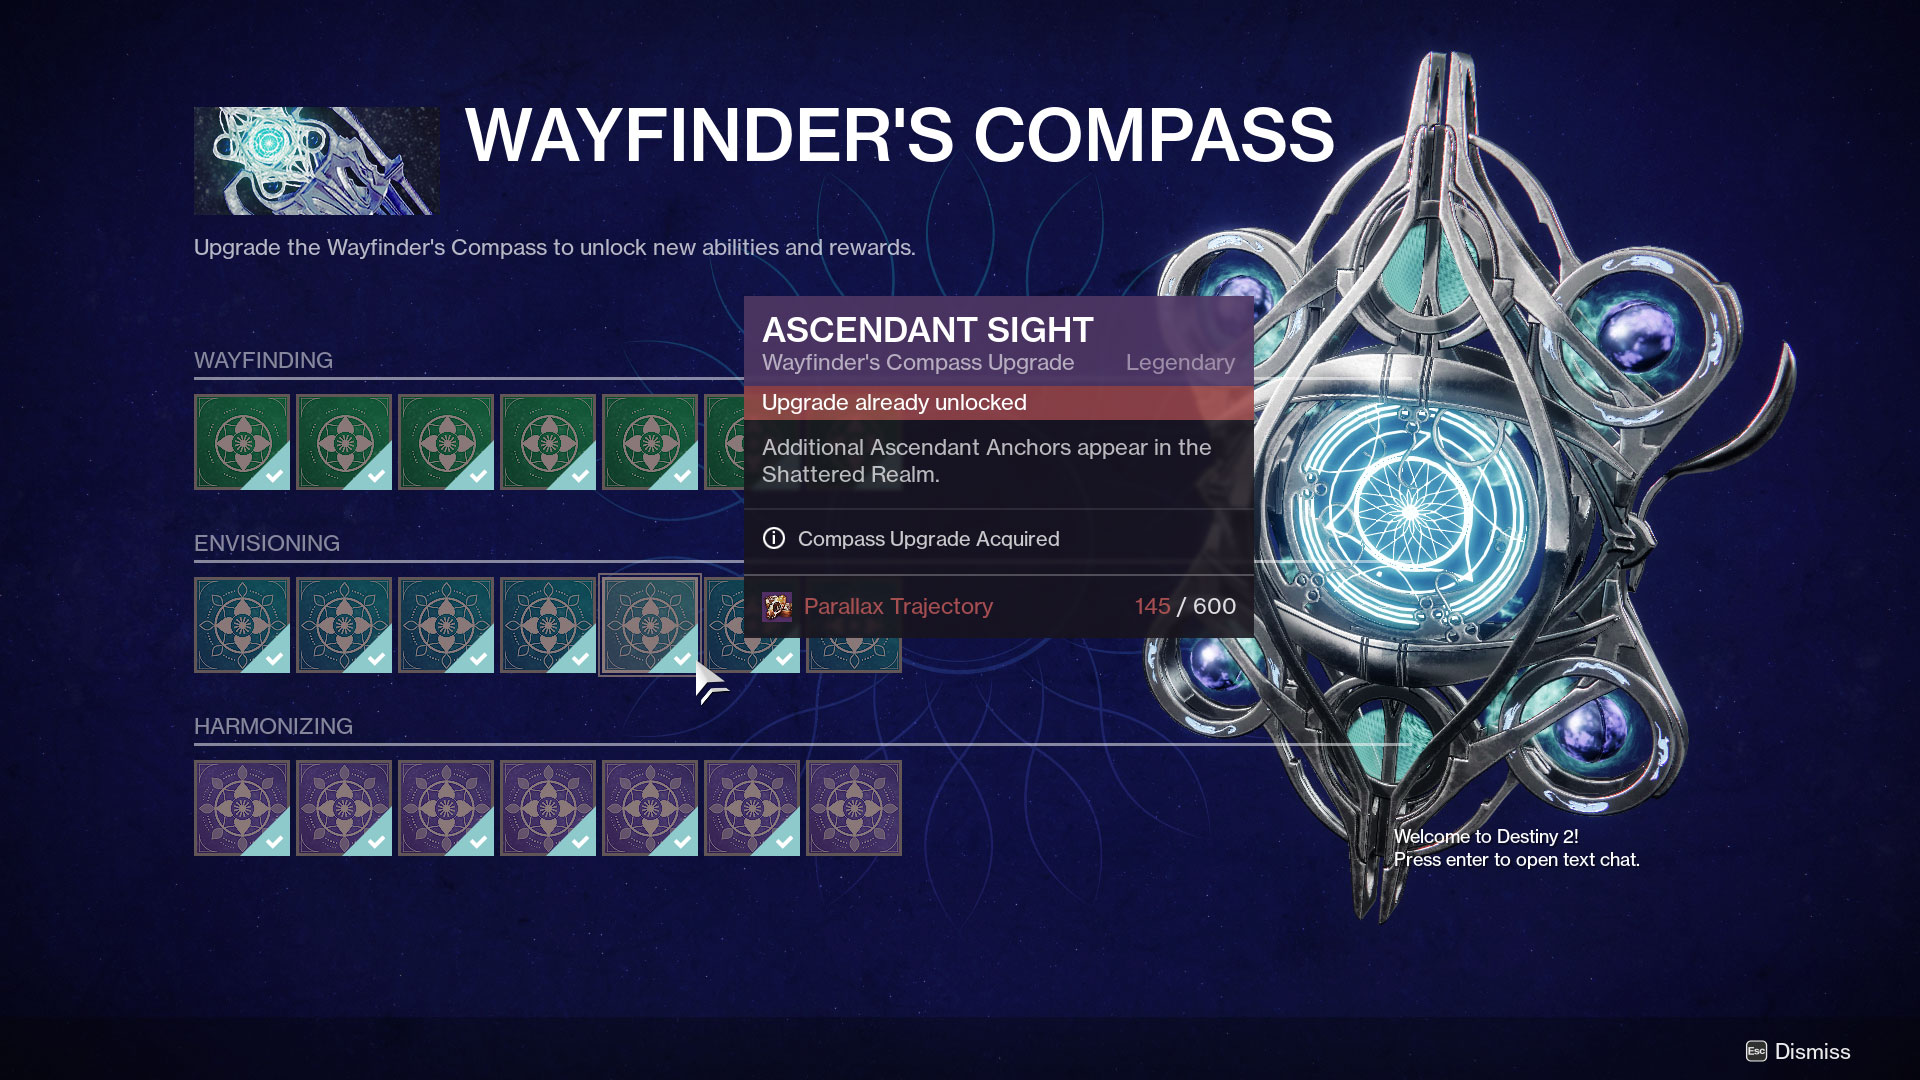
Bonus Anchors in the Forest of Echoes
In week 3, Guardians were able to unlock the Ascendant Sight ability on the Wayfinder’s Compass. This lets players see a completely new batch of Ascendant Anchors in the Shattered Realm that was previously hidden. You’ll also need to complete the Ager’s Scepter questline since you’ll need the trace rifle to destroy some walls to get to a few of these anchors.

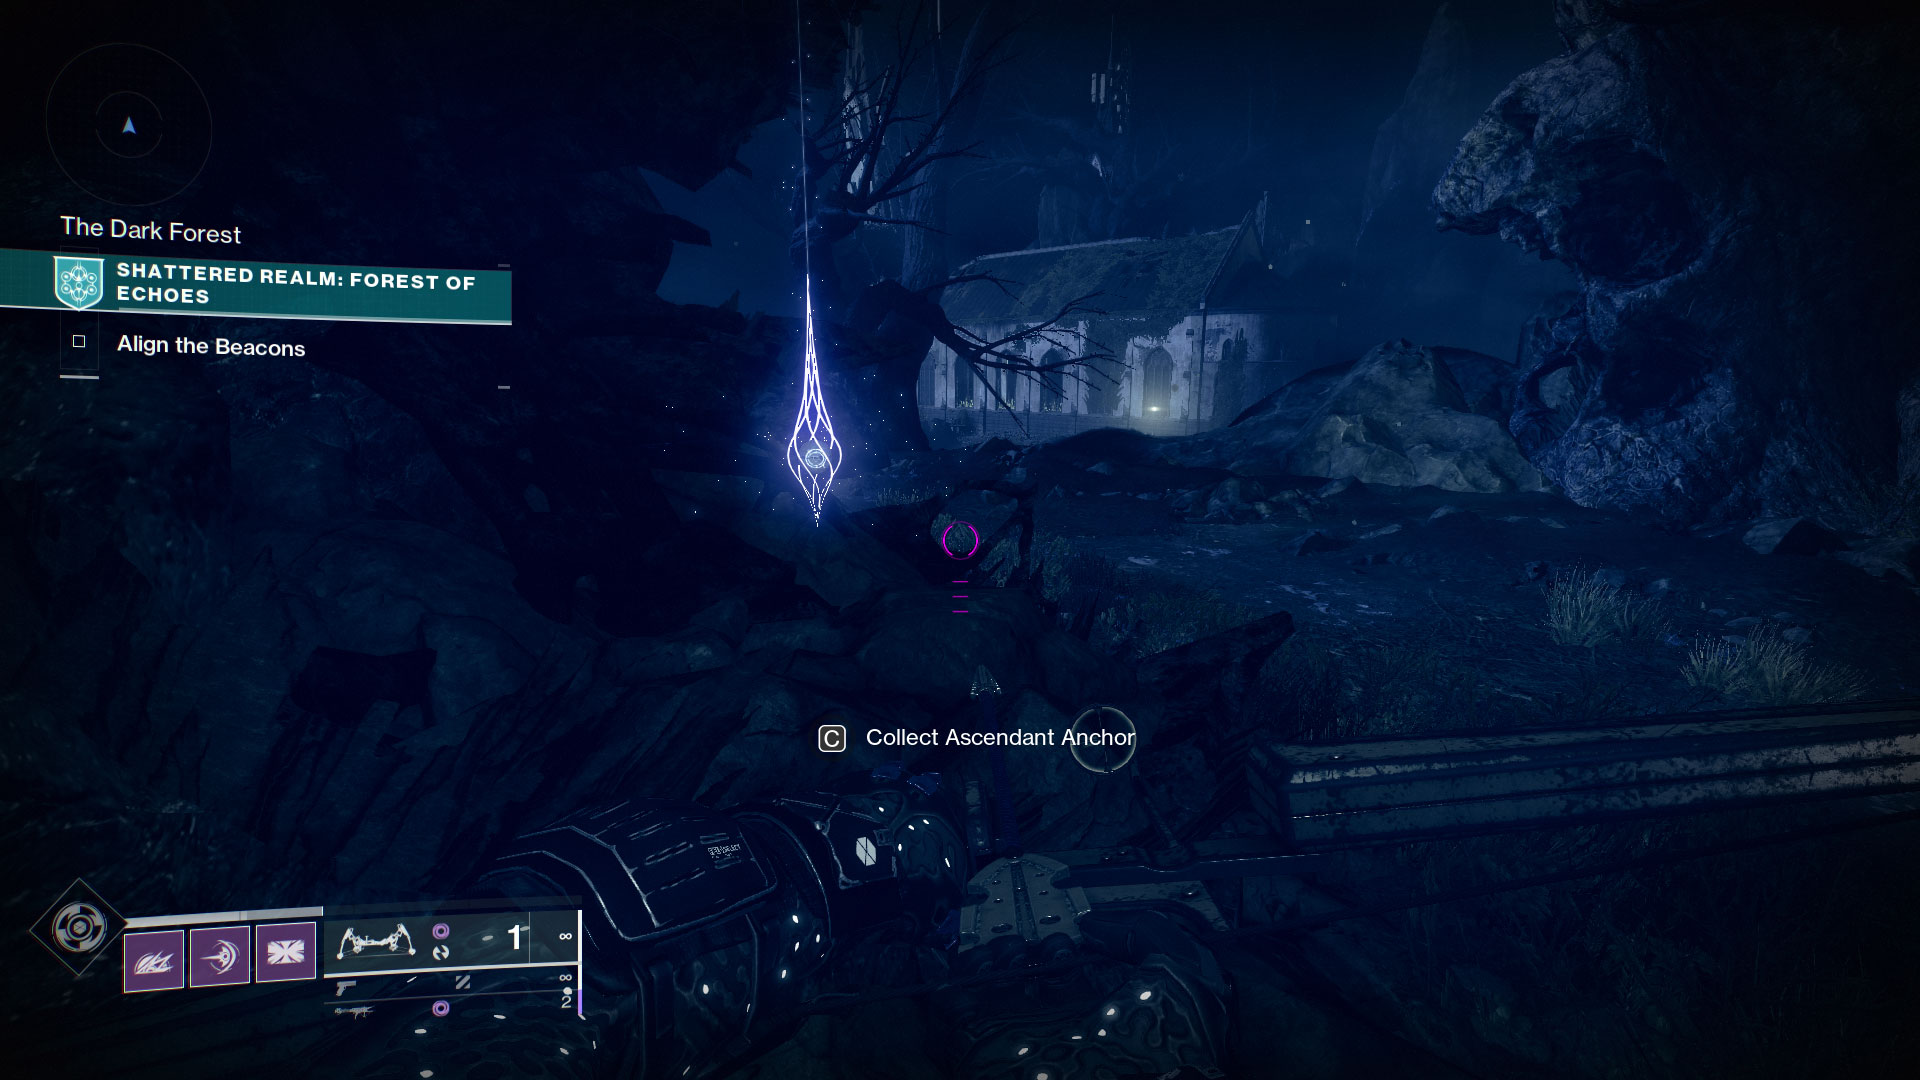
#1: The Dark Forest
The first of the hidden anchors is behind the very first Barrier that’s facing the Mausoleum in front of the Cathedral. Snag the Barrier Break buff from the totem outside the Mausoleum, go through the Barrier beneath the large tree, and make your way down to the bottom level. There are two totems here; a Barrier Break and a True Sight totem. Activate the True Sight one first because it has a longer duration, and then the Barrier Break. Go through the Barrier on the bottom level and you’ll see the Ascendant Anchor off in the distance to your left.

#2: Cathedral Grave
Make your way back to the Mausoleum in front of the Cathedral. Between it and the Cathedral itself is a statue with what looks like a grave next to it. You’ll see that the destructible stone is covering the grave. Destroy it with Ager’s Scepter and you’ll see the Ascendant Anchor once the rubble clears. Hop on down and pick it up.
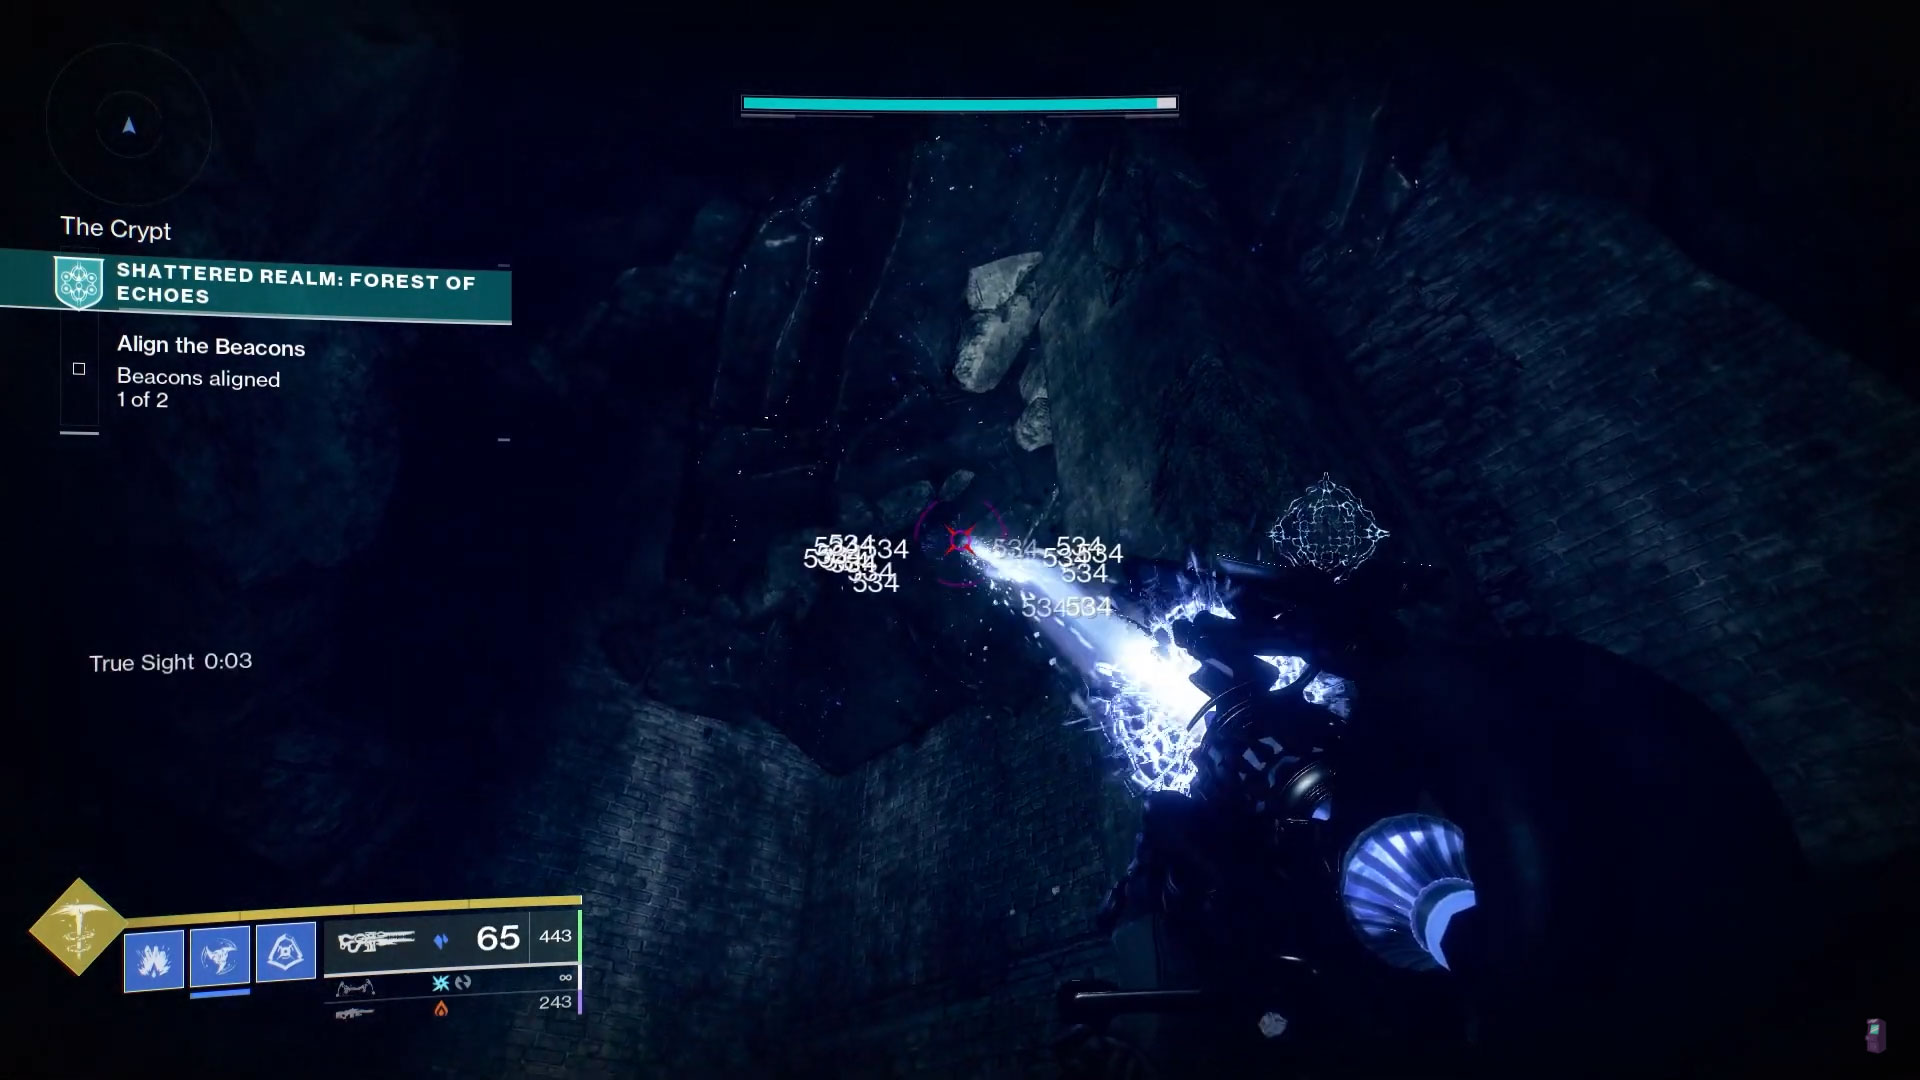
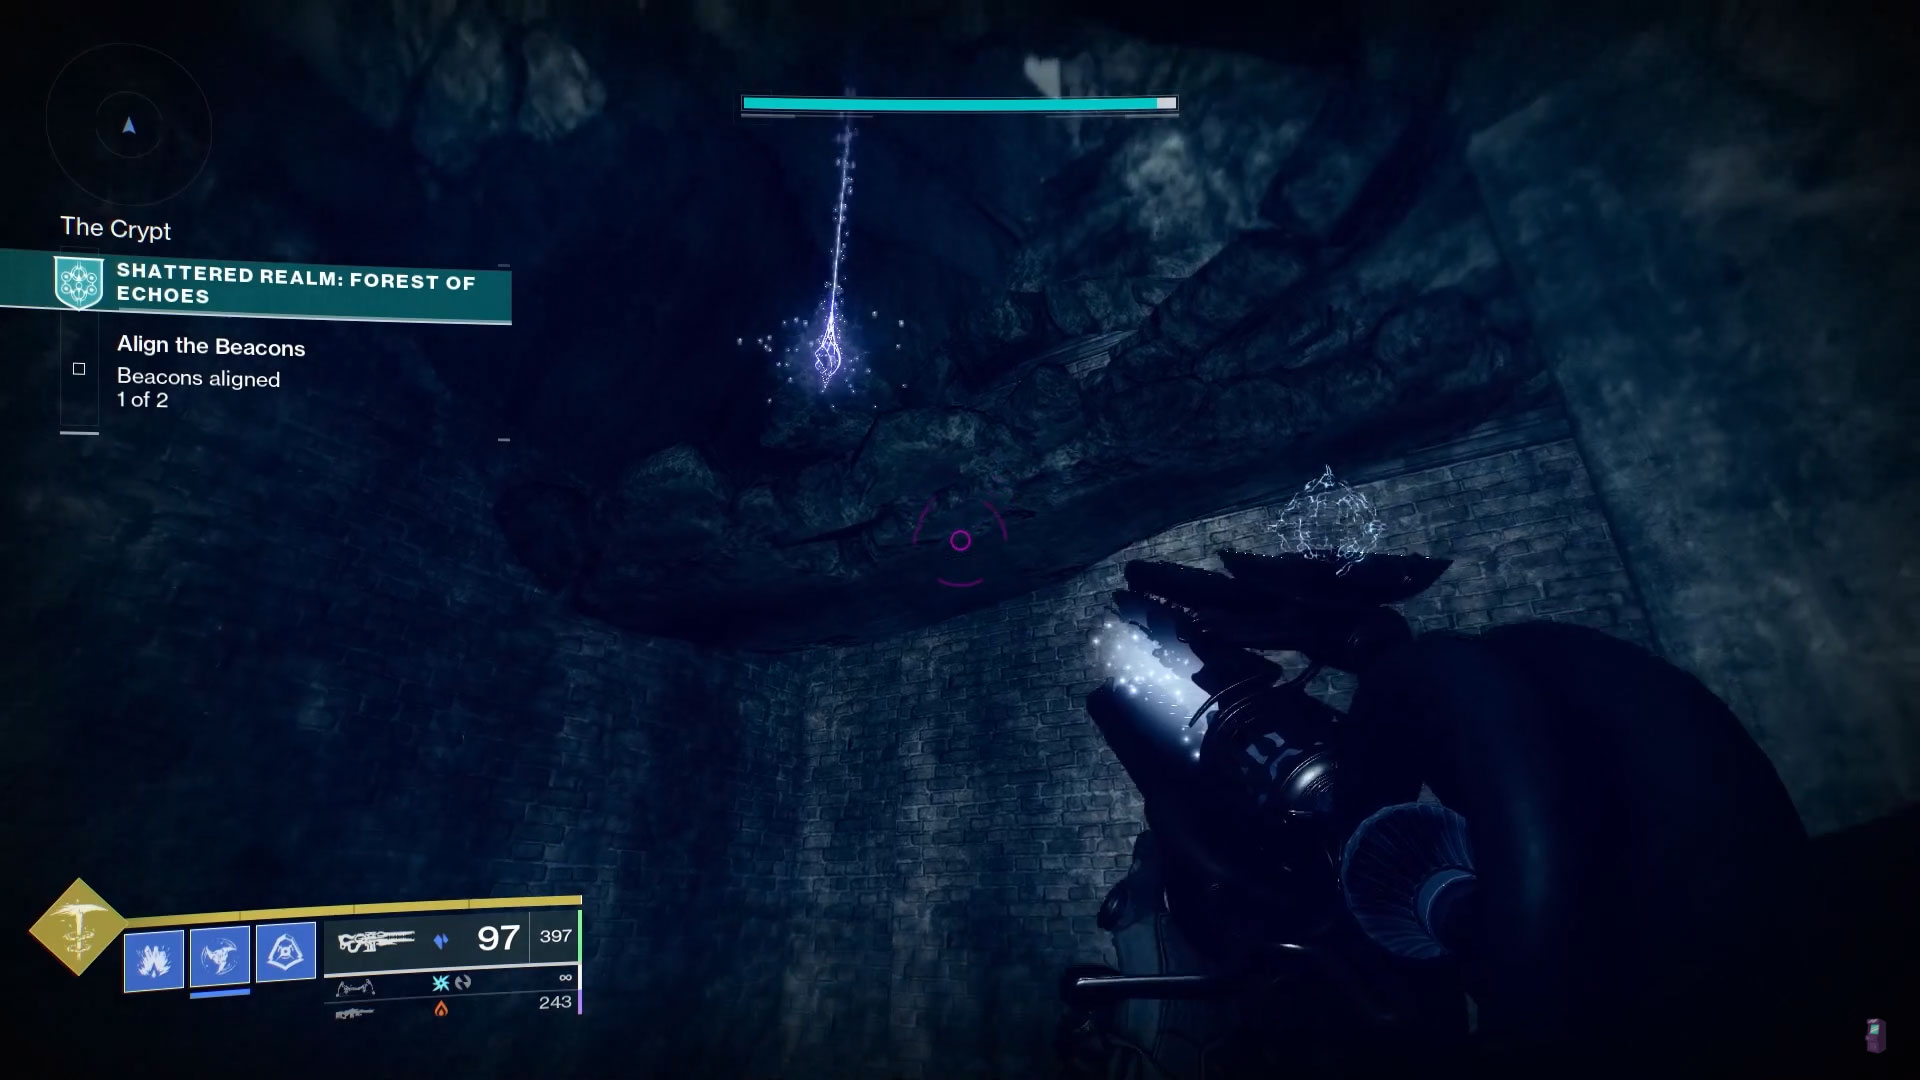
#3: The Crypt
You may already be familiar with the Crypt from the first batch of Anchors, but what you might not know is that there’s a second wing. To get there, head back to the Mausoleum entrance, pick up the Barrier Break buff, head inside, and follow the corridor until you see the two Totems at the end of the hallway. Take the buffs, go through the Barrier, and follow the platforms down to your right. Go through the second barrier and into the room filled with arches and columns.
Look for a small lantern at the far end of this room. You’ll see a demolished wall that opens up into a tunnel. Follow this corridor to the second lantern and look up. You’ll see the same destructible stone in the ceiling. Destroy it with Ager’s Scepter to reveal an Ascendant Anchor.
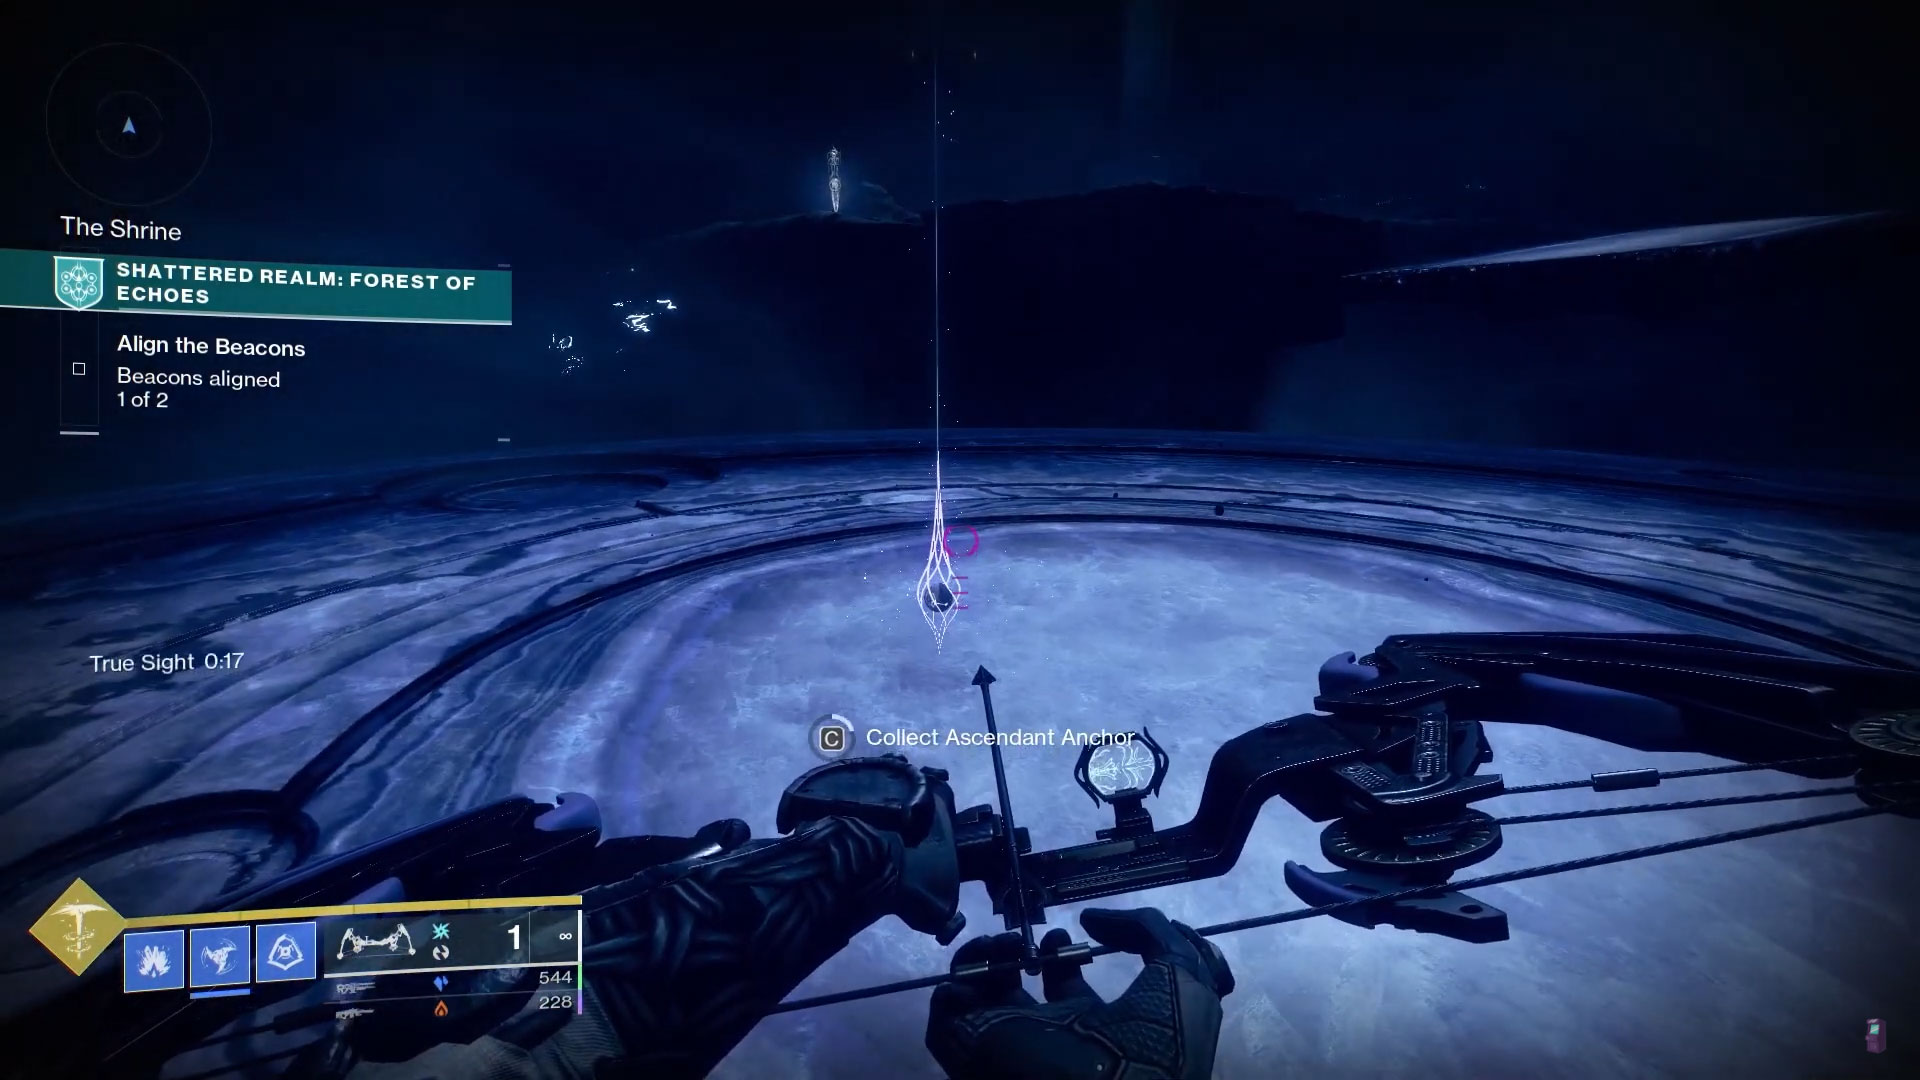
#4: The Shrine
If you’re facing the Cathedral and the Mausoleum from the entrance to the Forest of Echoes, the Shrine is off to your far left. You probably saw it when you entered the zone. It’s a floating island with a huge state in the middle of it.
There are two True Sight totems you can use to traverse the expanse between the two landmasses. You can find the first one just after the Barrier beneath the large tree in The Dark Forest. Go to the tree in the center of the clearing after the barrier and look towards the Shrine. You’ll see the totem at the edge of the ridge.
The other True Sight totem is behind the Cathedral on the side nearest the Shrine. This is the better way to go since the Ascendant Anchor is can be found on the platforms closer to this totem.

#5: Hidden Platform
Head back over to the Mausoleum and hop on top of the roof. Face the Cathedral and then turn to your right so you’re looking at the ridge. You should see an activated totem just past the slow zone on the ridge to the right. Head over to the totem and snag the buff. Make your way up the newly appearing platforms and you’ll get to this anchor.

#6: Sunken Cave
Make your way over to the ruined village courtyard that’s on the way to the second beacon. Instead of heading left to the beacon, hang a right instead. Go between the cliff wall and the ruined building to snag the True Sight buff there. This will help you reach the cave safely. Once inside, go to the far wall and hang a right. Snag both the Barrier Break and True Sight buffs there. Follow the platforms up and to the left and you’ll see the anchor when you round the corner.
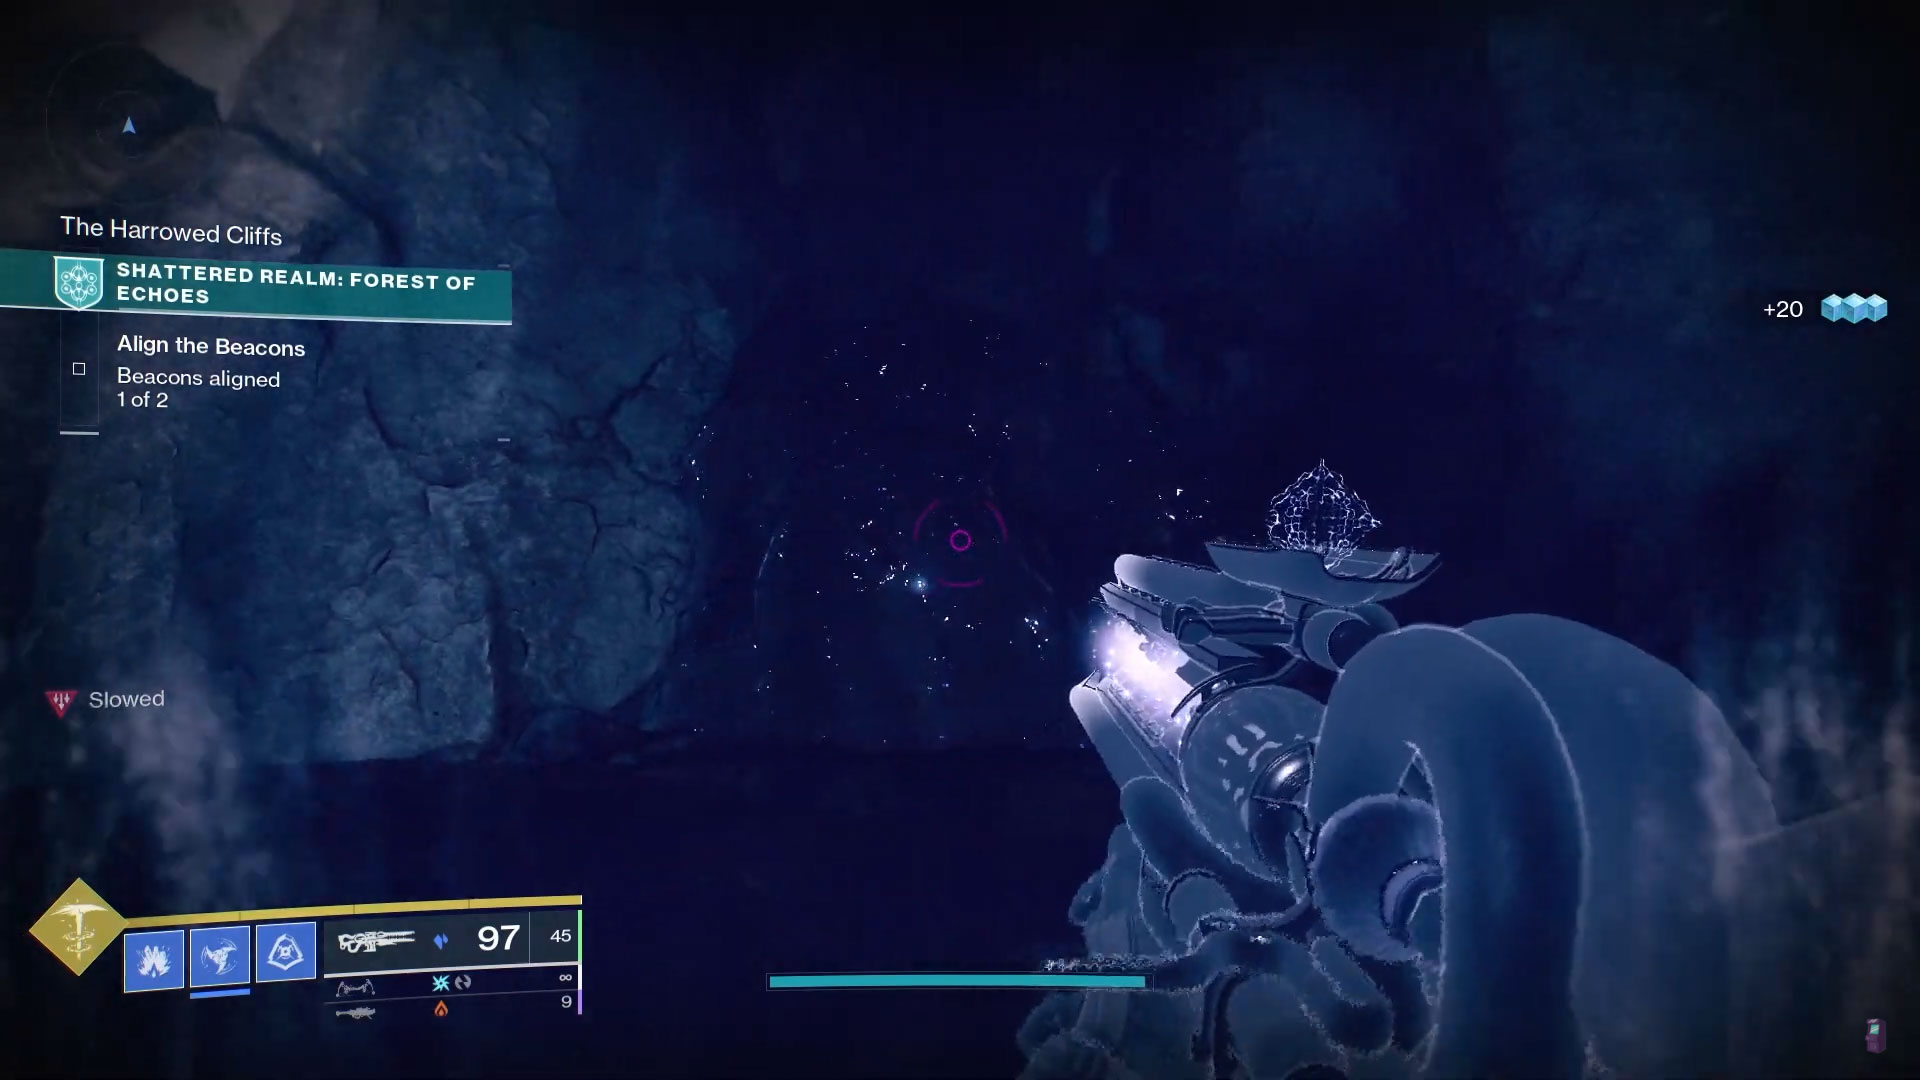
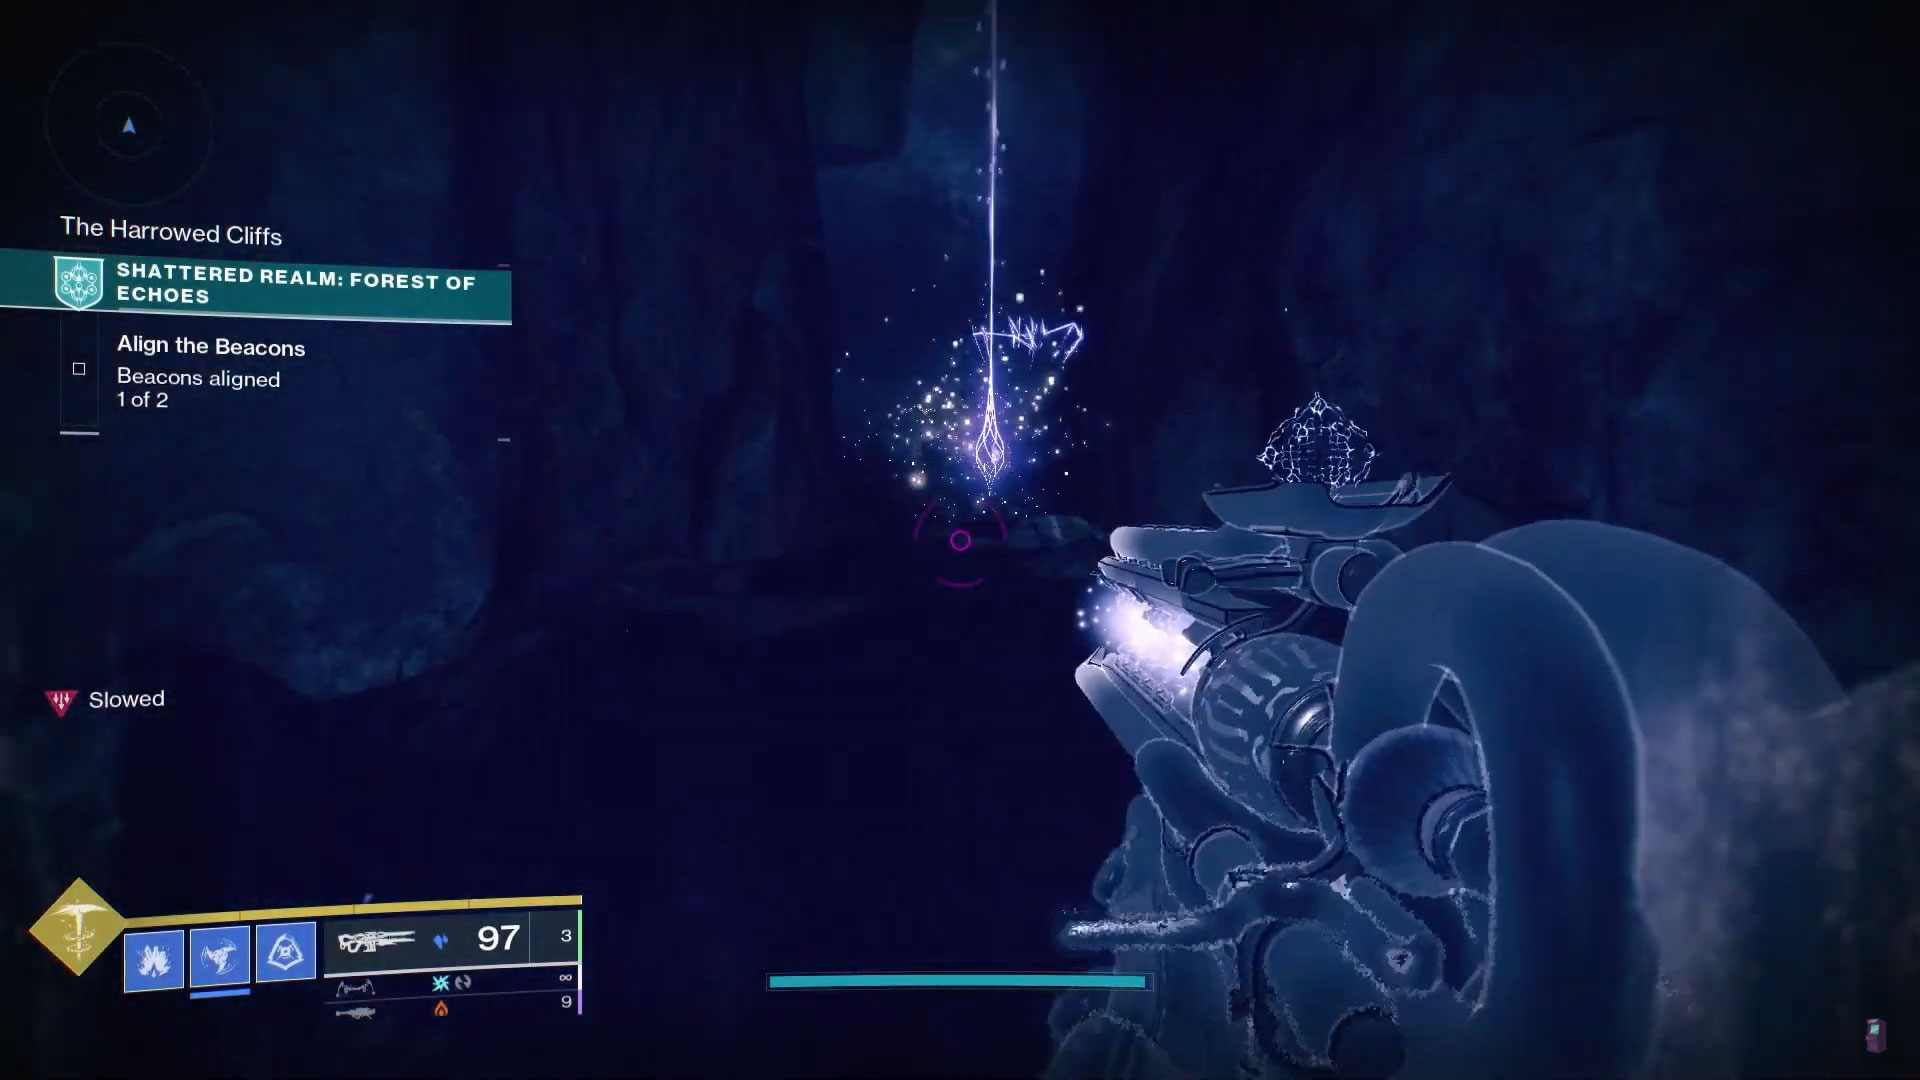
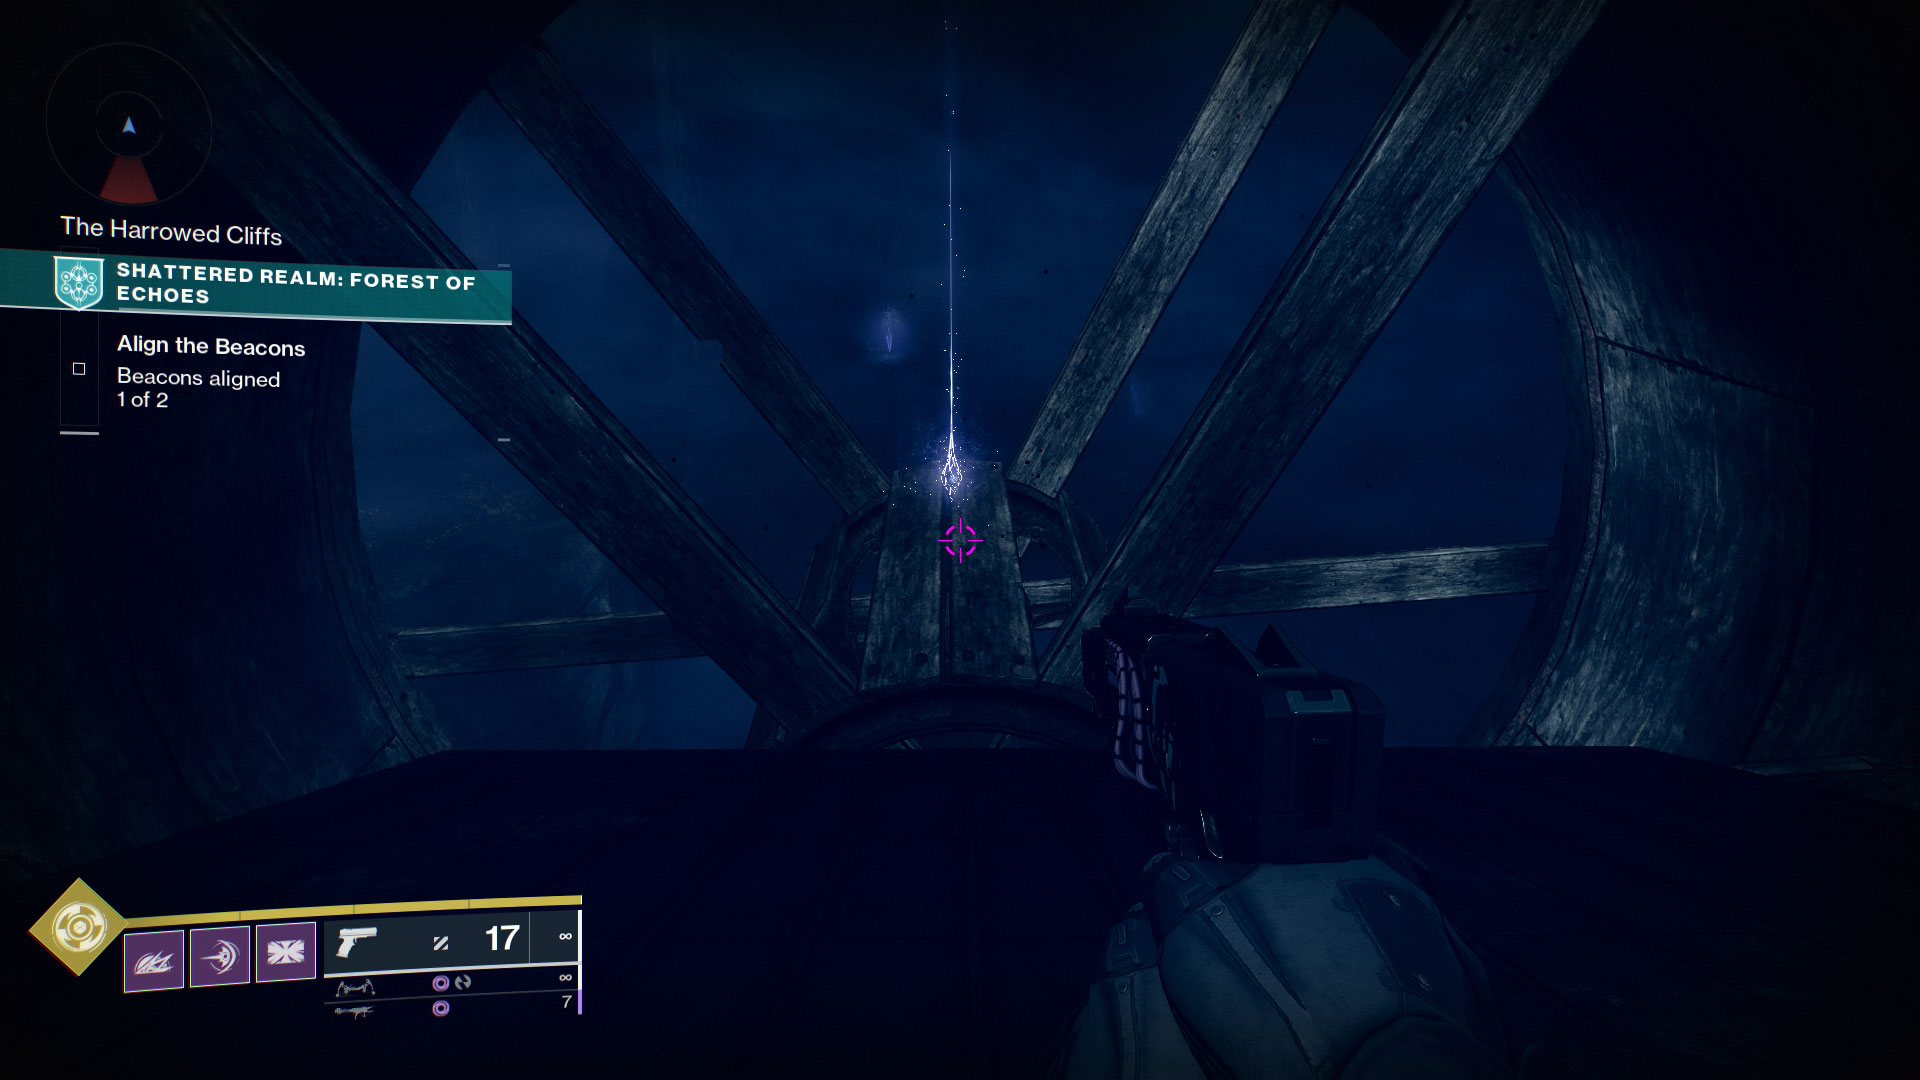
#7: Harrowed Cliffs
The Harrowed Cliffs are where the second beacon is located. Be sure to take the normal path to the beacon that has the slow zone. Once you’re there, look for the second lantern. Go to it and turn to your left. You’ll see the destructible wall. Destroy it with Ager’s and collect the anchor behind it.

#8: Harrowed Cliffs Stump
Head up to the second beacon so that you see the stepped cliffs behind it. Make your way up and around the cliffs to the back side of the landmass. You should see a floating island beneath you with three totems on it. Hop down and take the True Sight one on the left side. Follow the platforms around until you see a hollowed-out tree stump with an anchor inside.
Shattered Realm: Debris of Dreams
Guardians will need to make full use of the Barrier Break, True Sight, and Safe Passage abilities on their Wayfinder’s Compass to collect all of the Ascendant Anchors in the Debris of Dreams.
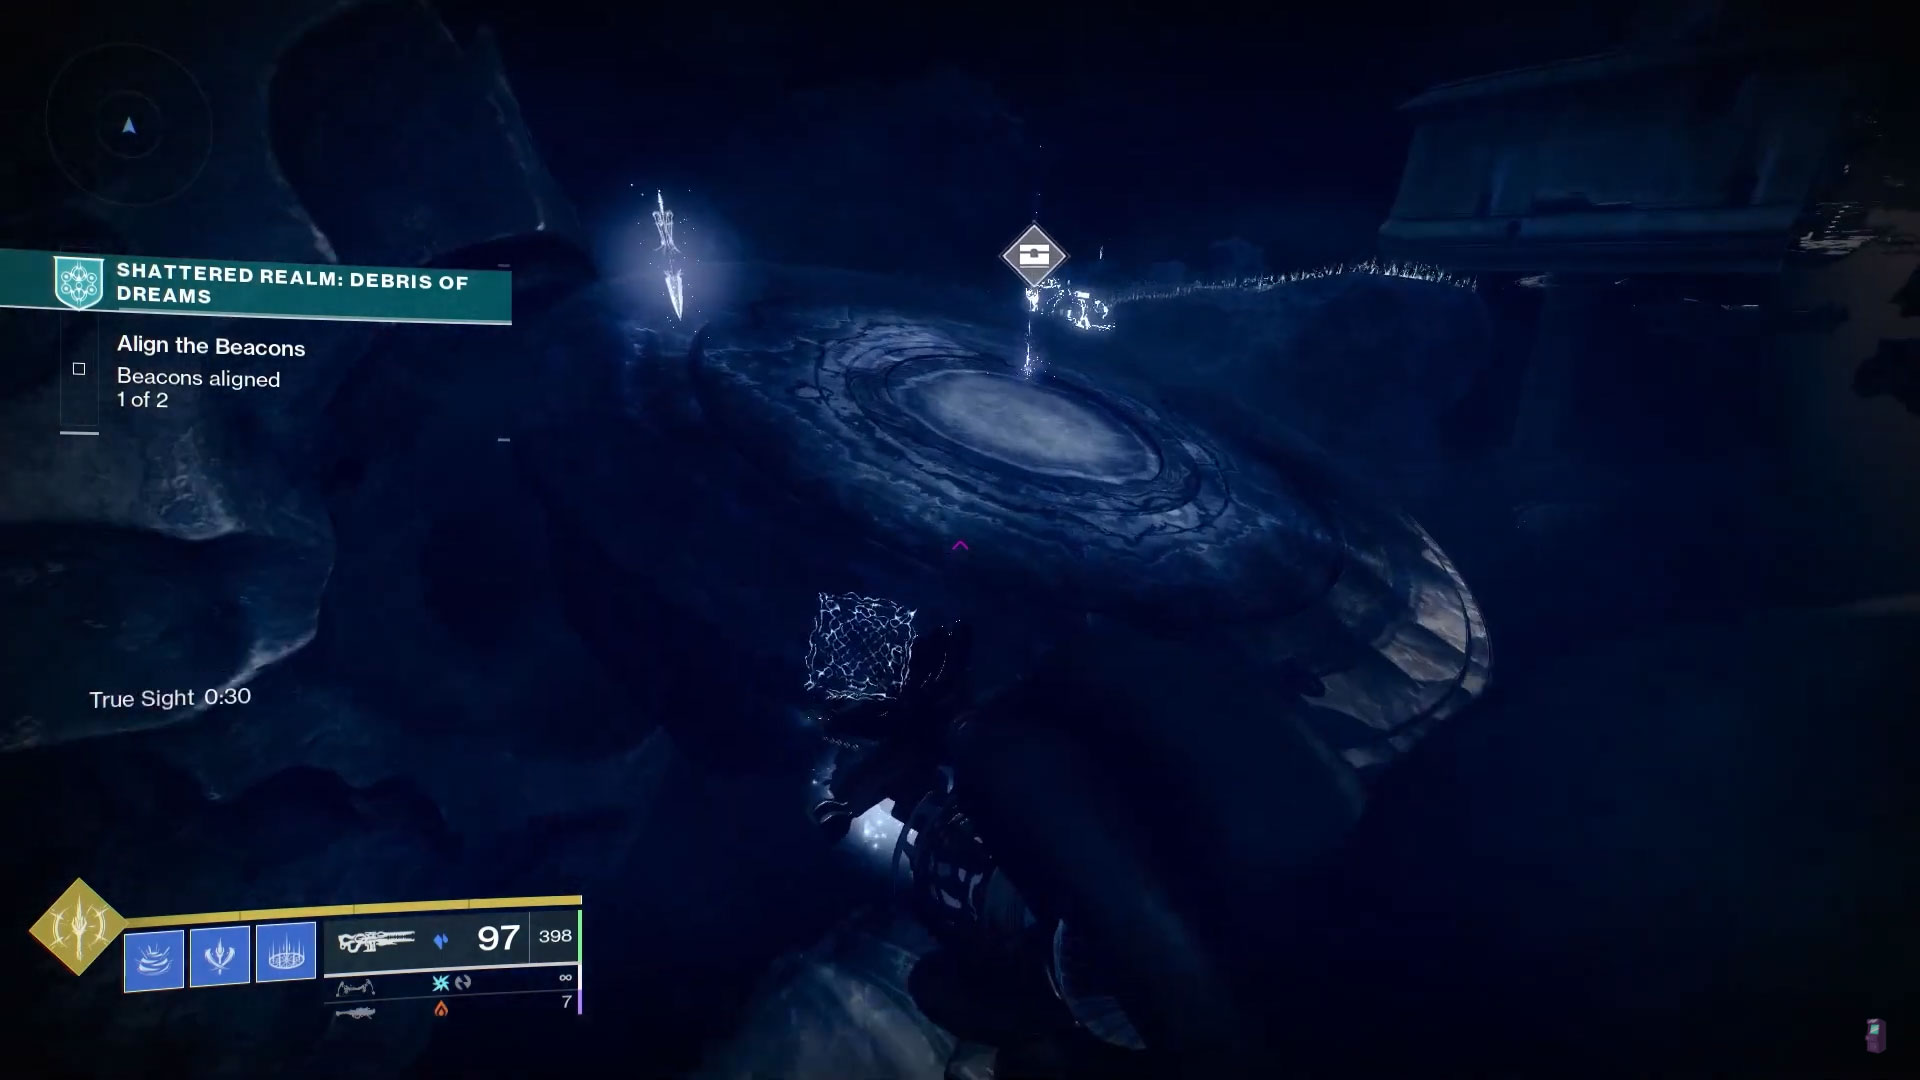
#1: Across the Gap
If you’re looking at the first major platform with the turbine in the center, this anchor towards the back right of this platform. Once you get to the ridgeline, the anchor will be across the gap on a stone outcropping.
#2: Hidden stone alcove
Off to the left of the main platform from the entrance is a series of enormous stone ledges that lead up to the first beacon. Jump onto the ledge that has the lantern on it. To the left of the lantern is a stone wall that carves through the center of the platform. The anchor is on the left side of this wall.
#3: Down in the tunnels
From the ledge you were on for anchor #2, turn around and look down. There’s a tunnel entrance at the bottom of that main platform. Jump down there and head inside. The third anchor will be on your right.
#4: Tunnel ridgeline
From the third anchor, go straight ahead and up the inclined tunnel keeping the support structures on your left. This tunnel leads to a T-intersection and you’ll want to hang a left there. Stay to the right and keep going up the incline. You’ll reach a ledge that overlooks a wide swathe of darkness. The fourth anchor will be on your right.

#5: On the hidden platform
Head back to the main platform and up the series of ledges that go to the first beacon. There are two ways in and out of this building and one of them is blocked with a Barrier. If you’re looking at the main entrance to the building, you can either:
- Go inside and follow the pathway around to the other door. There’s a barrier breach totem that will let you pass through to where you need to be.
- Head to the left and stay to the right as you follow the wall of the building around to the Barrier door.
Directly in front of this Barrier is a True Sight totem right on the edge of the ridge. Activate this totem and a series of platforms will appear and take you to a large circular platform that has the fifth anchor on it.
#6: Behind the shaft
After defeating the second beacon encounter, you’ll need to climb up the central shaft near the entrance to go to the teleporter that takes you to the boss area. Rather than going up, go around to the back of the column and the sixth anchor will be right there.
#7: Ledge below boss area
This one’s a little tricky. If you’re looking at the final beacon, look off to the left of the arena for the metal grating that protrudes from the side of the ridge. Head over there and go to the very edge of it so you can see through the grating. Look down. Once you see an active buff totem, hop off the grating and land on that platform. Straight ahead of you is the seventh anchor.
#8: Hidden Platform by the Shattered Enclave
After defeating the encounter at the first beacon, make your way to the True Sight totem between the beacon building and the floating island. Snag the buff and make your way to the circular platform to pick up this aanchor.

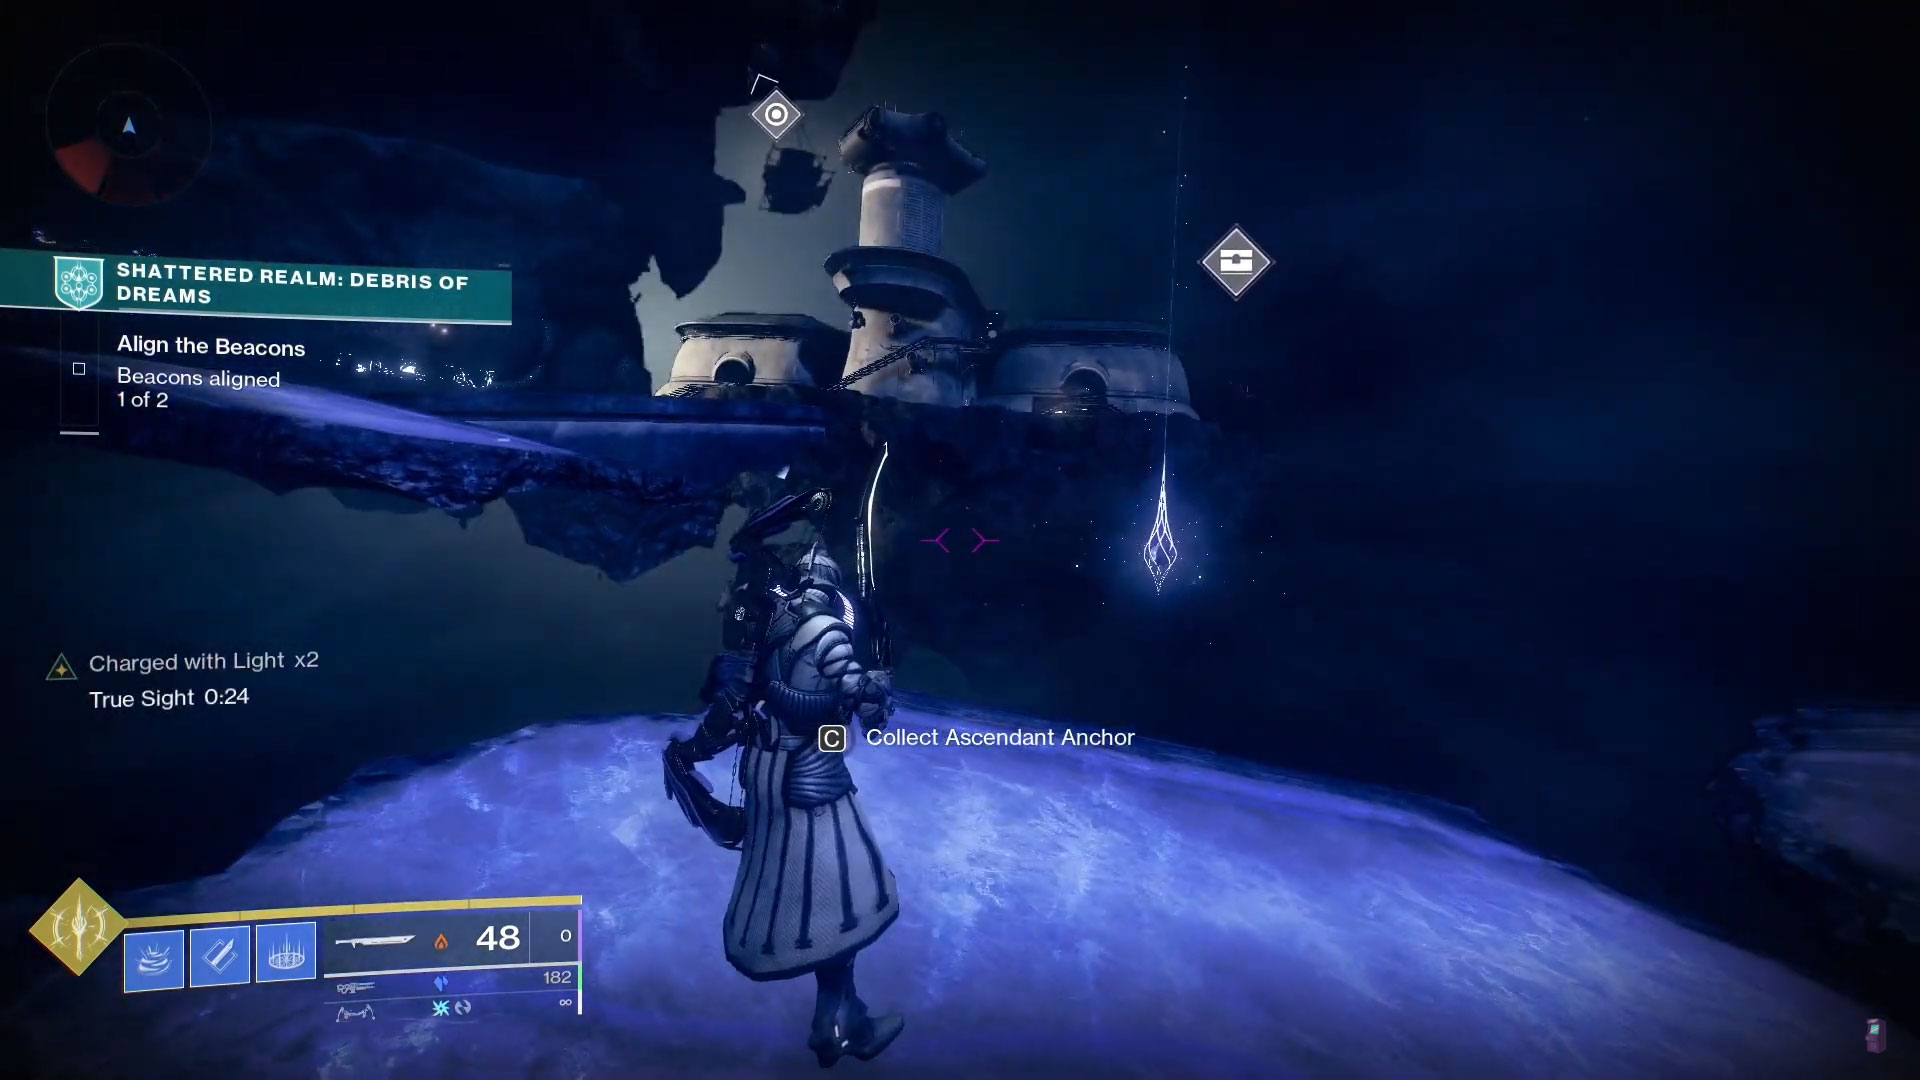
#9: Overlook Surface
For those of you who may not know, the Overlook is the floating island off to the right of main entrance to this wing of the Shattered Realm. There were ways to get over to it early, but players have only been able to get to it recently with their Wayfinder’s Compass leveled past a certain point.
The intended way to get over here is to defeat the Scorn drilling party that spawns after you complete the encounter at the first beacon. An orb will remain after you’ve defeated the drilling party and you need to take that over to the Industrial Facility. Near the centerline of the facility is a barrier break totem that leads to one of the Trivial Mysteries in the Debris of Dreams. On the right side of that room is a teleporter that will take you to the Overlook.
After being teleported, take an immediate right after leaving the building and go to the waypoint to deposit the charge you’re carrying. The anchor will be behind you on the ridgeline that faces the Industrial Facility.

#10: Overlook Hidden Platform
While you’re on the Overlook, there’s a True Sight totem near where you snagged the last anchor. Grab the buff and head back towards where you deposited the charge. To the left of it will be a hidden platform with an Ascendant Anchor on it.
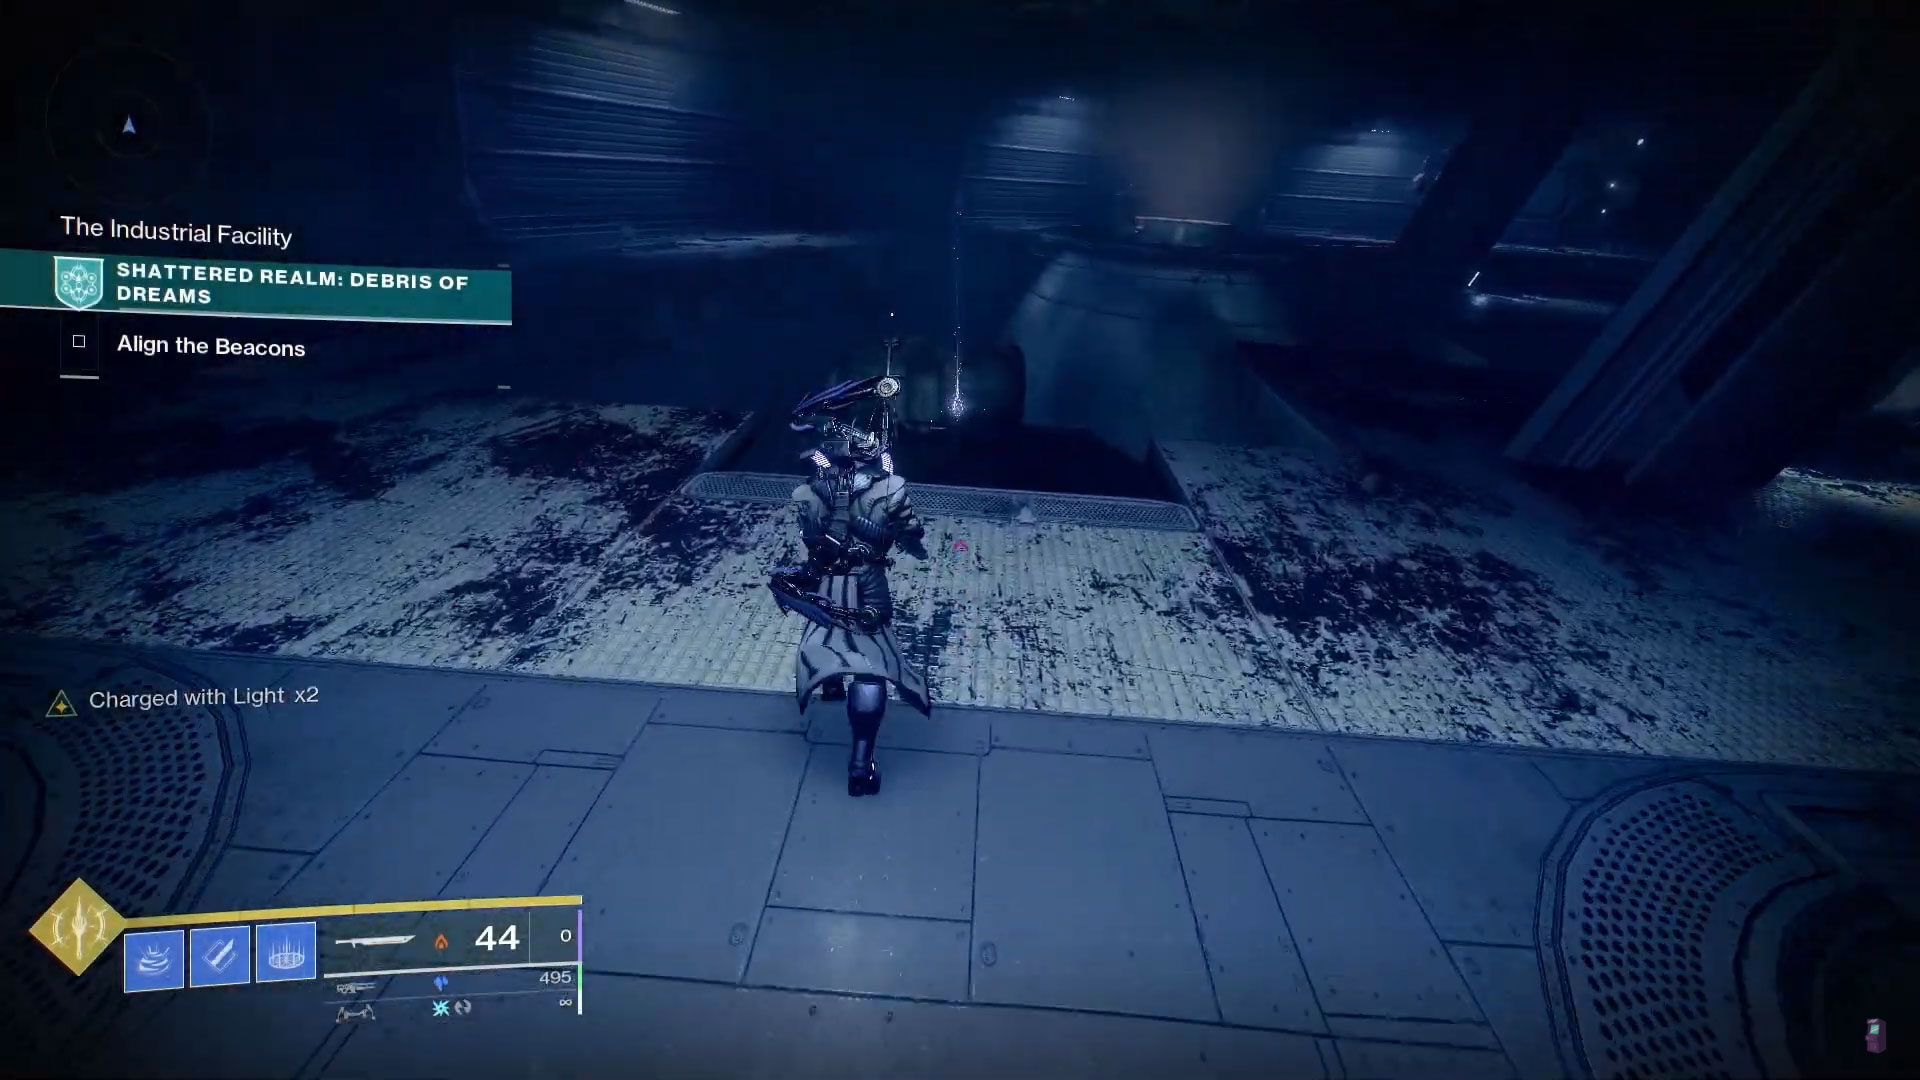
#11: Inside Industrial Facility
You can take the True Sight platforms over to the Industrial Facility or get there the usual way. If you’re facing the facility from the equipment hanging from the crane, there’s a door on the left side of the building. Drop down and go through this door. The anchor will be on a landing down a flight of stairs directly ahead of the entrance.
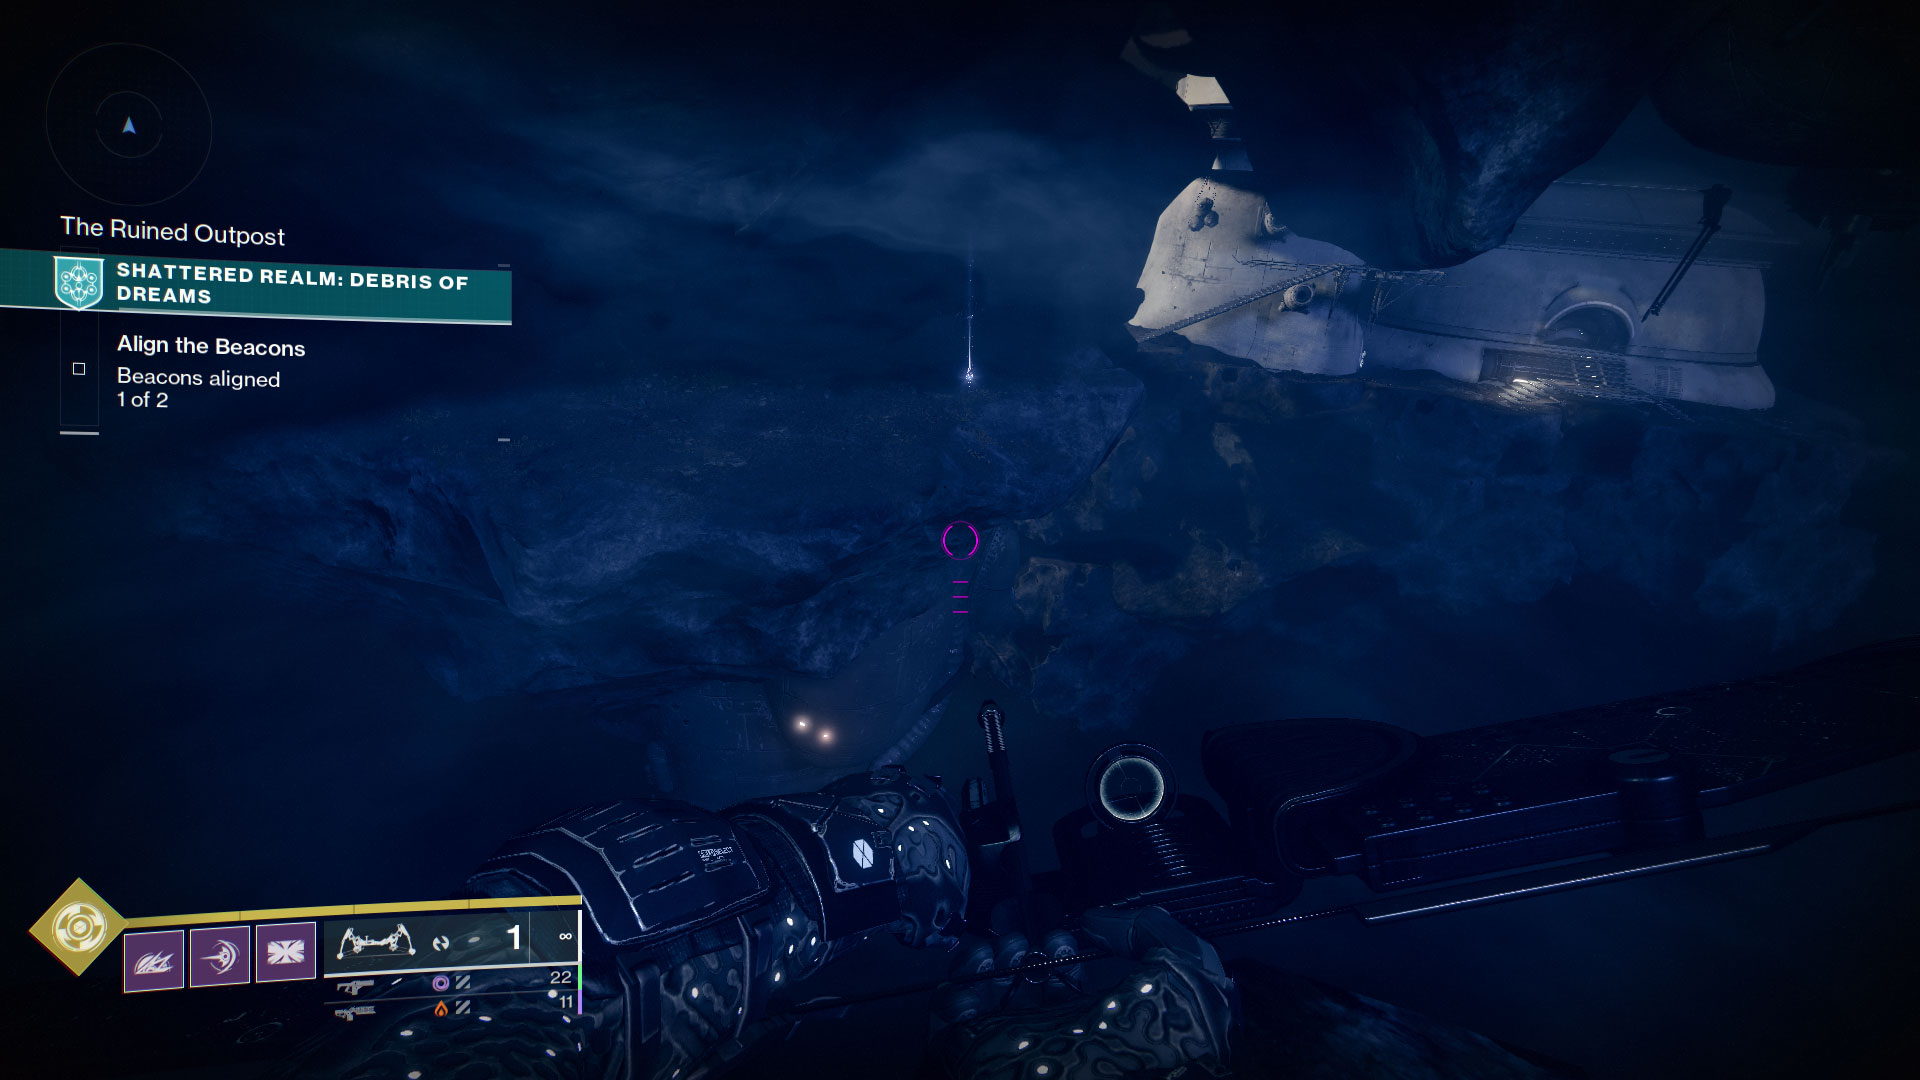
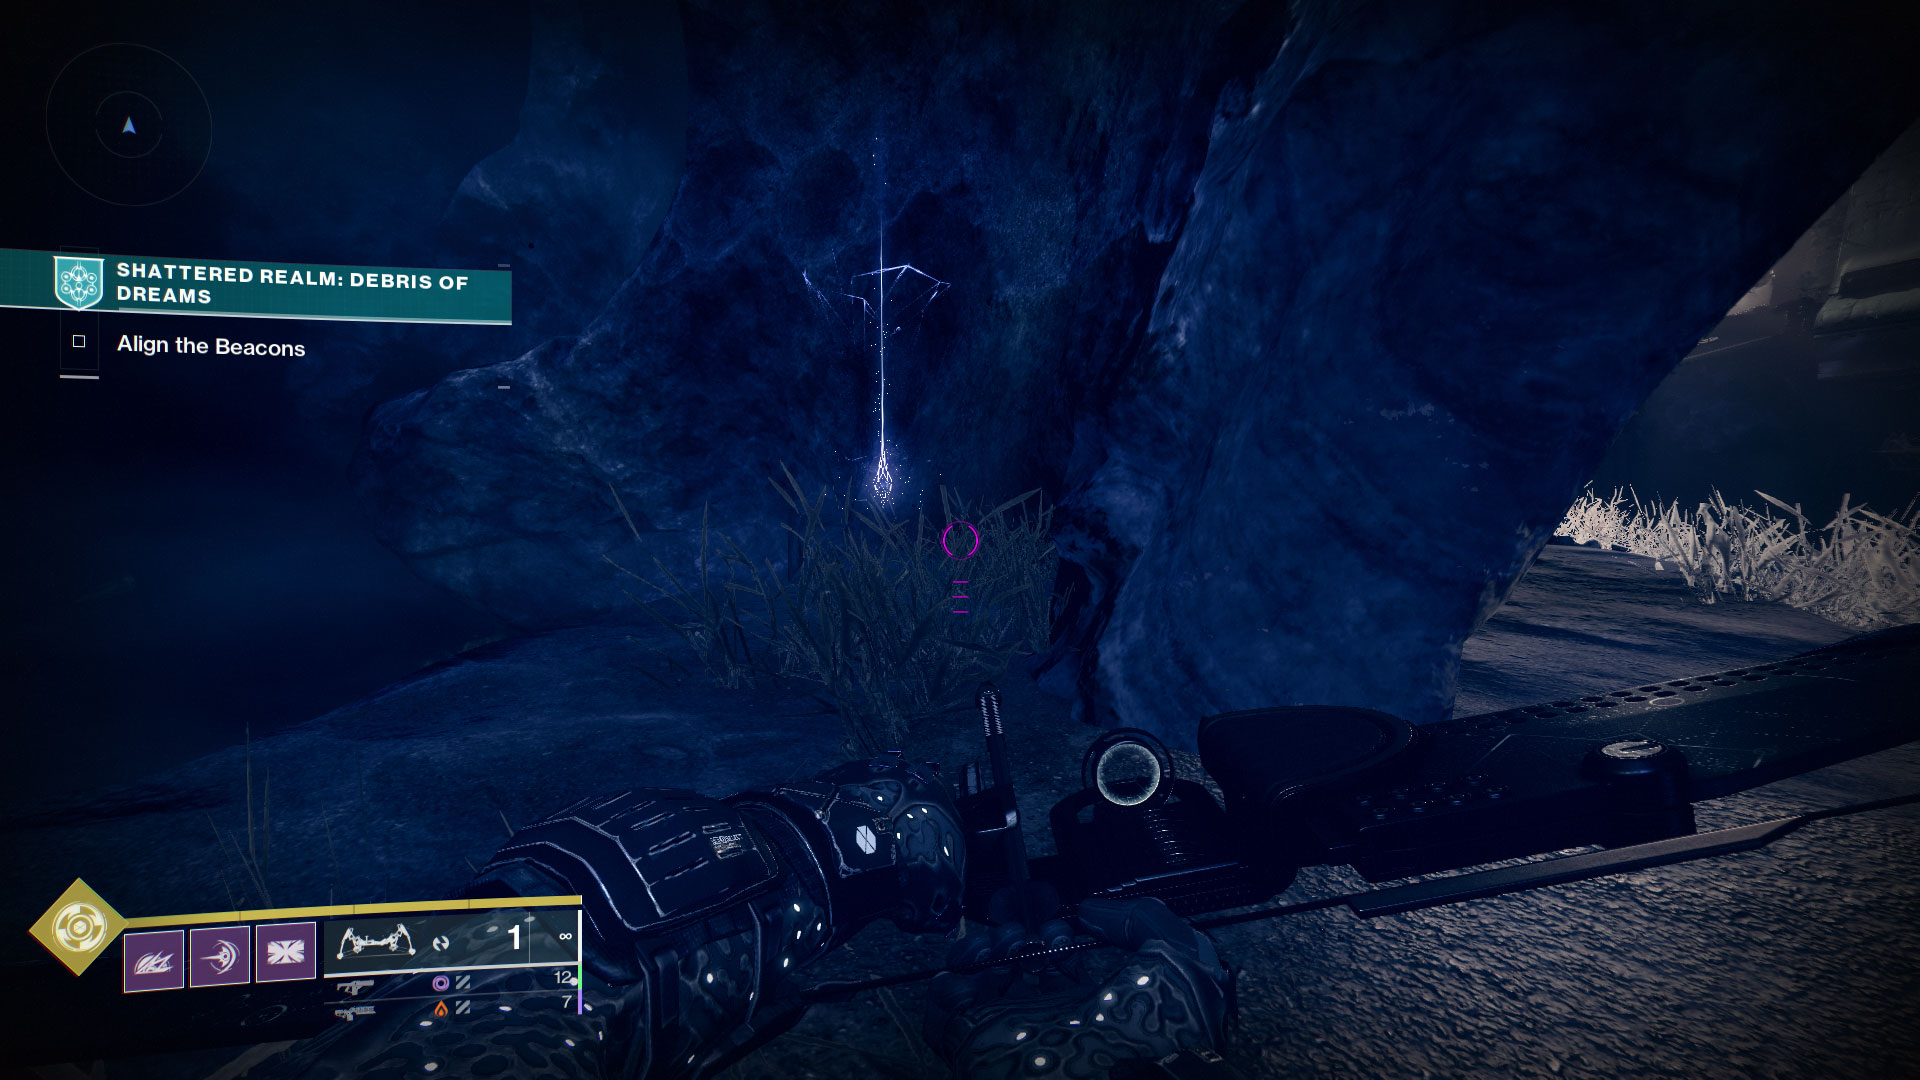
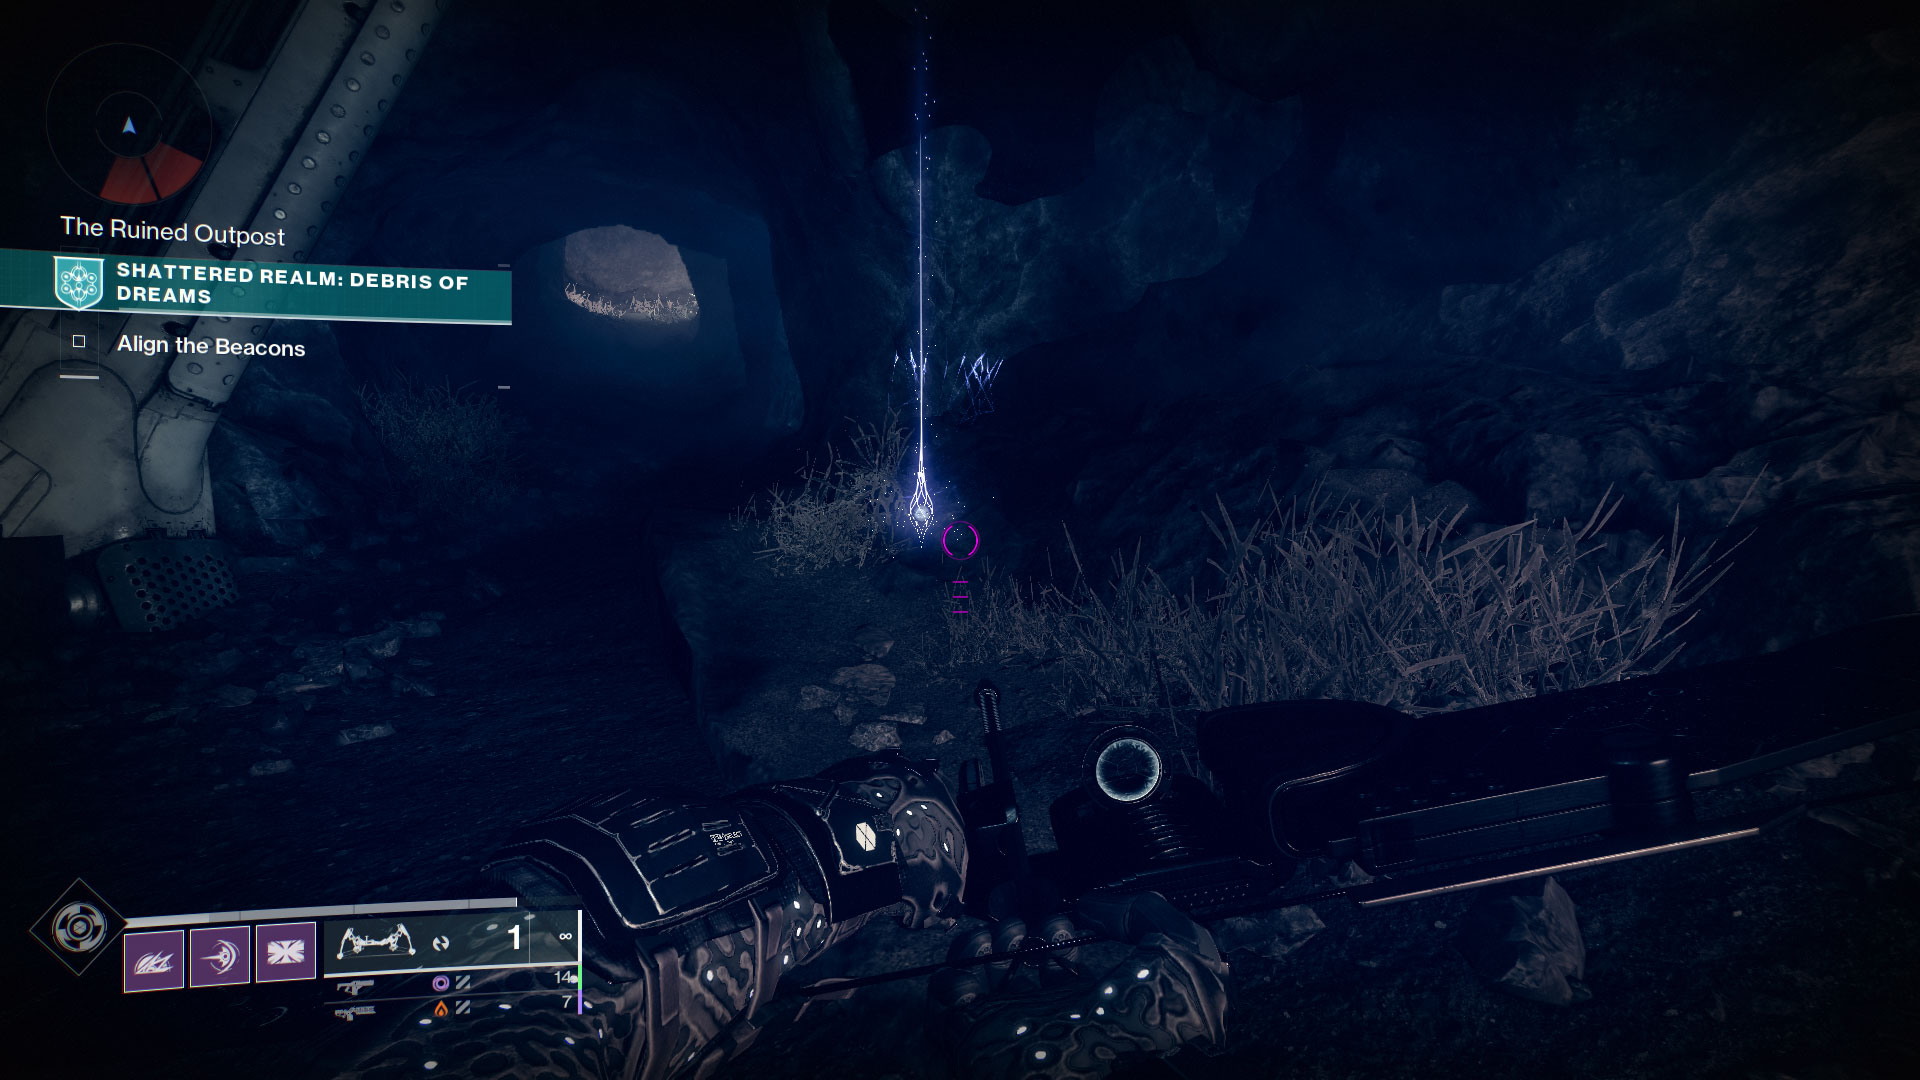
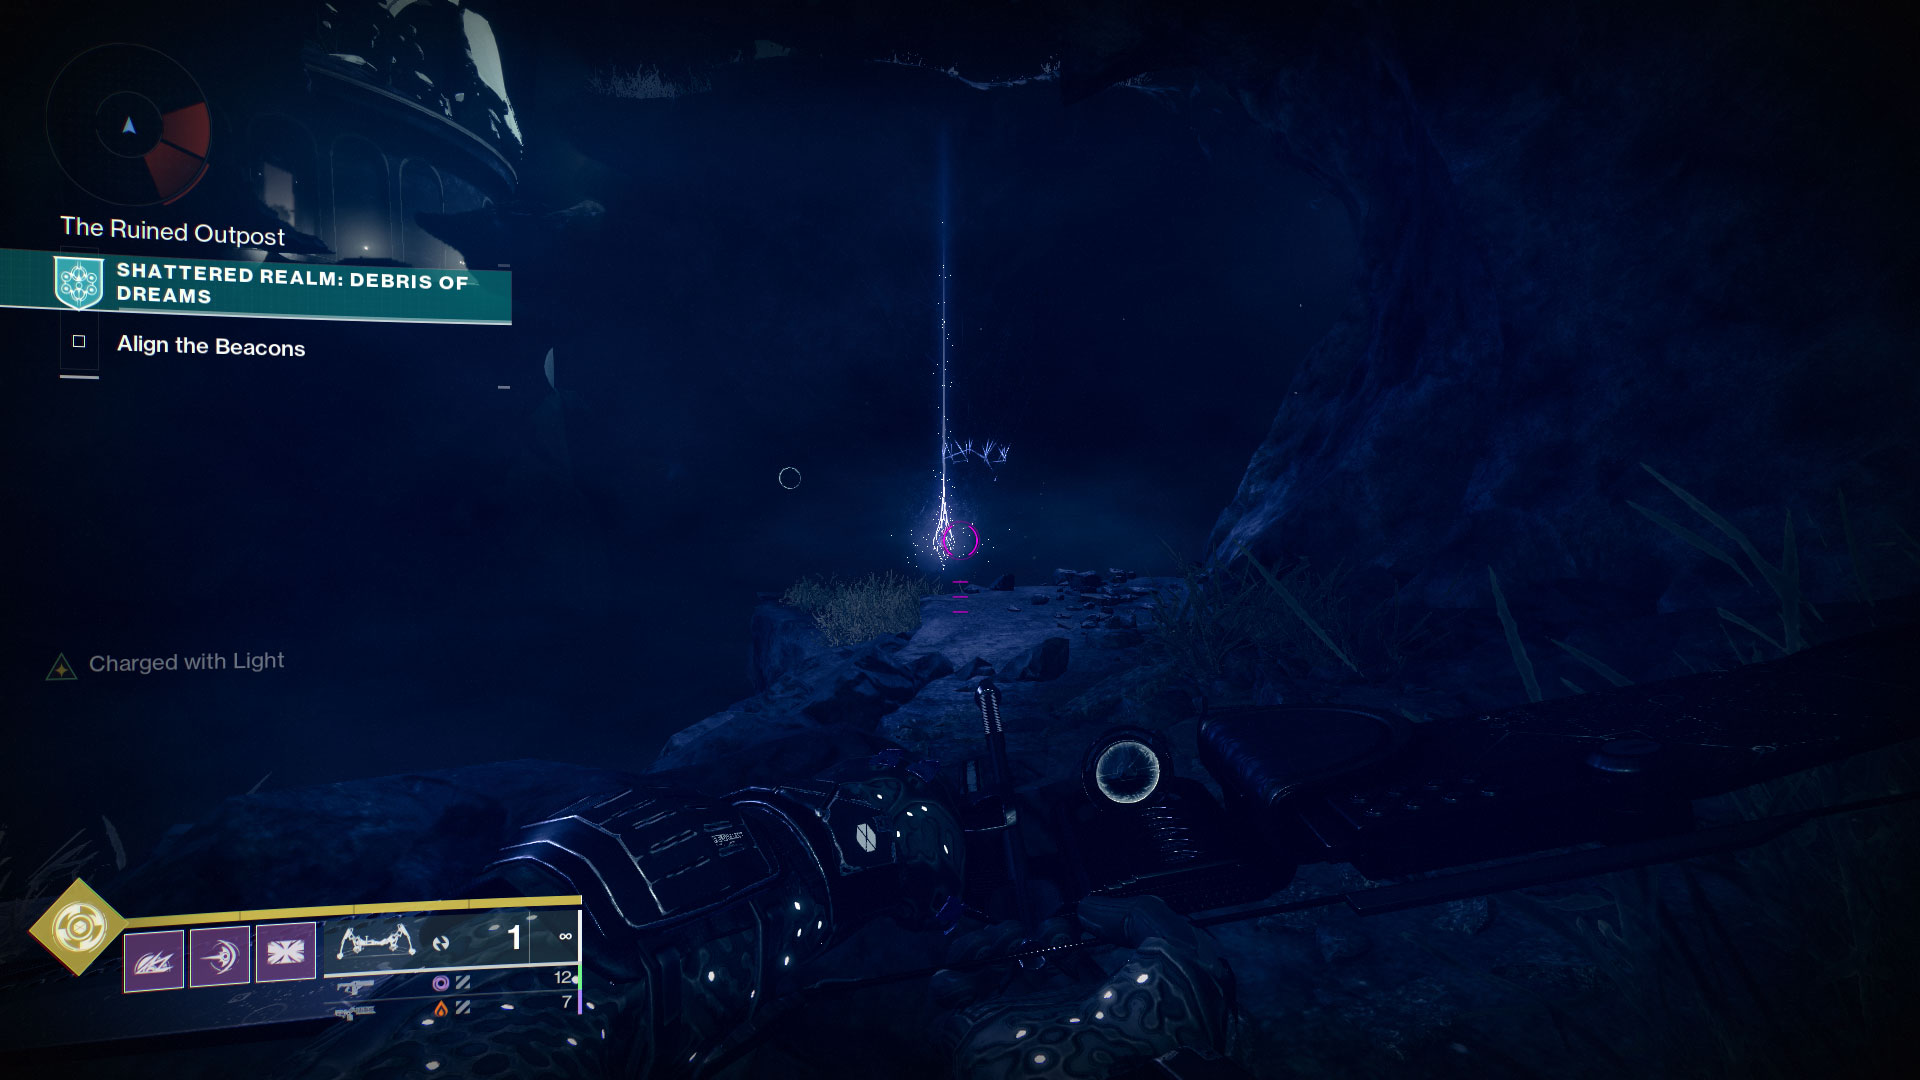
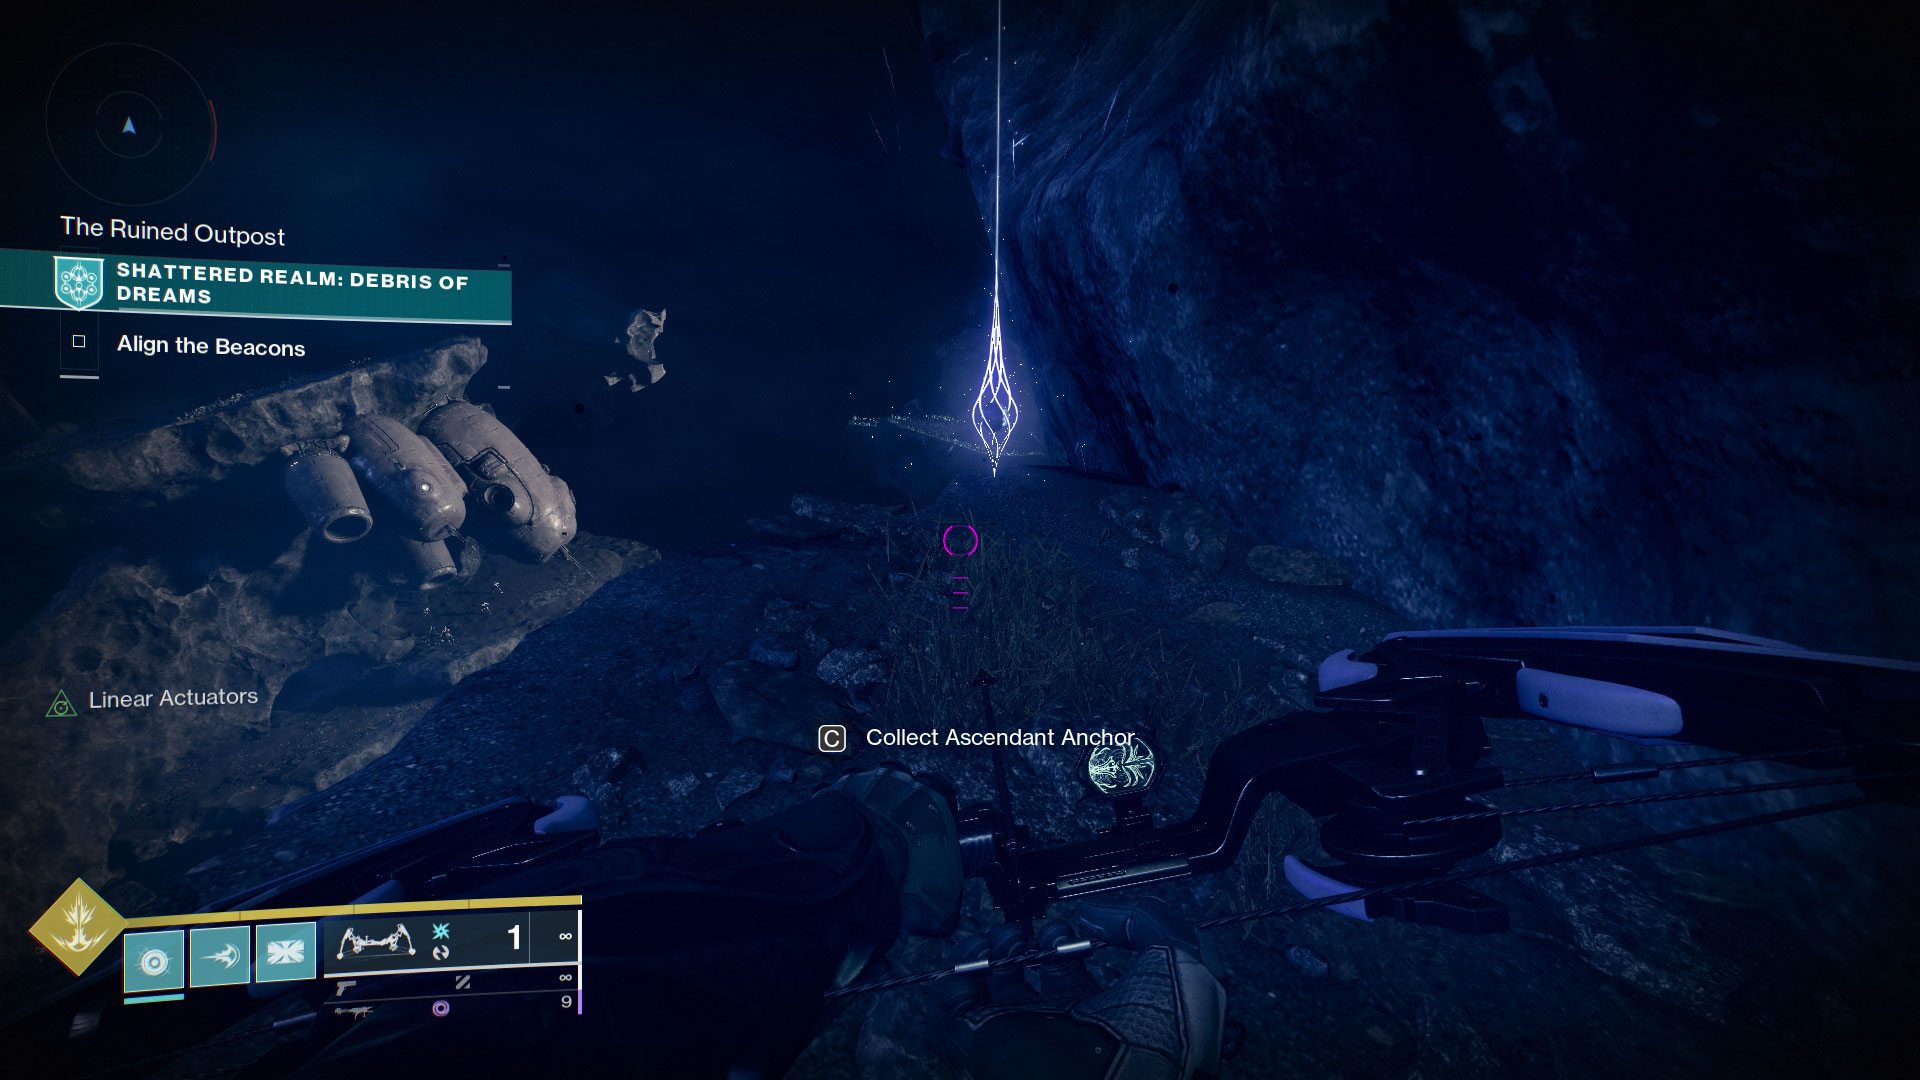
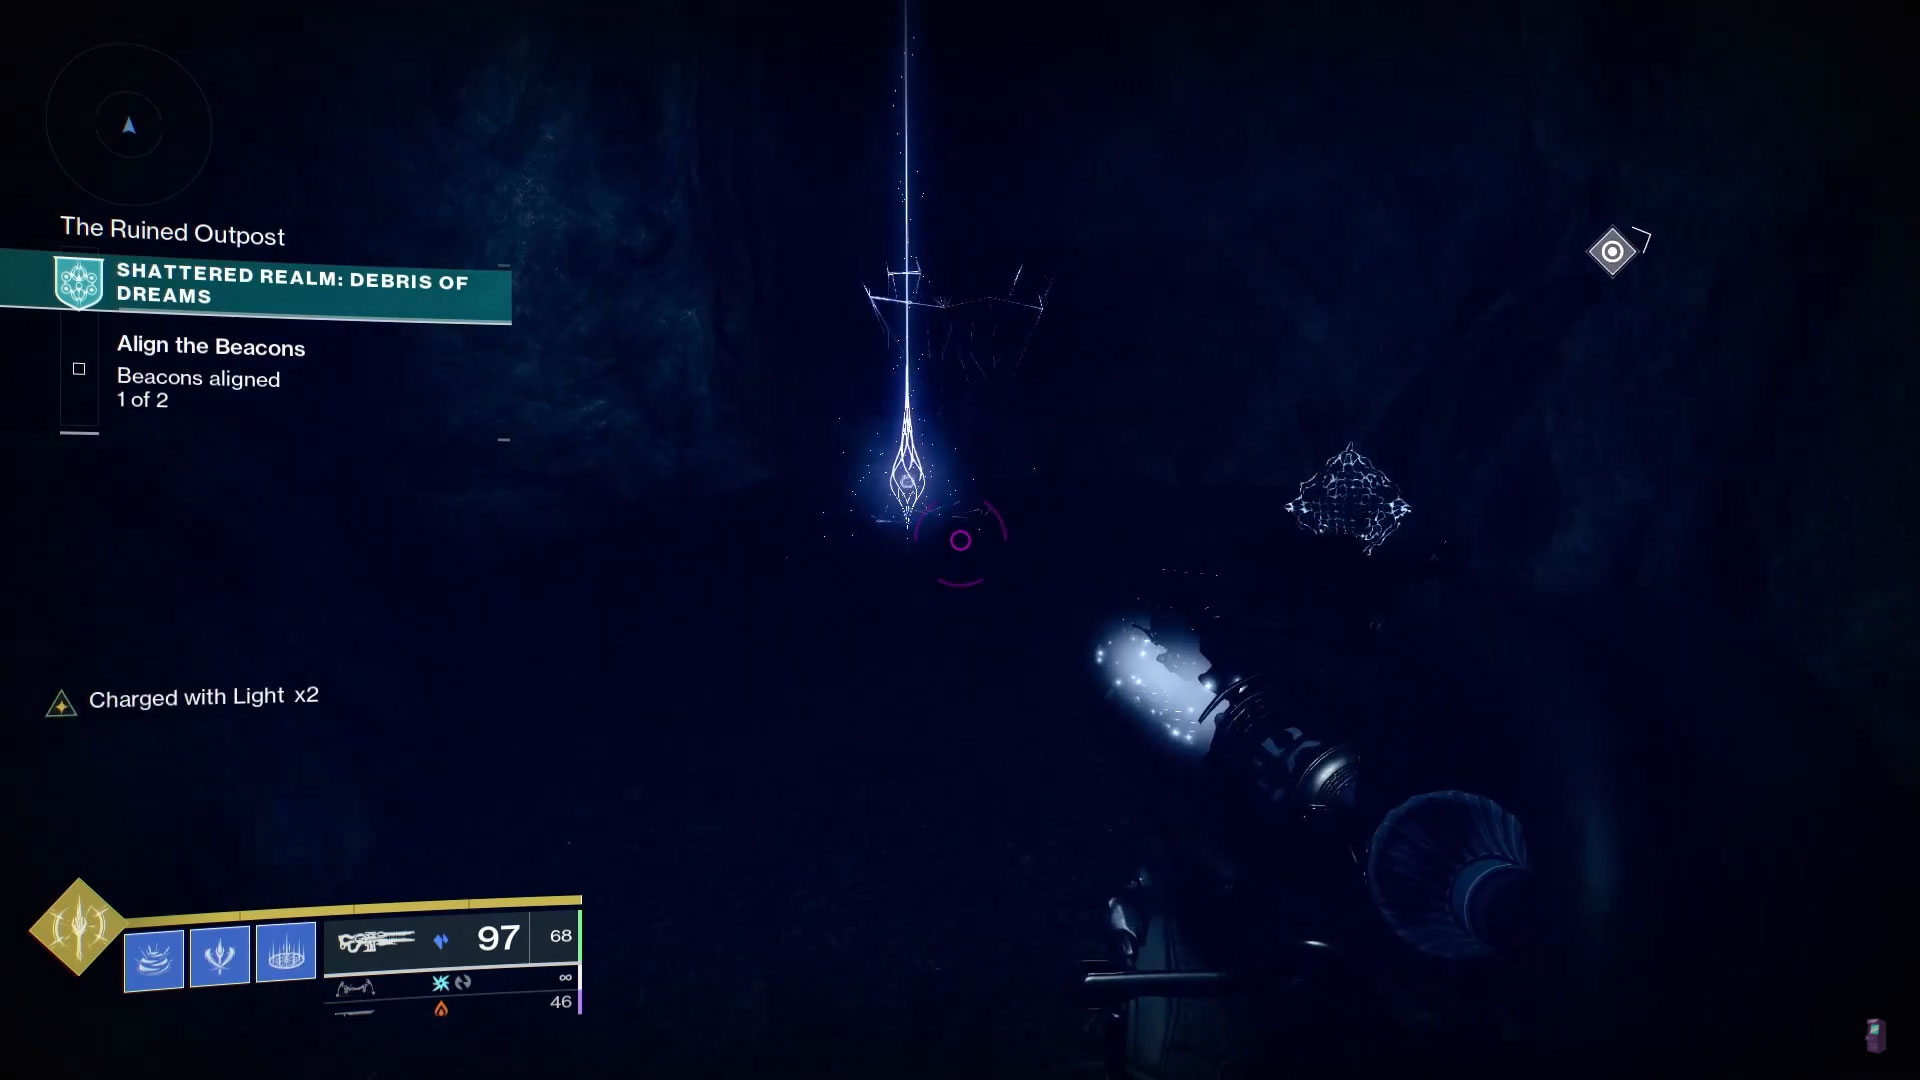
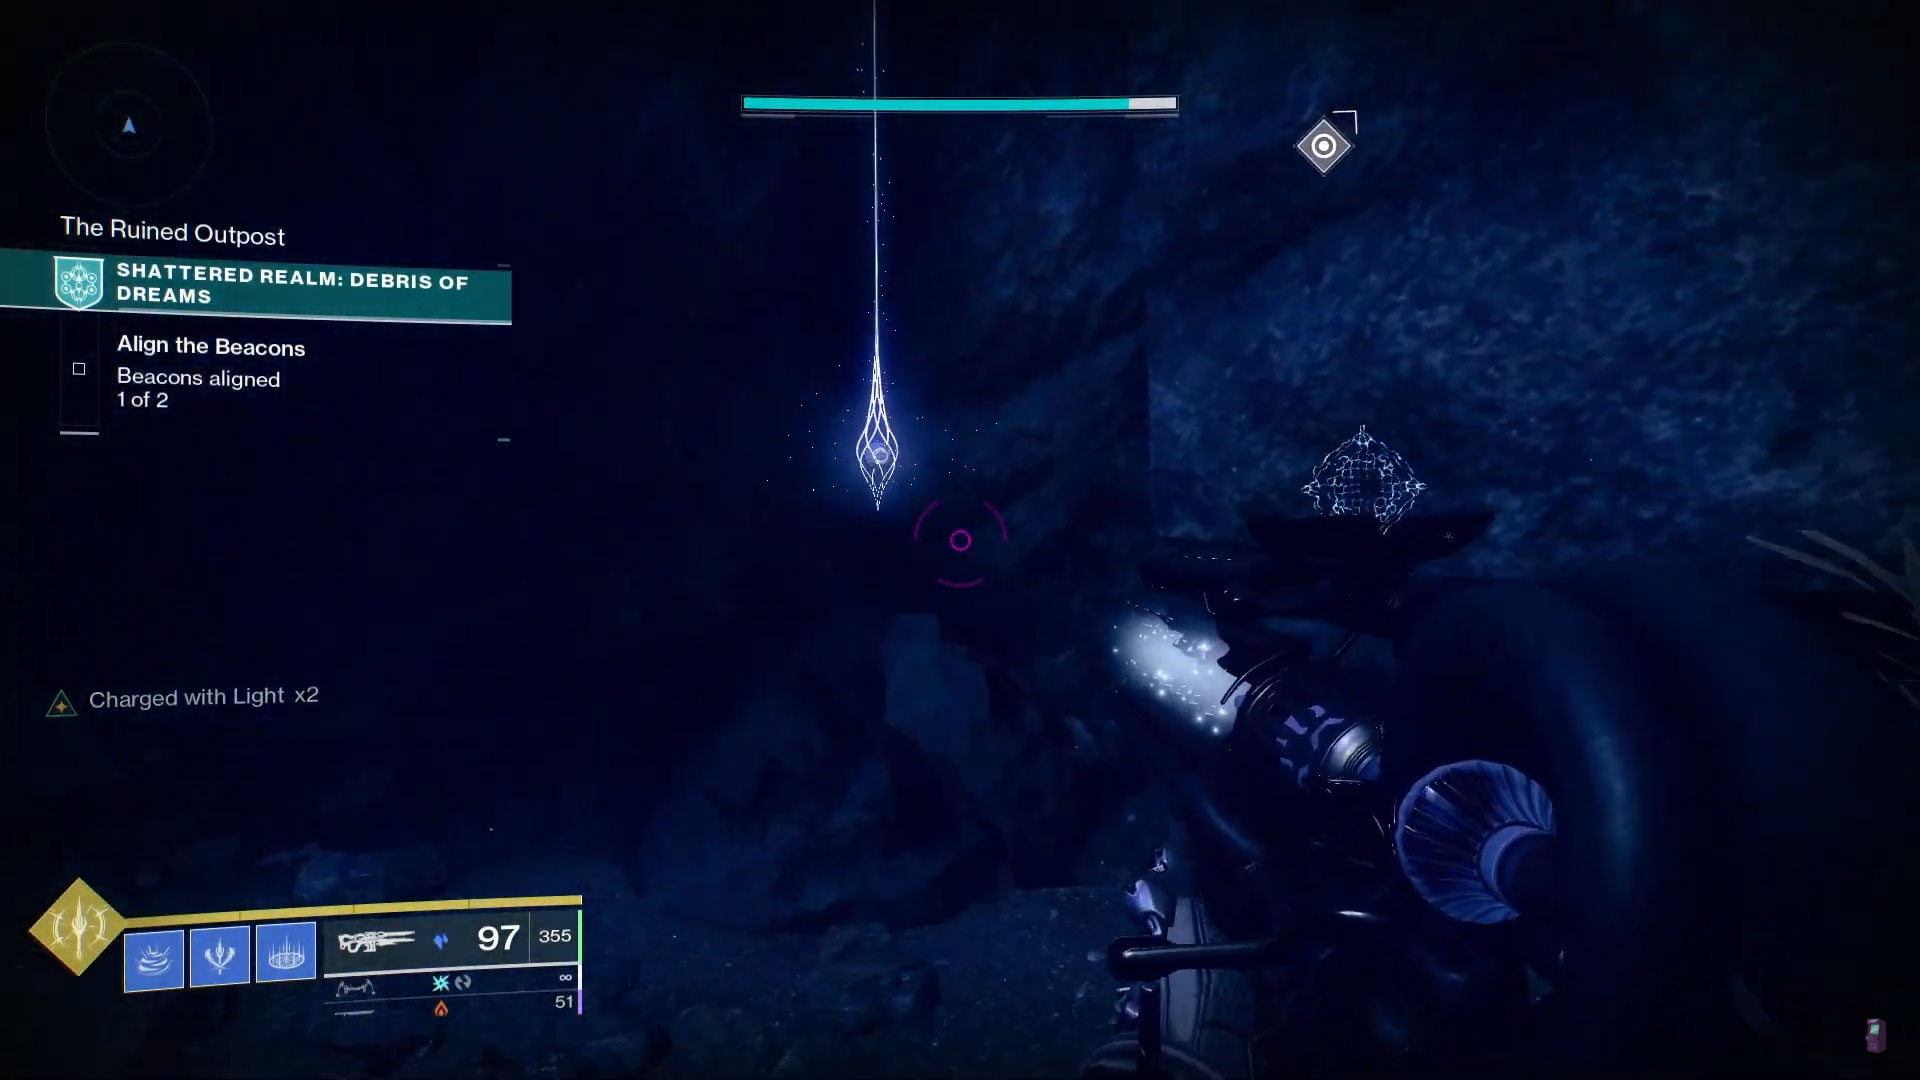
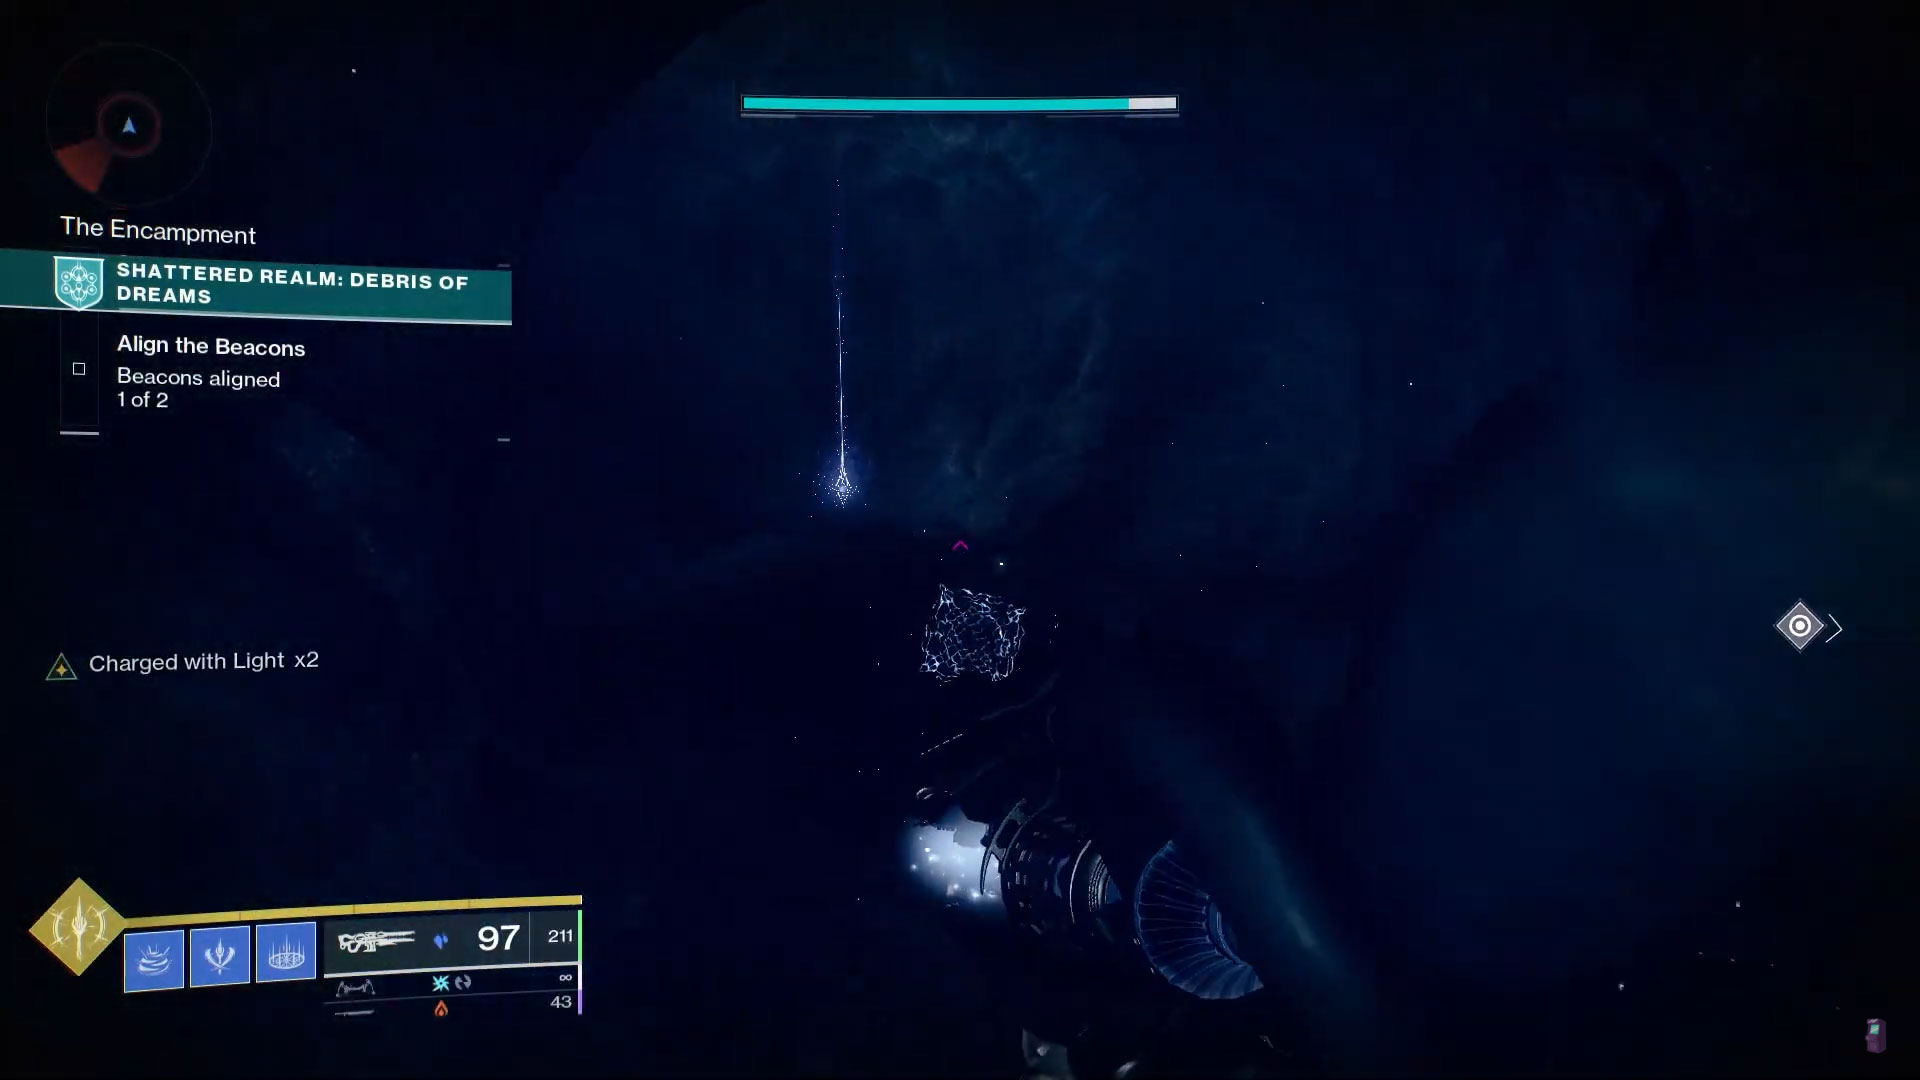
#12: Ruined Outpost Hidden Platform
Go back to the central platform in the Debris of Dreams. Stand on top of the platform with the turbine in it and look to the path that goes toward the second beacon. Go towards it, but take the path that leads down into the interior of the Ruined Outpost. Around that first bend is a True Sight totem that will uncover hidden platforms to your left. Follow those platforms down until you can snag this anchor.
#13: Ruined Outpost Destructible Wall #1
This anchor is near the bottom of the Ruined Outpost. To get there, you’ll want to go through the lowest entrance which you can get to from the path to the first beacon. Instead of following that up, turn around towards the main platform and go down. Jump across the gap, head inside, and take the path to the left. You’ll see a glittering section of the wall at the end of that passage that can be destroyed by using Ager’s Scepter. This anchor is in an alcove behind it.
#14: Ruined Outpost Destructible Wall #2
From the True Sight Totem in anchor #12, hang a right into the interior of the Ruined Outpost and stay to your left. Follow this path around to the right and you’ll find some rubble that can be destroyed with Ager’s Scepter. Destroy the rubble and pick up the anchor.
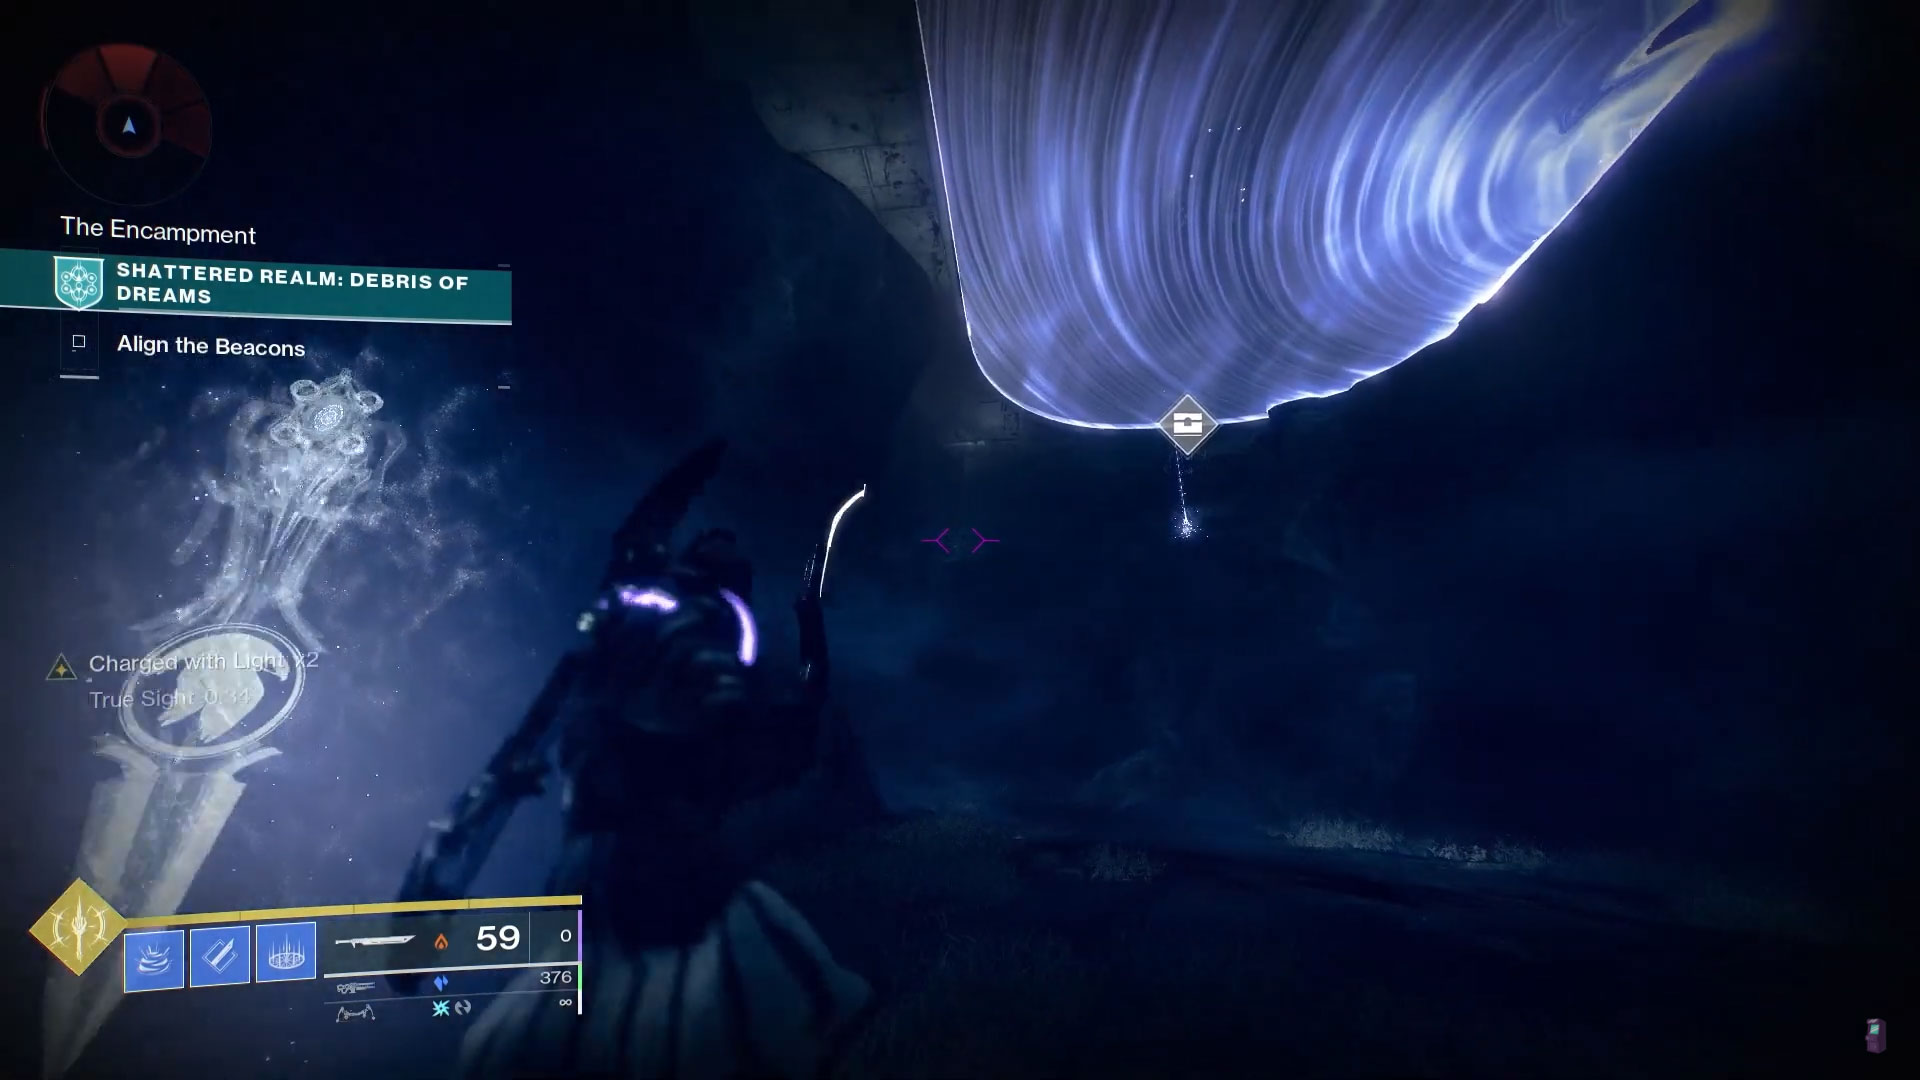
#15: Hidden Platform Inside Ruined Outpost
Head back up to the top of the Ruined Outpost and take the path that takes you to the second beacon. Up the first incline is a room with an energy barrier instead of a ceiling. You can see an Ascendant Anchor floating in the air just out of reach. On the far side of the room from the entrance is a True Sight totem that will let you see the hidden platforms that will let you collect this anchor.
#16: Ruined Outpost Destructible Wall #3
On the wall opposite of the True Sight totem for the previous anchor is another glittering wall. Break it down with Ager’s Scepter to reveal an alcove with the next anchor.
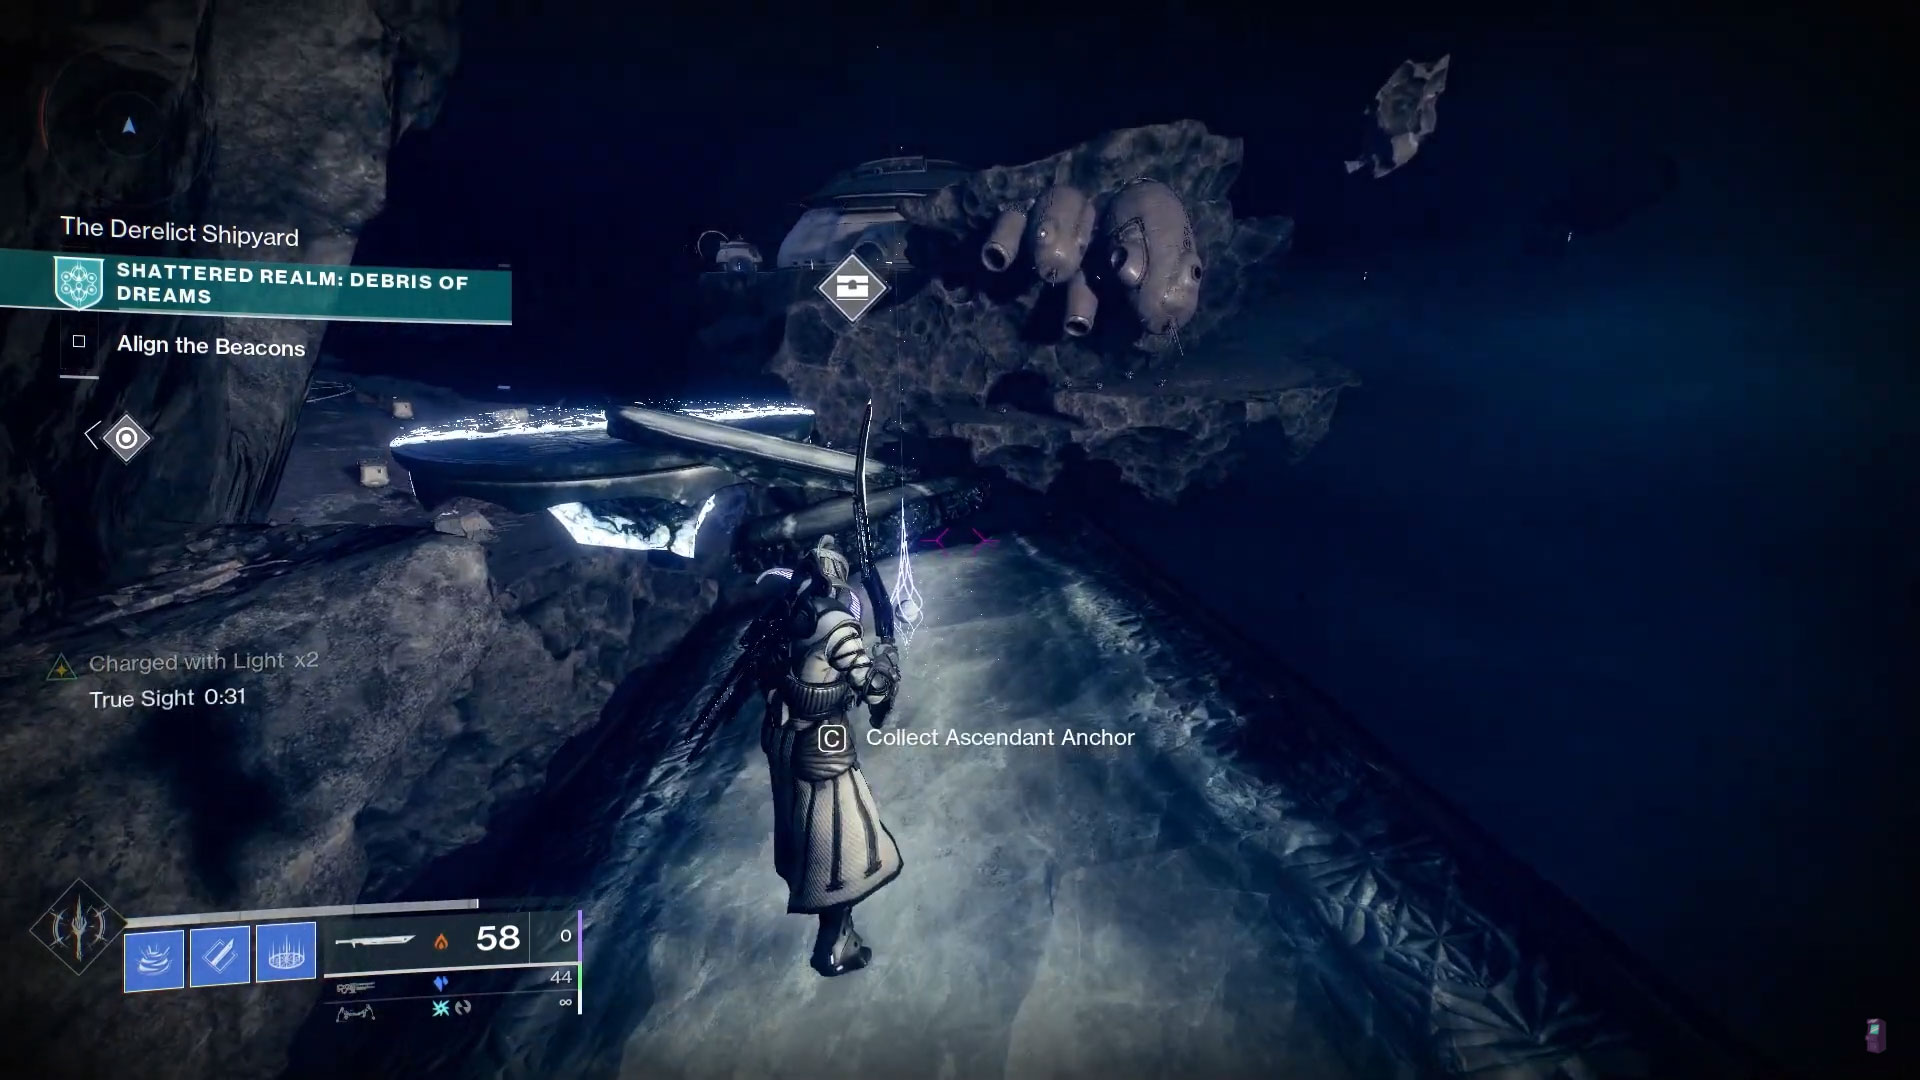
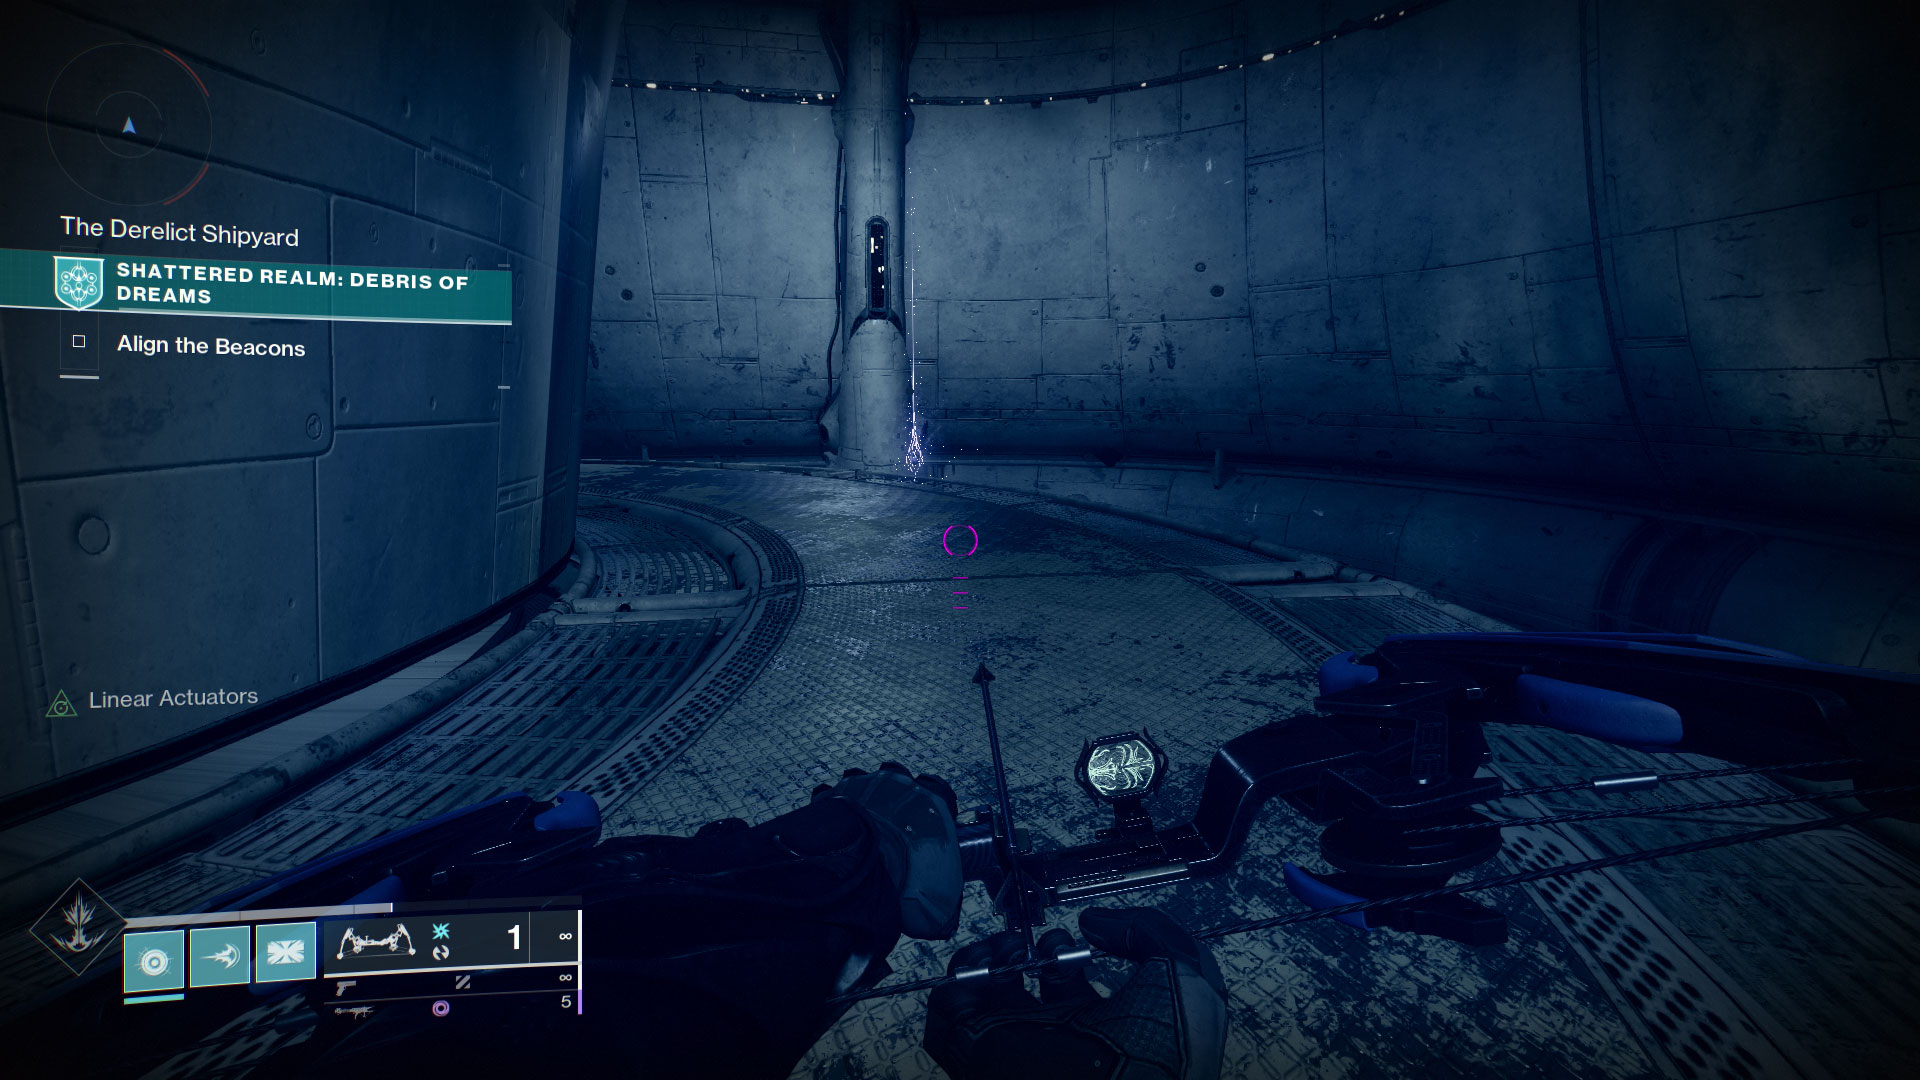
#17: Hidden Platform Next to Derelict Shipyard
To collect this anchor, you’ll need to have completed the second beacon’s encounter first. Go back through the entrance to find the True Sight totem. Take the buff so you can see the platforms and collect the anchor that was previously just out of reach.
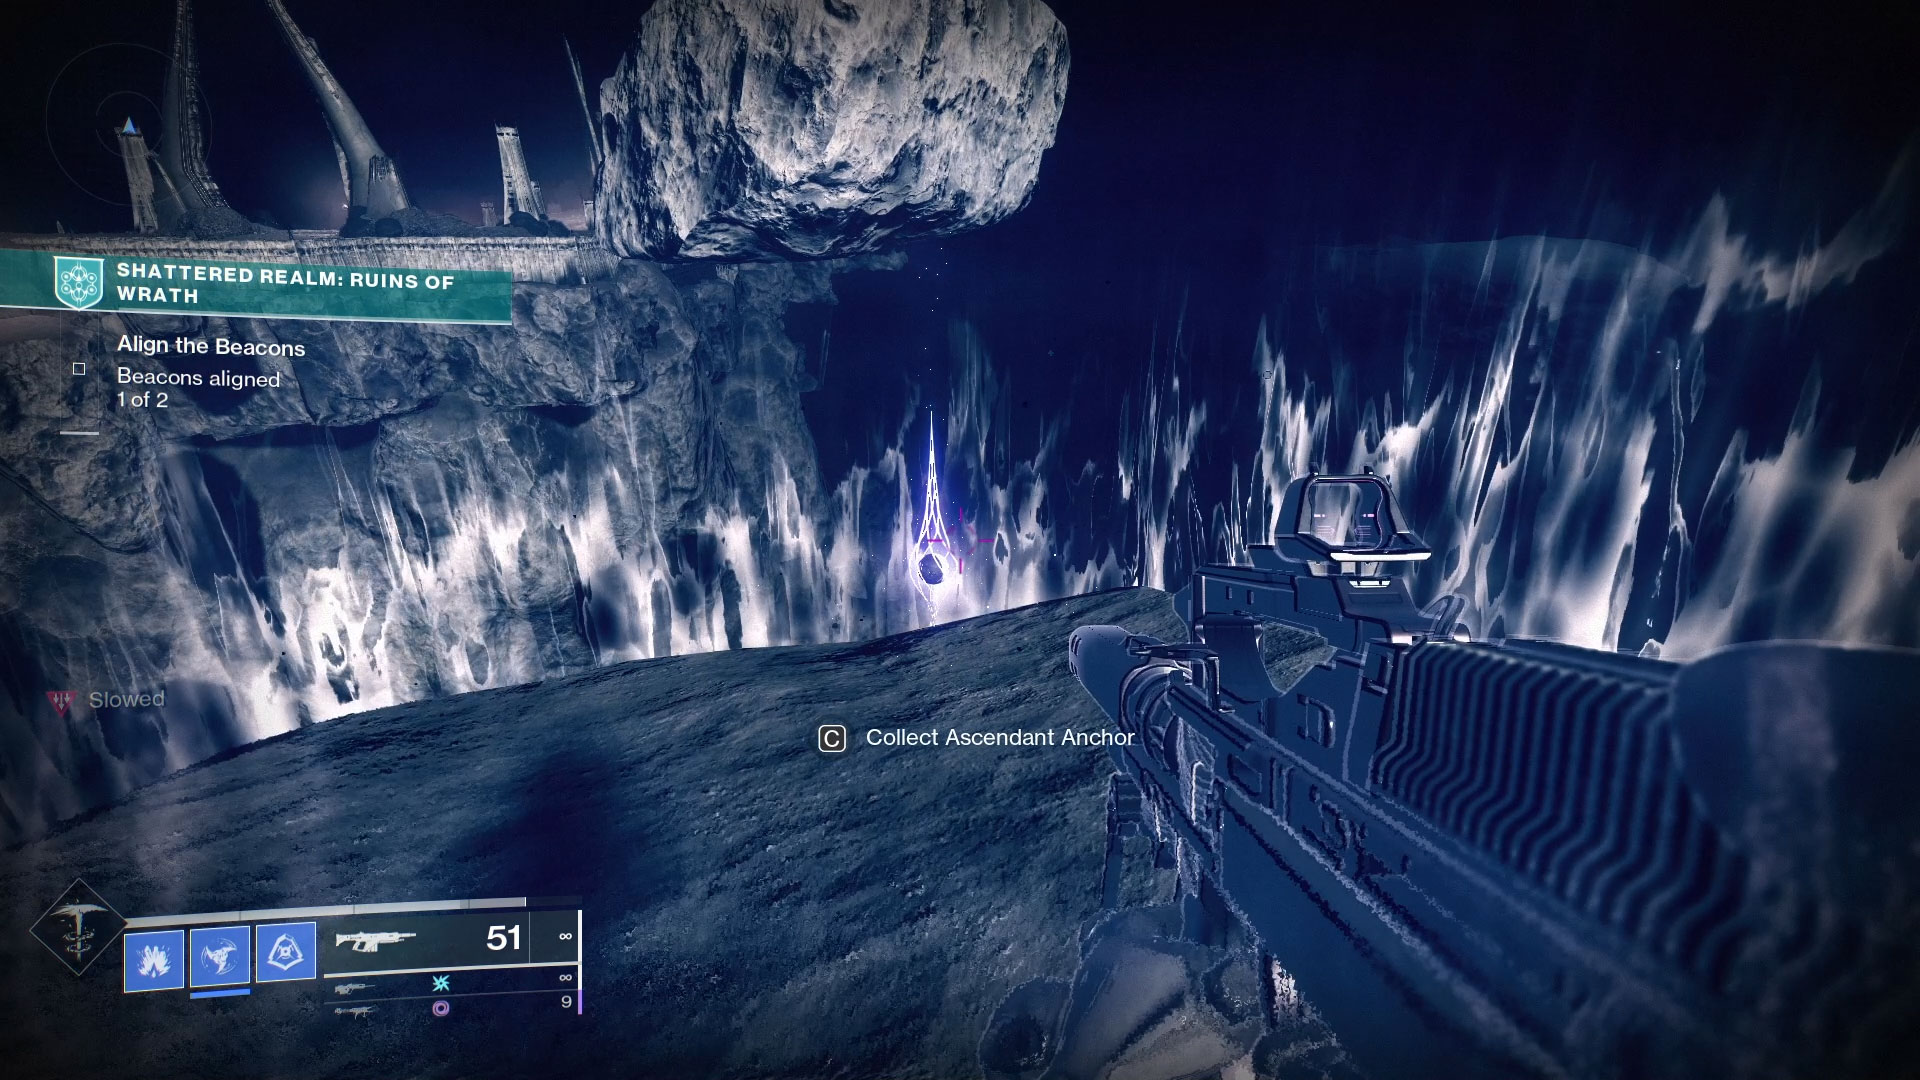
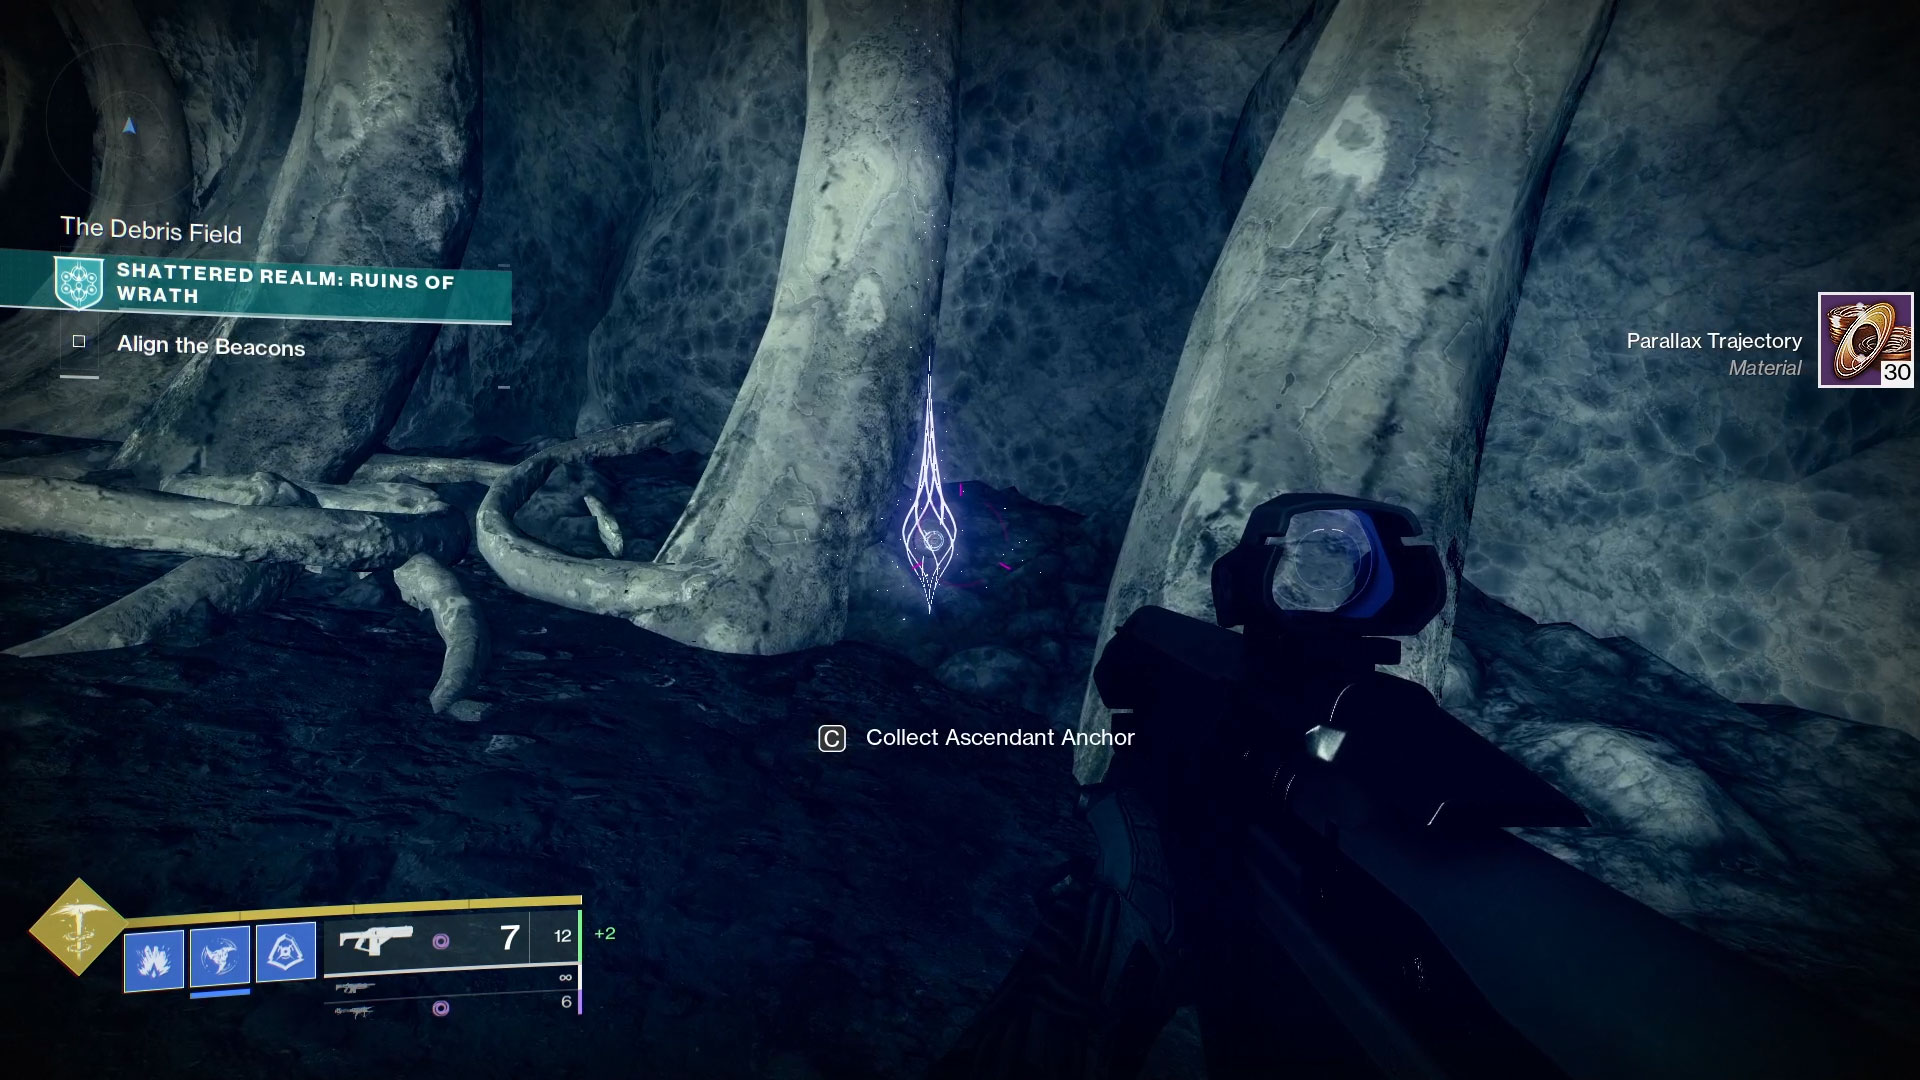
Shattered Realm: Ruins of Wrath
There are 8x Ascendant Anchors that can be collected in the Ruins of Wrath. Unlike previous Shattered Realm branches, you should go ahead and clear both beacons before collecting the anchors.

#1: Hidden Platform
Go to the first anchor and look at it so that the Ascendant Portal is behind it. Head to the left until you come to the True Sight totem against the ridgeline. Activate the totem, snag the buff, and jump from platform to platform until the large circular one appears. The first anchor will be at its center.

#2: Ascendant Portal Platform
Go back to the first beacon and look towards the Ascendant Portal. Go to the portal and the second anchor will be on the side closest to the floating archipelago.
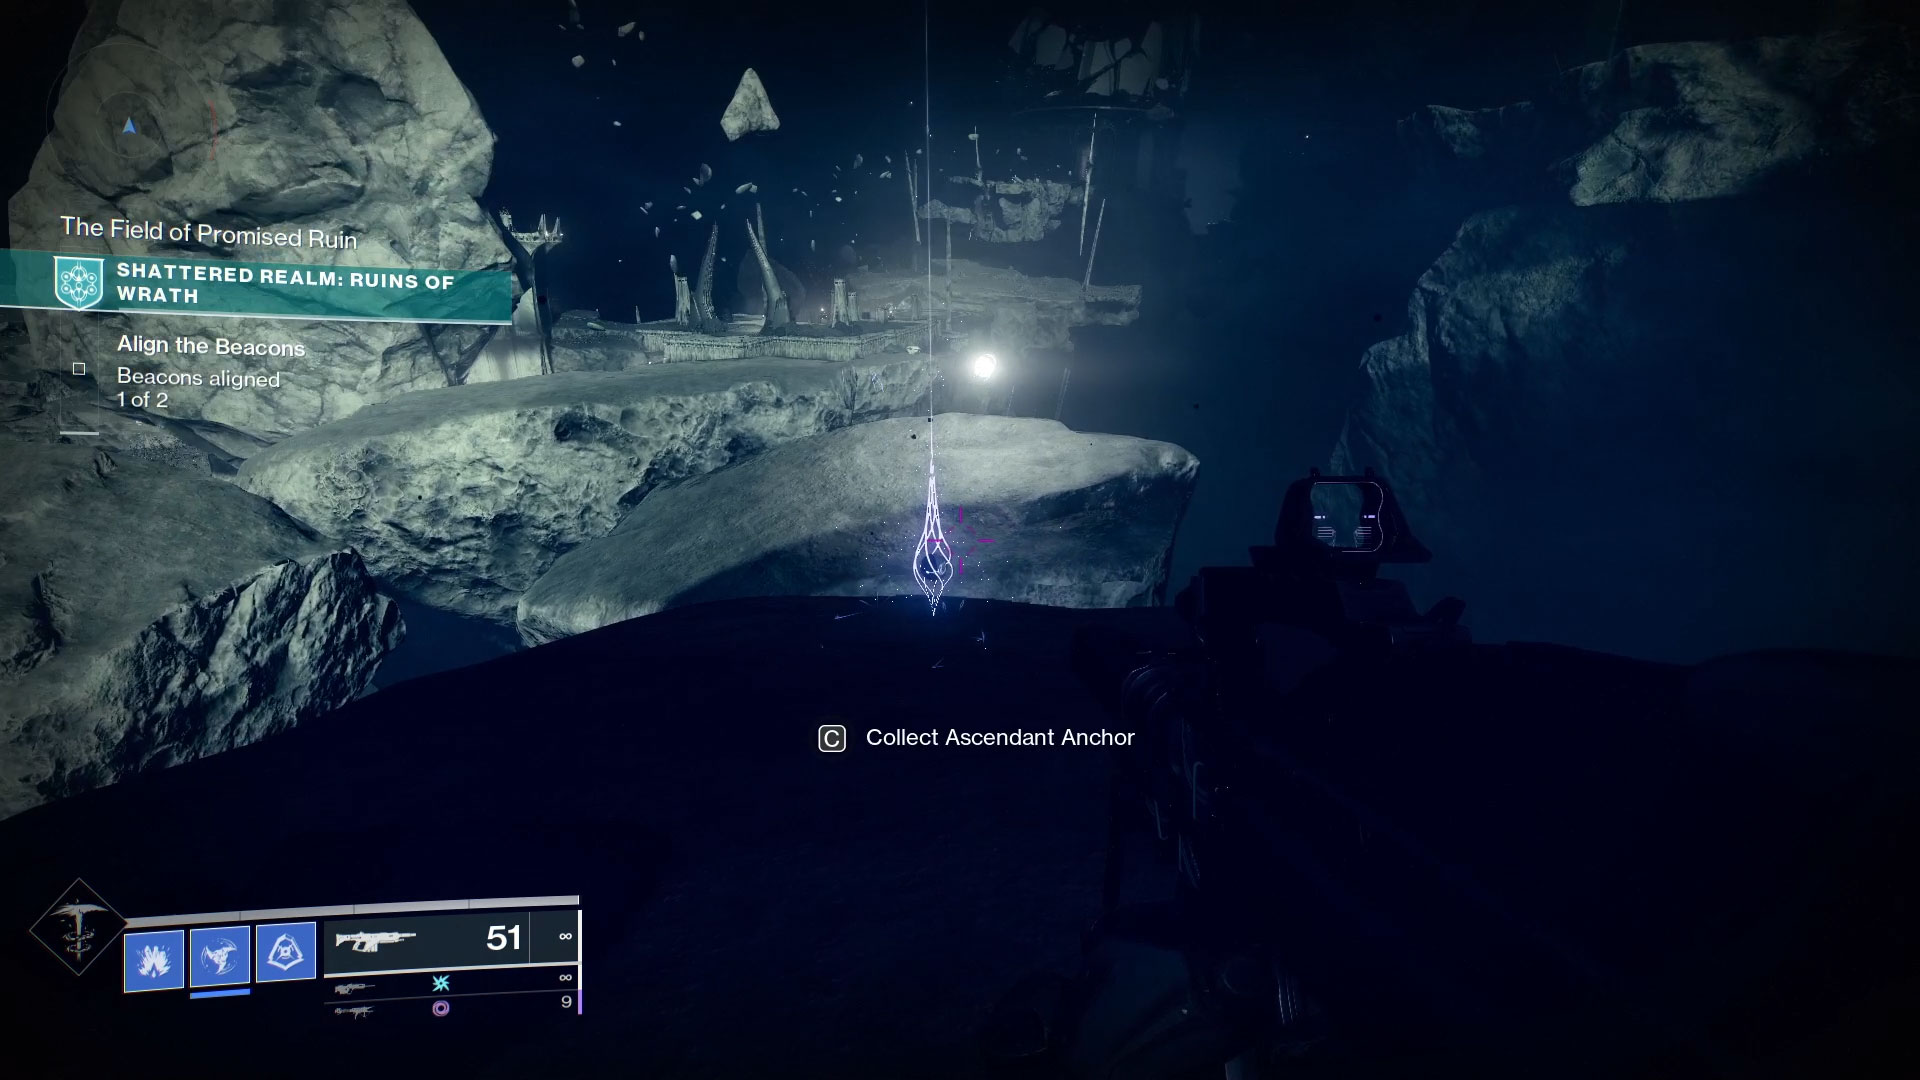
#3: Floating Archipelago
Make your way onto the archipelago and keep in mind that you’re going to have the slow debuff placed on you. You’ll want to max out your armor’s Mobility so you can make the jump from island to island. Once you’re on the archipelago, make your way around and to the left to the island just before the one with the chest on it. The anchor will be waiting for you on the ridgeline.
#4: Ramp
If you’re just hopping onto the archipelago, the exit is towards the back left side. Make your way over here and as you exit the slow zone, you’ll see a ramp that extends off your screen to the right. To the very left of it is the fourth anchor.
#5: Hidden Archipelago Platform
Near the center of the archipelago is a large platform that has two totems on it. The center one gives you the Safe Passage ability and the one on the edge gives you True Sight. The fifth anchor is just in front of that totem, but out of reach. Activate the True Sight totem and a series of platforms will appear and let you collect said anchor.
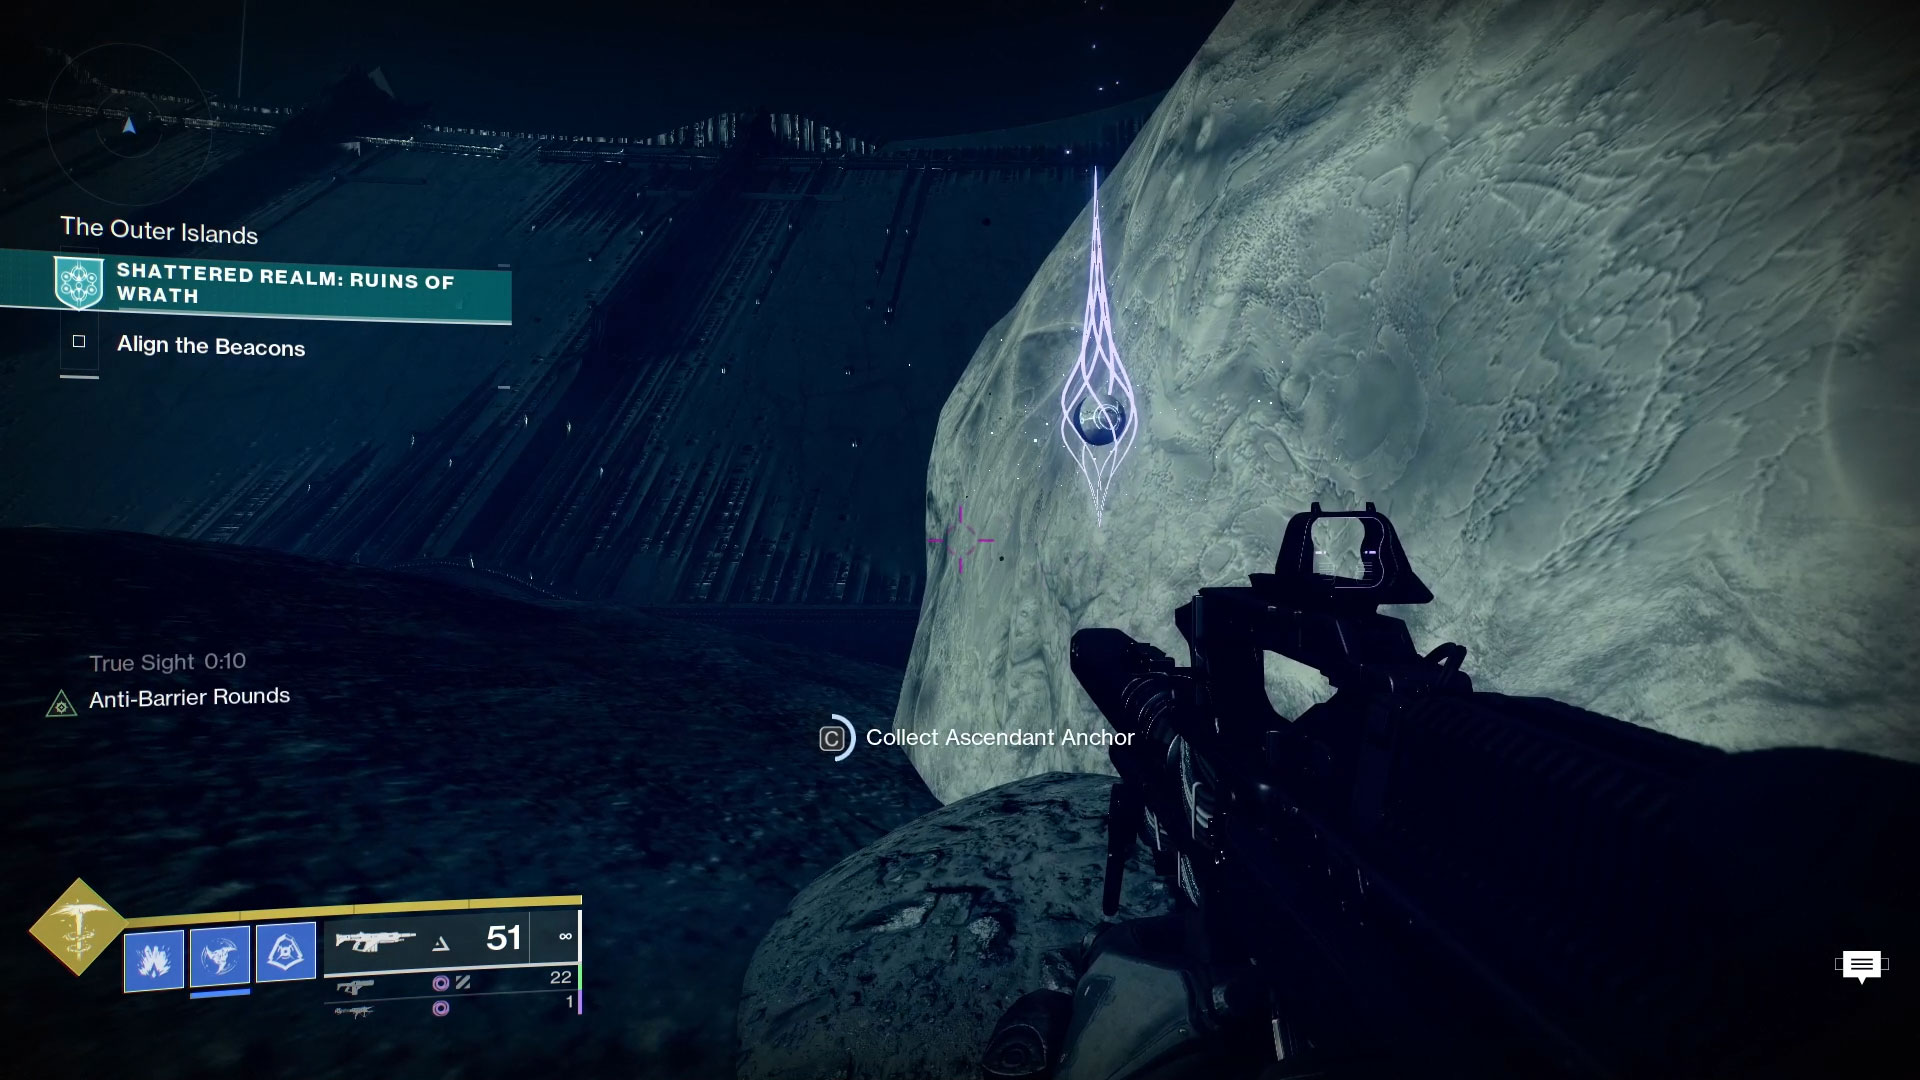
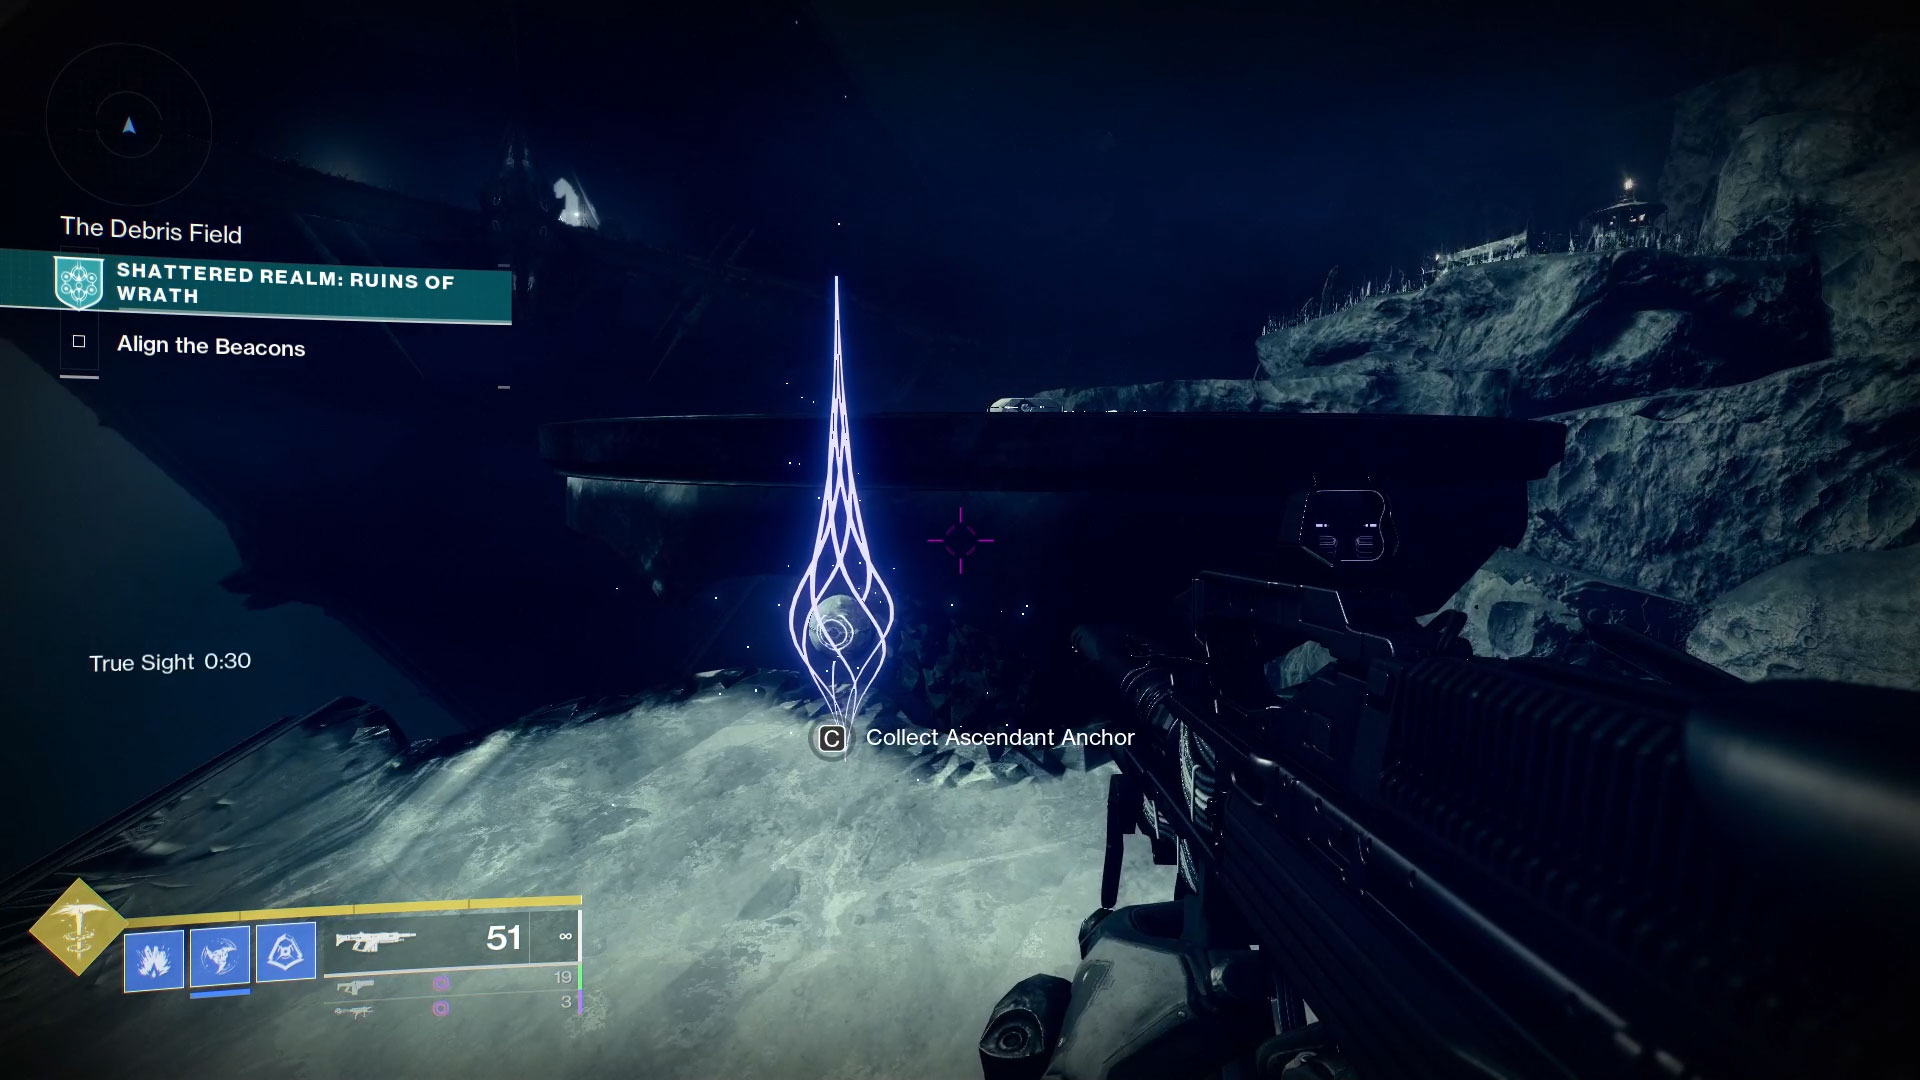
#6: Island
Go to the second beacon and look towards it so that the Dreadnaught is in the background. Directly ahead of you will be a floating island with a True Sight totem at the top of it. Go to the totem, snag the buff, and platforms will appear and lead you to the next floating island in the distance that flanks the Dreadnaught on its left. Head around to the back of this island and you’ll find the sixth anchor at the base of a small cliff.

#7: Cavern Altar
Head back to the ramp that leads up towards the Dreadnaught. Follow this ramp up and instead of going inside, head down the other ramp that leads to the section of the Ruins of Wrath we have yet to explore. Keep heading down the path until you see a large set of ribs jutting out from the earth. Follow this path down into the cavern, past the Barrier, and the next anchor will be on top of the platform to the left of said Barrier.
#8: Cavern Ribcage
Hang a left from the 7th anchor and you’ll see another set of ribs with the 8th anchor sitting its right side.

Kenny Empey
Kenny is a lifelong gamer that enjoys writing in-depth guides for RPGs, JRPGs, strategy, and FPS games. You can follow him on Twitter, YouTube, or Twitch to stay up to date with the latest content and guides from ArcadeHaven.io